Loading ...
Loading ...
Loading ...
SecuringControl Cable
NOTE: Use the hardware in Group 6 to complete the following
steps.
WARNING: The cable must be routed properly to
avoid contact with all sharp edges and hot surfaces.
Such contacts damage the cable and render the
controls inoperative.
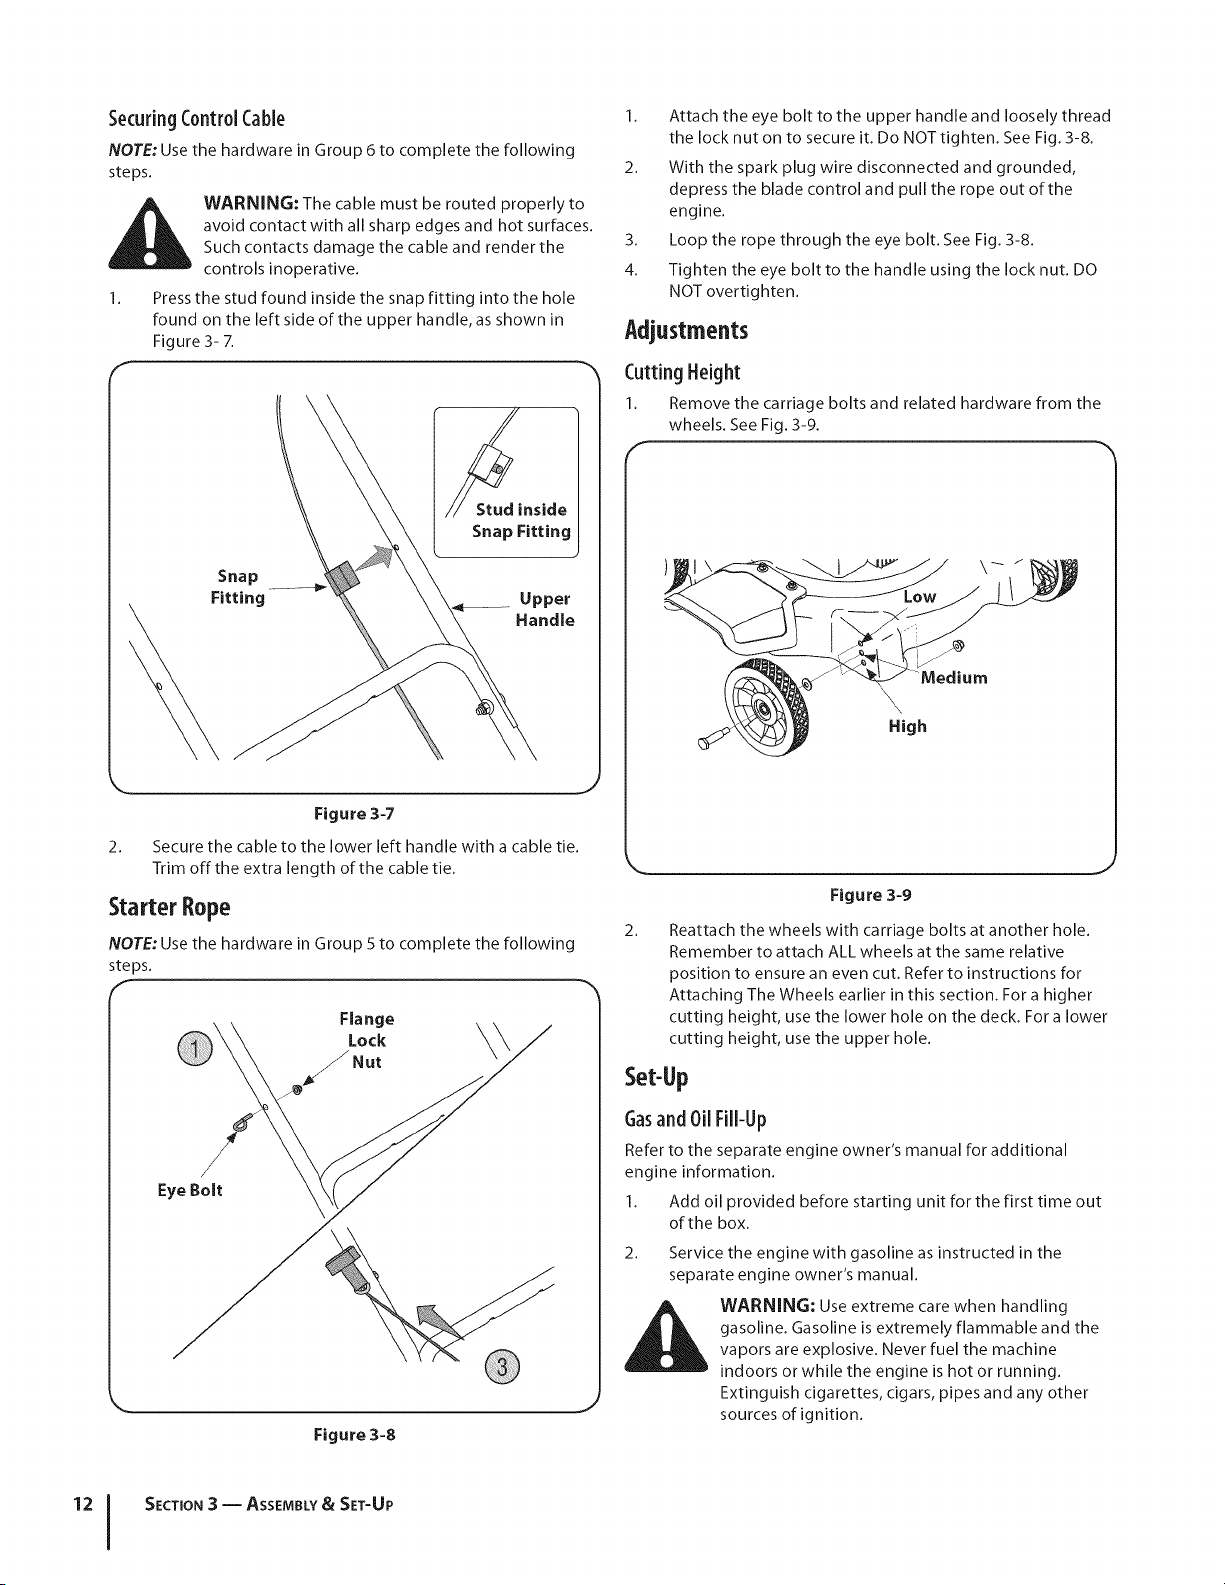
1. Press the stud found inside the snap fitting into the hole
found on the left side of the upper handle, as shown in
Figure 3- 7.
Snap
Fitting
/_Stu//d inside •
Snap Fitting
....... Upper
Handle
Figure 3=7
2. Secure the cable to the lower left handle with a cable tie.
Trim offthe extra length of the cable tie.
Starter Rope
NOTE: Use the hardware in Group S to complete the following
steps.
Flange
Lock _
Eye Bolt
Figure 3=8
1. Attach the eye bolt to the upper handle and loosely thread
the lock nut on to secure it. Do NOT tighten. See Fig. 3-8.
2. With the spark plug wire disconnected and grounded,
depress the blade control and pull the rope out of the
engine.
3. Loop the rope through the eye bolt. See Fig. 3-8.
4. Tighten the eye bolt to the handle using the lock nut. DO
NOT overtighten.
Adjustments
CuttingHeight
1. Remove the carriage bolts and related hardware from the
wheels. See Fig. 3-9.
f
Medium
\
High
Figure 3-9
2.
Reattach the wheels with carriage bolts at another hole.
Remember to attach ALL wheels at the same relative
position to ensure an even cut. Refer to instructions for
Attaching The Wheels earlier in this section. For a higher
cutting height, use the lower hole on the deck. Fora lower
cutting height, use the upper hole.
Set-Up
(;asand Oil Fill-Up
Refer to the separate engine owner's manual for additional
engine information.
1. Add oil provided before starting unit for the first time out
of the box.
Service the engine with gasoline as instructed in the
separate engine owner's manual.
WARNING: Use extreme care when handling
gasoline. Gasoline is extremely flammable and the
vapors are explosive. Never fuel the machine
indoors or while the engine is hot or running.
Extinguish cigarettes, cigars, pipes and any other
sources of ignition.
12 I SECTION3 -- ASSENIBLY& SET-UP
Loading ...
Loading ...
Loading ...