Loading ...
Loading ...
Loading ...
8 ENGLISH
Installing or removing drill bit
For model XAD05
To install the drill bit, place it in the chuck as far as it will
go. Tighten the chuck by hand. Place the chuck key in
each of the three holes and tighten clockwise. Be sure
to tighten all three chuck holes evenly.
To remove the drill bit, turn the chuck key counterclock-
wise in just one hole, then loosen the chuck by hand.
1
► 1. Chuck key
After use, return the chuck key to the key holder on the
tool as illustrated.
1
► 1. Key holder
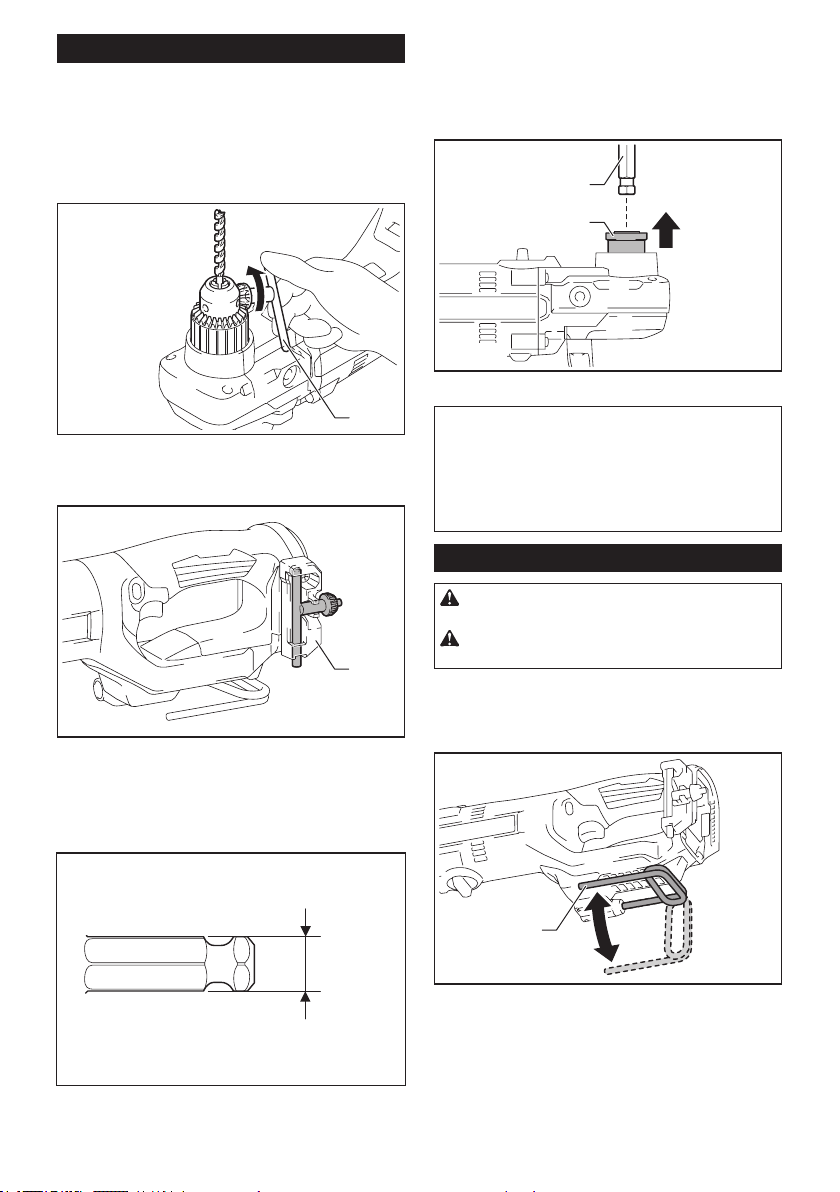
For model XAD06
Use only the drill bit designed with dimensions shown
in the gure.
A=11.2 mm (7/16″)
A
To install the drill bit, pull the sleeve in the direction of
the arrow and insert the drill bit into the sleeve as far as
it will go.
Then release the sleeve to secure the drill bit.
To remove the drill bit, pull the sleeve in the direction of
the arrow and pull the drill bit out.
1
2
► 1. Drill bit 2. Sleeve
NOTE: If the drill bit is not inserted deep enough into
the sleeve, the sleeve will not return to its original
position and the drill bit will not be secured. In this
case, try re-inserting the drill bit according to the
instructions above.
NOTE: After inserting the drill bit, make sure that it is
rmly secured. If it comes out, do not use it.
Hook
CAUTION: Always remove the battery when
hanging the tool with the hook.
CAUTION: Never hook the tool at high loca-
tion or on potentially unstable surface.
The hook is convenient for temporarily hanging the tool.
To use the hook, simply lift up hook until it snaps into
the open position. When not in use, always lower hook
until it snaps into the closed position.
1
► 1. Hook
Loading ...
Loading ...
Loading ...