Loading ...
Loading ...
Loading ...
Installation
1.
Take out parts for assembling: checking
whether the manual, remote control,
spare parts are all packed.
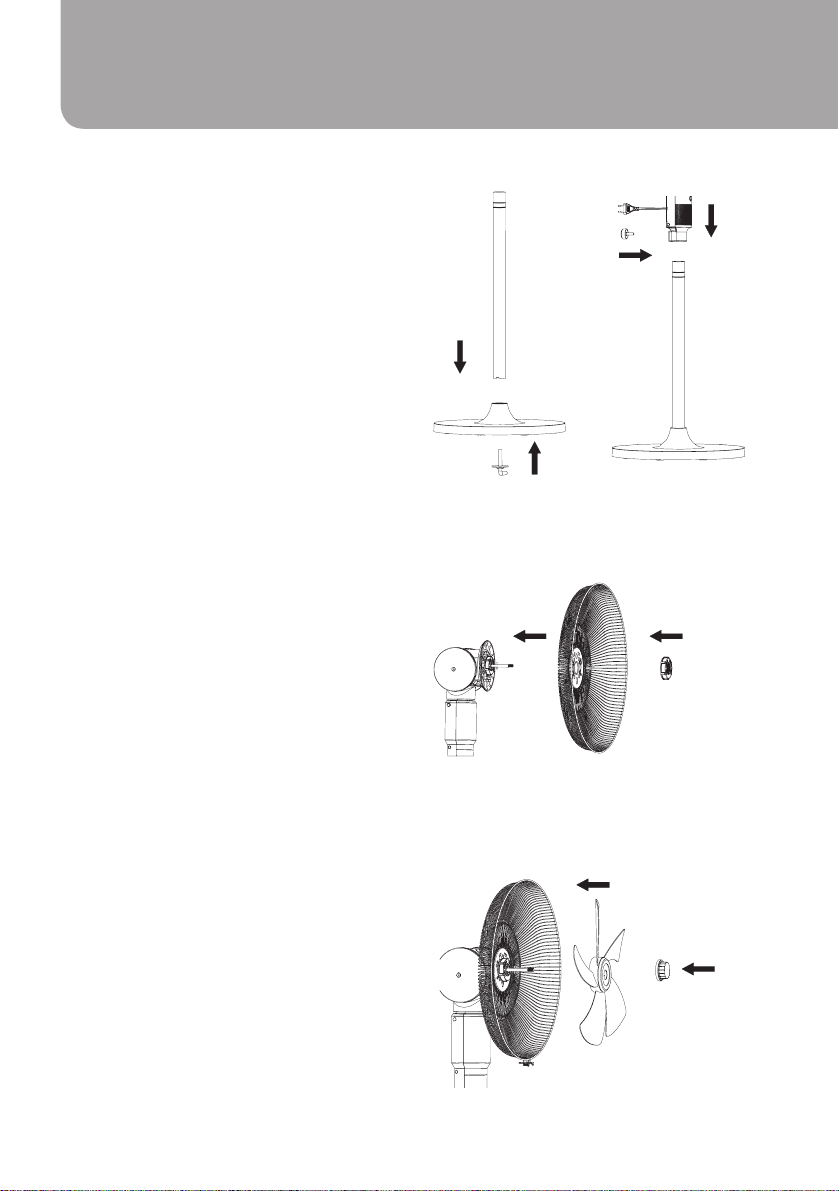
2. Assemble the fan as showing and
indication below,
2.1. Put the column through the hole of
base, and fix tightly by screw
(Figure 1).
2.2 Put the fan body on the column,
and fix by the nut (Figure 2).
2.3. Put the rear grill on the rear cover
of motor, ally at the hole on the grill, and
fix by the grill nut. (Figure 3)
2.4. Fit the fan blade on the motor axes,
tightly fixing by blade screw.
(Figure 4)
2.5. Assemble grill ring and front grill
up together with the rear grill, and tight
the grill ring with the lock on the bottom.
(Figure 5)
2.6. After assembled, plug in power
and use it as the manual (Figure 6)
Installation & Operation Instruction
Figure 1
Figure 3
Figure 4
Figure 2 Figure 5 Figure 6
Operation Instruction
All functions can be operated by pressing
the buttons on the control panel or using
the remote control.
1. ON/ OFF
When first plug in, the fan will "beep"
twice, then the fan is in standby mode.
You may turn on the fan and start
setting.
2. SPEED
Press "SPEED" button to set the fan
speed and LED lights will change
accordingly.
3. SWING
3.1. Manually Vertical oscillation: -10°,
0°, 10°, 20°, 30°, 40°, 50°, 60°, 70°, 80°,
90° can be adjusted by user.
3.2. Keep pressing the left button,
the fan will turn counter clockwise;
likewise keep pressing the right button,
the fan will turn clockwise. When
the fan reaches the desired direction,
release the button and you may
set the horizontal oscillation angles.
3.3. Horizontal oscillation angle can be
set in 0°, 60°, 90°, 180°, 360° and
LED
light will change accordingly.
Page 8 Page 9
Loading ...
Loading ...
Loading ...