Home
Bookmarks
Home
Empava
Empava 36 IN. PROFESSIONAL PRO-STYLE User Manual
Page 19
User Manual - Page 19
For 36 IN. PROFESSIONAL PRO-STYLE.
Page 19/52
Page 1
Page 2
Page 3
Page 4
Page 5
Page 6
Page 7
Page 8
Page 9
Page 10
Page 11
Page 12
Page 13
Page 14
Page 15
Page 16
Page 17
Page 18
Page 19
Page 20
Page 21
Page 22
Page 23
Page 24
Page 25
Page 26
Page 27
Page 28
Page 29
Page 30
Page 31
Page 32
Page 33
Page 34
Page 35
Page 36
Page 37
Page 38
Page 39
Page 40
Page 41
Page 42
Page 43
Page 44
Page 45
Page 46
Page 47
Page 48
Page 49
Page 50
Page 51
Page 52
Contents
Table of Contents
Search
Previous
Next
Bookmarks
Loading ...
Loading ...
Loading ...
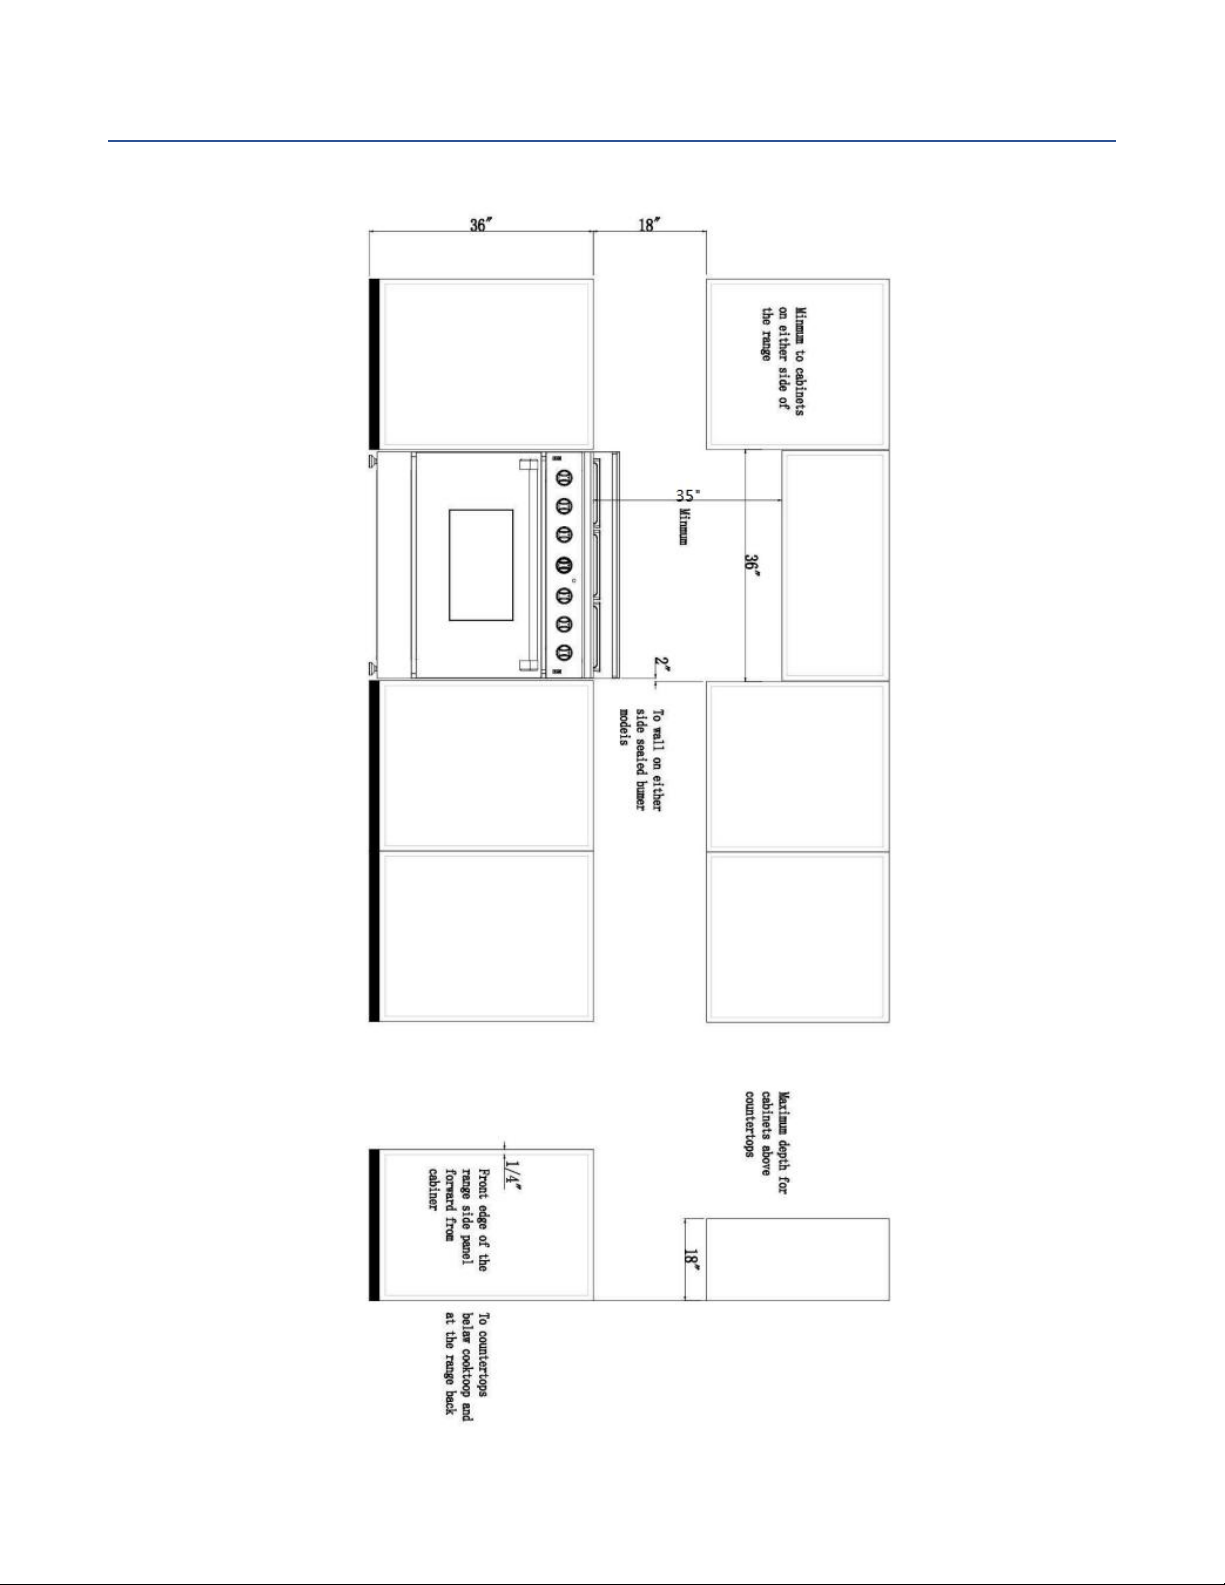
18
Dimens
ion
and
Clearance
36”
Gas
Range
Clearance
Loading ...
Loading ...
Loading ...
<
16
17
18
19
20
21
>
File type: PDF
File name: 88232664_36-in-professional-pro-style.pdf
File size: 2.39 MB
File Language: English
Pages: 52
Author: Empava
File created: 2019-01-05
Published: 2023-10-21
Updated: 2023-10-21
Download File
Table of Contents
×
Warnings
4
Welcome
5
Before you start
6
Safety and Warnings
7
Safety Symbols
7
Tipping Hazard
8
Explosion Hazard
9
Fire Hazard
9
Poisoning Hazard
10
Hot Surface Hazard
10
Other Safety Tips
10
Safety Tips for Gas Operation
13
Dimensions and Clearances
14
BTU Design
15
LRG3001ULRG3601U
16
LRG3001U
17
Connect Range to Gas Supply
23
After installation:
24
Cooktop Safety Guidelines
25
Surface Burner Ignition
26
Simmer and Boil
27
Flame Size
27
Power Failure
27
Cooktop
27
Burner Grates
27
Broil burner use
28
Oven cooking guidelines
28
Infrared Broil
30
Convection Bake
30
Convection Roast
31
Convection Defrost
31
Defrosting
31
Convection Dehydration
31
Preheating
32
To Broil
32
Setting Broil
32
Broiling guidelines
33
Donâts
34
Cleaning Burner caps and brass flame spreaders
34
Cleaning side racks
35
Cleaning oven shelves
35
Cleaning broil/roast pan and slotted grid
35
Cleaning bake and broil burners
36
Cleaning porcelain surfaces
36
Cleaning the oven glass window
36
Cleaning the oven door gasket
36
Cleaning stainless steel surfaces
36
Removing the oven door
37
Replacing the oven door
38
Warranties and Duration
43
Thor Group will pay for:
43
Thor Group will not pay for:
44
Warranty and Product Registration
45
Use the wrench to tighten the door handle holders.
50
For Any installation Inquiries, please call Thor C
52
Search:
×
Search