Loading ...
Loading ...
Loading ...
8 9
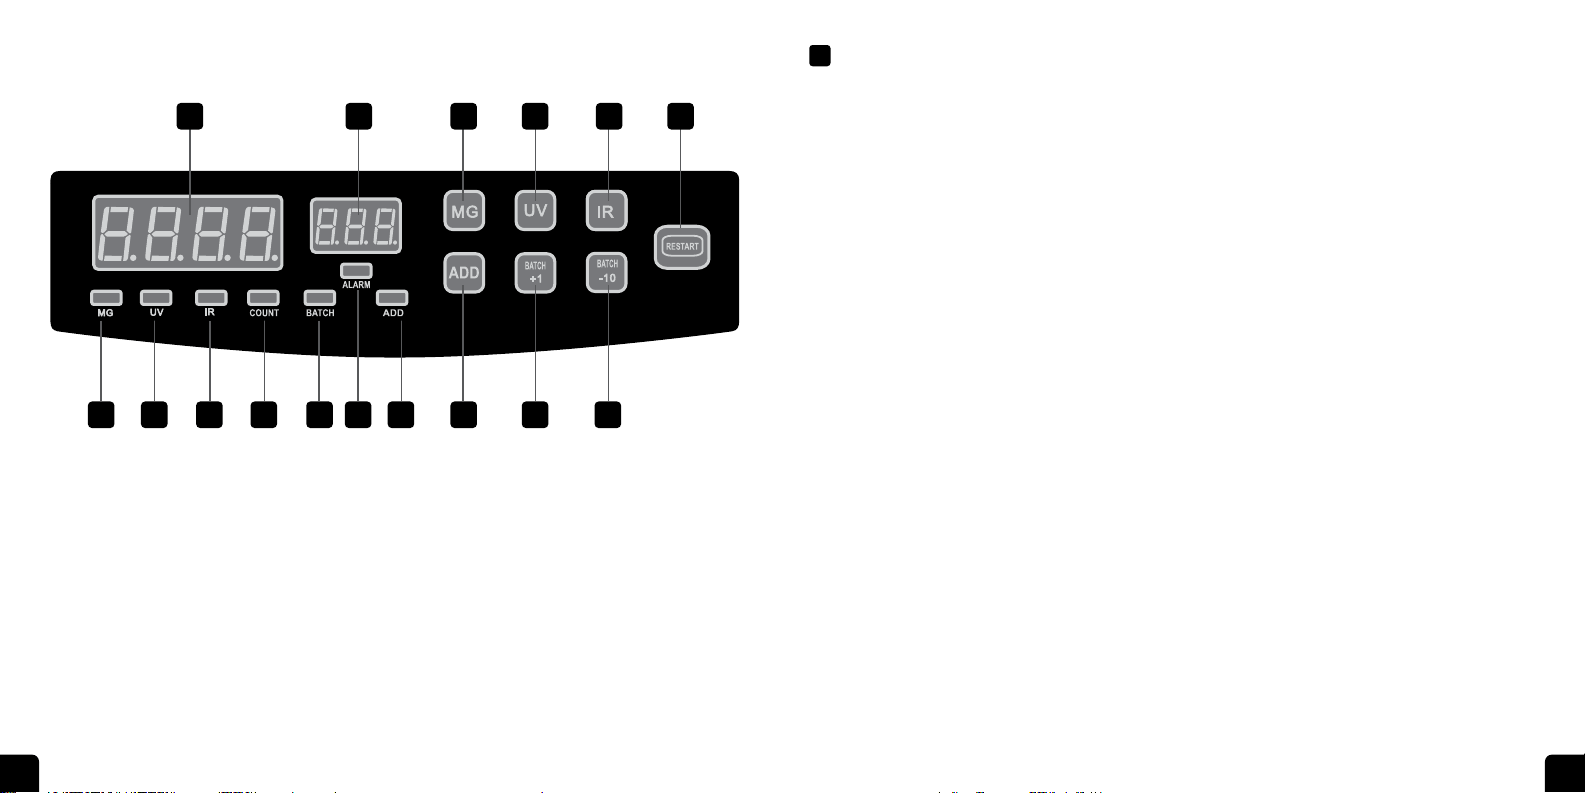
1. Counting Display
2. Batching Display
3. Magnetic Detection
Indicator
4. Ultraviolet Indicator
5. Infrared Indicator
6. Count Indicator
7. Batch Indicator
CONTROL PANEL
8. Alarm Indicator
9. Add Count Button
10. MG Button: Turns Magnetic
Detection On and O
11. UV Button: Turns
Ultraviolet Detection On
and O
12. IR Button: Turns Infrared
Detection On and O
13. Reset Button: Clears
the Machine to Zero and
Restarts
14. Add Button: Adds New
Batch to Previous Number
15. Batch +1 Button: Increases
Batch Amount
16. Batch -10 Button:
Decreases Batch Amount
1
3 4 5 6 7 8 9 14 15 16
2 10 11 12 13
USING YOUR MONEY COUNTER
UNDERSTANDING AND USING THE FEATURES
Note: For all modes, it is important to load your bills into the Hopper in an orderly fashion. However,
you can place them in the hopper either face-up, face-down, or a mixture of the two.
1. Automatic Counting
This counts the bills that are added to the Hopper, showing the total in the Counting Display.
• To perform this function, simply load the bills into the Hopper.
2. Batch Function
Set a custom batch amount to separate bills into desired quantities.
• Press the Batch button.
• The Batch Indicator will illuminate and the Batch Number will default to 100.
• Use the Batch +1 and Batch -10 buttons to adjust the number to your required amount.
3. Addition Function
Use this function to add a new batch to your running tally.
• Press the Add button.
• The Add Indicator will illuminate.
• Add your new batch of bills to the Hopper.
• The number will be added to the previous quantity.
• To end this function, press the Add button once more.
4. Half-Note Detection
If the machine detects a partial note during counting, it will stop and beep.
• The error message “EE4” will be displayed.
• The partial note will be the last one in the Stacking Tray.
• To continue counting, remove the partial note and press the Reset button.
5. Chain Notes Detection
Detects overlapping bills.
Loading ...
Loading ...
Loading ...