Loading ...
Loading ...
Loading ...

7
INSTALLATION
Installing the Range Hood
Note
• If the wood hood is enclosed at the bottom, make a cutout on the board so that the Range Hood can fit into the wood
hood.
Guide the duct into the Wood Hood. Temporarily secure the top of the duct to the ceiling opening or wall opening.
CAUTION
• Make sure the Hood Unit is securely mounted before releasing.
• Route and connect the Duct to the Roof or Wall Cap. Refer to Page 5 for the most efficient routing requirements.
• Use foil tape or duct tape to seal all connections.
Electrical Connection
• This range hood comes with a power cord with a 3-prong plug. Connect the power cord to a designated grounded
standard 110V outlet.
Figure 1
Figure 2
Figure 3
The following steps requires 2 or more people:
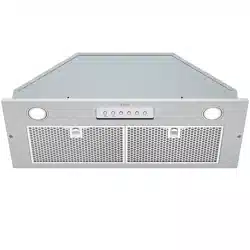
• Unpack the Range Hood and place it on a sturdy flat surface
with the Baffle Filters facing the ceiling.
• Remove the Baffle Filters and the Screws on both sides.
(
Figure 1
)
• Flip the stainless steel Panel open on the longest side, locate
and disconnect the Wires for the LED Lamps and the Control
Panel. (
Figure 2
)
• Remove the Panel and put it in a safe location.
• Connect the duct to the vent opening on the Range Hood.
If the duct size isn't the same as the vent opening, use an
adapter between the duct and the vent opening.
• While lifting the Range Hood to fit into the wood hood, retract
the Duct into the attic carefully.
• Insert and tighten all screws into the pre-drilled holes on the
Hood body until it is securely mounted to the wood hood.
(
Figure 3
)
• Release the Range Hood.
• Re-connect the wires for the LED Lamps and the Control
Panel.
• Put the Panel back and tighten all screws.
Disconnect
the Wires
LED Lamp Control Panel
Loading ...
Loading ...
Loading ...