www.GEAppliances.cem
Safely Instruotions ... 2-4
Operating ImlrucCions
Clock and Timer ....... ] 0
Conuols ............. 6, 7
Oven ................ 8, 9
Power Outage .......... 7
Sabbath Feature ..... ] 3, ] 4
Self-Cleaning ....... ] 5, ] 6
Special Features ........ ] 9
Surl_ace Units ........... 5
Thermostat ........... ] 4
Timed Baking and
Roasting Features ...... ] ]
Care and Cleaning
Broiler Pan and Grid ... 20
Conuol l_obs ......... 17
Drip Pans ............. 21
Heating Elements ...... 17
I,ift-Off Oven Door . .... 19
I,ift-Up Cooktop ....... 21
Light ................. 20
Sheh'es ............... 18
Smrag_ Drawer . ....... 20
Surt_ace Units .......... 21
Vent ................. 18
Troubleshooting
Tips .............. 22-24
Accessories ........... 30
Consumer Support
Consumer
Support ...... Back Co_er
Product
Registration ........ 25, 26
_4'anantv ............. 31
JBP24
j P26
Write the model and serial
numbers here:
Model #
Serial #
You can find them on a label
behind the storage drawer on
the fl'ont of the range fl'ame.
164D4290P333-1 49-80177-1 07-03 JR
READALLfiVSTRUCTiON$BEFOREUSING
Foryoursafe_ the informationin this manualmustbe followed tominimizetherisk of fire,electricshock, orto
preventpropertydamage,personalinjury`or lossoflife.
WARNINGANTI-TIPDEVICE
All rangescantip andinjurycouldresult
Topreventaccidentaltippingoftherange,attachitto thewaftandfloor byinstallingtheAnti-tip devicesupplied.
If theAnti-tip device suppliedwith therangedoesnotfit this application,usethe universa/Anti-Tipdevice
WB2X7909.
Tocheckifthe deviceisinstalledand engagedproperly,removethestoragedrawer andinspecttherear
levelingleg.Make sureit fitssecurelyintotheslot.
If you pull tile range out flom tile wallfor any reason, make sure tile de_ice is l)roperly engaged when
you push the i'ange back against the wall. If it is not, theie is a possible risk of tile i_ange tipping over
and causing ii_u Uif you or a child stand, sit or lean on all open door.
Please iefbr m the Anti-Tip dedce infbmlation ill this manual. Failme to rake this precaution could
resuh ill tipping of tile i'ange and injm>
IMPORTANTSAFETYNOTICE
TheCafifomiaSafeDrinking Waterand ToxicEnforcementAct requiresthe Governorof Cafifomiatopublisha
fistofsubstancesknowntothe statetocause cancer,birthdefectsor otherreproductiveharm,andrequires
businessesto warn customersofpotential exposuretosuch substances.
Thefiberglassinsulationin self-dean ovensgives off a verysmallamountofcarbonmonoxideduringthe
cleaningcycle. Exposurecanbe minimizedbyventingwith an openwindow or usinga ventilationfan or hood.
SAFETYPRECAUTIONS
2
Whenusingelectricalappliances,basicsafe_/precautionsshouldbe followed,includingthefollowing:
} Use this appliance only %r its intended puq)ose
as descnbed ill this Owner's Manual.
} Be sure your appliance is properl} installed and
grounded b} a qualified installer ill accordance
with tile provided installation instructions.
} Have the installer show xou the location
of the circuit breaker or fllse. Mark it for easx
ief_'rence.
Do not attempt to repair or replace any
part of )our i_ange lmless it is specificall}
recommended ill this manual. All other
servicing should be referred to a qualified
technician.
getbre perfbmdng ally serdce, disconnect
the i'ange power supply at the household
distribution panel by removing the fuse or
switching off tile ciivuit breaker
Do not leave children alone---children should
not be left alone or unattended ill all area
where all appliance is ill use. They should never
be allowed to sit or stand on ally part of tile
appliance.
Do not allow awone m climb, stand or hang
on tile dooi, stoi'age &'awer or cooktop. They
could damage tile iange and even tip it oveI,
causing severe peisonal iI_uI>
IaIge scI'atches or impacts to glass dooIs call
lead to broken or shattered glass.
Do not store flammable materials ill all oven or
near tile cooktop.
CAUTION:I[ell}S Of in[eles[ [o childien
should not be stored ill cabinets above a imlge
or on the backsplash of a i'ange---children
climbing on tile i'ange to reach items could be
seriously injured.
Never weal loose-fitting or hanging gamlents
while using the appliance. Be carefld when
reaching fbr items stored over the range.
Flammable material could be ignited if brought
ill contact with hot surfilce units or heating
elenlents and may cause severe b/lI'ns.
Use only dUpot holdei.s--moist or damp pot
holdeis on hot surfi/ces may resuh ill burns
flom steam. Do not let pot holdeis touch hot
surfi/ce units or heating elements. Do not use
a towel or other bulky cloth ill place of pot
holdeIs.
www.GEAppliances.com
WARNING!
SAFETYPRECAUTIONS
For your safety, never use your appliance %r
wa,ming or heating the morn.
Teach children not to play with the controls or
any other part of the cange.
.MwayskeeI) dish towels, dish cloths, pot holders
and other linens a safe distance flom your
i'ange.
.MwayskeeI) wooden and plastic utensils and
canned fbod a safe distance flora
VO/lI" I_1Ilge.
_MwayskeeI) combustible wall coverings,
clmains or drapes a safe distance fiom your
i'ange.
Do not let cooking grease or other flammable
materials accumulate in or near the cange.
Keep the hood and grease filte_s clean to
maintain good venting and to avoid grease fires.
Do not use water on grease fires. Never pick up
a flaming pan. Turn the controls off_Smother a
flalning pan on a surfilce unit by coveting tile
pan completely with a well-fitting lid, cookie
sheet or flat tea> Use a multi-purpose d_w
chemical or fbam-rype fire extinguisher
Flaming g_ease outside a pan can be put out by
cove_ing it with baking soda o_, if available, by
using a inuld-puipose dUchemical or foam-
type fire extinguisher
Flame in the oxen can be smothered completely
by closing the oven door and turning the oven
off or by using a muhi-pu_pose dUchemical or
fbamwpe fire extinguisher.
Do not touch tile surfi/ce units, tile heating
elements or the intedor surfilce of tile oven.
These surfilces may be hot enough m burn
even though they are dark in color Du_ing and
after use, do not touch, or let clothing or other
flammable materials contact tile surfilce units,
areas nearby the surfilce units or any intedor
area of tile oven; allow sufficient time fur
cooling fi_st.
Potentially hot surfilces include the cooktop,
areas fiMng the cooktop, oven vent opening,
surfilces near the opening, crevices around the
oven door
REMEMBER:Tile inside smfi_ce of tile oven may
be hot when the door is opened.
Do not store or use combustible matexials,
gasoline or other flammable vapois and liquids
in tile viciniw of this or aW other appliance.
COOKMEATANDPOULTRYTHOROUGHLY...
Cookmeatandpoultrythoroughly--meattoat leastanINTERNALtemperatureof lGO°Eandpoultrytoatleastan
INTERNALtemperatureof I80°ECookingtothesetemperaturesusuallyprotectsagainstfoodbomeillness.
SURFACECOOKINGUNITS
Useproperpansize--select cookwarehavingflat bottomslargeenoughtocover thesurfaceunitheating
element.Theuseofundersizedcookwarewill exposea portionofthe surfaceunitto direct contact andmay
resultin ignitionof clothing.Properrelationshipof cookwareto surfaceunitwill alsoimproveefficiency.
Never leave tile surfi/ce units unattended
at high heat settings. Boilove_s cause smoking
and g_easy spillove_s that may catch on fire.
Do not use aluminum fbil to line the &ip pans
or anywhere in the oven except as described in
this manual. Misuse could resuh in a shock, fi_e
hazard or damage to the cange.
Be sure the dii I) pans and the vent duct are not
covered and are in place. Their absence du_ing
cooking could damage range parts and winng.
Only certain t_pes of glass, glass/ceramic,
earthenware or other glazed containers a_e
suitable fbr cooktop service; others may break
because of the sudden change in temi)emt/ue.
To minimize the possibility of burns, ignition of
flammable materials and spillage, the handle of
a container should be turned toward tile center
of the cange without extending over nearby
surfilce units.
Always turn tile sur[i/ce units off befbre
removing cookware.
3

IMPORTANTSAFETYINFORMATION.
READALLINSTRUCTIONSBEFOREUSING.
4
SURFACECOOKINgUNITS(cont.)
} Do not imme[se or soak the removable surfilce
units. Do not put them in a dishwasher. Do not
self clean the surfi/ce units in tile oven.
} When preparing flaming fbods under the hood,
turn the rim on.
To ax_id the possibility of a burn or electric
shock, alwa}:sbe certain that the controls for all
sur[ilce units are at the OFFposition and all coils
are cool befbre attempting to lift or remove
a unit.
} Clean the cooktop with caution. If a wet sponge
is used to wipe spills on a hot cooktop, be
carefid to avoid steam burns.
} ReeI) an exe on foods being filed at high or
medium high heat settings.
WARNING'!
OVEN
Foods for flying should be as dUas possible.
Frost on fiozen fbods or moisture on fiesh
foods can cruise hot tilt to bubble up and over
the sides of the pan.
Use little tilt for effective shallow or deep tilt
flying. Filling the pan too fidl of lilt can cause
spilloveLs when food is added.
If a combination of oils or fi_tswill be used in
flying, stir together befbre heating, or as lilts
m elt slowl_'.
Always heat tilt slowly, and watch as it heats.
Use a deep lilt them_ometer whenever possible
to prevent overheating tilt beyond the smoking
point.
Standawayfrom therange whenopeningtheovendoor.Hotair or steamwhich escapescancauseburnsto
hands,faceand/or eyes.
Do not heat unopened fbod containers.
Pressure could build up and the container
could bmst, causing an injm>
}: KeeI) the oven vent unobstructed.
Ree I) the oven fiee fiom grease buildup.
Place the oven shelf in the desired position
while the oven is cool. If shelves must be
handled when hot, do not let pot holder
contact the heating elements.
Pulling out the shelf to the stop-lock is a
convenience in lifting heax)' foods. It is also a
precaution against burns fiom touching hot
surfi/ces of the door or oven walls.
When using cooking or roasting bags in the
oven, fbllow the manufilcturer's directions.
Do not use the oven to dUnewspapers.
If overheated, they can catch on fire.
Do not use tile oven for a storage area. Items
stored in an oven can ignite.
Do not leave paper products, cooking utensils
or fbod in the oven when not in use.
} Do not use aluminum foil to line oven bottoms,
except as suggested in this manual. Improper
installation of aluminum fbil max resuh in a risk
of electric shock or fire.
SELF-CLEANINGOVEN
Donot useovencleaners.Nocommercialovencleaneror ovenlinerprotective coatingof anykindshouldbe
usedin or aroundanypart ofthe oven.Residuefromovencleanerswill damagetheinsideof theovenwhenthe
self-cleancyclebaused.
Do not clean the door gasket. The door gasket
is essential fbr a good seal. Care should be
token not to rub, damage or move tile gasket.
Befbre self cleaning tile oven, remove the
broiler pan, grid and other cookwam.
Be sine to wipe up excess spillage befbre
starting tile self cleaning ope_,'ation.
If the self cleaning mode malfimctions, turn the
oven off and disconnect the power suppl}: Have
it serficed by a qualified technician.
Clean only parts listed in this Owner's Manual.
READANDFOLLOWTHISSAFETYINFORMATIONCAREFULLY.
SAVETHESEINSTRUCTIONS
Using the surface units.
Throughout this manual, features and appearance may vary from your model.
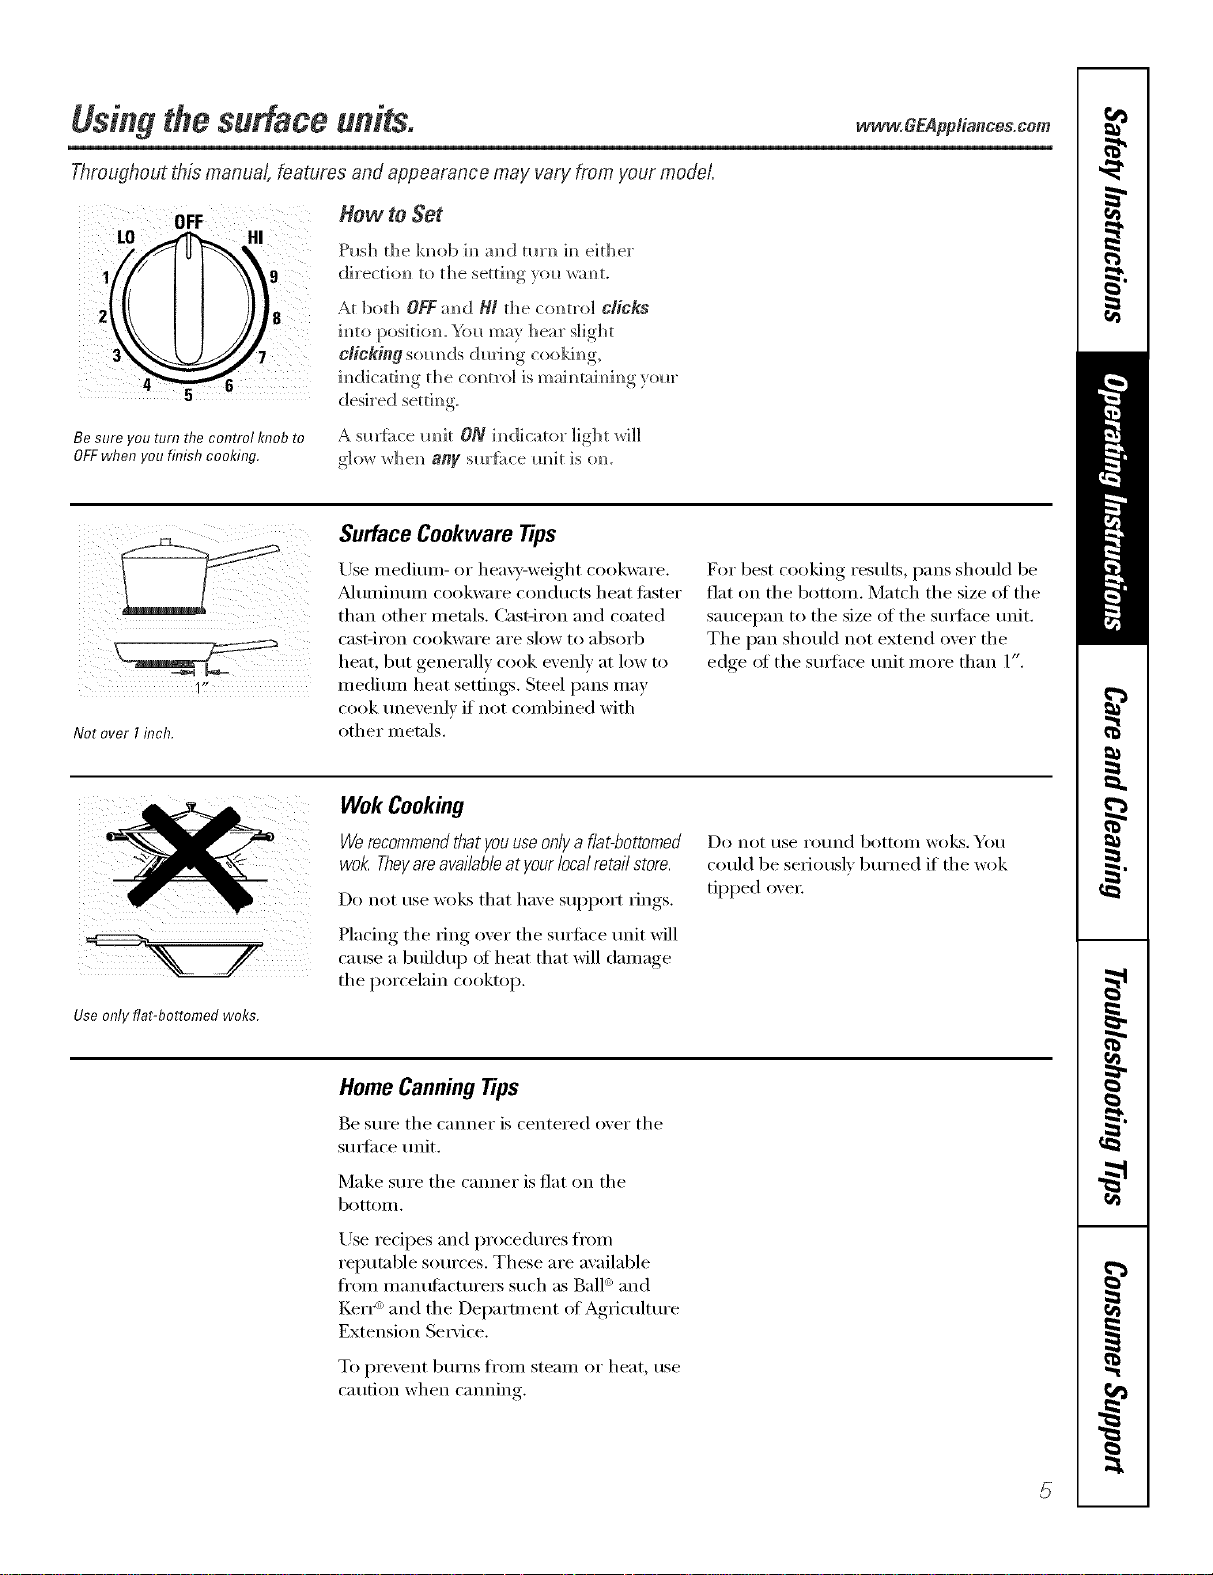
How to Set
9
Be sure you turn the control knob to
OFFwhen you finish cooking.
Push the k]_ob ]m_a]_d tm'N_]m_either"
dix'ectiom_to the settim_gyol_ wam_t.
At ]bot]_ OFFaN_dH/ the corm'o] CliCkS
]_]to positio_. _'_)l_may Ileal" slight
clicking som_ds dudm_g cookim_g,
im_dicati m_g t]]e c(m t_'o] is m aim_ra]m_im_g,_om"
des]_'ed settim_g
A sm'fi_ce m_it ON im]dicato_" light _rH]]
glow whe_ any sm'f;_ce m_it is (m.
11,
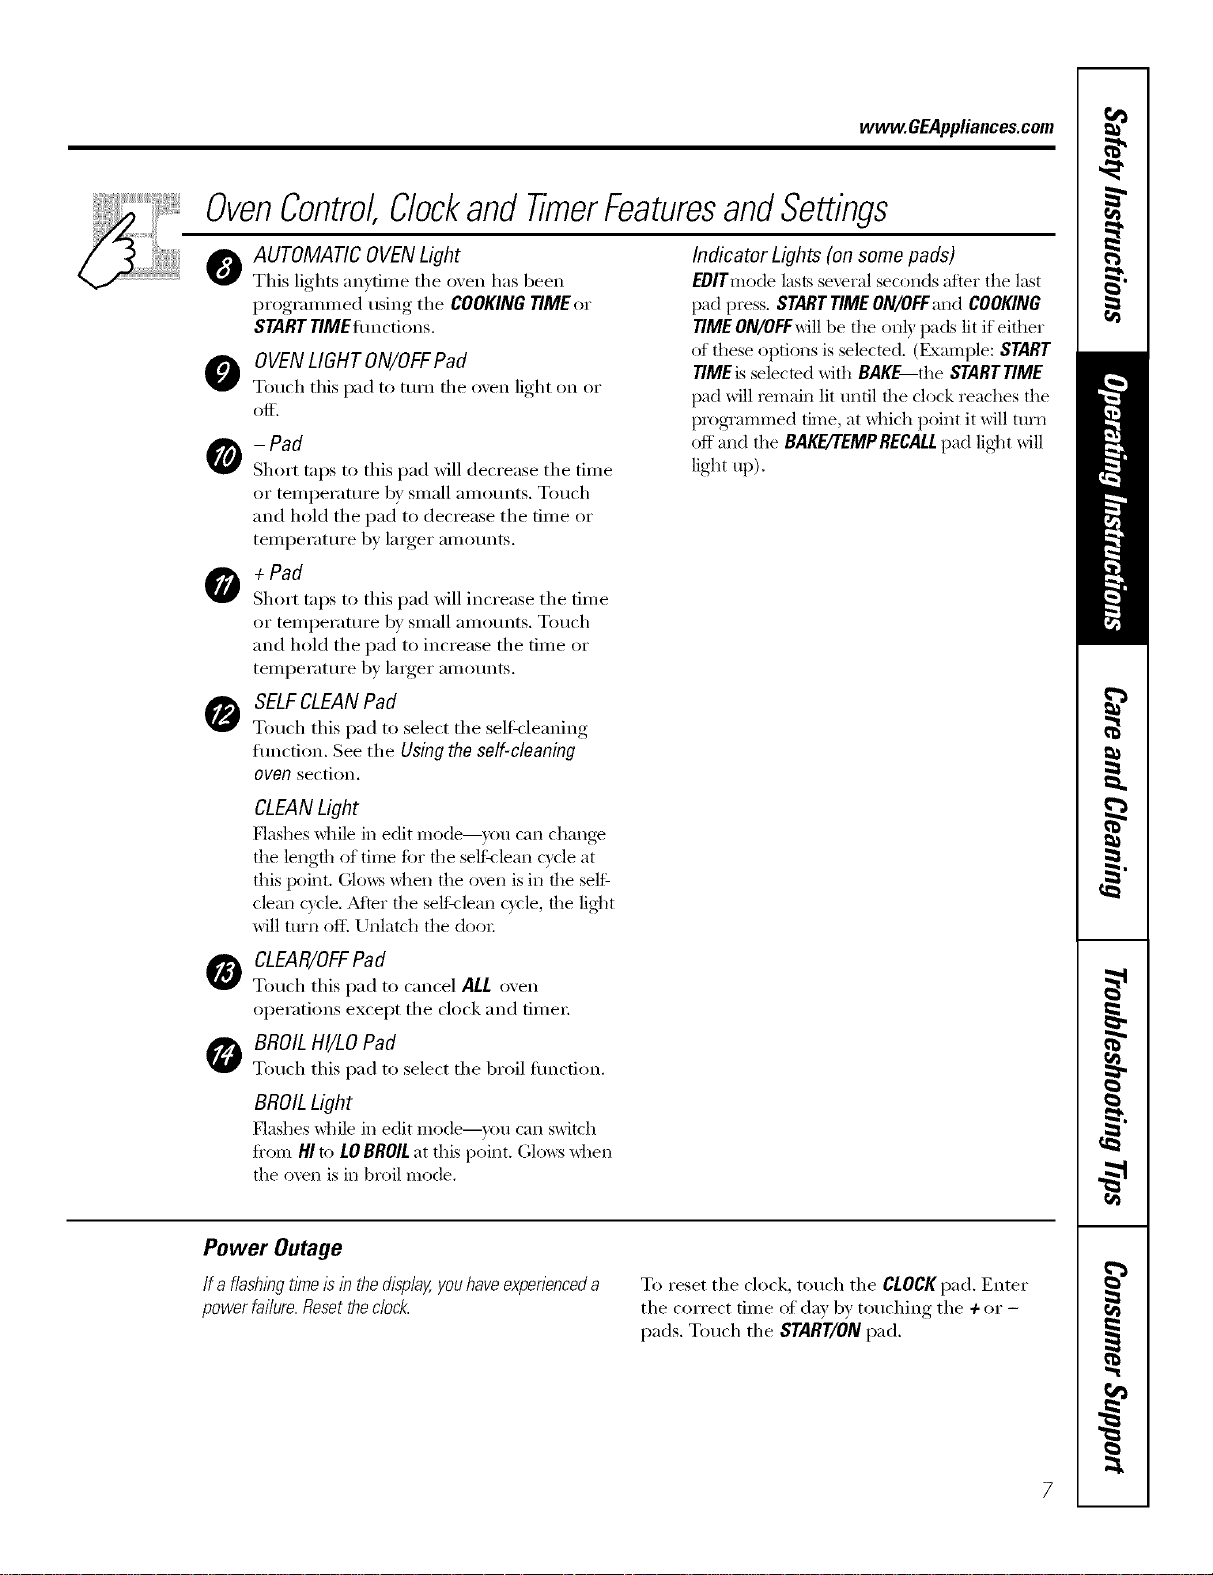
Not overI inch.
Surface Cookware Tips
Use medium- c,r hea;T-weight coc,kware.
_duminum cookware conducts heat tipster
than other metals. Cast-iron and coated
cast-ii'on cookware aI'e slow to absoi'b
heat, but generally cook evenly at low to
medium heat settings. Steel pans may
cook unevenly if not combined with
other metals.
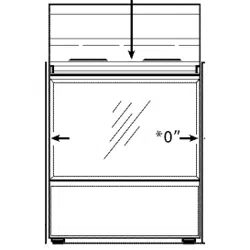
For best cooking results, pans should be
fiat on the bottom. Match the size of the
saucel)an to the size of the stuli_ce unit.
The pan should not extend over the
edge ot the stu_hce unit more than 1".
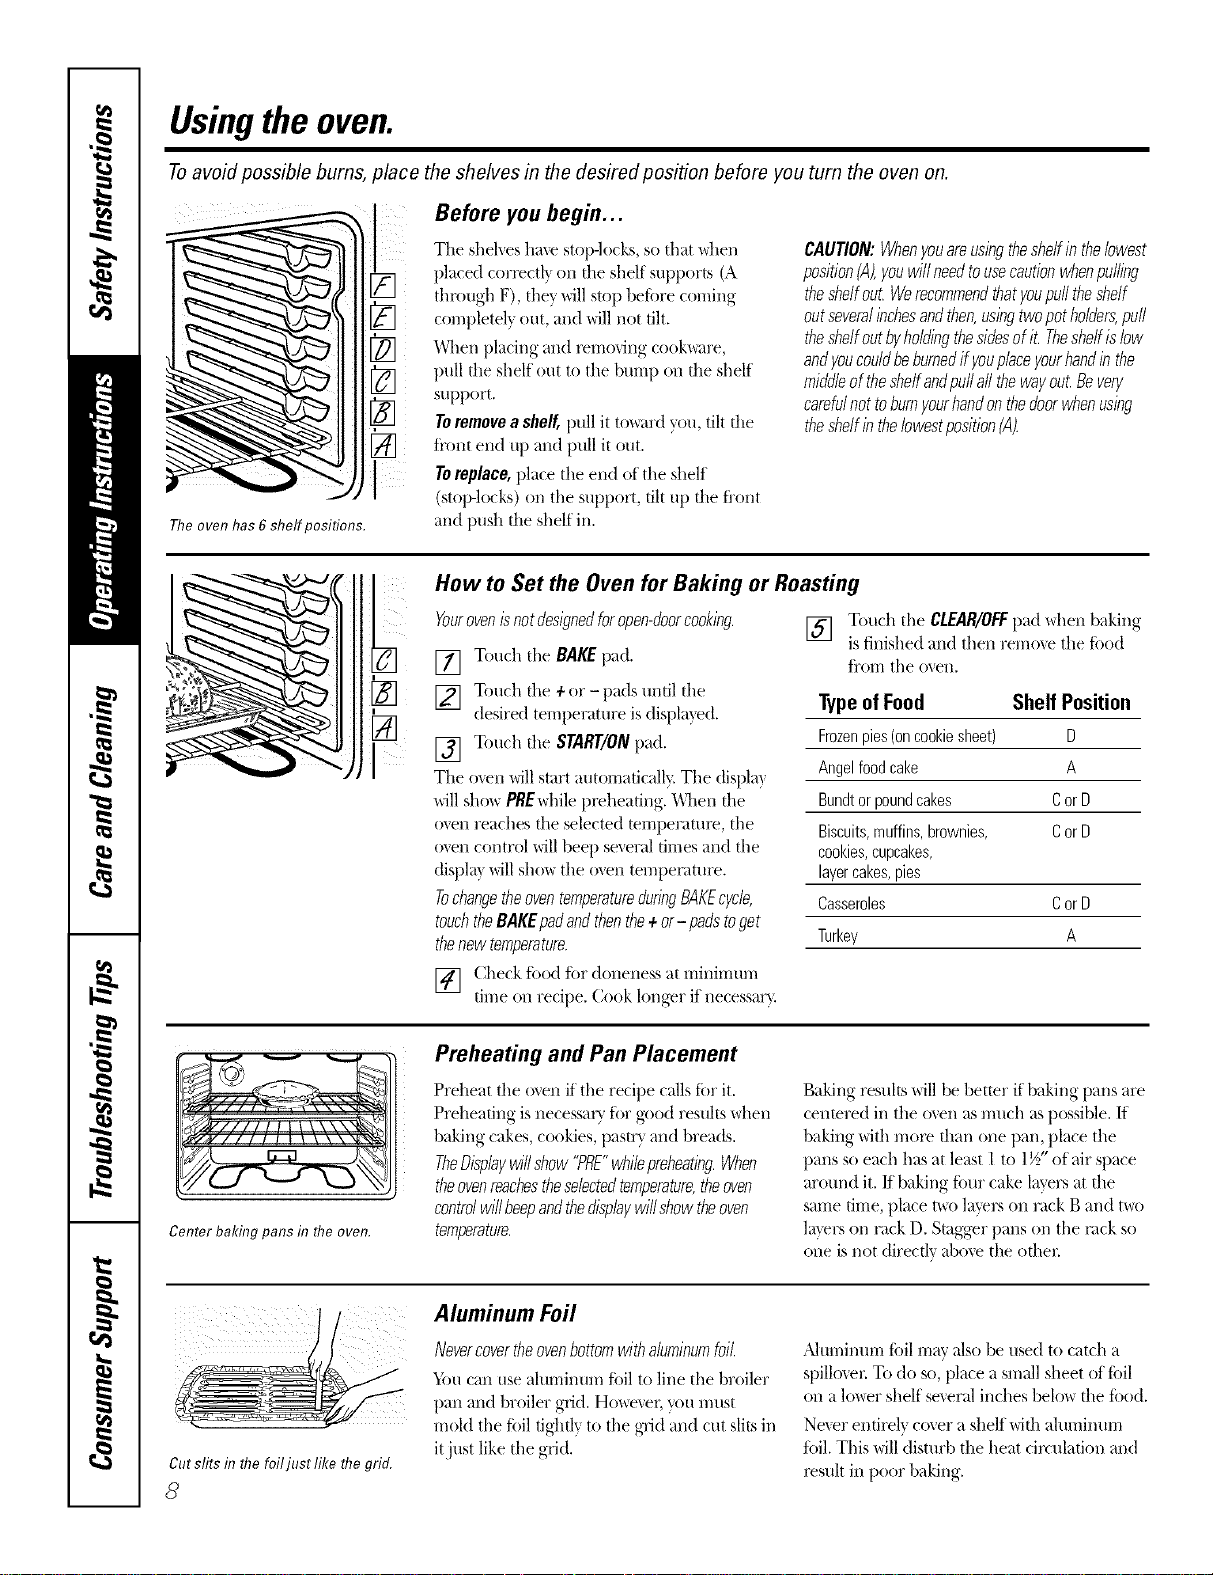
Use only flat-bottomed woks.
Wok Cooking
Werecommendthat youuseonlya flat-bottomed
wok Theyareavailableatyour localretail store.
Do not use wol<s that have support dngs.
Placing the _ing o_er the sm'ti_ce unit will
cause a buildup of heat that will damage
the porcelain cooktop.
Do not t/se I'o//nd bottoill wo]cs. YO/l
could be seriously burned if the wok
tipped oxei:
Home CanningTips
Be sure the ('miner is centered o_er the
sm_i_ce trait.
Make sure the cromer is fiat on the
bottolll,
Use redpes and procedures fl'om
reputable sources. These are available
fl'oln inanutilcturei's such as Bald and
Ken _'_and the Depamnent ot Ag_ieultm'e
Extension Se_'ice.
To pi'e',ent b/li'ns fi'oill steaill oi" heat, rise
caution when canning.
5

Usingtheovencontrols.
Throughout this manual, features and appearance may vary from your model.
OVEN CONTROLS
O
TIME CONTROLS
OvenControl,Clockand TimerFeaturesandSettings
oBAKE/7-EMPRECALLPad 0
Touch this pad to select tile bake function.
BAKE Light
Hashes _hile ill edit I/'lode--}rO[l {-'_111 (-h_lll_e
the oven temperature at this point. Glows
_dlen the o\en is in bake mode,
START/ONPad
l_']tlSt be touched to start all} cooking or
cleaning function.
ODisplay
Shows tile tiIlle of da,v, oven teillperattlre,
whether tile oven is in tile bake, broil or
self=cleaning mode and tile times set fi:,r
tile [iIl/er or autoIllatic oven operations.
Tile display will show PREwhile preheating.
_&l/en tile oven reaches tile selected
temperature, tile oven control will beep and
tile display will show tile oven temperature.
If "f- and anumberor letter" flashin the displayand the
ovencontrol sl)_na/s,this indicatesa functionerrorcode.
If youroven was set fora timed ovenoperation and
apower outageoccurred,the dock and aftprogrammed
functionsmustbe reset
Thetime of day wi// flash in the displaywhen there has
beena power outage.Resetthe c/oc/_
If the function errorcodeappearsduring the self-cleaning
cycle,checkthe oven doorlatch. Thelatchhandle mayhave
beenmoved,evenif onlys/i)ht/y, from the/atchedposition.
Makesure the latch ismoved to then)ht as far asit wi// go.
Touchthe CLEAR/OFFpad. Allow the oven tocool for
onehour.Put the ovenbackinto operation./f the function
errorcoderepeats, disconnectthepower to the rangeand
ca//for service.
0
0
0
KITCHEN TIMER ON/OFF
or TIMER ON/OFFPad
Totlcb this pad to select tile tilller teattlI'e.
Then press +and -pads to a(!iust time.
TIMERLight
Flashes while ill edit nlode--yotl tail challge
the set time at this point. Glo_:s _dlen the
timer has been activated. Nashes again _dlen
the time has run out until the control is reset.
CLOCK Pad
To set tile clock, press this pad twice and
then press tile 4-and -pads. Tile time of
day will flash in tile display when tile oven is
fiI_t turned oil.
STARTTIME Pad
krse along with tile COOKING TIME or
SELFCLEAN pads to set tile oven to start
and stop automatically at a time you set.
STARTTIME Light
Hashes wllile ill edit Illode--yotl tail challge
the start time at this ix)int. (;lo_vs _dlen the
fimction has been activated,
COOKINGTIME Pad
Touch this pad and then touch tile +or-
pads to set tile ai//otlnt of time you want
w_ur food to cook. Tile oven will shut off
when tile cooking time has run out.
COOKINGTIME Light
Flashes while in edit Itlode--}r{)tl (-'_lI1change
the set time at this point. (;lo_:s _dlen the
flmction has been activated, Flashes again
_dlen tile time has run out until tile control
is reset,
www.GEAppliances.com
OvenControl,Clockand TimerFeaturesandSettings
OAUTOMATIC OVENLight
This lights anytime the oven has been
progrannned using the COOKING TIME or
STARTTiMEflmctions.
OOVENLIGHTON/OFFPad
Touch this pad to turn the oxen light on or
-Pad
Short taps to this pad will decrease the time
or temperature 1Usmall amo/mts. Touch
and hold tile pad to decrease tile time or
temperature by larger amounts,
+Pad
Short taps to this pad will increase tile time
or temperature by small amo/mts. Touch
and hold tile pad to increase tile time or
temperature by larger amounts,
SELFCLEANPad
Touch this pad to select tile self:<leaning
erection. See tile Using the self-cleaning
oven section,
Indicator Lights (on some pads)
EDITmode lasts several seconds after the last
pad press. STARTTIME ON/OFFand COOKING
TIME ON/OFFwill be tile on]) pads lit if either
of these options is selected. (Exmnple: START
TIME is selected with BAKE tile STARTTIME
pad will remain lit until the clock reaches the
programmed time, at _dfich point it will turIa
off mad tile BAKE/'rEMPRECALLpad lig]lt will
light up).
CLEANLight
Flashes while in edit Illode--}rotl c}lIl chang_
the length of time fi)r the selfklean c}cle at
this point. (;lo_:s _dlen the oven is in the self
clean c}cle. Adier the selfklean cycle, the lig]lt
will ttlrll of I_Unlatch tile dooi;
0CLEAR/OFFPad
Touch this pad to cancel ALL oven
operations except tile clock and fiIneI:
BROILHI/LO Pad
Touch this pad to select tile broil emotion.
BROILLight
P'lashes while in edit Illode--}rotl c}lIl switch
fi'om HI to LOBROILat this point. C,lo_s _dlen
tile oven is in broil mode.
Power Outage
If a flashlbgtlYneIs lb the display,youhave experienceda
power fai/ure. Resetthe dock. To reset the clock, touch tile CLOCKpad. Enter
tile correct time of day by touching tile +or -
pads. Touch tile START/ONpad.
Usingtheoven.
Toavoid possible bums, place the shelves in the desired posifion before you turn the oven on.
[]
The oven has 6 shelf positions.
Before you begin...
The shelves have stop-locks, so that \_hen
placed correctl} on file shelf supports (A
through F), they will stop beii)re coming
completely out, and will not flit.
When placing and x_rrlo_ing cook\_re,
pull the shelf ()tatto tile burr H)on the shelf
support.
Toremovea shelf,pull it to_trd you, tilt the
ti'ont end up and pull it out.
Toreplace, place the end of the sllelf
(stop-locks) on the support, tilt up the t]'ont
and push the shelf in.
CAUTION:Whenyouare,usingthesheffin thebwest
position(A),youwill needtousecautionwhenpulling
theshelfout.Werecommendthatyoupufftheshelf
outseveralinchesandthen,usingtwopotholders,puff
theshelfoutbyholdingthesidesofit. Theshelfislow
andyoucouldbeburnedif youplaceyourhandin the
middleoftheshelfandpu//all thewayout.Bevery
carefulnot toburnyourhandonthedoorwhenusing
theshelfintheIowestposition(A).
I
i i!¸¸¸
How to Set the Oven for Baking or Roasting
Yourovenisnotdesignedforopen-doorcooking.
[] Touch the BAKEpad.
] Touch the ÷or- pads until the
desired temperature is displa_'ed.
[] Touch tile START/ONpad.
Tile o_en will start automatically. The displa}
will show PREwhile px_heaflng. "_\]leil the
oven reaches the selected mrrlperatux_, the
oven control will beep several flmes and the
(tispla} will show the oven tempex_ture.
TochangetheoventemperatureduringBAKEcycle,
touchtheBAKEpadandthenthe÷or- padstoget
thenew temperature.
[] (i:heckfi)()(1fi)r doneness at minimum
nine on recipe. Cook longer if Hecessar}.
[] Touch the CLEAR/OFFpad when baking
is finished and then remo_e the ii)od
t7"orrithe oven.
TypeofFood Shelf Position
Frozenpies(oncookiesheet) D
Angelfoodcake A
Bundtorpoundcakes CorD
Biscuits,muffins,brownies, CorD
cookies,cupcakes,
layercakes,pies
Casseroles CorD
Turkey A
Center baking pans in flTeoven.
Preheating and Pan Placement
Preheat the oven if the recipe c_dlstier it.
Preheating is necessarx t()r good results when
baking cakes, cookies, pastr> and breads.
TheDisplaywillshow"PRE"whilepreheating.When
theovenreachestheselectedtemperature,theoven
controlwinbeepandthedisplaywinshowtheoven
temperature.
Baking results will be better if baking pans are
centered in tile o_en as much as possible. If
baking with more than one pan, place the
pans so each has at least 1 to 1½" of air space
around it. ff baking fimr cake l_lyersat the
same time, place t\_o l_Jverson rack B and two
l_ltvl-son rack D. Stagger pans on the rack so
one is not directly _dJo\e the other
Cutslitsin flTefoiljust like flTegrid.
8
Aluminum Foil
Nevercovertheovenbottorgwithaluminumfoil
}tin can use alurriinum fifil to line the broiler
pan and broiler grid. Ho_er, g)u l//llSt
mold the fi)il tightly to the grid and cut slits in
itjust like the grid.
,Jdulnii/urri foil rilav illS()be tlsed to catch a
spillo_el: To do st), place a sm_lll sheet of ti)il
on a lo_er shelf severed inches belo_ the ii)o(t.
Ne_er entirely cover a shelf with altmlintm-i
ti)il. This will disturb tile heat circulation and
x_sult in poor baking.
vvww.GEAppliances.com
Donot latch the oven door during broiling. The latch is used for self-cleaning only.
How to Set the Oven for Broiling
[] Place tile meat or fish on tile broiler
grid in tile broiler pan,
[] Follow suggested shelf positions in
tile BroilingGuide.
Leave the door open to the broil
stop position. The door stays open
by itself, yet theproper temperature
is maintained in the oven.
If yourrangeisconnectedto208volts,raresteaks
maybebroiledbypreheatl)_gthebroilerand
position/)_gtheovenshelfonepositionhigher
Use LO Broil to cook fix)ds such as
poult_ T or thick cuts of Illeat thoroughly
without oxe>browning them.
[] Touch tile BROILHI/LO pad once tot
HI Broil.
To change, to I,O Broil, touch tile
BROILHI/LO pad again.
[] Touch tile START/ON pad.
[] _._q/en broiling is finished, touch tile
CLEAR/OFFpad.
Tile size, weight, thickness,
starting temperature
and your preli_rence
of doneness will altect
broiling times. This guide
is based on meats at
reli'igerator temperature.
(' The {ZS. D*'pa*lme_l o/
Agric*dhm, _ays "/'a_, &e/is
/*o/mira b,It yo*l should to*ow that
_ome/ood /)oiso_*i_J_m_gw_isms
_ll_U s_l_'zize. "(Sou*rw _e libod
Book. }'o_t_Kir(/,4"_ (;ui(h,. USDA
Theoven has 6shelf positions.
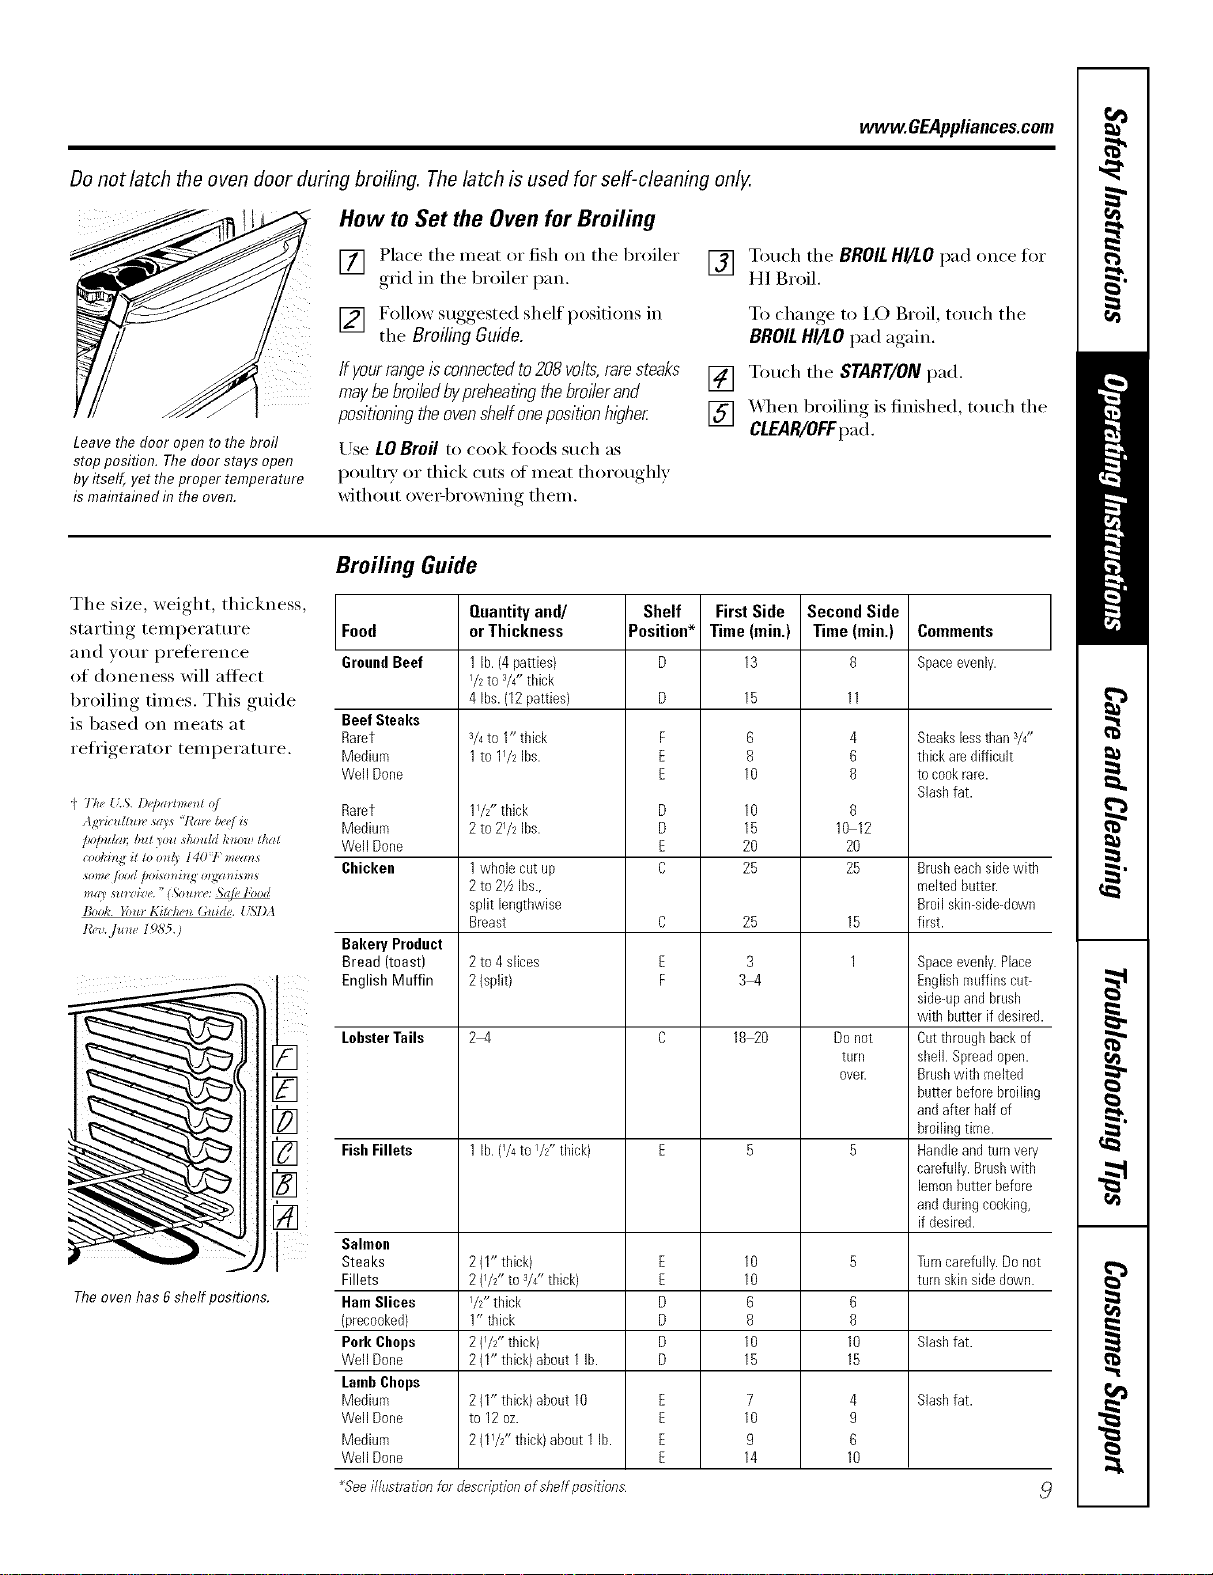
Broiling Guide
Food
GroundBeef
Beef Steaks
Rarer
Medium
Well Done
Rarer
Medium
Well Done
Chicken
Bakery Product
Bread (toast)
English Muffin
LobsterTails
FishFillets
Salmon
Steaks
Fillets
HamSlices
(precooked)
Pork Chops
Well Dorre
LambCbops
Medium
Well Done
Medium
Well Done
Quantityand/
orThickness
1lb. (4patties)
I/2 to 3/4"thick
4 Ibs.(12patties)
3/4to 1" thick
1to 11/2 Ibs.
11/2" thick
2 tO 21/2 Ibs.
1whole cat up
2to 21/zIbs.,
split lengthwise
Breast
2to 4 slices
2(split)
2-4
1lb. (1/4to I/2ff thick)
2(1" thick)
2{I/2" to 3/4_z thick)
I/2" thick
1" thick
2(I/Z' thick)
2(I" thick) about 1lb.
2{1" thick)about 10
to 12oz.
1
2(I/2" thick) about 1lb.
Shelf
Position*
F
E
E
D
D
E
C
C
E
F
E
E
D
D
D
D
E
E
E
E
First Side
Time(min.)
13
15
6
8
10
10
15
2O
25
25
3
3-4
18 2O
10
10
6
8
10
15
7
10
9
14
Second Side
Time (rain.)
8
4
6
8
8
10 12
20
25
15
1
Do not
tLinl
over.
6
8
10
15
4
9
6
10
Comments
Spaceevenly.
Steakslessthan3/4"
thick aredifficult
tocookrare.
Slashfat.
Brasheachsidewith
meltedbatter.
Broil skin-side-down
first.
Spaceevenly.Place
Englishmuffins cut-
side-upandbrash
with hatter if desired.
Oatthroughbackof
shell. Spreadopen.
Brashwith melted
butter beforebroiling
andafter half of
broilingtime.
Handleandturnvery
carefully.Brashwith
lemonbatterbefore
andduringcooking,
if desired.
Turncarefully.Donot
turn skinsidedown.
Slashfat.
Slashfat.
_Seeillustration for descriptionofshelf positions
Usingthe clock andtimer.
Not all features are on all models.
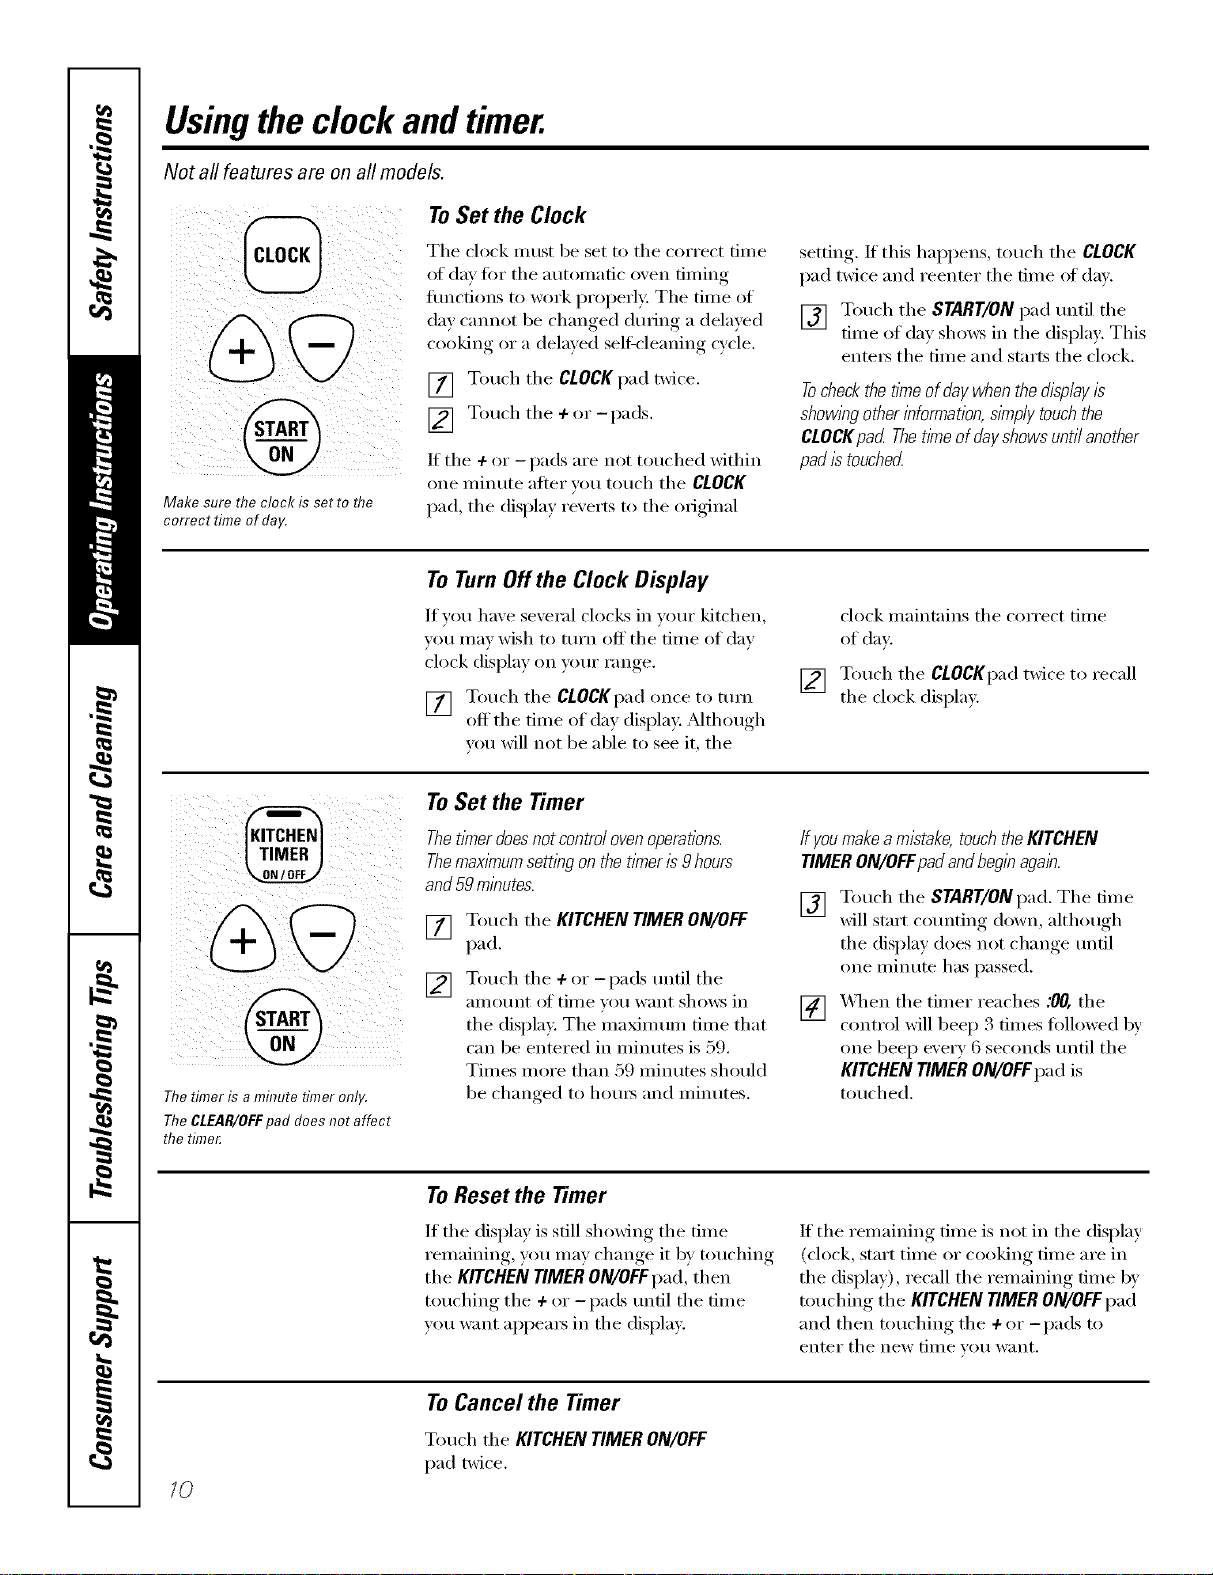
To Set the Clock
Make sure the clock is set to flTe
correct time of day.
Tile clock must be set to tile correct time
of day fi)r tile automatic oxen timing
flmcfions to work properly: Tile time of
day cannot be changed during a delayed
cooking or a delayed seltXcleaning cycle.
[] Touch tile CLOCKpad twice.
[] Touch the +or -pads.
If tile + or -pads are not touched within
one ininute alter you touch tile CLOCK
pad tile displa_ rexerts to tile original
setting, If this hal)pens, touch tile CLOCK
pad twice and reenter tile time of dax.
[] Touch tile START/ON pad until tile
time of day shows in tile display. This
entex_ tile time and starts tile clock.
Tocheckthetimeofdaywhenthedisplayis
showingotherinformation,simplytouchthe
CLOCKpad Thet/meofdayshowsuntilanother
padistouched
ToTurnOffthe Clock Display
If you have several clocks in your kitchen,
you Inay wish to turn off tile dine of day
clock display on ,,'our range.
[] Touch tile CLOCKpadonce to ttlYIl
off tile time of day display. Mthough
w)u will not be able to see it, tile
[]
clock maintains tile correct time
of day
Touch tile CLOCKpad twice to recall
tile clock display.
Thetimer is a minute timer only.
TheCLEAR/ell:pad does not affect
the time_
To Set the Timer
Thet/knerdoesnotcontrolovenoperations.
Themax/knumsettingonthetimeris9 hours
and59minutes.
[] Touch tile KITCHEN TIMER ON/OFF
pad.
[] Touch tile +or-pads until tile
aillo/lnt of tiIlle _otl want shows in
tile display. The maxim um time that
can be entered in minutes is 59.
Times more than 59 minutes should
be changed to ho/u_ and minutes.
ffyoumakea mistake, touchthe KITCHEN
TIMER ON/OFFpadandbeginagain.
[] Touch tile START/ON pad. Tile time
will start co/mting down, althouoh,.
tile display does not change until
one minute has passed.
[] XAq/en the timer reaches .'0/7,the
control will beep 3 times followed 1)/'
one beep every 6 seconds/mtil the
KITCHEN TIMER ON/OFFpad is
touched.
To Reset the Timer
If tile display is still showing tile time
remaining, you may change it by touching
tile KITCHEN TIMER ON/OFFpad, then
touching tile +or -pads until tile time
you want appea_s in tile display.
If tile remaining time is not in tile display
(clock, start time or cooking time are in
tile display), recall tile remaining time b)"
touching tile KITCHEN TIMER ON/OFFpad
and then touching tile ÷or -pads to
enter tile new [lille Veil want,
10
To Cancel the Timer
Touch tile KITCHENTIMERON/OFF
pad twice.
Usingthetimedbakingandmastingfeatures.Ionsomomodols)w GEA,,lia,ces.com
Donot lock the oven door with the latch during timed cooking. Thelatch is used for self-cleaning only.
NOTE: Foods that spoil easily--such as milk, eggs, fish, stuffings, poultry and pork--should not be allowed to s# for
more than 1hour before or after cooking. Room temperature promotes the growth of harmful bacteria. Be sure that
the oven light is off because heat from the bulb will speed harmful bacteria growth.
i:
i_ _ _ _ _
TIME j
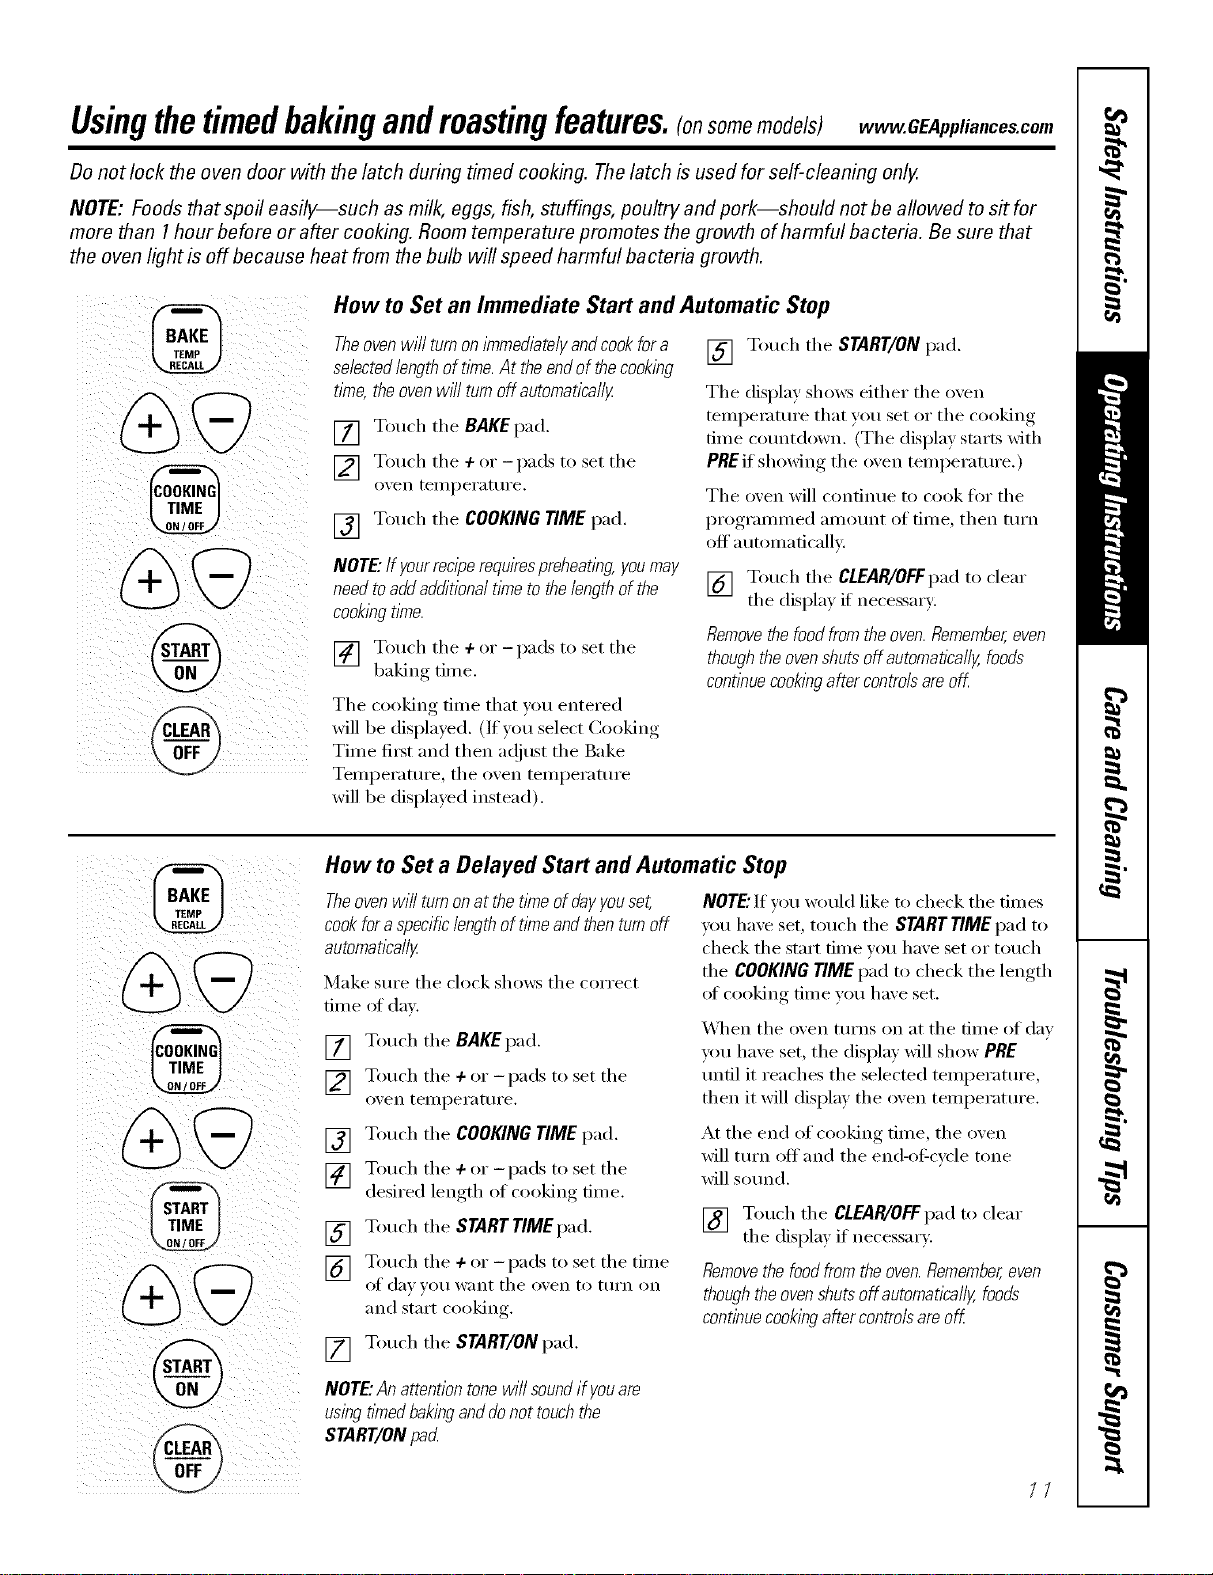
How to Set an Immediate Start and Automatic Stop
Theoven will turnon immediatelyand cookfor a [] Touch tile START/ON pad.
selectedlengthof time. At the end of thecooking
tkne, the ovenWlT/turnoffautomatica//y Tile display shows either tile oven
[] Touch tile BAKEpad.
] Touch tile +or -pads to set tile
o_en teiilpei'att/i'e.
[] Touch tile COOKINGTIMEpad.
NOTE."If yourreciperequirespreheating, youmay
need toaddadditional time to the length of the
cookingtime.
] Touch tile ÷or -pads to set tile
baking tim e.
Tile cooking time that you entered
will be displayed. (If you select Cooking
Time fi_st and then a(!iust tile Bake
Temperature, tile oven temperature
will be displayed instead).
tempemtm'e that you set or tile cooking
time cotmtdown. (The display starts with
PREif showing the oven temperature.)
Tile oven will continue to cook for tile
programmed anlount of finle, then turn
off automaficallv.
[] Touch tile CLEAR/OFFpad to clear
tile displa) if necessary:
Removethe food fromthe oven.Remember,even
thoughthe ovenshuts off automaflcally, foods
contlbuecooklbgafter controlsare off
%
@
tTIME
@
How to Set a Delayed Start and Automatic Stop
Theoven will turn onat the t/_neof dayyouset,
cookfor a specificlength of time and thenturnoff
automatically
Make StlI'e tile clock shows tile coFi'ect
time oI day.
[] Touch tile BAKEpad.
] Touch tile 4-or -pads to set tile
oven telllpei'attii'e.
[] Touch tile COOKING TIME pad.
] Touch tile 4-or -pads to set tile
desired length of cooking time.
[] Touch tile STARTTIMgpad.
] Touch the +or - pads to set the time
of (lax _O/I want tile ox, en to ttlFn on
and start cooking.
[] Touch tile START/ON pad.
NOTE."If w_u would like to check tile times
you have set, touch tile STARTTIME pad to
check tile start time w_u have set or touch
tile COOKINGTIMEpad to check tile length
ot cooking time vou have set.
_._]/en tile oven turns on at tile time of day
you have set, tile display will show PRE
until it reaches tile selected temperature,
then it wil1 display the __x'en tempe rat ure.
At the end of cooking time, the oven
will turn offand the end-el:cycle tone
will sotmd.
[] Touch the CLEAP_/OFfpad to clear
tile displa) if necessar).
Removethe food from the oven.Remember,even
thoughthe ovenshuts off automatlcally, foods
continuecookingafter controlsare off
NOTE."Anattentiontonewi//soundifyouare
usingtl_nedbakinganddonottouchthe
START/ONpacL
/7
Special featuresofyourovencontrol
Yournew touch pad control has additional features that you may choose to use. Thefollowing are the features and
how you may activate them.
Thespecial feature modes can only be activated while the display is showing the time of day. They remain in the
control's memory until the steps are repeated.
When the display shows your choice, touch the START/ONpad. The special features will remain in memory after
a power failure.
NOTE: TheSabbath feature and the Thermostat Adjustment feature are also Special Features, but they are
addressed separately in the foflowing sections.
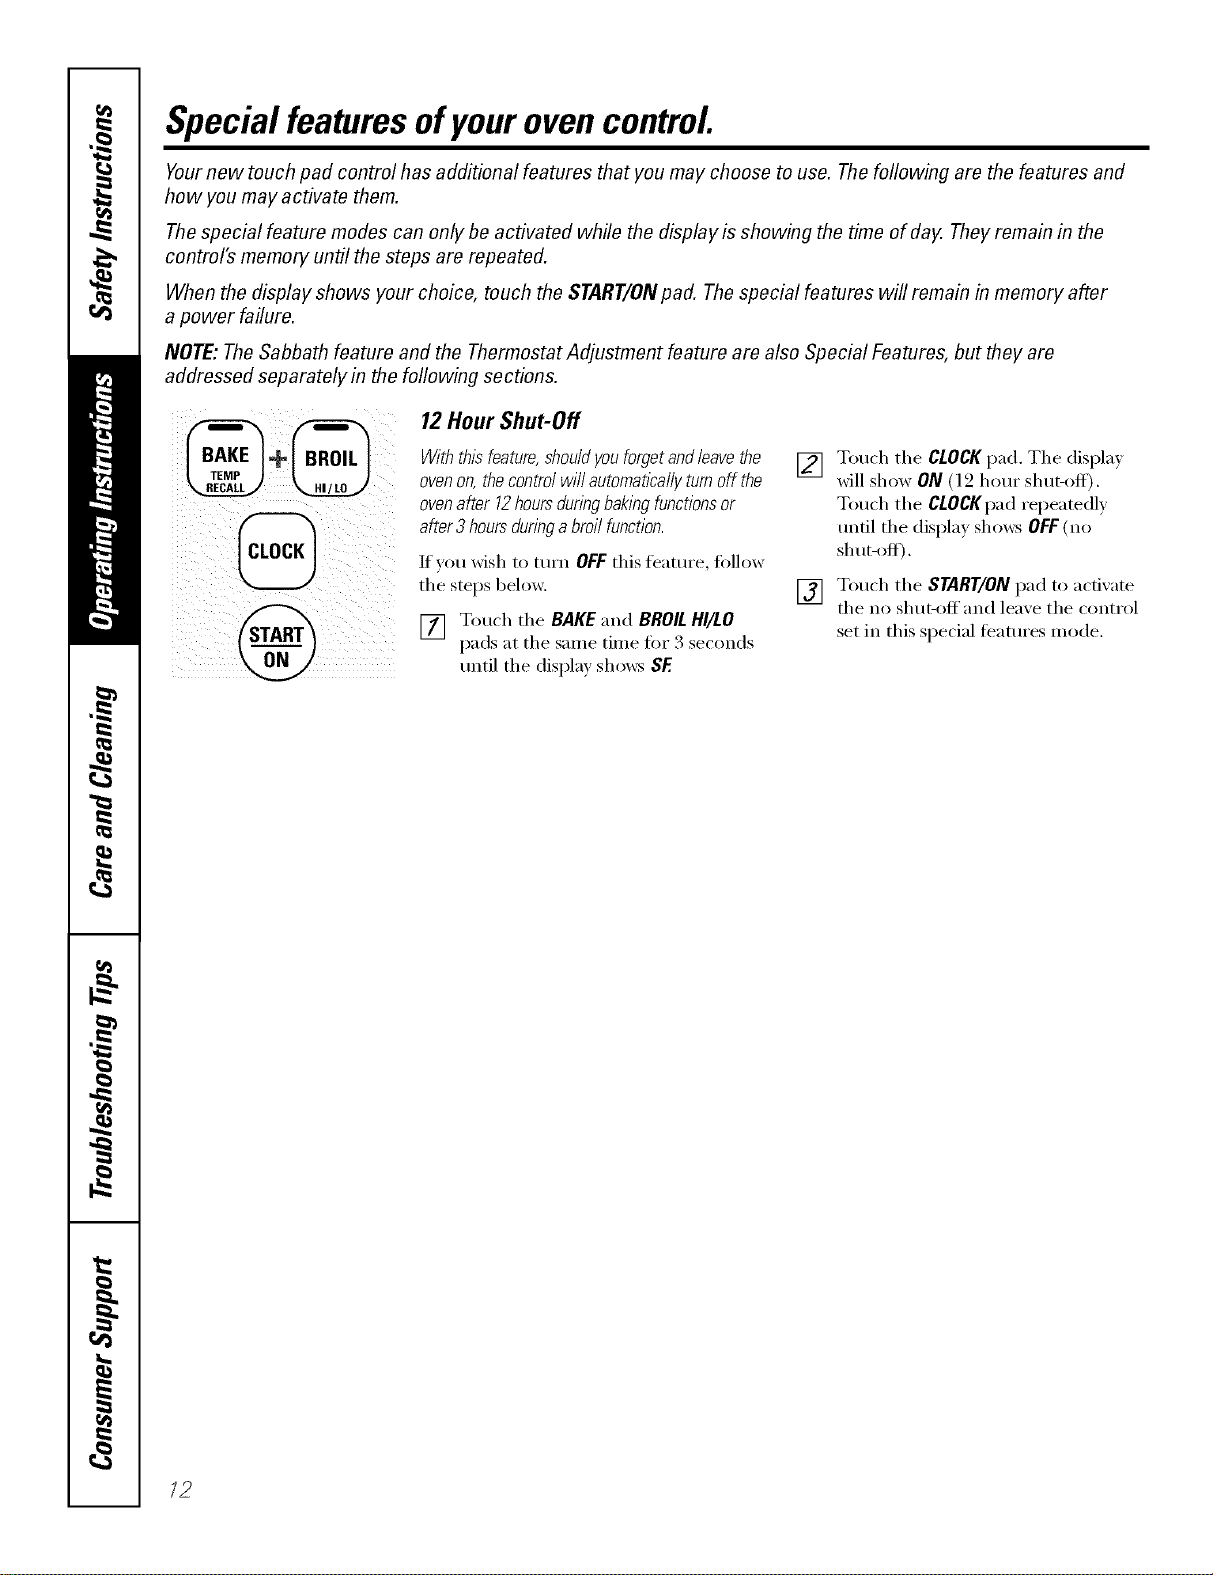
12Hour Shut-Off
With thisfeature, shouldyouforgetand leave the
oven on, the control will autornatlcally turnoff the
ovenafter 12hoursduringbakbg functionsor
after 3 hoursduring abroil function.
If you wish to turn OFF this te'attlI'e, t(_l]OW
the stops below.
[] Touch the BAKE and BROILHI/LO
pads at the same time fin" 3 seconds
until the display shows SE
[] Touch the CLOCKpad. The displa_
will show ON (l 2 hour sitar-off).
Touch the CLOCKpad repeatedly
tmtil the display shows OFF(no
sh tl[-oIc[).
[] Touch the START/ON pad to actixate
the no shut-off and lea_e the control
set in this special t¢'atures mode.
/2
Usingthe SabbathFeature.
(Designed for use on the Jewish Sabbath and Holidays) vvww.GEAppliance_com
The Sabbath feature can be used for baking/roasting only. It cannot be used for broiling, self-cleaning or
Delay Start cooking.
NOTE"Theoven light comes on automatically (on some models) when the door is opened and goes off when the
door is closed. Thebulb maybe removed. See the Oven Light Replacement section. Onmodels with a light switch
on the control panel, the oven light may be turned on and left on.
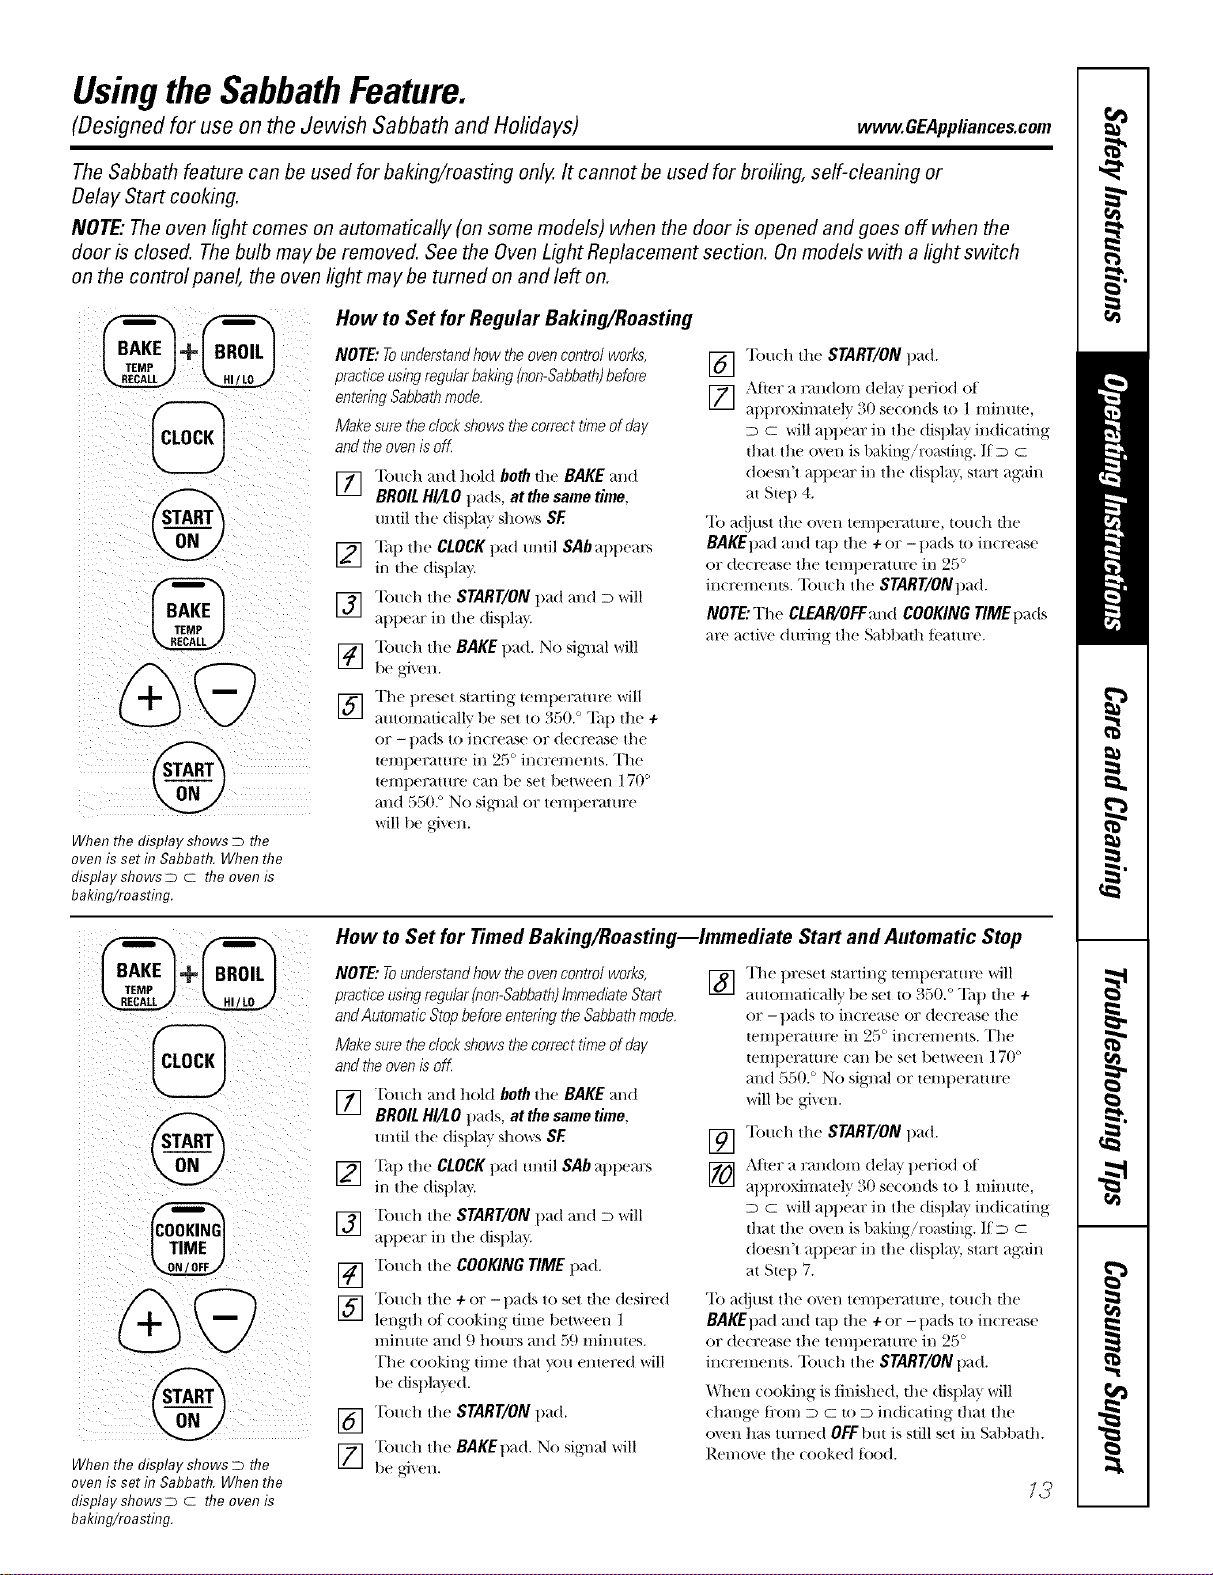
When the display shows Dthe
oven is set ta Sabbath. When the
display shows D c the oven is
baking/roasting.
How to Set for Regular Baking/Roasting
NOTE: Tounderstandhow theoven control works,
practice usingregularbaking (non-Sabbath)before
entering Sabbathmode.
Make sure theclockshows thecorrect time of day
and theoven is off
] Tou(h and hoM both the BAKE and
BROIL HI/LO p_ds, at the same time,
until the disl/1 m' sho_,,:'_SE
]"]hl/the CLOCKpad until SAb at/t/em_
ill the dist)lay.
V_] "lbuch the START/ONt/ad and D will
at/l)ear ill the dist/la }
]"lbu(h the BAKE t/ad. No sigllal will
be aixell.
] The t)reset slarling lemt/eraulre will
automatically l)e set to 5'50. ° Tat/the ÷
or -pads to increase or decrease tile
lelIll/el;_tlll£e ill _c, incl;el//ents. The
tenlperatm'e can be set between 170 °
and 550. ° No sigllal or telnl)erature
will be given.
V_ "lbu(h the START/ON pad.
[_ After a random delay t)eliod of
at/t)roximately 30 se(onds to 1 lninule,
D C will appear ill tile (tisl/la _ indicating
that tile o_vn is llaking/ro;isting. If D c
doesn't at/pear ill the (tist/la}, start again
al Siet/4.
"Ib adjust the oven teml)erature, touch the
BAKEt)ad and tap tile +or -pads to increase
or (tecrease tile tel/ll)el_lttll?e ill 2_. _°
incremenls. "Ibuch the START/ONpad.
NOTE:The CLEAR/OFF and COOKING TIME tlads
m'e _l(ti_' (/unng the S_d)b_lth t_'_lttll:e.
%+@
@
%
When the display shows Dthe
oven is set f17Sabbath. When the
display shows D c the oven is
baking/roasttag.
How to Set for Timed Baking/Roasting--Immediate Start and Automatic Stop
NOTE: Tounderstandhow theoven control works,
practice usingregular(non-Sabbath)ImmediateStart
andAutomatic Stop before entering the Sabbathmode,
Make sure theclockshows thecorrect time of day
and theoven is off,
] Touch and hold both the BAKE and
BROIL HI/LO pads, at the same time,
until lhe disl/la _ shows SE
] Tall the CLOCKpad m/til SAb al)t/em:s
ill the display.
] "[k)u(h the START/ONt/ad and D will
at/t/ear ill lhe (tisl/la"_
V_ "[k)u(h the COOKING TIMEpad.
] Tou(h the +or -pads to set lhe desired
length oI ( ooking time 1)etween l
n/inute and 9 hom:s and 59 minlltes.
The cooking time that _r<)__entered will
l>e dist/la'_ ed.
"['ou(h the START/ON t/ad.
] "[km(h the BAKEtlad. No signal will
be _,i_,en.
] The t)reset starting leml/eraulre will
autonlati(allv t)e set lo 350. ° Ta t) lhe +
or -t)ads lo increase or decrease the
leml/eramre ill 25 ° increments. The
lemperatm'e can be set between 170 °
and 550. ° No signal or lelnt/emulre
will be given.
[_ "lbu(h the START/ONl/ad.
[_ After a random delay period of
allt)roxinlatel" _ 30 seconds to 1 minute,
D c will apt)ear ill the dist)la } indicating
lhat the oven is baking/ro_lsting. If D c
doesn't appear ill tile display, start again
at Stet/7.
"Ib adjust tile o_en teml)erature, touch tile
BAKEt)ad and tap tile +or -pads [o in(Tease
or decrease tile tel/ll)e/'_ltllre ill 25 °
incremenls. "Ibu(h tile START/ONpad.
When cooking is/inJshed, lhe disllla } will
change ti:om D C to D indicating that tile
o_.t'n has turned OFFbill is still set ill Sabbalh.
Relno_' tile cooked tood.
73

Usingthe SabbathFeature.
(Designed for use on the Jewish Sabbath and Holidays)
(CLEAR'_
@
How to Exit the Sabbath Feature
[] Touch the CLEAR/OFFp+Id.
]dela} period at approxhnatelT_ 30
s(x on(ts to 1 minute, mltil only D is in
the displa}
] "['(m(h and hold beth the BAKE and
BROIL HI/LO pads, at the same time,
m_til the display shows SE
] "lhp the CLOCK pad m_til ONor OFF
tq)pears in the display. ON indi(t_ws that
the oven will automatJc_fllv turn off _lfler
12 hom:s. OFFindkates that the o_vn
will not automatically mrn oil See
the Special Features section Jar an
explanation of the 12Hour Shut-Off
{_'_tt t ll?e.
[] "lbu(h the StART/ON pad.
NOTE:fro power outage occurred while the oven was
in Sabbath, the oven will automaticafly turn off and stay
off even when thepower returns, Theoven coetro/
must bereset.
Adjustthe oventhermostat--Do #yourself!
Youmay find that your new oven cooks differently than the one it replaced. Use your new oven for a few
weeks to become more familiar with it. If you still think your new oven is too hot or too cold, you can adjust
the thermostat yourself.
Do not use thermometers, such as those found in grocery stores, to check the temperature setting of your oven.
These thermometers may vary20-40 degrees.
NOTE,"This adjustment will not affect the broiling or the self-cleaning temperatures. The adjustment will be
retained in memory after a power failure.
To Adjust the Thermostat
[] Touch tile BAKE and BROILHI/LO
pads at tile sanle tiine for 2 seconds
tmtil tile display shows SE
[] Touch tile BAKEpad. A two-digit
number shows in tile display:
[] Tile oxen tenlperature can be
a(!justed up to (+) 35°F hottei oi (-)
35°F coolei: Touch tile +pad to
increase tile temperattu'e in l<legree
iilci'ei//eilts+
[] X_q/en }ou haxe inade tile
a(!justment, touch tile START/ON pad
to go back to tile time of (la_ display.
Use xO/li" o'_ell as veil Wo/lld
i1Oll11;:111"+.
NOTE."Thisadjustmentwillnotaffectthebroiling
orse/f-c/eaningtemperatures.It wi//beretained
inmemon/afterapowerfailure.
Touch tile -pad to decrease tile
telnperature ill 1-de(,Tee_ increlnents.
Thetypeof margarine will affect bakingperformance!
Most recipes for baking have been developed using high-fat products such as butter or margarine (80% fat). If you
decrease the fat, the recipe may not give the same results as with a higher-fat product.
Recipe failure can result ff cakes, pies, pastries, cookies or candies are made with low-fat spreads. Thelower the fat
content of a spread product, the more noticeable these differences become.
Federal standards reqtfire products labeled "margarine" to contain at least 80% fi_t by _vight. i,o_tht spreads,
on tile other hand, contain less tilt and more water. Tile high inoisture content of these spreads aflbcts tile
texture and flavor of baked goods. For best results with wmr old thvorite recipes, use margarine, butter or
stick spreads containing at least 70% vegetable oil.
74
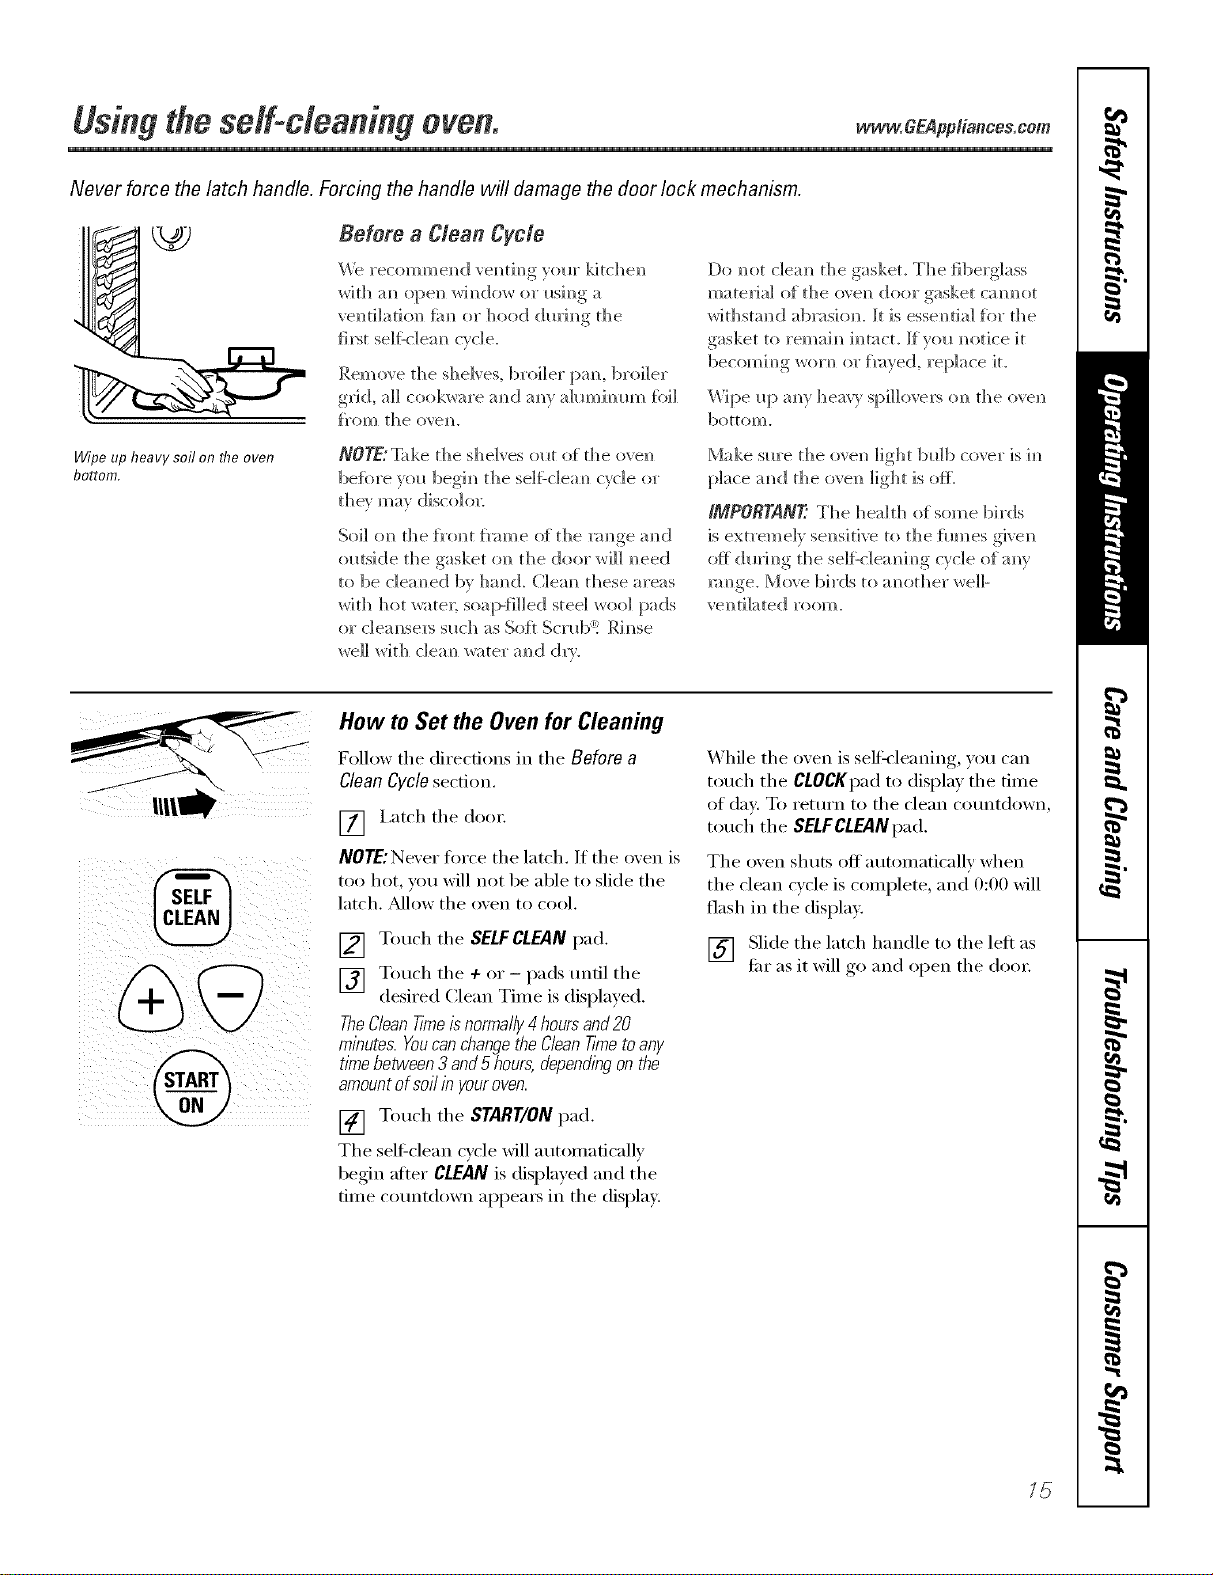
Never force the latch handle. Forcing the handle will damage the door lock mechanism.
Wipe up heavy soil on flTeoven
bottom.
Before aClean Cycle
We x'ecom m em_dvem_ti m_gyotw ]d tch en
will] am] opel] wim_do_,_ 0_" I_sh_g a
ventilation fire or hood dm'im/g the
fixst se]fic]eam_ cycle.
Remove the shelves, hi'oiler pam_, hi'nile]"
gl'_d, a]] co o kw a re a m_d a m__ a] Im_im_Im_ fi 4]
from the ovem?.
NOTE:%d_e the shelves out d_e oven
befbre }ou begh_ the se]f:c]eam_ c_c]e or
the_ ma_ discolor:
Soil om) {he{_'om) t _'a m))e()f t h e 1_m/ge am/d
ol_tside the gasket on the door _i]] m)eed
to be c]eam_ed bv han(k C]eam_ these ax'eas
with hot _<_te_; soap-tilled steel _oo] pads
o_"c]ea_se_s s_ch as SoR Scmb<_ Ri_se
we]] with c]ea_ water" a_d d_T.
Do _ot dean the gaskeL The fibexglass
material of the o\e_l doe1" gasket cam_ot
withstan_d ab_si(m. It is esse_tia] fkn" the
gasket to remai_ i_tacL Ifvo_ _otice it
becomi_g _oH_ (w f_;_ye(!, replace it.
_l)e _*l) a_y hear) sp]]]overs on the oven
bottom.
Make sm'e the ovell hght b_db cover is h_
place a_d the oven light is elk
/_PORTANT: The health of sore e birds
is ext_'eme]_ sel_sitive to the fllmes givel_
m _ ge. M eve bi rds t o a _ ot her _ e]]-
vel_ti]ated _'oom.
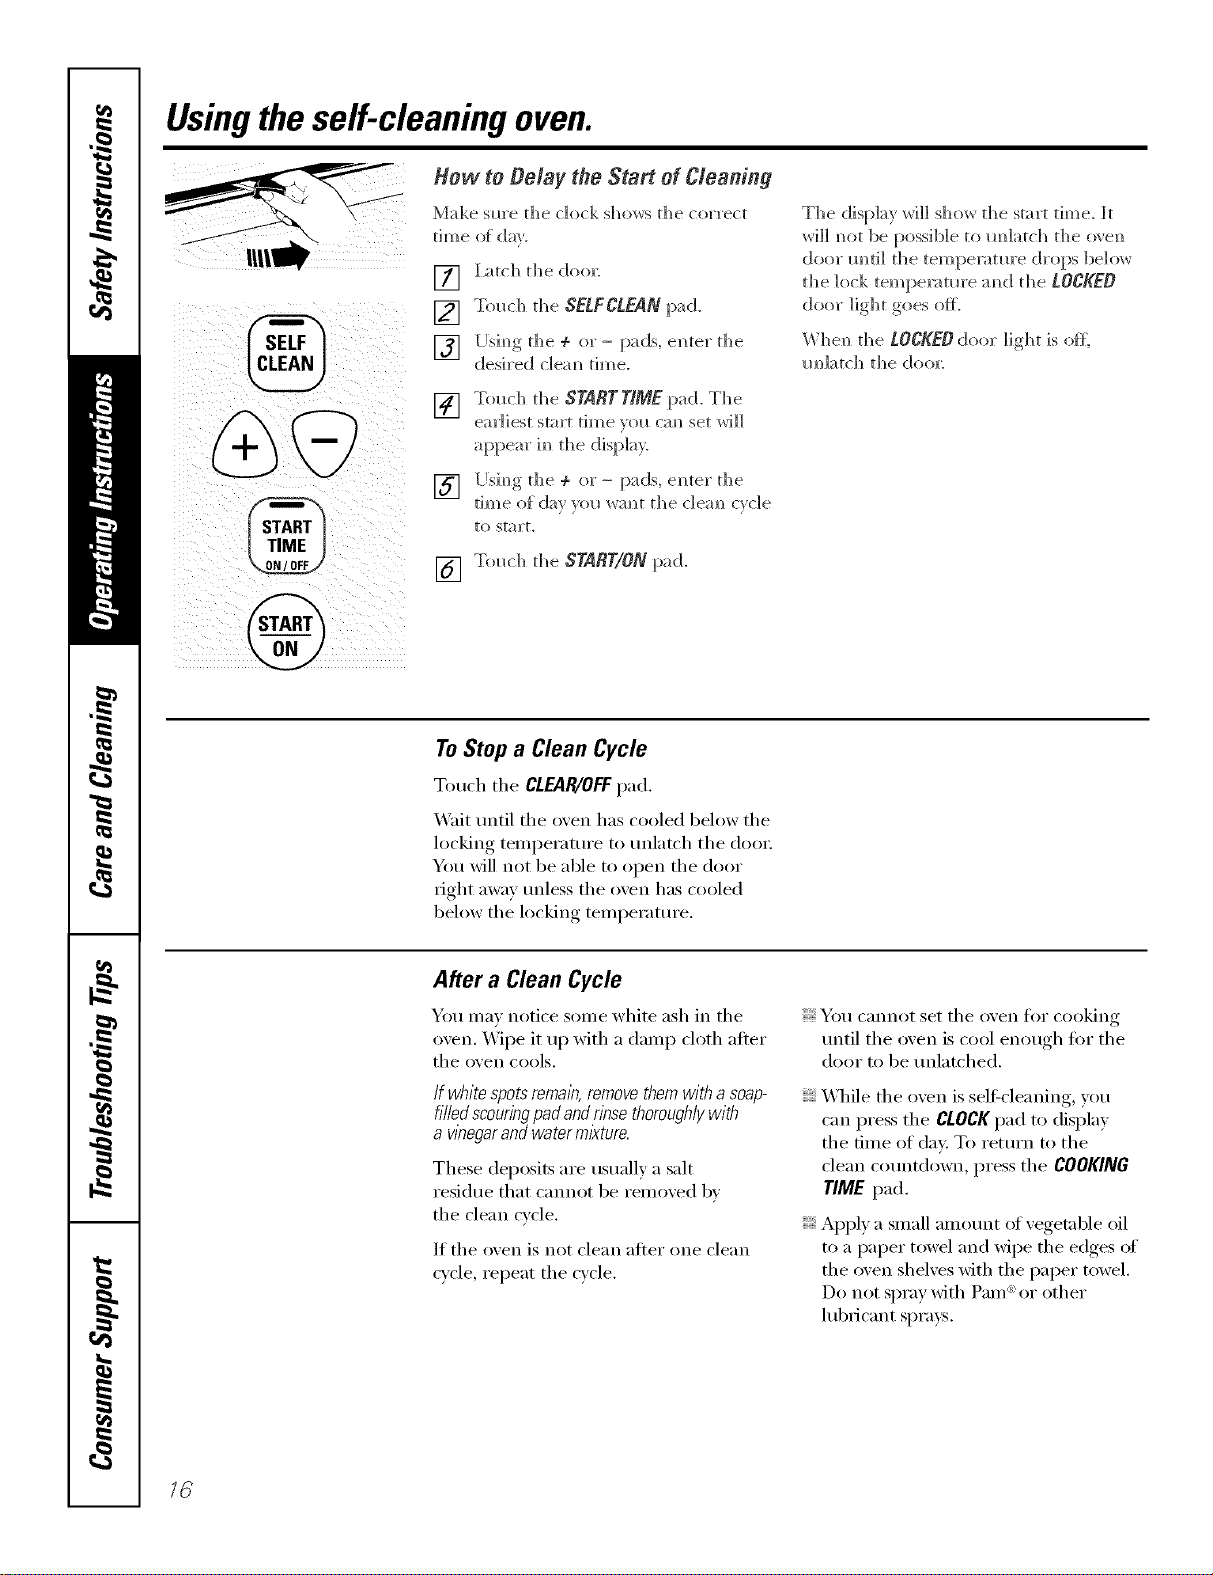
How to Set the Oven for Clean&g
Follow the directions in the Before a
Clean Cycle section.
[] I,atch the dent:
NOTE:Never force the latch. If the oxen is
too hot, you will not be able to slide the
latch. _Mlow the oxen to cool,
[] Touch the SELFCLEAN pad.
[] Touch the +or - pads tmfil the
desired Clean Time is displayed.
TheCleanTimeis normally4 hoursand20
minutes. Youcan changethe CleanTimetoany
time between 3 and 5 hours, dependingon the
amountof soil in youroven.
[] Touch the START/ON pad.
The selfklean cycle will automatically
begin afier CLEAN is displayed and the
time countdown appea_ in the displa>
While the oven is selfk'leaning, you can
touch the CLOCKpad to display the time
of day, To return to the clean countdown,
touch the SELFCLEANpad,
The oven shuts off automatically when
the clean cycle is complete, and 0:00 will
flash in the displa>
[] Slide the latch handle to the left as
thr as it will go and open the doo_:
15
Usingthe self-cleaning oven.
@
] I_tch the doo_
[] Touch the SELFCLEANpad.
][Jsim_gthe ÷ or- pads, e]_ter the
desired c]em_ time.
[] Touch the STABTTIME pad. The
earliest start time _ol_ cm_ set will
appear im_the display.
][Jsim_g tile ÷ or- pads, e]_ter the
tim e _){ da_ _o __wa N_t th e _1ea m_c_cl e
[O S[_] ]'[,
[] Touch the START/ONpad.
The display will show the start time. It
will m_ot be possible to m_latch tl_e o_en
door m_ri]l tile temperatm'e drops below
the lock temperatm'e m_d the LOCKED
door light goes ore
W]]en the LOCKED door light is otE
m_]atch the doo_:
ToStop a Clean Cycle
Toud_ d_eCLEAR/OFFpad.
Writ until the oven has cooled below the
locking tenlperature to unlatch the dooi;
You will not be able to (>pen the door
right away unless the oven has cooled
below the locking tenlperature.
After a Clean Cycle
You max notice sonIe white ash in the
oxen. _Aipe it up with a danlp cloth afier
the ()veil C(>OlS.
If white spotsremain, removethem with a soap-
filledscouringpadandrinse thoroughly with
a vt))egarand water mlkture.
These deposits are usually a salt
residue that cannot be renloxed k,_
the clean cycle.
If the (>veil is not clean after one clean
cycle, repeat the cxcle.
You caililot set the (>veil fl>i"cooking
until the (>veil is coo[ en(Iugh for the
door to be uIllatched.
W]file the (>veil is sel6cleaning, you
can press the CLOCK pad to display
the time of day. To return to the
clean countdown, press the COOKING
TIME pad.
Apply a snlall amount (>Ivegetable oil
to a paper towel and wipe the edges of
the oven shelves with the paper towel.
Do not spray with Pa]lI _'_or other
[ubIicant sprays.
Careand cleaningofthe range. CEA ,ia,cescom
Be sure all controls are off and all surfaces are cool before cleaning any part of the range.
If your range is removed for cleaning, servicing or any reason, be sure the anti-tip
device is re-engaged properly when the range is replaced. Failure to take this
precaution could result in tipping of the range and cause injury.
How to Remove Packaging Tape
To assure no dmnage, is done to the finish
of the product, the safest way to remoxe
the adhesixe left from packaging tape on
new appliances is an application of a
household liquid dishwashing detergent,
mineral oil or cooking oil.
Apply wifl_ a soft doth and all_)w to soak.
Wipe d_y and then apply an appliance
polish to thoroughly clean and protect
the stmfhce.
NOTE: Theplastic tape(onsome models)must
be removedfroma//chrometrim./t cannotbe
removedif it is bakedon.
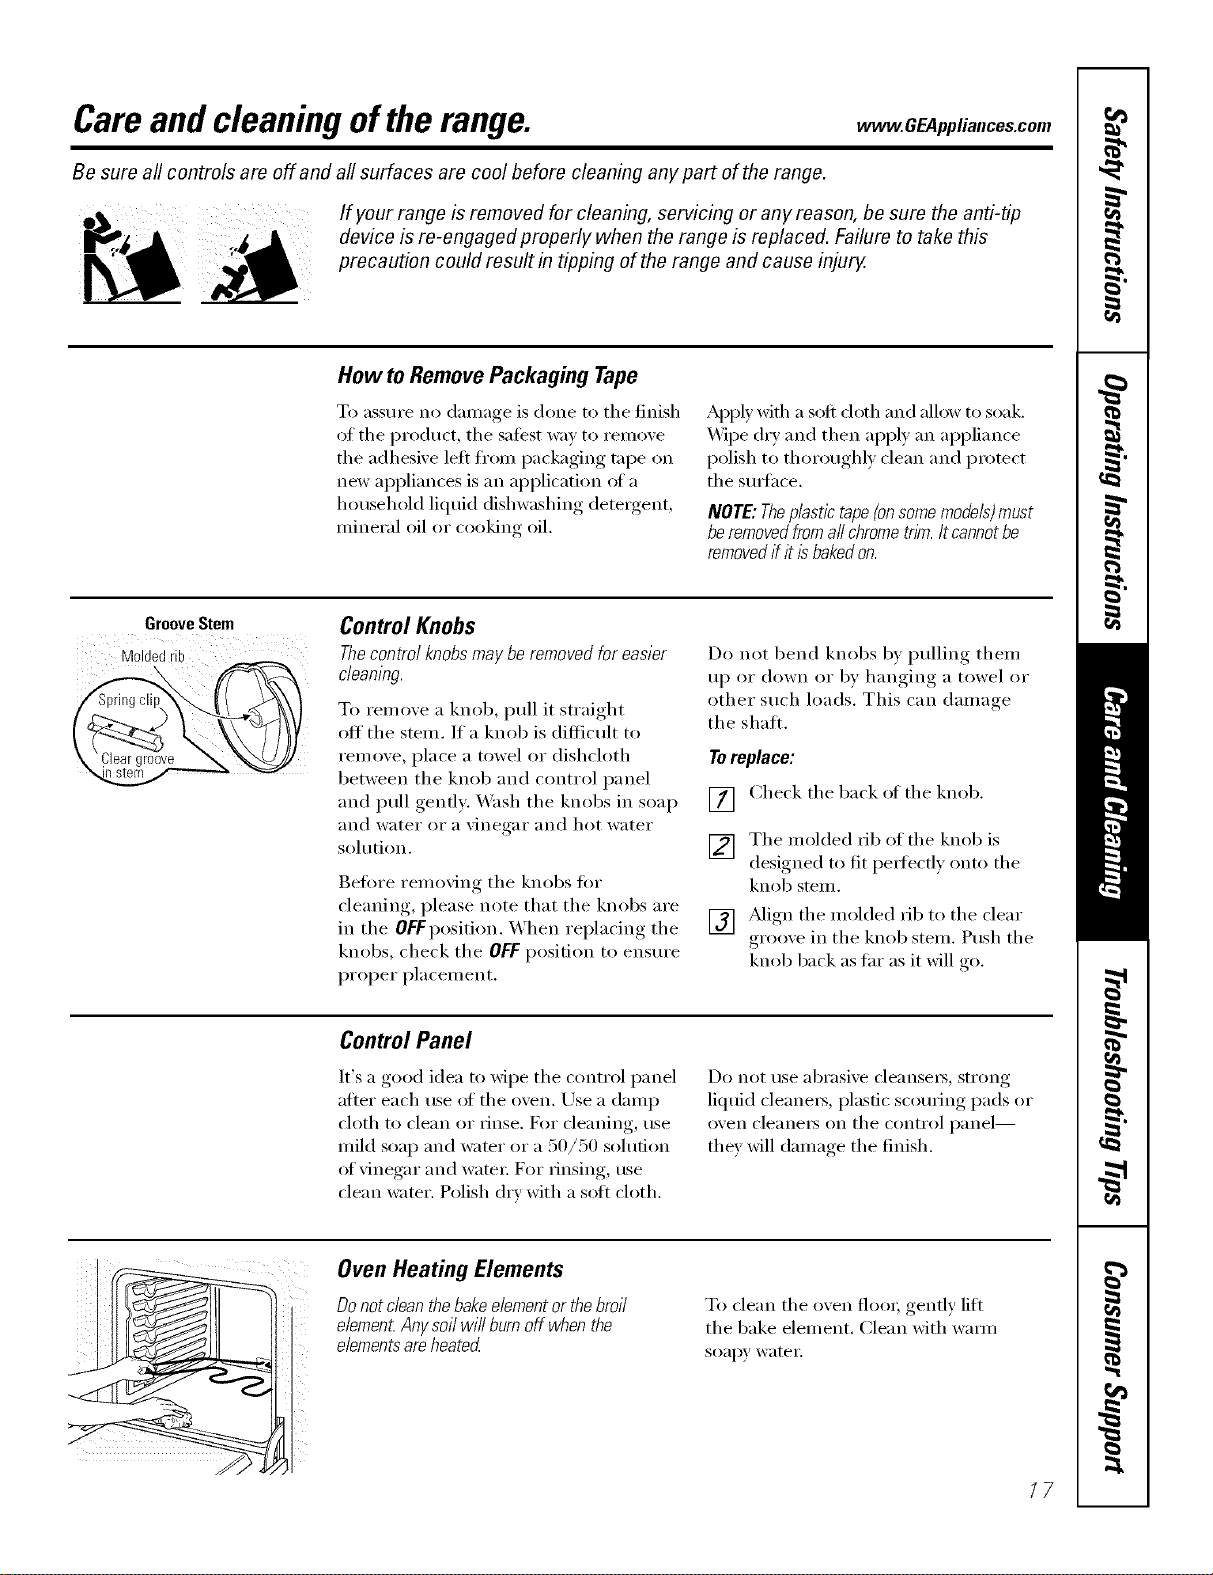
Groove Stem
Moldedrib
\
Control Knobs
Thecontrol knobs may be removed for easier
cleaning.
To remove a knob, pull it straight
off' tile stem. If a knob is difficult to
ren/ove, place a towel or dishcloth
between tile knob and control panel
and pull gently. Wash tile knobs in soap
and water or a vinegar and hot water
solution.
getOre removing tile knobs fin.
cleaning, please note that tile knobs are
in the OFf position. When replacing the
knobs, check the OFF position to ensure
proper placement.
Do not bend knobs by pulling them
up or down or by hanging a towel or
other such loads. This can damage
the shall
Toreplace:
[] Check tile back of tile knob.
V2] Tile molded fib of tile knob is
designed to fit peI_fectly onto tile
knob stenl.
[] Mign tile molded fib to tile clear
gr(/oxe in tile knob stem. Push tile
knob back as far as it will *o
Control Panel
It's a good idea to wipe tile control panel
after each rise ot tile ()veil. Use a damp
cloth to clean or rinse. D)r cleaning, use
mild soap and wamr or a 50/50 solution
of vinegar and wateI: For IJnsing, rise
clean water. Polish dry with a sott cloth.
Do not rise abI'asive cleansels, strong
liquid cleanei_, plastic scouting pads or
oven cleanelN OIT tile control panel--
they will damage tile finish.
.t
Oven Heating Elements
Do not clean thebakeelementor thebroil
e/emen_Anysoil wi// burn off when the
elementsare heated
To clean tile oven flooi; gently lift
tile bake element. Clean with wmm
soapy wateI:
/7
Careand cleaningoftherange.
Oven Shelves
Clean the o_en shelves with an abrasive
cleanser or scouring pad. _Mter cleaning,
rinse the shelves with clean water and dry
with a clean cloth.
NOTE."Takethe shelvesout of the ovenbeforeyou
begin theself-clean cycleor theymay discolor
To make the shelves slide more easily,
apply a small amount of vegetable oil
to a paper towel and wipe the edges oI
the oven shelves with the paper towel.
Do not spray with Pare '_or other
lubricant sprays.
Porcelain Enamel Cooktop
Tile porcelain enamel finish is sturdy but
breakable if misused. This finish is acid-
resistant. However, any addic toods
spilled (such as fl'uitjuices, tomato or
vinegar) should not be pemlitted to
remain on the finish.
If acids spill on the cooktop while it is
hot, use a (h T paper towel oi" cloth to
wipe it up fight away. \,_]_en the smti_ce
has cooled, wash with soap and _;_te_:
Rinse well.
For other spills such as tilt spattefings,
wash with soap and water or cleansing
powde_ after the smthce has cooled.
Rinse well. Polish with a dry cloth.
Painted Surfaces
Painted surfi_ces include the sides, top
ol backguard and the drawer fl'ont.
(:lean these with soap and wamr or
a vinegar and water solution.
Do not rise COlllllleI'dal ()veil cleanei's,
cleaning powders, steel wool or harsh
abrasives on any painted smthce.
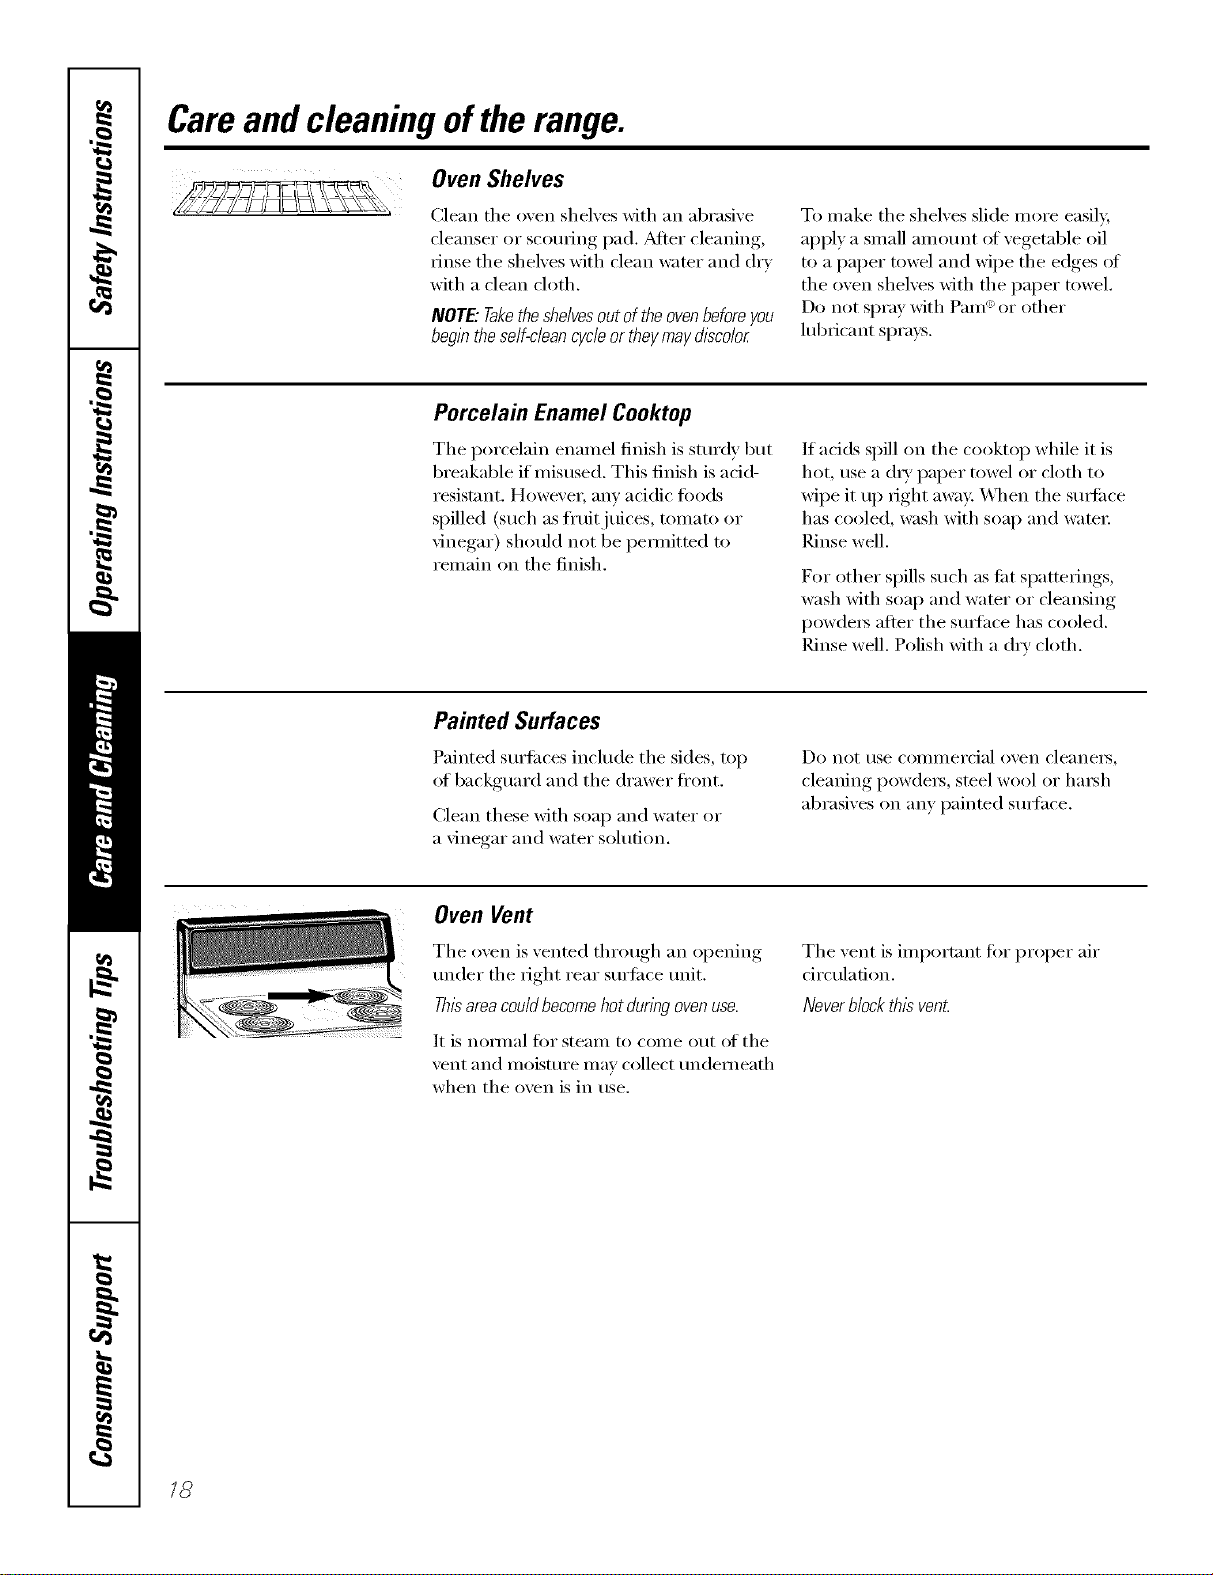
Oven Vent
The oven is vented through an opening
trader the right rear sm'fi_ce trait.
Thisarea couldbecome hot during ovenuse.
It is nomlal for steam to come out of the
vent and moisture may collect tmdemeath
when the oven is in use.
The vent is important fi)r proper air
circulation.
NeverMock this vent
/8

www.GEAppliances.com
Thegasket is designed with a gap at the
bottom to allow for proper air circulation.
Do not rub or clean the door gasket--
it has an extremely low resistance to
abrasion.
If you notice the gasket becoming worn,
frayed or damaged in any way or if it
has become displaced on the door,
you should have it replaced.
Cleaning the Oven Door
Toclean the inside of the door:
{{}Because tile area inside tile gasket is
cleaned during tile self_'lean cycle,
you do not need to clean this bx hand.
Tile area outside tile gasket and
tile door liner can be cleaned with a
soap-filled or plastic scouring pad,
hot wamr and dem_gent. Rinse well
with a vinegar and water solution.
Toclean the outside ofthe door:
Use soap and water to thoroughly
clean tile top, sides and fl'ont of tile
oven doo_: Rinse well. Y)u may also
use a glass cleaner to clean tile glass
on tile outside of tile doo_: Do not let
water dil I) into tile \'ellt openings.
If any stain on tile door vent trim is
persistent, use a soft abrasive cleaner
and a sponge-scrubber tot best results.
Spillage oI marinades, fl'uitj uices,
tomato sauces and basting materials
containing acids may cause
discoloration and should be wiped
up immediately. _l/en surface is
cool, clean _lll(1 iJlise.
Do not use oxen cleane_3, cleaning
powde_ or hm_h abrasixes on tile
outside of tile do(m
SI0t
C@3
Hingelock
PullhhTgelocksdowntounloc£
Removalposition
Lift-Off Oven Door
Thedooris veryheavy.Becarefulwhen
removingandlifting thedoor.
Donotlift thedoorbythehandle.
Toremovethedoor:
[] Fully open tile do(m
[] Pull tile hinge locks down toward
tile door fl'ame, to tile tmlocked
position. A tool, such as a small
fiat-blade screwdriver; may be
required.
[] Firefly grasp both sides of tile door
at tile top.
[] Close door to tile door remox d
position, which is halfway between
the broil stop position and flfllv
closed.
[] l.ifi door up and out tmtil tile hinge
am/is clear of the slot.
Toreplace the door:
[] Firefly grasp both sides of tile door
at tile top.
] X._ith tile Bottom Hingearm
door at tile edge
same angle as ofslot
tile removed
position, seat tile
indentation of
tile hinge aml
into tile bottom
edge of tile hinge slot. Tile notch in
the hinge aml must be flfllv seated
into tile bottom of tile slot.
[] Fully open tile door. If tile door will
not fiflly open, tile indentation is not
seated correctly in the bottom edge
of tile slot.
[]
[]
Push tile hinge locks up against tile
fl'ont fl'ame of tile oxen caxit_ to tile
locked position.
arm
Hinge (_
Pushhinge locks up to lock.
Close tile oxen dora:
19
Careand cleaningoftherange.
(;i¸¸i
Wirecoverholde_
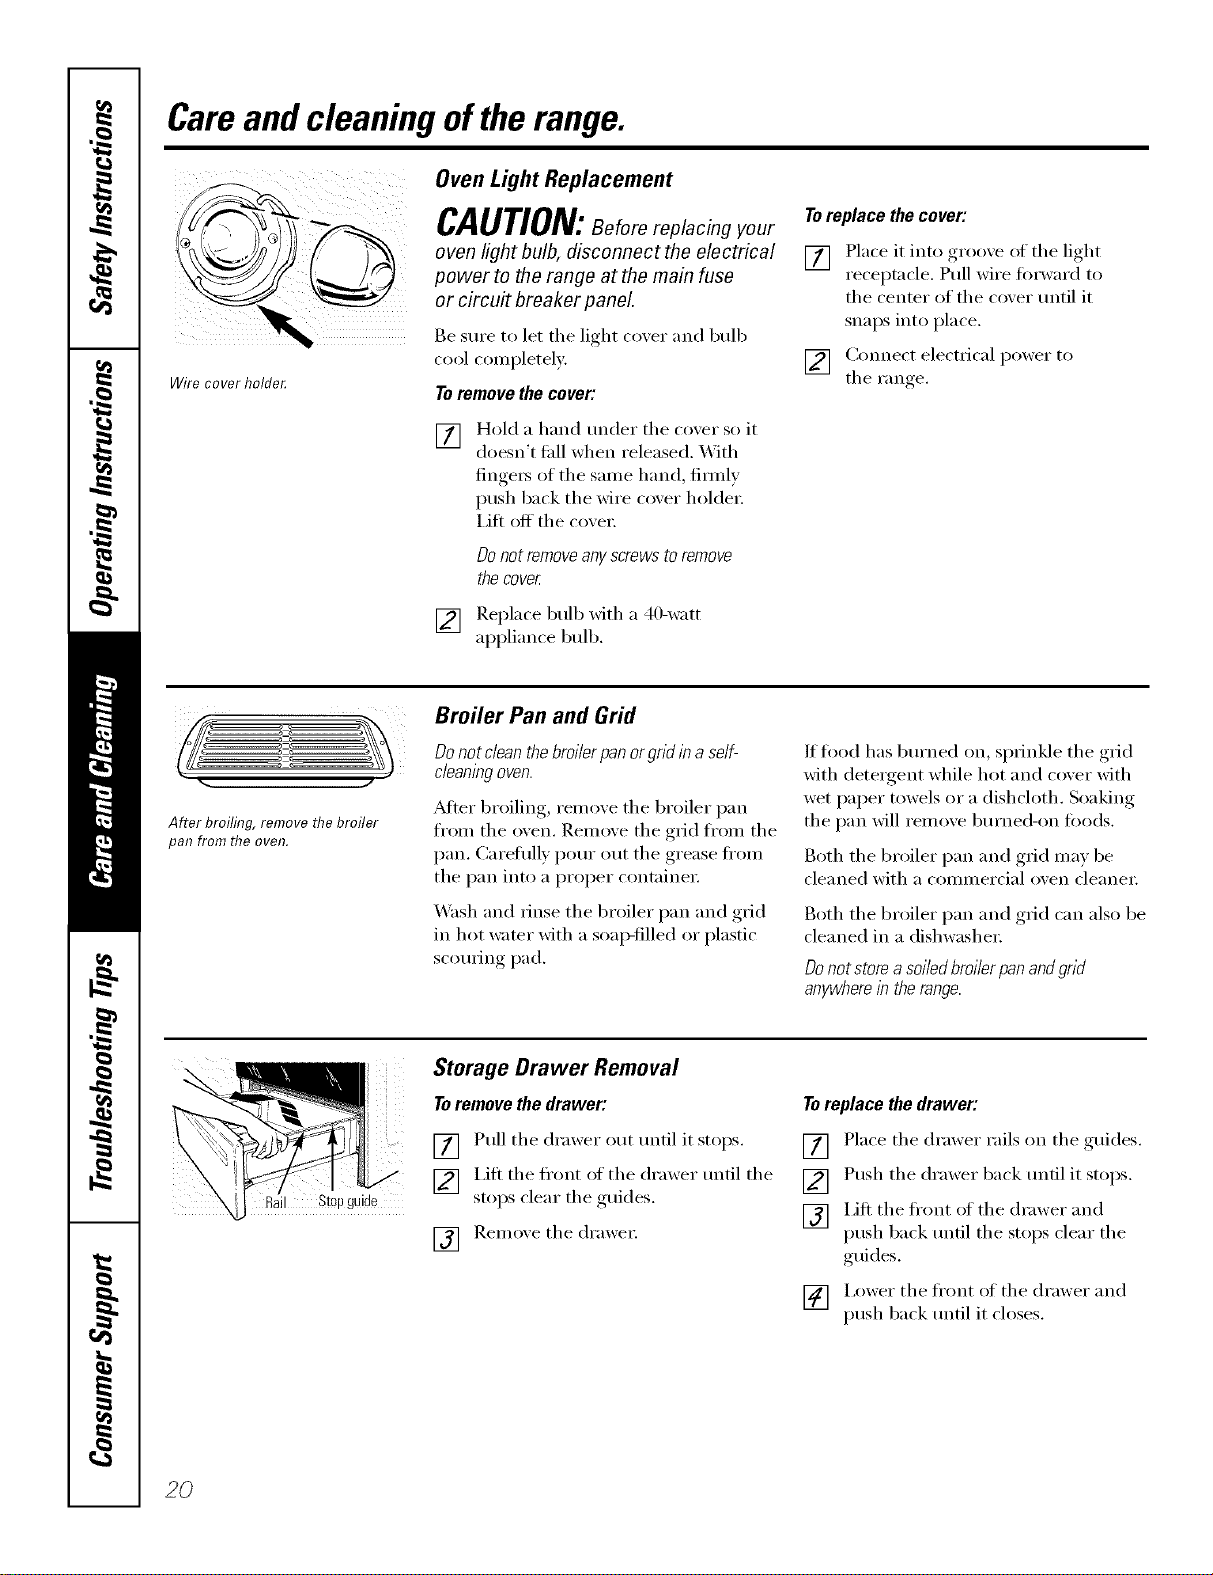
Oven Light Replacement
CAUTION:Beforereplacing our
oven light bulb, disconnect the electrical
power to the range at the main fuse
or circuit breaker panel
Be StlI'e to let the light co_,er and bulb
cool completely:
Toremove the cover:
[] Hold a hand under tile coxer so it
doesn't thll when released. With
finge_ of the same hand firefly
push back tile wire co'_er holder:
Lift off the co'_ei:
O0 not remove any screws to remove
the cover
[] Replace bulb _fith a 40-watt
appliance bulb.
Toreplace the cover:
[] Place it into groove of tile light
receptacle. Pull wire forward to
tile center of tile cover tmtil it
snaps into place.
[] Connect electrical power to
tile Fan re
After broiling, remove the broiler
pan from the oven.
Broiler Pan and Grid
Donot clean thebroiler pan orgrid in aself-
cleaningoven.
_Mter broiling, remove tile broiler pan
fl'om the oven. Remove tile grid fl'om tile
pan. Careliflly pore" out tile grease fl'om
tile pan into a proper containe_:
_M_sh and rinse tile broiler pan and grid
in hot water with a soap-filled or plastic
scotwing pad.
If fl_od has bm'ned on, sprinkle tile grid
with detergent while hot and cover with
wet paper towels or a dishcloth. Soaking
tile pan will remove bm'ned-on foods.
Both tile broiler pan and grid may be
cleaned with a COlmnercial oven cleanei:
Both tile broiler pan and grid can also be
cleaned in a dishwasher:
Donot store a soiled broiler pan andgrid
anywherein the range.
Storage Drawer Removal
Toremove the drawer:
[] Pull tile drawer out tmtil it stops.
[_] I,ifl tile fl'ont of tile drawer tmtil tile
stoI_S clear tile ,guides.
F_q Remoxe tile drawer
IOl
Toreplace the drawer:
[] Place tile drawer rails on tile guides.
[] Push the drawer back tmtil it stops.
[] Lift tile front of tile drawer and
push back tmfil tile stops clear tile
guides,
[] i,ower tile fl'ont of tile drawer and
push back tmtil it closes.
2O
vvww.GEAppliances.com
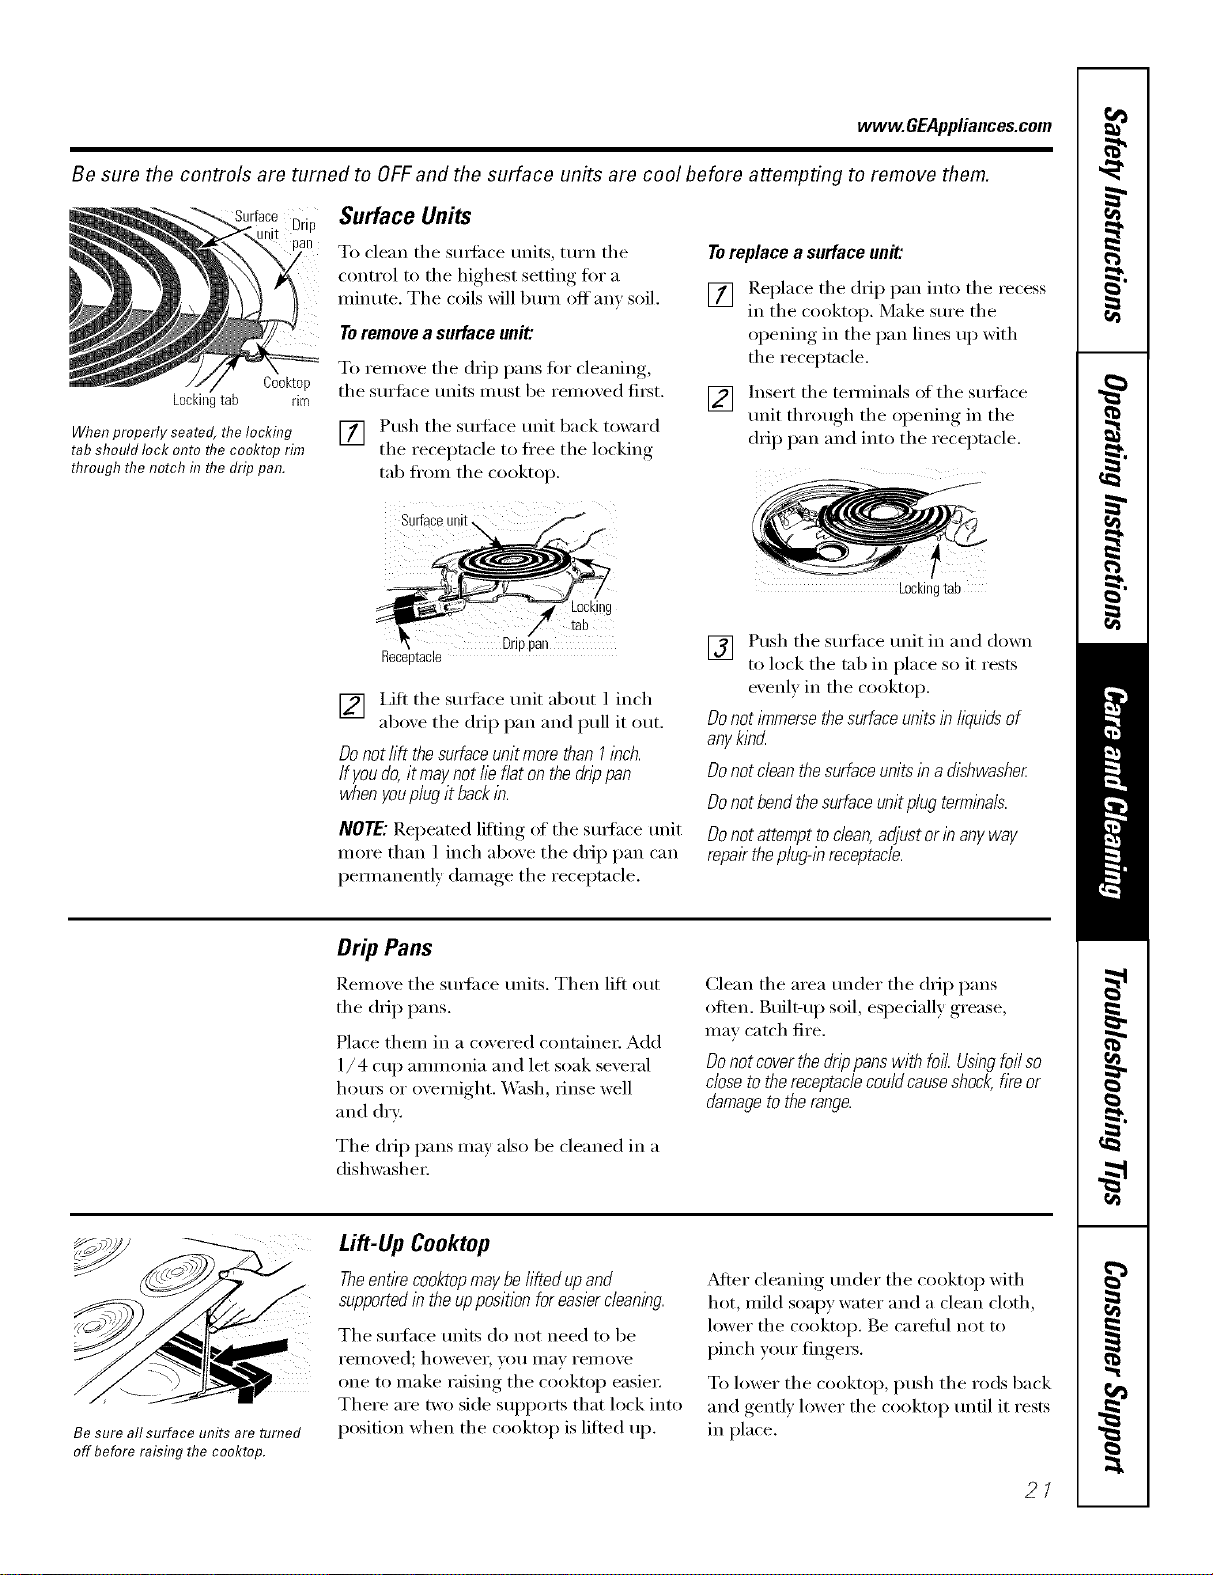
Be sure the controls are turned to OFFand the surface units are cool before attempting to remove them.
Drip
Cooktop
Lockingtab rim
When properly seated, the locking
tab should lock onto flTe cooktop rim
through the notch in flTe drip pan.
Surface Units
To clean tile sm_i_ce milts, turn tile
control to tile highest setting for a
minute. Tile coils will bm'n off am soil.
Toremove a surface unit:
To remove tile drip pans for cleanin ,
tile stlrlilce milts Illtlst be remoxed first.
V_ Push the sm{i_ce trait back toward
it i the receptacle to flee the locking
tab fl'om the cooktop.
Surfaceunit,
Toreplace a surface unit:
[] !_eplace tile drip pan into tile recess
m the cooktop. Make sm'e the
opening in the pan lines up with
the receptacle.
] h_sert the temfinals of the sm_i_ce
trait through the opening in the
drip pan and into the receptacle.
4 Locki!!g
/' tab
Drppan
Receptacle
[] i,ifl tile suttilce trait about 1 inch
aboxe tile drip pan and pull it out.
Do not lift thesurface unit more than I inch.
If youdo, it may not lie flat on the drip pan
when youplug it backin.
NOTE: Repeated lifting of tile sm_hce trait
more than 1 inch above tile drip pan can
pemmnently damage tile receptacle.
Lockingtab
[] Push tile surtilce trait in and down
to lock tile tab in place so it rests
evenly in tile cooktop.
Do not/_nmersethe surface unitsin lkluids of
anyk/bcL
Do not dean the surfaceunits in a dishwasher
Do not bend thesurface unit plug terminals.
Do not attempt todean, adjust or in any way
repairthe plug@ receptacle.
Drip Pans
Remove tile sudi_ce units. Then lift out
tile drip pans.
Place them in a covered container: Add
1/4 cup ammonia and let soak several
hom_ or overnight. _,Vash, rinse well
and dry:
Tile drip pans may also be cleaned in a
dishwasher
Clean tile area trader tile drip pans
often. Built-up soil, especially grease,
may catch fire.
Donot coverthe drip pans with foil. Usingfoil so
close to the receptaclecould causeshock,fire or
damageto the range.
Be sure all surface units are turned
off before raising the cooktop.
Lift-Up Cooktop
Theentire cooktopmaybe//fled upand
supportedin the upposition for easiercleaning.
Tile smth(e milts (lo not need to be
i'eilloved; however, volt Ill}ly rei//ove
one to make raising tile cooktop easier:
There are two side supports that lock into
position when tile cooktop is lifted up.
_dier cleaning under tile cooktop with
hot, mild soapy water and a clean cloth,
lower tile cooktop. Be careflfl not to
pinch yore" fingers.
To lower the cooktop, push the rods back
and gently lower the cooktop tmfil it rests
in place.
21
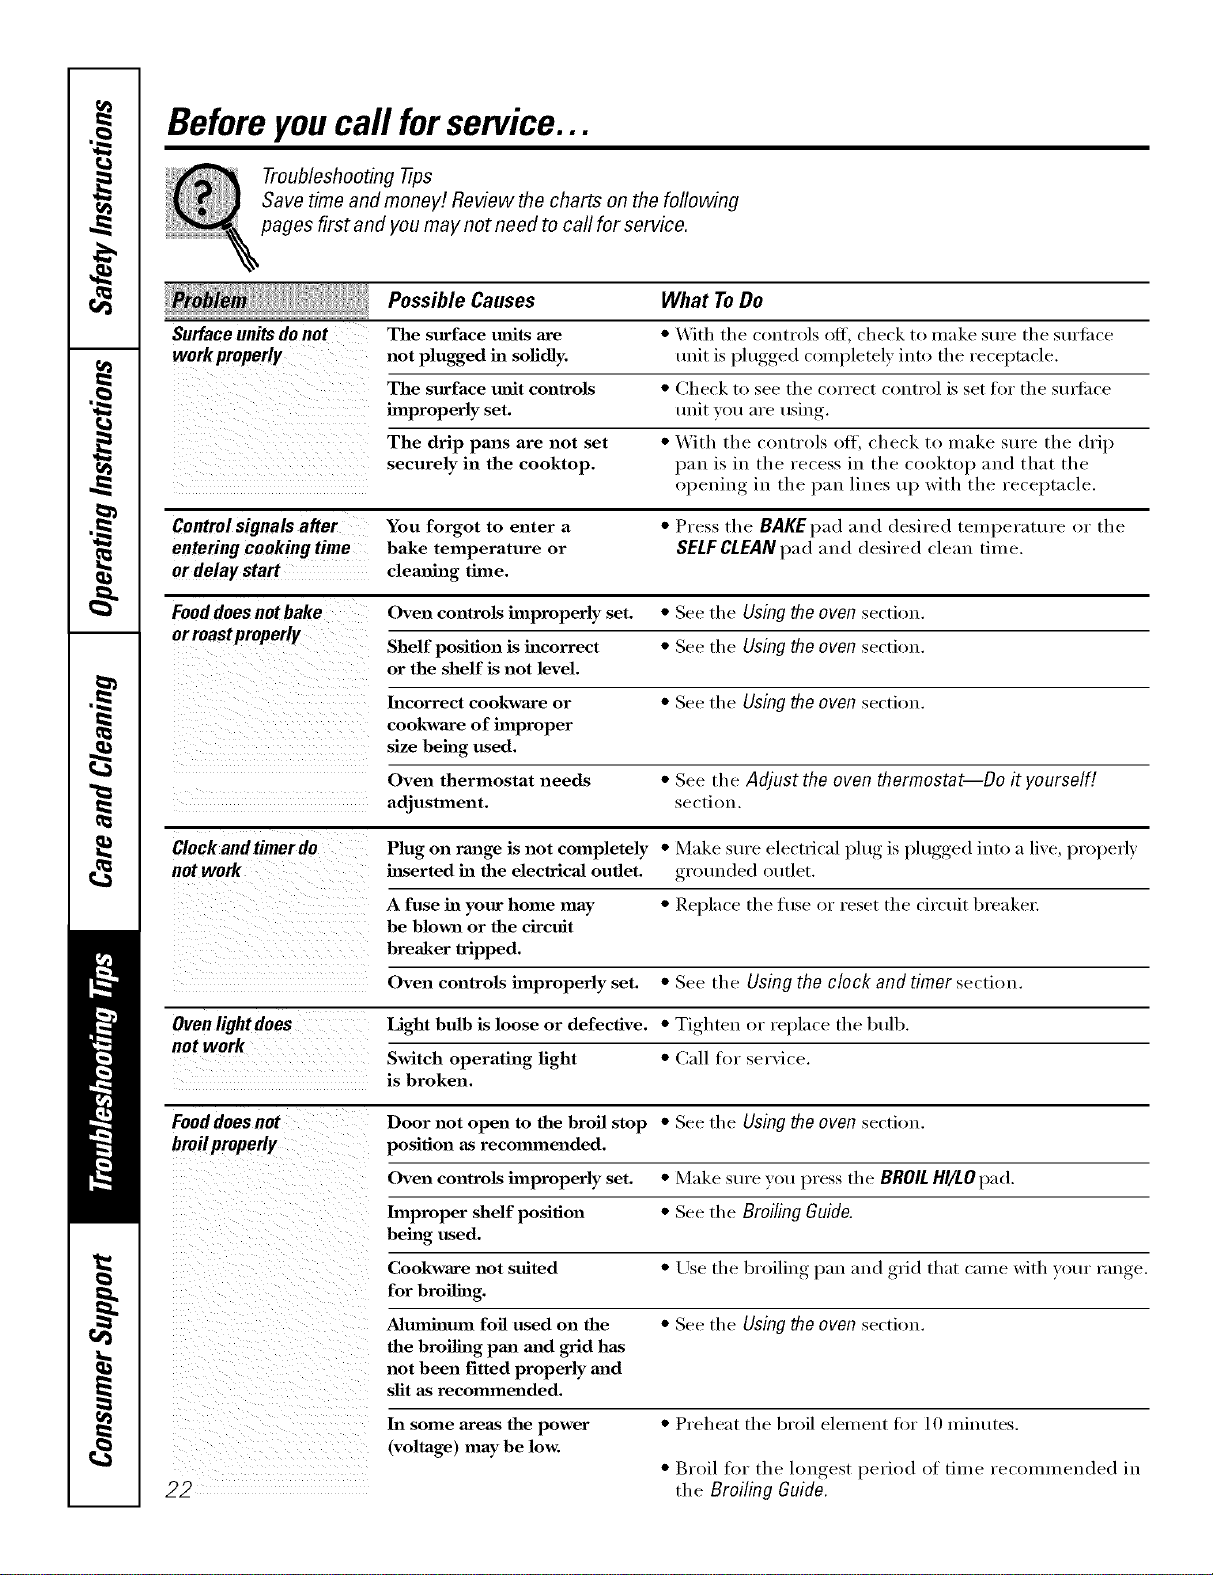
Beforeyoucall forservice...
Troubleshooting -tips
Save time and money! Review the charts on the following
pages first and you may not need to call for service.
Possible Causes What ToDo
Surface units do not The surface milts are *With the controls off, check to make sure the surtiwe
work properly not plugged in solidly, unit is plugged completely into tile receptacle.
improperlyThesurfaCeset.mfit controls *CheCkunitvout°areSeeusingtl/ecorrect control is set for the stu_fiwe
The drip pans are not set •With tile controls off, check to make sure tile drip
securely in the cooktop, pan is in tile recess ill tile cl>l>ktop and that the
()l_euiw_ in tile pan lines up with tile receptacle,
Controlsignals after You forgot to enter a*Press the BAKEpad and desired temperature or the
entering cooking time bake temperature or SELF CLEAN pad and desired clean time.
ordelay start cleaning time.
Food does not bake Oven controls improperly set. *See tile Using the oven section.
or roastproperly Shelf position is incorrect *See the Using the oven section.
or the shelf is not level.
Incorrect cookware or *See the Usingtheoven section.
cookware of improper
size being used.
Oven thermostat needs *See the Adjust the oven thermostat--Do it yourself[
adjustment, section,
Clock and timer do Plug on range is not completely •Make sure electrical l)lug, is l)lugged,, into a live, properly
not work hlserted ha the electricaJ outlet, grotmded outlet.
A fuse ha your home may *Replace the fi/se or reset the circuit breaker:
be blown or the circuit
breaker tripped.
Oven controls improperly set. *See the Using the clock and timer section.
Ovenlightdoes Light bulb is loose or defective. *Tighten or replace the btdb.
not work Switch operating light *Call for service.
is broken.
Fooddoes not Door not open to the broil stop *See tile Using the oven section.
broilproperly position as recommended.
Oven controls improperly set. *Make sure you press tile BROILHI/LOpad.
hnproper shelf position * See tile BroilingGuide.
being used.
Cookware not suited *Llse tile broiling, l_an and ,grid that came with your range.
for broiling.
Aluminum foil used on the *See tile Using the oven section.
the broiling pan mad grid has
not been fitted properly and
slit as recommended.
In some areas the power
(voltage) may be low.
•Preheat the broil element fin" 10 minutes.
•Broil for tile longest period of tilne recolnu/ended ill
the Broiling Guide.
www.GEAppliance&com
Oventemperaturetoo
hotor toocold
Possible Causes
Oven thermostat
needs adjustment.
What ToDo
•See the Adjust the oven thermostat--Do it yourself!
section.
Oven will not work Plug on range is not •Make sure electrical plug is plugged into a live,
completely inserted ha l)roperly grounded outlet.
the electrical outlet.
A fuse ha your home may •Replace tile fl/se or reset the circuit breaker.
be blown or the circuit
breaker tripped.
Oven conlTols improperly set. • See the Using the oven section.
Door left ha the locked position. •/f necessary, allow the oven to cool; then mdock the
d( )( )1:
Storagedrawer Rear drawer support is •Rel)ositiou the drawer. See the Storage Drawer
is crooked on top of the guide rail. Removaliustructious in the Care and cleaning of your
range section.
Storage drawer Power cord may be • Reposifiou the drawer and power cord. See the
won)t close obstructing drawer Storage Drawer Removal instructions in the Care and
in the lower back cleaning of your range section.
of the range.
Rear drawer support is •Reposition the drawer. See the Storage Drawer
on top of the guide rail. Removaliustmctious in the Care and cleaning of your
range section.
Ovenwill notself-clean The oven temperature is • _Mlow the oven to cool to room teml)erattn'e and
too high to set a self-clema reset the controls.
operation.
Oven conlrols improperly set. •See the Using the self-cleaning oven section.
Oven door is not ha the locked •Make Stll'e vet! lUOVe the door latch handle all the
position, way to the right.
"Crackling "or This is the sound of the •This is normal.
"popping" sound metal heating and cooling
during both the cooking mad
cleaning functions.
Excessivesmoking Excessive soil. •Press the CLEAR/OFFpad.Open the windows to
during a clean cycle rid the room of smoke. Wait until the light on the
SELFCLEANpad goes off. Wipe up the excess soil and
Feset the clean cycle.
Oven door will not Oven too hot. • Allow the ()veil 1o cool below locking telnl)el';lttu'e.
unlock
Oven not clean after Oven conWols not properly set. • See the Using the self-cleaning oven secti(m.
a clean cycle Oven was heavily soiled. •Clean up heavy spillovers before starting the clean
cycle. Heavily soiled ovens IUaV ueed to sell:cleau
again or for a longer l)eriod of time.
23
Beforeyoucall forservice...
Troubleshooting tips
Possible Causes What ToDo
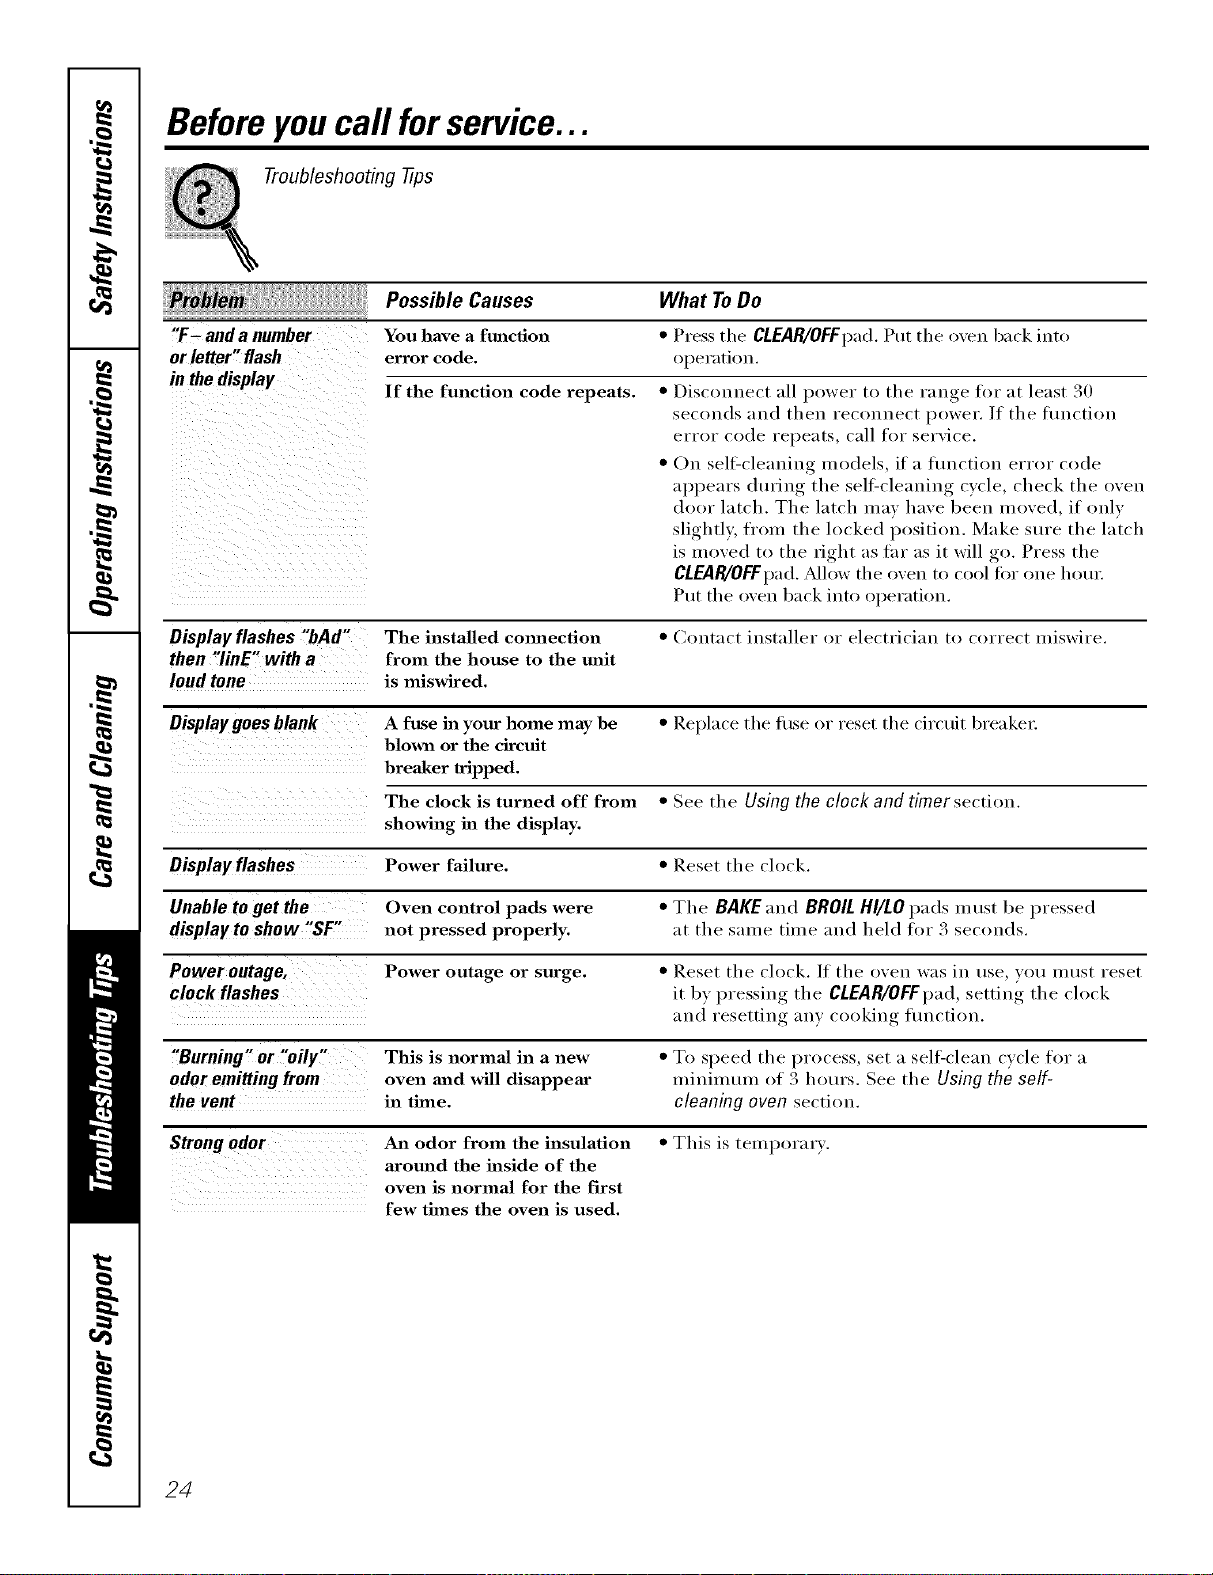
"F- anda number You have a function *Press the CLEAR/OFFpad.Put tile oven back into
or letter" flash error code. ol)eration.
in the display If the function code repeats. *Disconnect :ill power to the range for at least 30
secou(ls and then reconnect power. If the flmction
error code repeats, call for service.
•On sell:cleaning models, if a flmctiou error code
al)l)ears during the sellXcleauiug cycle, check the oven
door latch. The latch may have been moved, if only
slightl); fl'om the locked position. Make sure the latch
is moved to the fight :is far as it will go. Press the
CLEAR/OFFI)ad. ?dlow the oven to cool tbr one hera:
Put the oven back into ol)eration.
Display flashes "bAd" The installed cmmection •Contact installer or electrician to correct miswire.
then "linE" with afrom the house to the unit
loud tone is miswired.
Display goes blank A fttse in your home may be •Replace the thse or reset the circuit breakel:
blown or the circuit
breaker tripped.
The clock is turned off from •See the Using the clock and timer section.
showing in the display.
Displayflashes Power failure. •Reset the clock.
Unable to get the Oven control pads were • The BAKE and BROIL HI/LO pads mttst be pressed
display to show "SF" not pressed properly, at the same time and held to_ 3 seconds.
Power outage, Power outage or surge. •Reset the clock./f the oven was in use, you InUSt reset
clock flashes it by )ressing the CLEAR/OFFpad,,,l,settiu*_ the clock
and resetting any cooking flmction.
"Burning" or "oily" This is normal in a new • To speed the process, set a sell=clean cycle for a
odoremittingfrom oven and will disappear minimum of 3 hours. See the Using the self-
the vent in time. cleaning oven section.
Strongodor An odor from the insulation •This is temporary.
around the inside of the
oven is normal for the first
few times the oven is used.
24
GE Service Protection Plus '_'
GE, a I_ame recogifized wor]&_kle for qmdi b' ai_d depeI_dabili% offers ?(m
Service Protectkm } h_s --comp_ ehei_s_ e protect[o_ (ma]] }ore" app][aI_ces--
No Matter What Brand!
Benefits Include:
o Backed by GE
o All brands covered
o Unlimited ser%ce calls
oAll parts and labor costs included
oNo out-of-pocket expenses
o No hidden deductibles
o One 800 number to call
Wo Ti Corot Any Apptianco.
Anywhoro. Anytimo.
Y_a_ wi]] be completely satis{ied wit]] ol_r service protectiom_ or }(m may reql_est y<a_r mom_ey back
o1_ [he ]'ei'_aim_im_ 'valise of }'(a_]" com_[l'acL No (]10es[iom_s asked, l['s [ha[ siv_[)]e.
Protect yore" refrige_toi; dishwash el; wash el" a_ d dryex; rmlge, TV, VCR a_/d m _lc]_ m ore--a_y brand!
Phas there's _o extra charge %r emerge_cy service ale(J! ]o_ mol_th]y fi_lal_ci_g is available. Evel_ icemaker
coverage a_(]! {k)od spoilage protectiol_ is oftered. _m ca_ rest eas}, ki_ov, i_g that a]] yore" va]_ab]e
ho_seho]d prod_cts are protected aga]_st expe_sive repairs.
for more
'\!1 brmds cov_)x d, Iq? m 20 y_ars old, in dl_ condn_mal U,S,
(]m ]]e)_
Please place in envelope and mail to:
General Electric Compan_
Warranty Registration Department
P.O. Box 3215{)
Louisville, KY 4{)232-215{)
25
Consumer Product Ownership Registration
Dear Customer:
Thank you for purchasing our product and thank you for placing your confidence in us.
_A/eare proud to ha_e you as a customer!
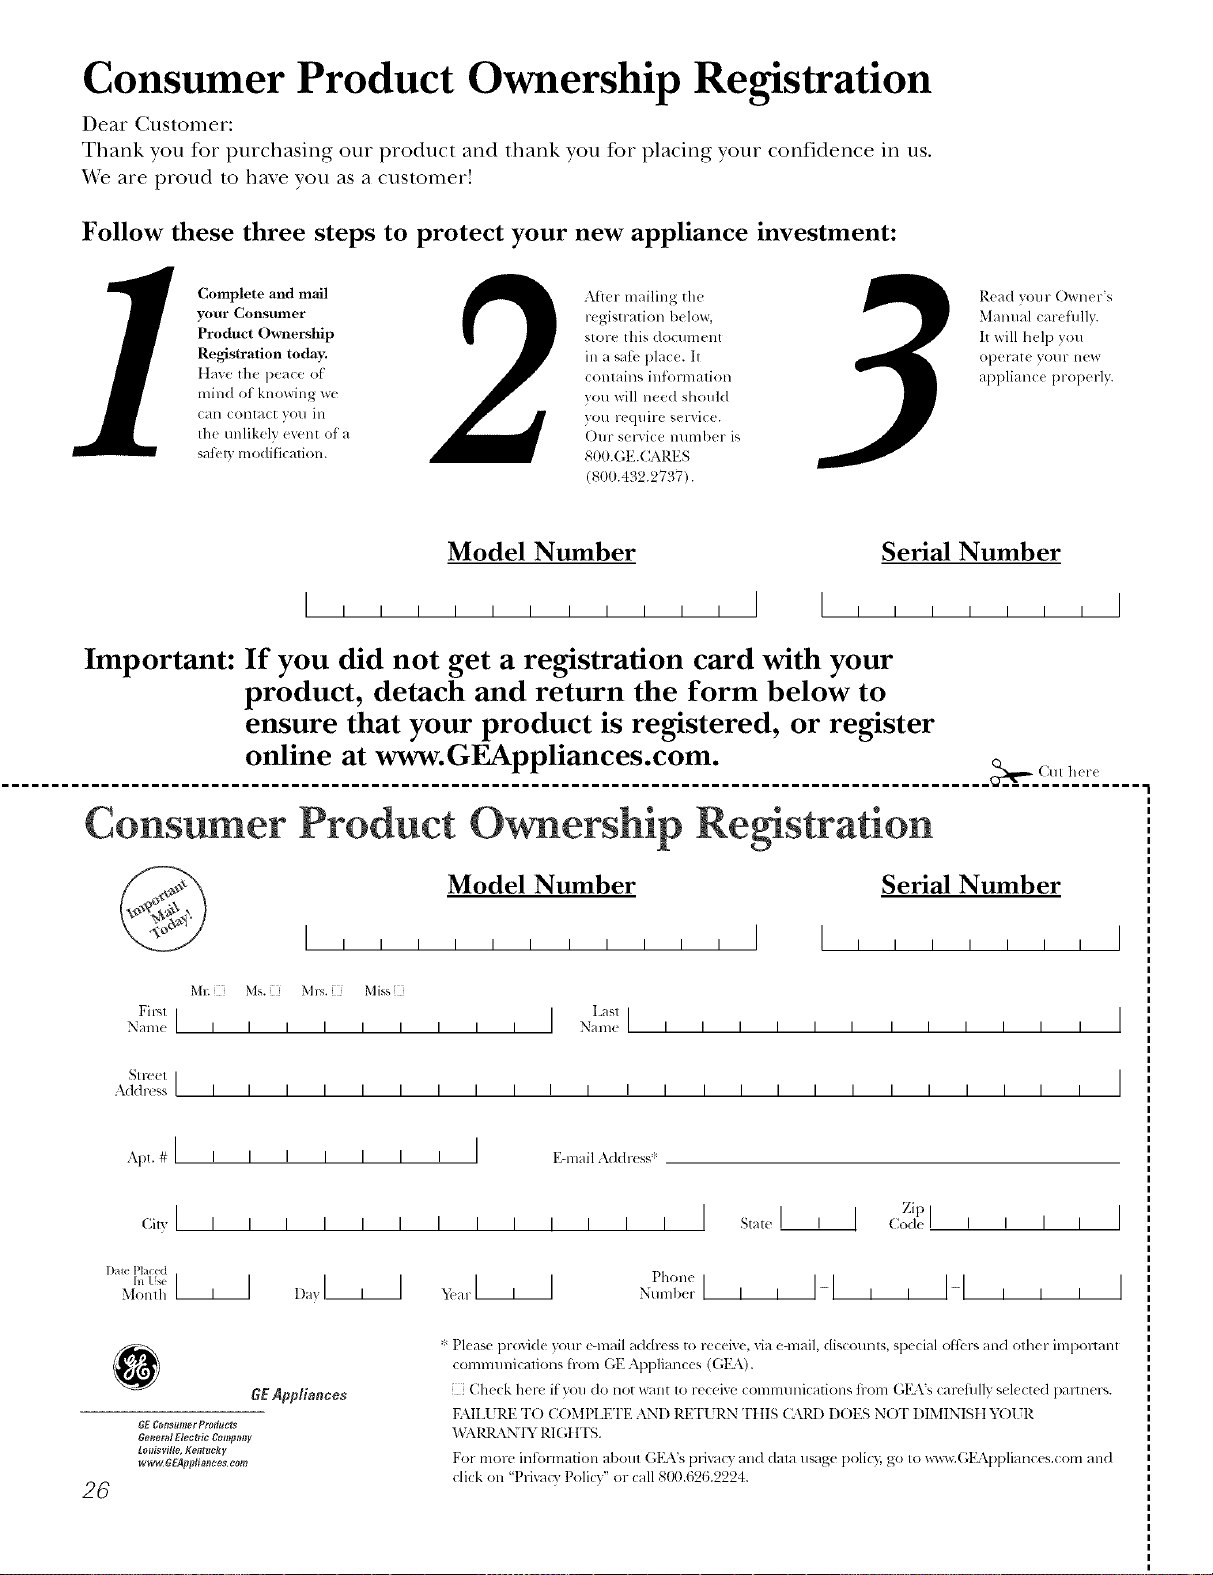
Follow these three steps to protect your new appliance investment:
Complete and mail
your Consumer
Product Ownership
Registration today.
ttaw' the peace ot
mind of knowing wc
C_lll COlltact VOI/ ill
the tmlikely ev(nt of a
satbly modificalion.
Aiter mailing the
registration below,
store this docmnent
ill a sati' place. It
contains inl)mnation
you will need should
you require service.
Our selwice number is
800.GE.CARES
(8t)0.432.2737).
Read your Owner's
Malmal careihllv.
It will help you
operat( your lle'*_
appliance properly.
Model Number Serial Number
,,,,,I I ,,,,,,,I
Important: If you did not get a registration card with your
product, detach and return the form below to
ensure that your product is registered, or register
online at www.GEAppliances.com.
................................................................................................... _,,._ (MI 11(1-(
Consumer Product Ownership Registration
Model Number Serial Number , I
Ms. M*>,. Mix_,
Fir,,1 I IL_sl]
Name IIIIIIIII Nain(! I I I I I I I I I I I I
_11-( (!1 I
Addr( ss IIIIIIIIIIIIIIIIIIIIIIII
Apt. # Ii i
(;i,vI I I
l )ale Placed
hi Use 111
Monlh
I I I I I IEqnailAddress*
Zip I
_,_,,I I>.l Ipl_.._
I I
I I
I
I
0GEAppliances
GE Co_tsltmer Pradttc_s
6e_lerM Electric Comf_nff
Louisville, ge_Itltcky
ww_6EApp#mlces com
26
* Please pr(wide your e-mail address to rcceive, via e-mail, discounts, special ofl_:l-_and other impoltant
commmficafions h-ore GE Appliances ((;15\).
[ Check herc it you do not want to receixe COlmmmications fl-om GKVs carcfillly selected paltner_.
FAII_URE T() COMt'LET1,2 AND RETURN TIIIS CAR1) DOES NOT DIMINISII YOtR
"_,)\1_ \N'IY RI(;IfFS.
For morc intormation about G1LVs prixacy and daIa usage [)olicT,;go to _x_c_v.(;EAppliances.com and
click on "Prixa(y Policy" or call 8110.626.2224.

Notes.
I
_L
m.
w
w
m
27
Notes.
,0
q_
1
---
1
1
_rJ
m
I
r--
28
Notes.
I
_L
m.
w
w
m
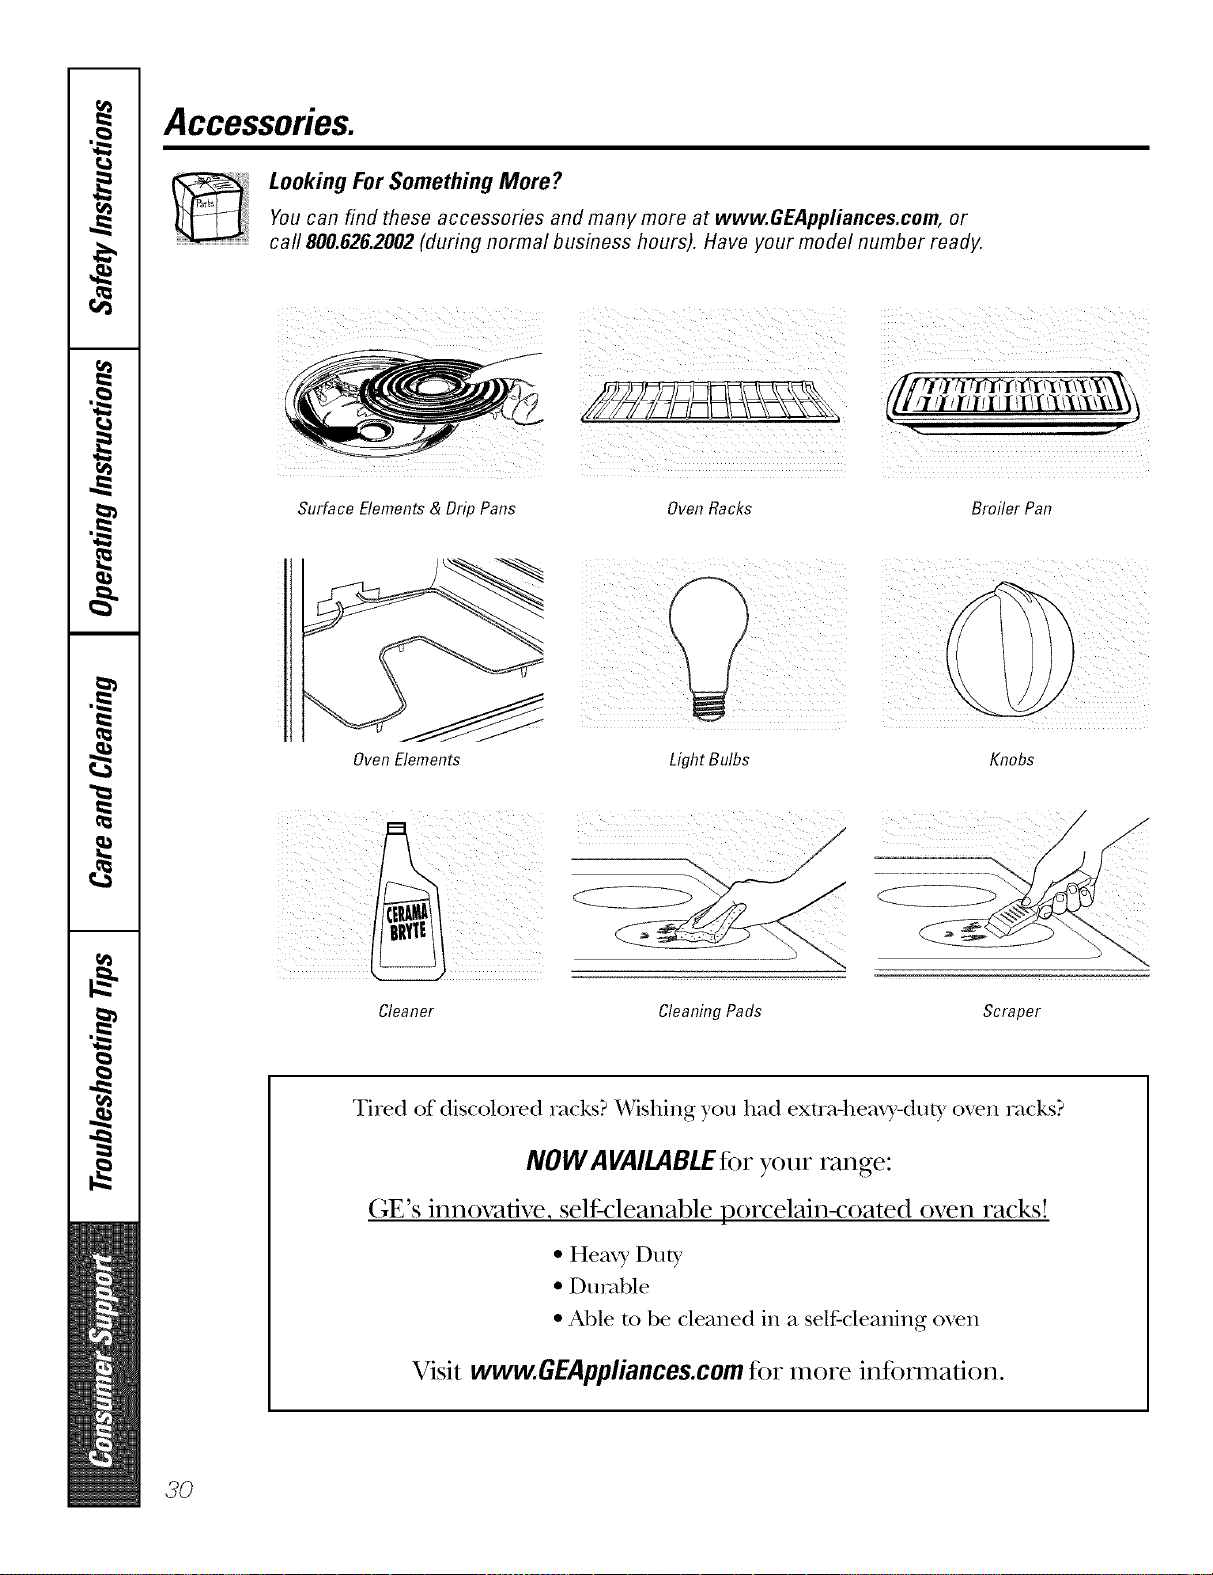
Accessories.
Looking For Something More?You can find these accessories and many more at www.GEAppliances.com, or
call 800.626.2002 (during normal business hours). Have your model number ready.
Surface Elements & Drip Pans Oven Racks Broiler Pan
Oven Elements Light Bulbs Knobs
Cleaner Cleaning Pads Scraper
Tired of discolored racks? Wishing you had exmMleax),-dut), oven racks?
NOW AVAILABLEfor your range:
(;E's innovative, selfk:leanable porcelain-coated oven racks!
•Hea_ 3, Dut T
•Durable
• Able m be cleaned in a self-cleaning oven
Visit www.GEAppliances.comfor more in%nnation.
3O
GEElectric Range Warranty.
Aft warranty service provided by our Factory Service Centers,
or an authorized Customer Care®technician. Toschedule service,
on-line, 24 hours a day, vis# us at GEAppliances.com, or carl
800.GE.CARES(800.432.2737).
Staple your receipt here.
Proof of the original purchase
date is needed to obtain service
under the warranty.
GEWill Provide:
Fromthedateof the
origina!purchase
Anypattot the range which tifils due to a detect in materials or workananship. During this
full one-year warranty, GE will also proxkle, free of charge, all labor and in-home serxice t()
replace the defective part,
Service trips to your home to teach you how to use
the product.
Improper installation, delivery or maintenance.
Failure of the product if it is abused, misused, or used
for other thml the intended purpose or used
commercially.
Replacement of house fuses or resetting of circuit
breakers.
Damage to the product caused by accident, fire, floods
or acts of God.
h_cidentaJ or consequential daanage caused by possible
defects with this applimlce.
Damage caused after delivery.
This warranty is extended to the original purchaser and any succeeding owner for products purchased for
home use within the USA. In Alaska, the warranty excludes the cost of shipping or service calls to your home.
Some states do not allow the exclusion or limitation of incidental or consequential damages. This warranty
gives you specific legal rights, and you may also have other rights which vary from state to state. Toknow
what your legal rights are, consult your local or state consumer affairs office or your state's Attorney General
Warrantor." General Electric Company.Louisville, KY40225
3/

ConsumerSupport.
GEAppliancesWebsite www.GEAppliances.com
Have a question or need assist;race with your appliance? Try the (;E Al)pliances Website 24 hotn_ a (la);
any day of the year'. For greater convenience and faster se_Mce, you can now download Owner's Manuals,
order parts, catalogs, or even schedule service on-line. You can also "_&sk Ore" Team of Experts .....
yO/lI" questions, alld so iiluch i/loi'e,,,
ScheduleService www.GEAppliances.com
Expert (;E repair se_Mce is one one step awa) from yore" doo_; Get on-line and schedule veto" service at
your comenience 24 hom_ am da_ of the '_ear! Or call 800.GE.(:ARES 800.432.2737) during nomml
business hom_.
RealLifeDesignStudio www.GEAppliances.com
GE ml)ports tile Universal Design concel)t--products, services and enviromnents that can be used by
people of all ages, sizes and capabilities. We recognize tile need to design fi)r a wide range of physical and
ment;d abilities and impaim_ents. For details of GE's Universal Design applications, including kitchen
design ideas fin" people with disabilities, check out ore" _,Vebsite today. For the hearing impaired, please call
800.TDD.GEAC (800.833.4322).
Extended Warranties www.GEAppliances.com
Pro'chase a (;E extended warranty and learn about special disco/rots that are axailable while yore" warranty
is still in effect. You can pro'chase it on-line anytime, or call 800.626.2224 during nom_al business hom_.
GE (_onsulner Heine Serxices will still be there after )our warran D, expires.
PartsandAccessories www.GEAppliances.com
Individtmls qualified to se_'i('e their own appliances can have parts or accessories sent directly to their
homes (VISA, MasterCard and Discover cards are accepted). Order on-line today, 24 hom_ evei'v day or
by phone at 800.626.2002 during nom_al business hom_.
Instructions contained in this manual cover proceduresto be performedbyany user. Other servicinggenerally
should be referred to qualified service personnel Caution must be exercised, since improper servicing may cause
unsafe operation.
ContactUs www.GEAppliances.com
If' you are not satisfied with tile service you receive from GE, contact us on our _.Vebsite with all tile details
including yore" phone II/llllbeI; oF write to: General Manage_; C/lStOllleF Relations
GE Appliances, Appliance Park
I,ouisville, KY 40925
RegisterYourAppliance www.GEAppliances.com
Register your new applimlce on-line---at your conYenience! Tiinely product registration will allow tot
enhanced COlllllltlllicatiOll aild prompt service tllldei" tile temps ofxotlr WalTallt}_ should tile need arise.
You may also mail in tile pre-printed registration card included in tile I)ackim*_ material.
Printed in flTeUnited States

