Loading ...
Loading ...
Loading ...
15
7b) Coca-Cola Freestyle
®
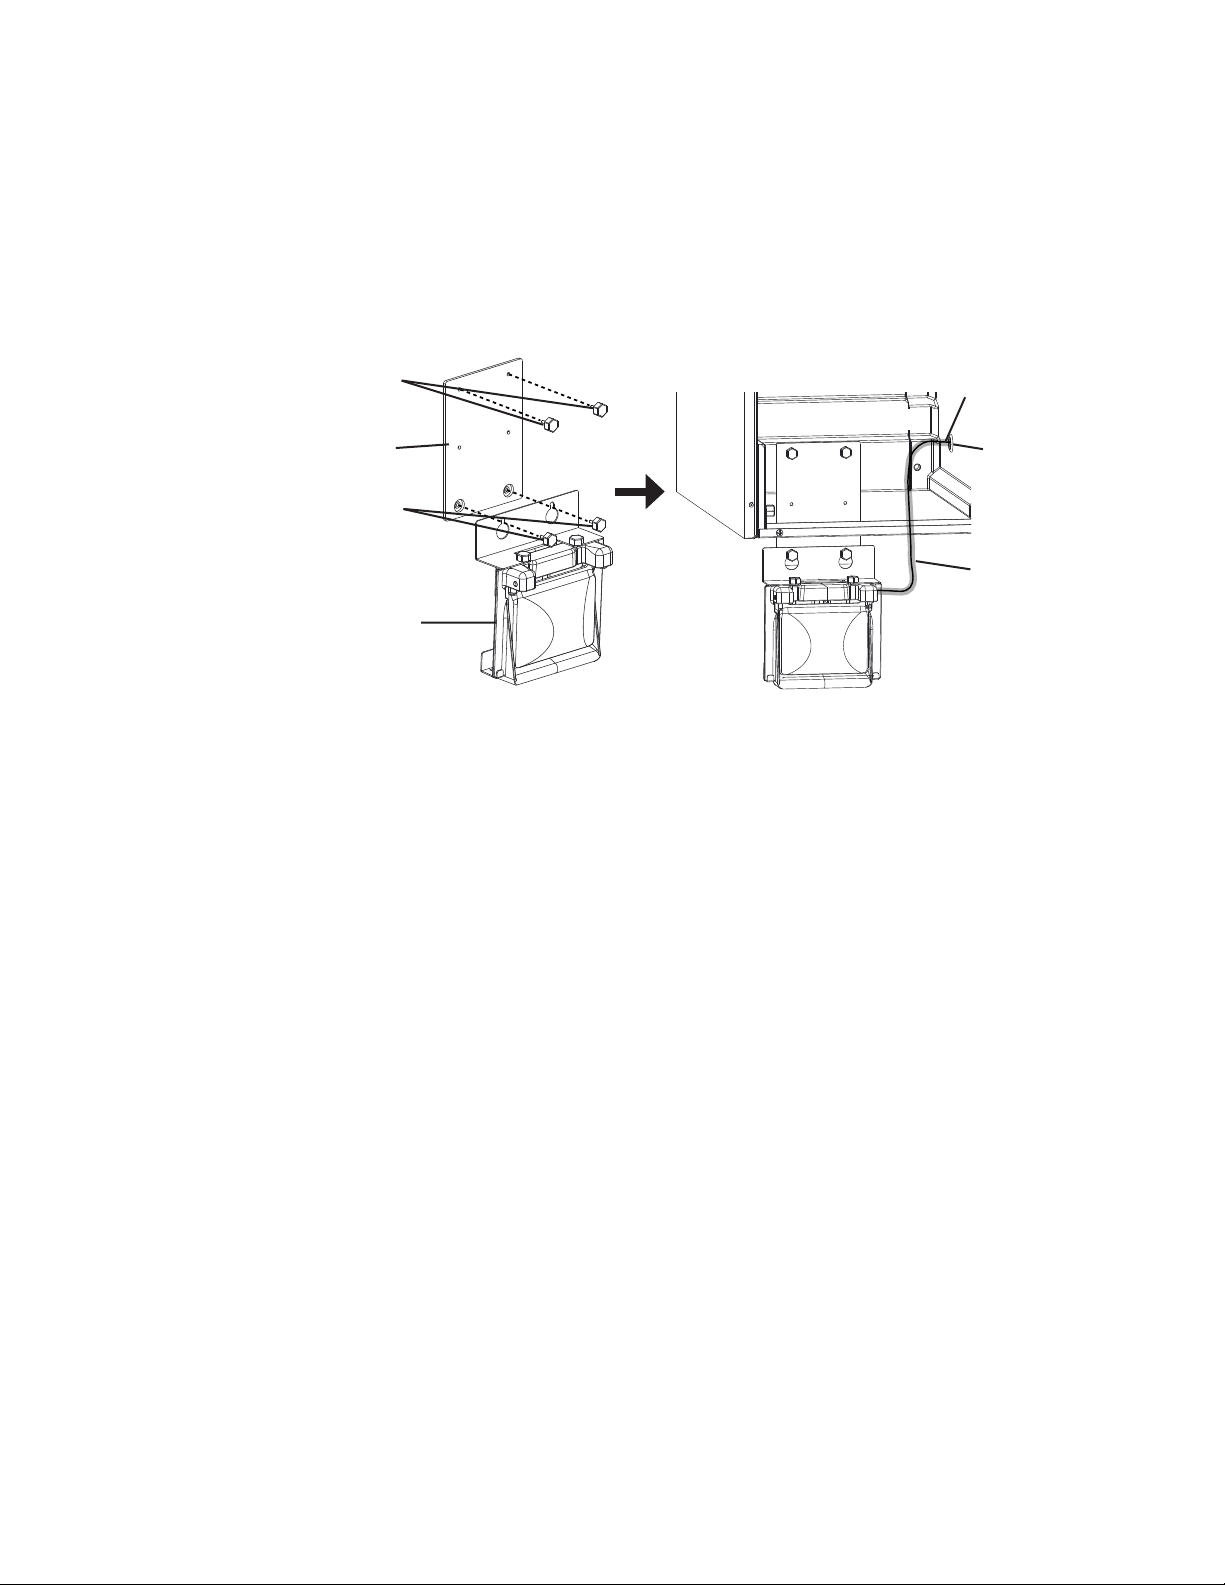
Dispenser or Dispenser Unit with Thick Adapter Application:
Remove the extension bracket and 2thumbscrews from the accessory bag. Secure the
bin control to the extension bracket using the 2thumbscrews. See Fig. 6. Secure the
extension bracket to the rear interior wall using the 2thumbscrews on the rear interior
wall. Route the bin control cable vinyl hose through the grommet as illustrated. Do not
leave any slack in the ice drop zone.
Optional Bin Control Mount Position
for Coca-Cola Freestyle
®
Dispenser or Dispenser Unit with Thick Adapter Application
Bin Control
Fig. 6
Thumbscrews from
Accessory Bag
Extension Bracket
from Accessory Bag
Thumbscrews from
Rear Interior Wall
8) Replace the water tank, cube guide, and pump motor and oat switch assembly in their
correct positions.
9) Secure the pump motor and oat switch assembly with the 2 thumbscrews.
10) Reconnect the hoses.
11) Reconnect the pump motor connector and the oat switch connector.
12) Replace insulation panel (B) in its correct position and secure with the 2 thumbscrews.
13) Replace insulation panel (A), the top insulation, the control box cover, and the exterior
panels in their correct positions.
Bin Control Cable
Vinyl Hose
Grommet
Rear Interior Wall
Loading ...
Loading ...
Loading ...