Loading ...
Loading ...
Loading ...
6
STEP 6
Run a little water from the HOT and COLD water faucet
into a pail to remove any particles from the line.
Note which faucet is hot and which is cold.
N
Put a flat washer from the parts bag into each end of the four
inlet hose couplings. Be sure flat washers are firmly seated.
FLAT Attach hoses to faucets.
WASHER
HOSE Tighten couplings by
COUPLING hand, then another 2/3
turn with pliers.
STEP 7
Attach other ends of hoses to washer.
Attach HOT water hose to the BOTTOM washer inlet.
Attach COLD water hose to TOP washer inlet.
Tighten couplings by hand, then another 2/3turn with
pliers.
Do not crossthread or overtighten, this could cause leaks.
STEP 8
Turn the water faucets on and check for leaks. If there is
a leak, make sure the flat washers are in place in all four
hose couplings. Tighten couplings to stop leaks. DO NOT
OVERTIGHTEN, this could cause damage to faucet.
STEP 9
Move washer to the exact spot where it will be used.
Remove the cardboard or hardboard from under washer.
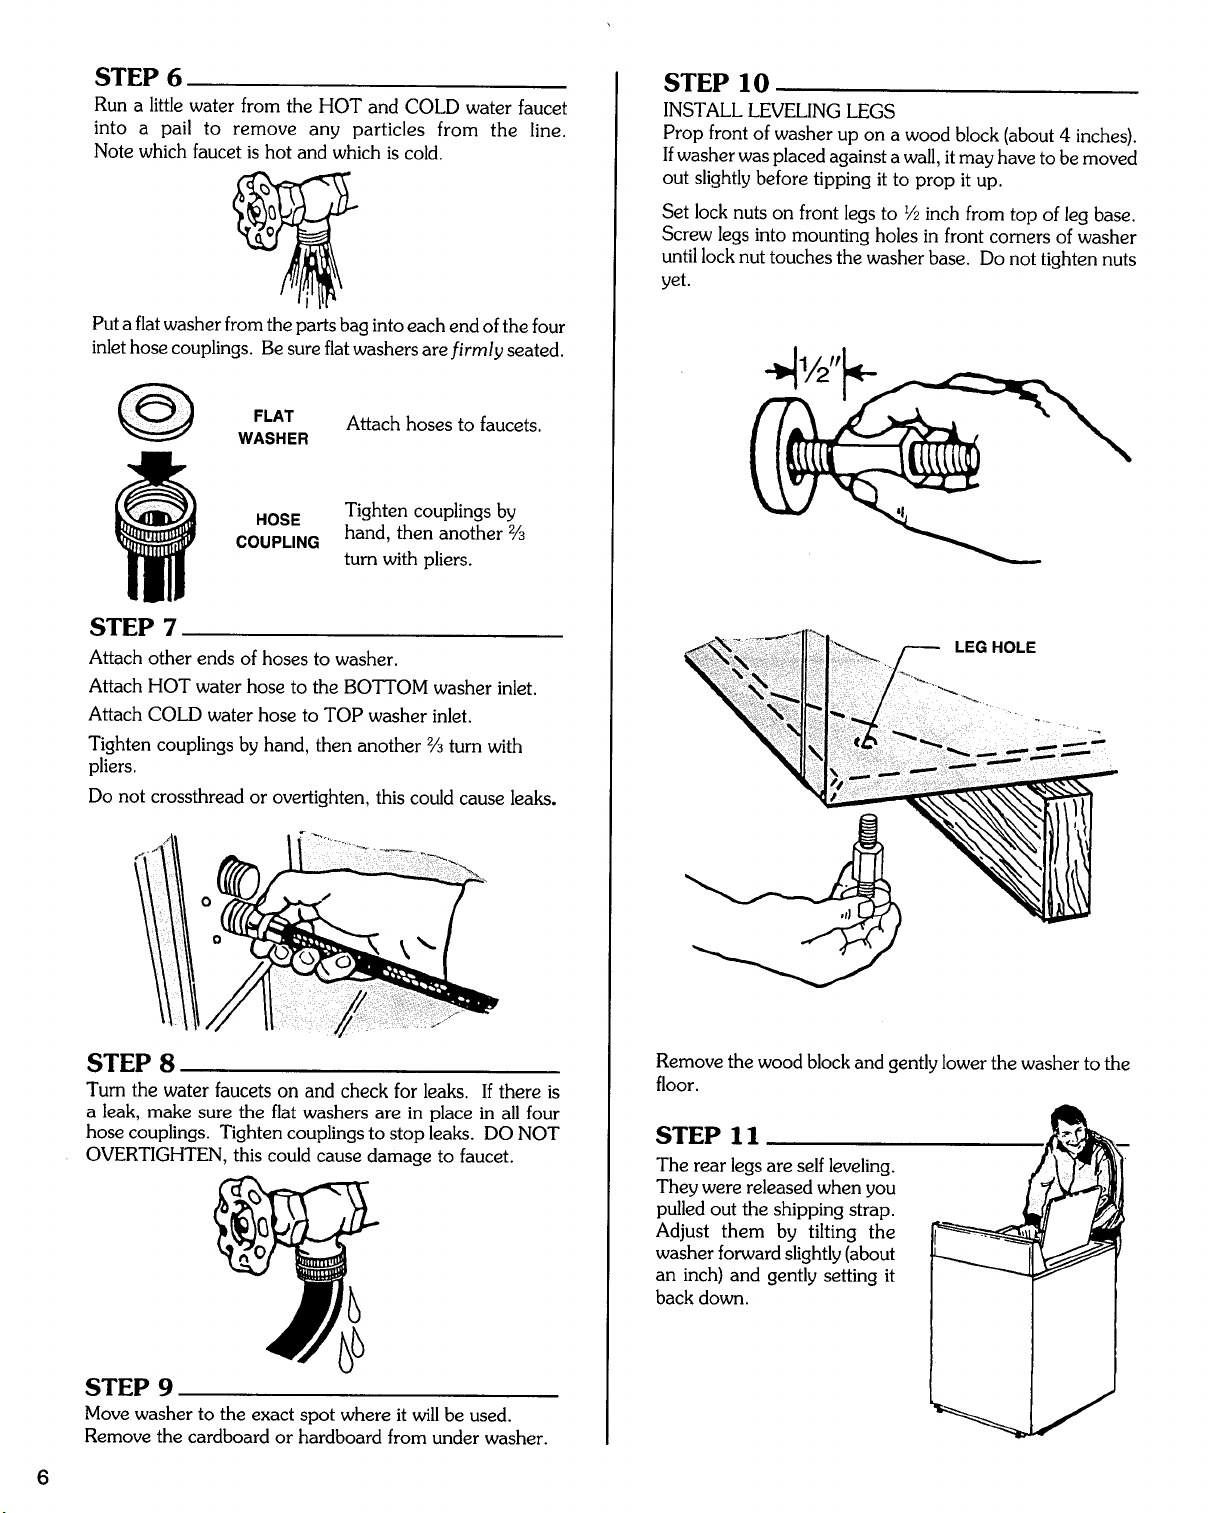
STEP 10
INSTALL LEVELING LEGS
Prop front of washer up on a wood block (about 4 inches).
Ifwasher was placed against a wall, it may have to be moved
out slightly before tipping it to prop it up.
Set lock nuts on front legs to I/2inch from top of leg base.
Screw legs into mounting holes in front corners of washer
until lock nut touches the washer base. Do not tighten nuts
yet.
LEG HOLE
Remove the wood block and gently lower the washer to the
floor.
STEP 11
The rear legs are self leveling.
They were released when you
pulled out the shipping strap.
Adjust them by tilting the
washer forward slightly (about
an inch) and gently setting it
back down.
Loading ...
Loading ...