Loading ...
Loading ...
Loading ...
6
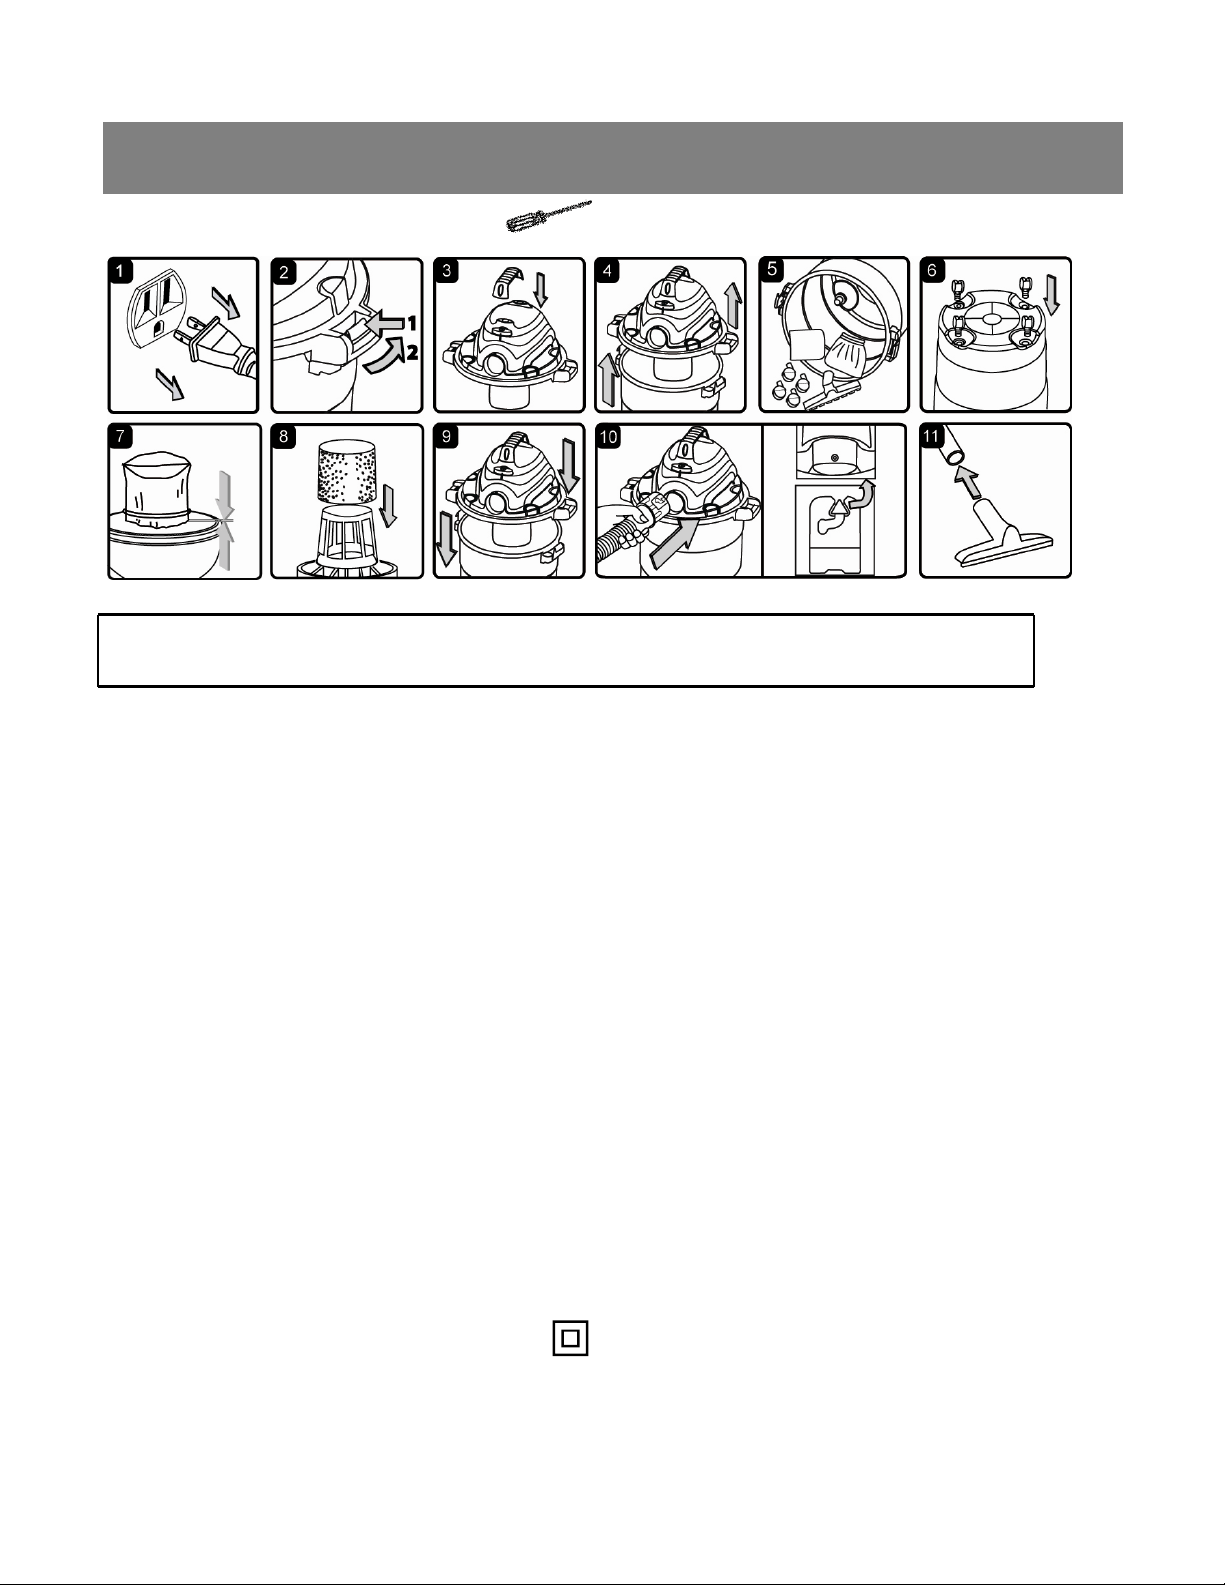
A Philips head screw driver is required
WARNING: DO NOT PLUG IN POWER CORD TO POWER OUTLET, MAKE SURE PLUG IS
DISCONNECTED BEFORE ASSEMBLING THE WET/DRY VAC
UNPACKING YOUR WET/DRY VACUUM & GENERAL ASSEMBLY
1. Verify that the power cord is disconnected from the outlet. (fig.1)
2. Undo the latches. (fig.2)
3. Insert the handle into the slots located on the top of the power head and secure it with the screws
provided. Do not over tighten the screw. (fig.3)
4. Lift the power head off the container. (fig.4)
5. Remove the contents from inside the container, make sure you have all contents as listed on page 5.
(fig.5)
6. Insert the casters into the socket on to bottom of the container and apply pressure until castors snap
into place. (fig.6)
7. For dry vacuum cleaning, install the supplied dust filter. (fig. 7) See page 10 for filter installation.
8. For wet vacuum cleaning, install the supplied foam filter. (fig.8) See page 10 for filter installation.
9. Place the power head back on the container, aligning the top section with the latches, and snap into
place. (fig.9)
10. Insert the locking end of the hose into the port of the container and turn to lock in to place. (fig.10)
11. Choose the desired accessories and insert onto the end of the hose. (fig.11)
POLARIZED PLUG
To reduce the risk of electrical shock, this appliance has a double polarized plug (one with the blade wider
than the other). This plug will fit in a polarized outlet only one way. If the plug does not fit fully in the outlet,
reverse the plug. If it still does not fit, contact a qualified electrician to install the proper outlet. Do not
change the plug in any way. Double insulation eliminates the need for the three wire grounded power
cord and grounded power supply system.
GENERAL ASSEMBLY INSTRUCTIONS
Loading ...
Loading ...
Loading ...