Loading ...

2
PLAN THE INSTALLATION
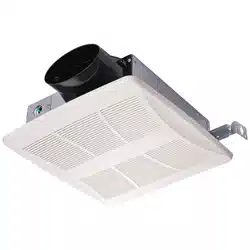
1. Do not use in a cooking area. 2. Two ways to connect ductwork to a factory-shipped unit.
ROOF CAP*
(with built-in
damper)
ROUND
DUCT*
WALL CAP*
(with built-in
damper)
* Purchase
separately
POWER
CABLE*
INSULATION*
(Place around and
over Fan Housing.)
Seal gaps
around
Housing.
FAN
HOUSING
ROUND
ELBOW(S) *
Seal duct
joints with
tape.
Keep duct
runs short
ASSEMBLY INSTRUCTIONS
1. Before installation, you need to know:
Screw A ST4.2*13 mm
Screw B ST4.2*25 mm
Hanger bar 13 3/8 in. (340 mm)
When installing contractor packs, make sure to install any optional modules such as
speed controls or humidity sensors with the fan housing to ensure wiring is completed
properly. Module and grille plugs come packaged with the optional accessory and must
be installed with the fan housing.
2. Ceiling installation
2a. Mount with mounting holes
Hold housing in place so that the housing contacts the bottom of the joist.
Screw housing to joist through the hole A and hole B.
2b. Mount with hanger bar
Slide one hanger bar into the channel on the housing and adjust as needed to fit
between framing. Hold housing in place so that the housing contacts the bottom of
the joist. Screw housing to joist through the hole A and hole B. Screw the hanger
bar onto the other side of joist through its hole.
Screw hanger bar to housing with screw A.
2c. Mount to I-joist
Slide hanger bar into the channel on the housing and adjust as needed to fit I-joist.
Hold housing in place so that the housing contacts the bottom of joist. Screw
housing to joist through the hole A and hole B. Screw the hanger bar onto the joist
through its hole.
Screw hanger bar to housing with screw A.
Screw B
Screw A
Screw A
Screw B
Screw B
Screw B
Screw B
Hole A
Hole B
Hole A
Hole B
Hole A
Channel
Hole B
Loading ...
Loading ...
Loading ...