Do Not Return to Store!
STOP
FOR IMMEDIATE ASSISTANCE WITH
ASSEMBLY, USE, OR TROUBLESHOOTING
PLEASE CONTACT US!
WARRANTY REGISTRATION
To register your brewer, please visit the following URL:
MOCCAMASTER.COM/REGISTERPRODUCT
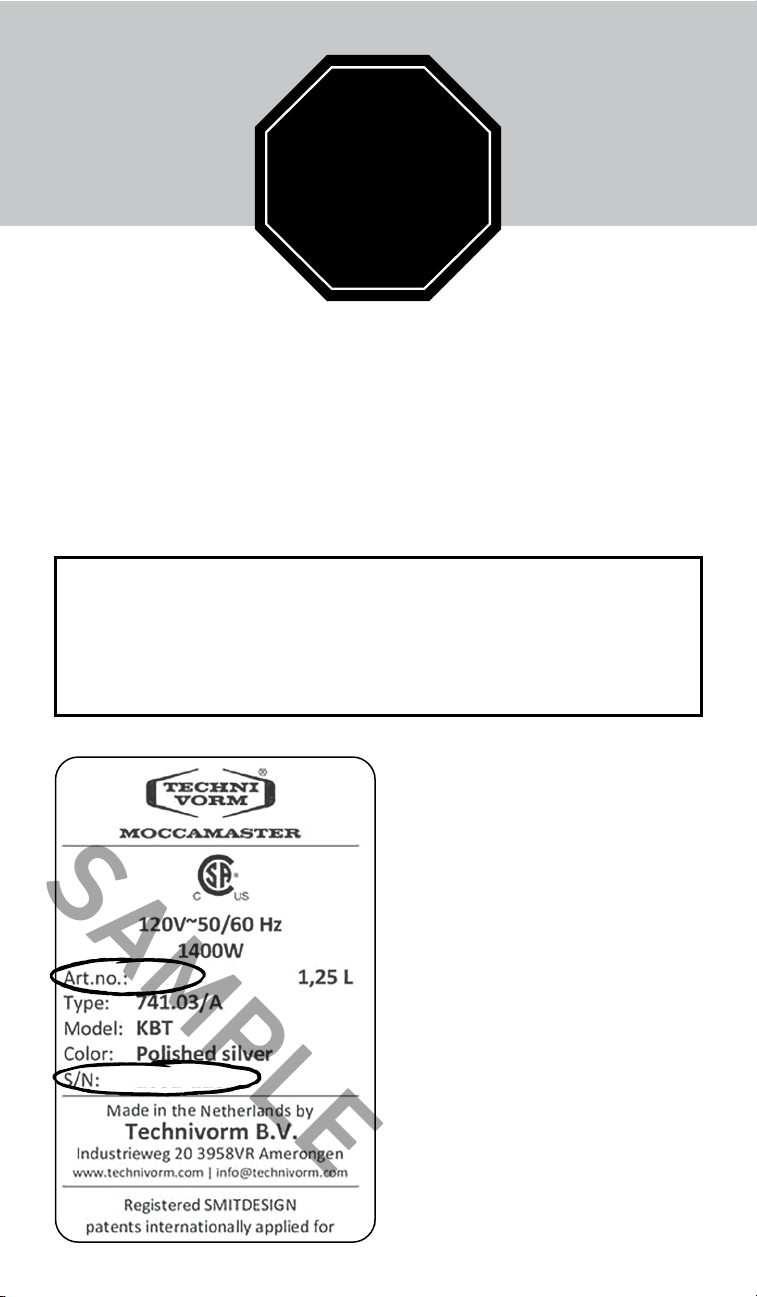
To register your product and
request repairs, please have your
Art.no. and Serial Number (S/N)
ready for Customer Service. This
information is found on the base
plate of the brewer and will look
like the sample image to the left.
HOW TO CONTACT US
Email
support@moccamaster.com
Phone
855.662.2200
Find Help Online
moccamaster.com/support
Business Hours
Monday - Friday, 8AM-5PM CST
We look forward to hearing
from you!
Warranty
5-Year Limited Warranty
Important Safeguards Important Safeguards
This Moccamaster Brewer, excluding carafe and parts, is warrantied by
Moccamaster USA to be free from defects in materials and workmanship
existing at the time of manufacture and appearing within one of the
following warranty periods:
Five (5) years from the date of purchase of a NEW BREWER.
One (1) year from the date of purchase of a REFURBISHED BREWER.
If Moccamaster USA inspects the
brewer and fi nds it to be defective, it
will be repaired or replaced without
charge to you. If a replacement
product is provided, it will assume
the remaining warranty of the original
product, as described above.
This warranty does not apply to any
defect arising from a buyer or user’s
misuse of the product, including
negligent handling, lack of descaling,
failure to follow manufacturer's
instructions, modifi cation, alteration,
or repair not authorized by
Moccamaster USA. If you choose
to have someone other than an
authorized service center service
your brewer, THIS WARRANTY WILL
AUTOMATICALLY BECOME NULL
AND VOID. Any liability is expressly
limited to an amount equal to the
purchase price paid, and all claims for
special, incidental, or consequential
damages are hereby excluded.
Unless otherwise specifi ed,
Moccamaster USA makes no other
warranty of any kind, expressed or
implied, as to the merchantability
or fi tness of any product for any
particular purpose. Moccamaster USA
expressly disclaims all warranties and
conditions not stated in the limited
warranty. Moccamaster USA is not
liable for any claim made by a third
party or made by a buyer or user for a
third party.
This warranty gives you specifi c legal
rights, and you may also have other
legal rights, which vary from state to
state. Some states do not allow the
limitation or exclusion of incidental or
consequential damages, so the above
limitation or exclusion may not apply
to you.
If you believe your brewer is defective,
return it to the location of purchase
(within fi rst 30 days) or contact
Moccamaster USA Customer Service
at support@moccamaster.com, or
855.662.2200.
KEEP ORIGINAL SALES RECEIPT OR
INVOICE AS PROOF OF PURCHASE
FOR WARRANTY PURPOSES.
For out-of-warranty product repair
services visit moccamaster.com
When using electrical appliances,
always follow basic safety
precautions, including:
READ ALL INSTRUCTIONS
• Unwrap the co ee brewer with care.
Remove all packaging materials. Keep
plastic and cardboard packaging out of
reach of children.
• Confi rm the voltage of the brewer
matches your main voltage. The brewer
must be plugged into a socket with
safety grounding.
• Place the brewer on a fl at surface in a
frost-free room.
• Do not touch hot surfaces. Use
handles or knobs.
• Do not place cord, plugs, or brewer in
water or other liquids.
• This brewer is not fi t for use by adults
or children with physical, mental,
or sensory disabilities, or a lack of
knowledge or experience, unless
supervised or instructed on its use by a
person who is held responsible for the
aforementioned individual’s safety.
• Unplug from outlet when not in use
and before cleaning. Allow brewer
to cool before cleaning and before
putting on or taking o parts.
• Do not operate brewer with a
damaged cord or plug, or if the brewer
malfunctions or is damaged in any way.
Return brewer to the nearest authorized
service facility for examination, repair,
or adjustment.
• Using an accessory not recommended
by the manufacturer may cause injury
o r fi r e .
• Do not use outdoors.
• Do not let cord hang over table or
counter edges, and do not let it touch
hot surfaces.
• Do not place on or near a hot gas or
electric burner or in a heated oven.
• To disconnect, turn power switch to
“OFF” position, then remove plug from
wall outlet.
• Do not use brewer for any purpose
other than its intended use.
• Do not remove brew basket or carafe
while brewing.
• Do not pour any liquids other than water
or recommended cleaning products into
water reservoir.
• Always place all lids in the correct
position, as shown in the descriptive
images. Scalding may occur if any
of these parts are removed during
brewing cycles.
• WARNING: Do not remove bottom
panel of brewer; doing so will void
warranty. No user-serviceable parts
inside. Repair must be done by
authorized personnel only.
GLASS CARAFE
• Glass carafe is designed for use with
this appliance.
• Do not set a hot carafe on a
cold surface.
• Never place carafe over open fl ame, hot
range cook-top, or other heat source.
• Do not use a cracked carafe or a carafe
with loose handles.
• Do not clean carafe with abrasive
cleansers, steel wool pads, or
similar materials.
• Never place carafe in an oven or
a microwave.
NOT DISHWASHER SAFE.
THERMAL CARAFE
• Do not use thermal carafe for storing
dairy products or baby food, as these
will curdle if kept hot for a longer period
of time.
• Do not use for carbonated beverages.
• Do not transport carafe in a horizontal
or upside-down position, as it can
lead to leakage. Use special travel lid
for transporting.
• WARNING: Do not drink directly from
thermal carafe. Liquid from carafe may
be very hot.
• Never place thermal carafe on a hot/
warm cooking ring, gas cooker, or other
heat source.
• Never place carafe in an oven or
a microwave.
• Do not clean carafe with abrasive
cleansers, steel wool pads, or
similar materials.
NOT DISHWASHER SAFE.
SAVE THESE INSTRUCTIONS
BEFORE USE
Before the fi rst use of your new co ee
brewer, or if it has not been used for
some time, we recommend running two
brew cycles of plain water to rinse the
water receptacle.
POWER SUPPLY CORD
The power supply cord is short to reduce
risks resulting from becoming entangled in
or tripping over a longer cord. If using an
extension cord, its marked electrical rating
must be at least as great as the co ee
brewer’s electrical rating. The extension
cord must be a grounding type 3 cord. The
extension cord should not drape over the
counter or tabletop where it can be pulled
over by children or tripped over.
ENVIRONMENTAL
RECOMMENDATIONS
Dispose of fi lters and co ee grounds in
an organic waste container or compost
heap where available. If not available,
fi lters and grounds may be disposed of in
normal household waste. Please recycle
all packaging and parts responsibly.
Basic Cleaning
Clean the exterior of your brewer regularly with a moist cloth, wiping dry. Hand-
wash carafe and brew basket with mild dishwashing detergent after each use.
Rinse thoroughly. Carafes are not dishwasher safe. Remove co ee oil stains from
thermal carafes by placing a small amount of dishwasher detergent and water in
the carafe and allowing it to soak overnight, or use Urnex® or Durgol® cleaning
products (follow manufacturer directions).
Descaling Your Brewer
Descale your brewer every 100 cycles
(easily remembered after every box of
100-count fi lters), or a minimum of every
three months. We recommend Urnex®
or Durgol® descaling products (follow
manufacturer directions). You must
descale your co ee brewer regularly
to maintain performance and warranty
coverage. After descaling, always brew
2 full reservoirs of water through the
brewer to clear out any remaining
descaling product.
Extended Storage and
Anti-Frost Protection
If storing the brewer, or if leaving the
unit unused for longer than 1 week:
• Turn the brewer o and unplug from
the electrical outlet.
• Remove the outlet arm.
• Empty any remaining water within
the brewer by holding it upside down
over the sink.
• Replace the outlet arm before using
the brewer again.
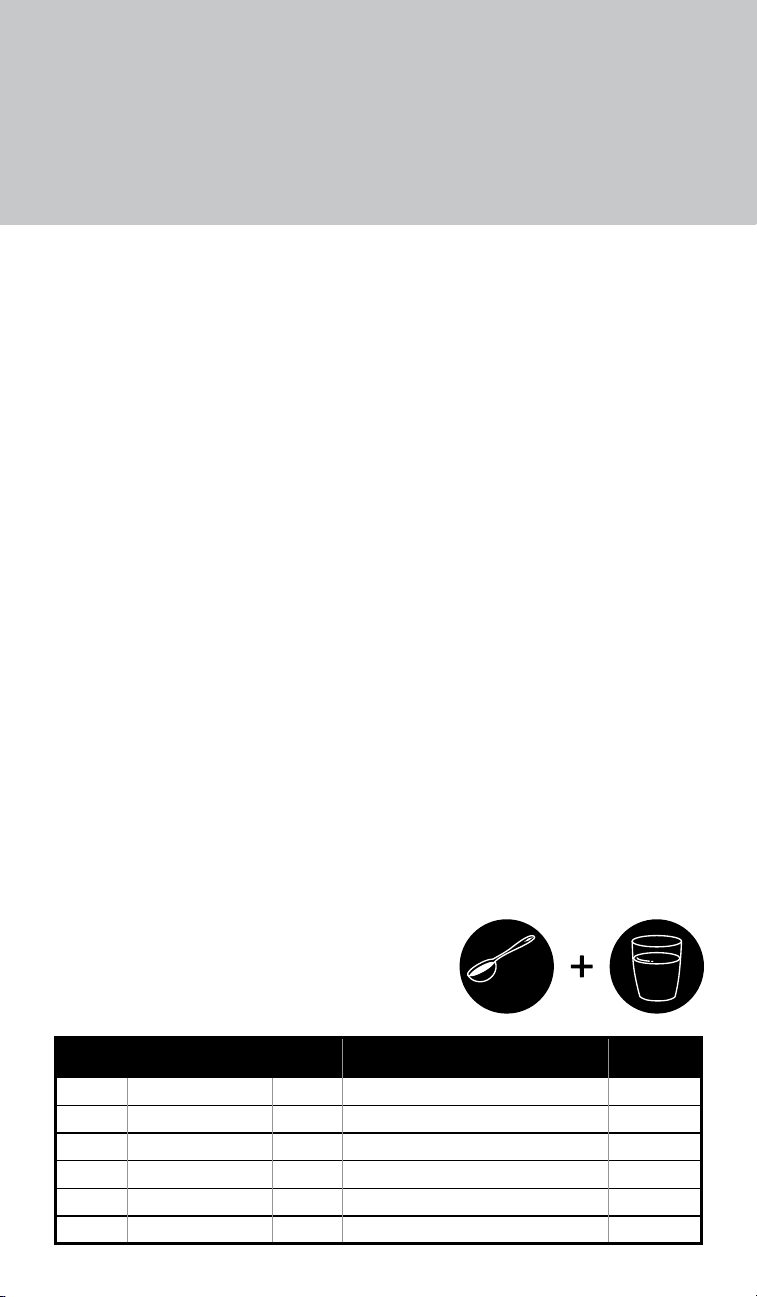
WATER VOLUME
(Note: European cup size is 4oz)
MOCCAMASTER 2 TBSP SCOOP
GRAMS
+/ 5
1.8L 15-Cup (Grand) 60oz 10 level scoops 99
1.25L 10-Cup 40oz 7 level scoops 69
1L 8-Cup 32oz 6 level scoops 55
3/4L 6-Cup 24oz 4 level scoops 41
1/2L 4-Cup 16oz 3 level scoops 28
0.3L Cup-One 10oz 2 level scoops 17
REPLACEMENT PARTS
Replacement parts are available through many retailers,
online at www.moccamaster.com, or through Customer Service
at 855.662.2200.
WHAT IS DESCALING?
Over time, minerals from
water accumulate inside
the Moccamaster’s boiling
element, forming scale.
This buildup can slow and
eventually stop the fl ow of
water. It also can a ect the
brewing temperature and
saturation time. If not
descaled regularly, the
brewer can become
permanently damaged.
Descaling products break
down the mineral buildup
inside your brewer,
ensuring consistent brewer
functionality and great co ee.
NOTE: We do not
recommend descaling with
vinegar. It may not e ectively
remove buildup and can be
di cult to thoroughly rinse,
resulting in a lingering odor
that could a ect future brews.
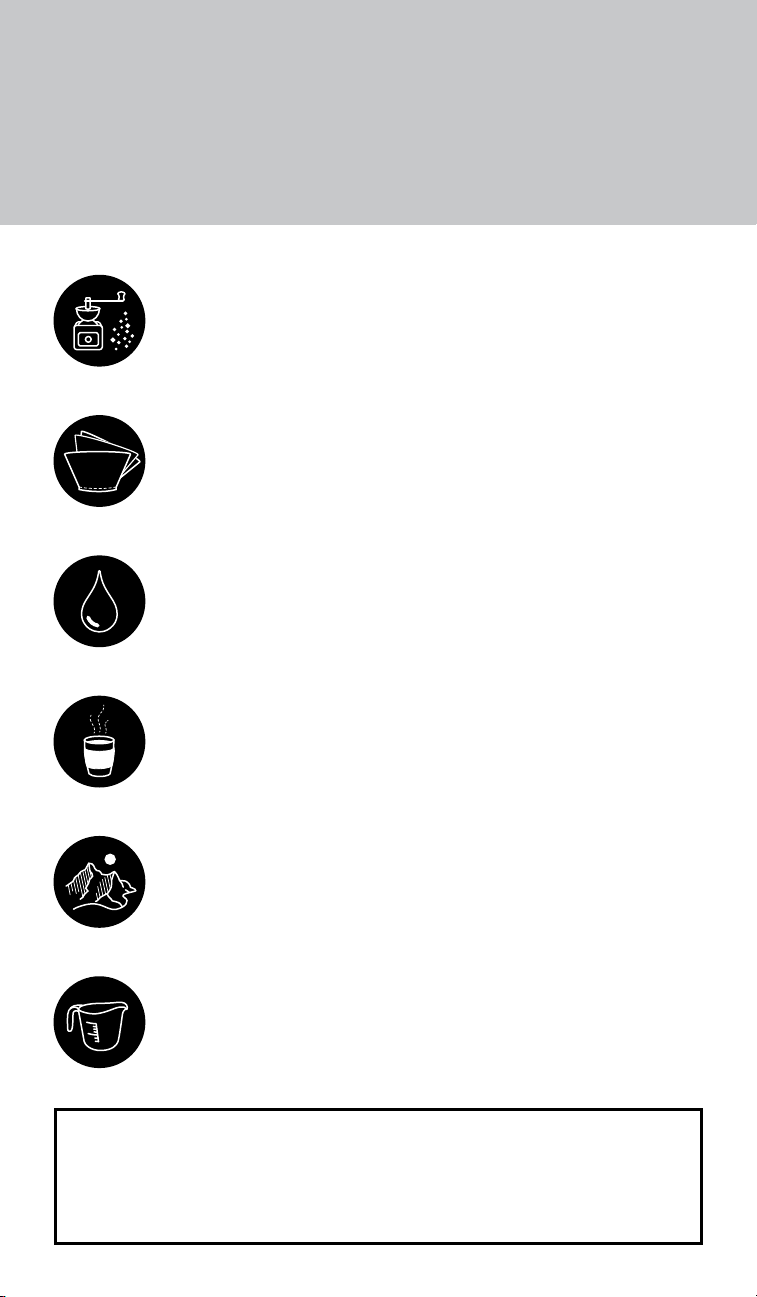
Get started with your Moccamaster co ee brewer following the steps below.
For instructions on your specifi c model, please refer to the brewer guides on the
opposite page. We recommend running two brew cycles of plain water before
brewing your fi rst pot of co ee.
1. Set power switch to o .
2. Firmly attach outlet arm to silicone gasket at the top of the cool water
reservoir; the fi t should feel snug. Caution: outlet arm is HOT while brewing.
3. Fill cool water reservoir to the desired level with fresh, cool water. Place lid
on the cool water reservoir.
4. Place paper fi lter in brew basket. Refer to your specifi c brewer’s guide for
correct fi lter type. Caution: Do not remove lid while brewing; scalding
may occur.
5. Add ground co ee. Refer to the chart below for the recommended formula.
6. Place brew basket on bracket; position outlet arm over center of brew basket.
Place lid on brew basket. For manual-adjust brew basket models, adjust slide
to open position.
7. Place carafe into position. For Cup-One, ensure mug is pressed against studs
or nested in the mug tray.
8. Plug into grounded outlet. Set power switch to “ON” position.
9. Brewing will begin quickly; water will be brought to a boil, rise through the
brewer across the outlet arm, and into the brew basket. Refer to your brewer
guide for brew times.
Now experience the real taste of co ee, perfectly brewed with your
new Moccamaster!
Directions For Use
Best Practices
for Best Results
Cleaning & Maintenance
Recommended
Water-to-Co ee Ratio
The industry standard for optimal fl avor is
2 tbsp. of ground co ee to every 6 oz. of water
– or 55 grams of ground co ee per liter.
Grind Size
Use a medium to medium-coarse grind. We suggest grinding
your co ee either at the time of purchase or at home with a
Moccamaster grinder. Note that most pre-ground, bagged
co ee tends to be too fi nely ground for ideal operation.
Filters
Check your brewer guide for replacement fi lter size. We
recommend using oxygen-whitened fi lters. We advise against
using gold-mesh or other reusable fi lters, as they can cause
inconsistent extraction times and are di cult to clean properly.
Water
If it tastes good to drink, it will make good co ee. We recommend
fresh tap, fi ltered, or bottled water. We do not recommend using
reverse osmosis fi ltered water or distilled water, as it can damage
the brewer’s boiling element.
What's In The Cup
The water-to-co ee ratio we recommend is the approved industry
standard, but your taste preferences may vary. If your co ee is
too strong, add hot water to your fi nished cup. If it’s too weak,
DO NOT add more co ee – instead, try a di erent co ee roast or
growing region.
Brewing at High Altitudes
Moccamaster’s unique copper element brings water to a boil.
At sea-level, the boiling temperature is 212°F. The boiling
temperature can be as low as 198°F at higher elevations, resulting
in cooler brewing temperatures. Rest assured, the brewer is still
making great co ee!
Minimum Brew Volume
We recommend brewing no less than 4 cups (16 oz.) in all 8- to
10-cup brewers.
2
Tbsp
6oz
XXXXX
XXXX XXXXX
SAMPLE
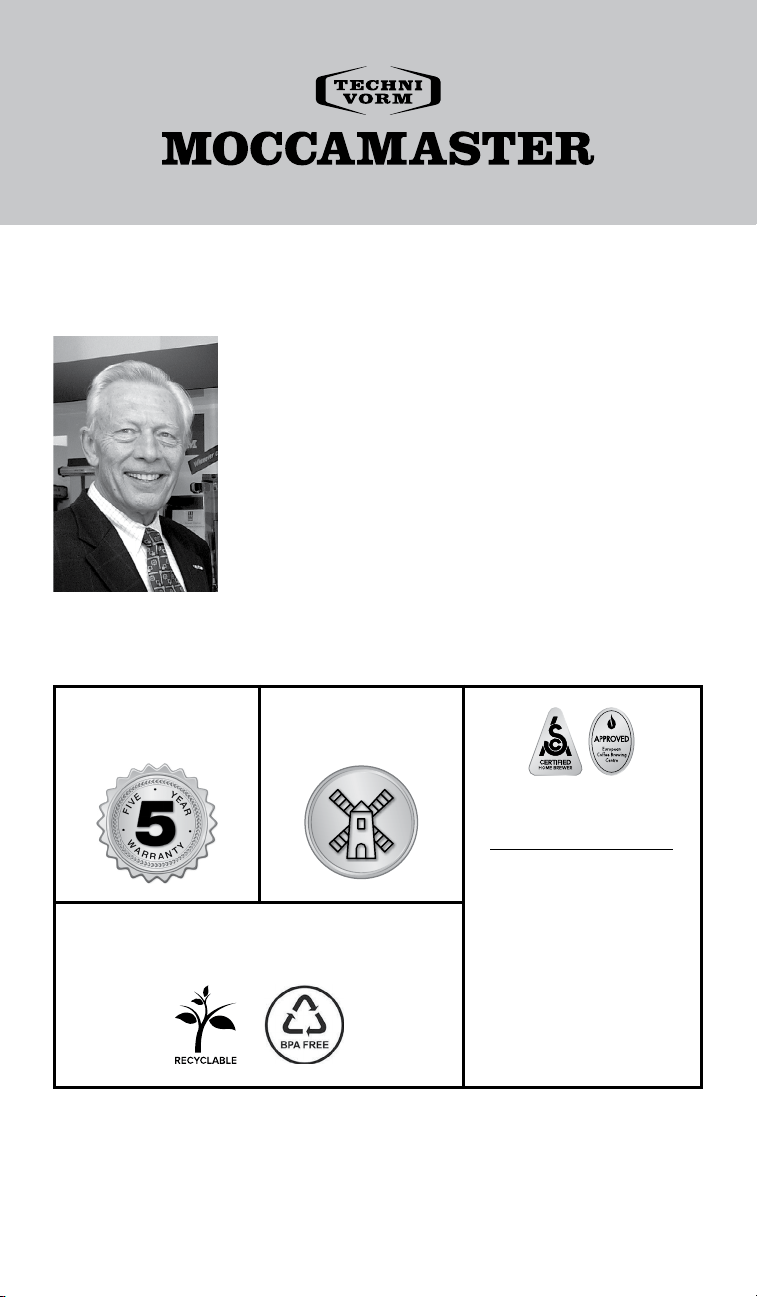
Gerard Clement Smit
Founder and Designer
moccamaster.com
Recyclable, Repairable, Sustainable,
Cleanable, BPA/BPS/BPF and Phthalate Free
Meets ECBC and SCA
GOLDEN CUP
Brewing Standards for 4T’s:
Industry-Leading
5-Year Warranty
Handmade in
the Netherlands
TEMPERATURE
Brews at 196°-205°F
Holds at 175°-185°F
TIME
Full carafe in 4 to 6 minutes
TURBULENCE
Creates perfect bloom and
even extraction
TOTAL DISSOLVED
SOLIDS TDS
Solubles between 18-22%
We’re so glad you’ve joined the Moccamaster family. We
believe your new Moccamaster co ee brewer will give you
the best co ee brewing experience available. Our consistent
quality is the result of innovative engineering driven by a
passion for good co ee. From our copper heating element to
the shape of our brew basket, every thoughtfully designed
component of the Moccamaster works together to brew
delicious co ee to industry standards every time.
Since 1968, when founder Gerard Clement Smit designed
the fi rst Moccamaster co ee brewer, every Moccamaster has
been handmade and tested in our factory in the Netherlands.
Our brewers are energy-e cient, long-lasting, and
recyclable. We are committed to providing our customers with
superior service, so you can be sure that your Moccamaster
experience will be exceptional for years to come.
Welcome, and thank you for your purchase!
All Moccamaster co ee brewers are certifi ed to brew to the strict standards
of the European Co ee Brewing Center (ECBC) and the Specialty Co ee
Association (SCA); certifi cations awarded only after extensive and rigorous
quality control and laboratory testing.
Do Not Return to Store!
STOP
FOR IMMEDIATE ASSISTANCE WITH
ASSEMBLY, USE, OR TROUBLESHOOTING
PLEASE CONTACT US!
WARRANTY REGISTRATION
To register your brewer, please visit the following URL:
MOCCAMASTER.COM/REGISTERPRODUCT
To register your product and
request repairs, please have your
Art.no. and Serial Number (S/N)
ready for Customer Service. This
information is found on the base
plate of the brewer and will look
like the sample image to the left.
HOW TO CONTACT US
Email
support@moccamaster.com
Phone
855.662.2200
Find Help Online
moccamaster.com/support
Business Hours
Monday - Friday, 8AM-5PM CST
We look forward to hearing
from you!
Warranty
5-Year Limited Warranty
Important Safeguards Important Safeguards
This Moccamaster Brewer, excluding carafe and parts, is warrantied by
Moccamaster USA to be free from defects in materials and workmanship
existing at the time of manufacture and appearing within one of the
following warranty periods:
Five (5) years from the date of purchase of a NEW BREWER.
One (1) year from the date of purchase of a REFURBISHED BREWER.
If Moccamaster USA inspects the
brewer and fi nds it to be defective, it
will be repaired or replaced without
charge to you. If a replacement
product is provided, it will assume
the remaining warranty of the original
product, as described above.
This warranty does not apply to any
defect arising from a buyer or user’s
misuse of the product, including
negligent handling, lack of descaling,
failure to follow manufacturer's
instructions, modifi cation, alteration,
or repair not authorized by
Moccamaster USA. If you choose
to have someone other than an
authorized service center service
your brewer, THIS WARRANTY WILL
AUTOMATICALLY BECOME NULL
AND VOID. Any liability is expressly
limited to an amount equal to the
purchase price paid, and all claims for
special, incidental, or consequential
damages are hereby excluded.
Unless otherwise specifi ed,
Moccamaster USA makes no other
warranty of any kind, expressed or
implied, as to the merchantability
or fi tness of any product for any
particular purpose. Moccamaster USA
expressly disclaims all warranties and
conditions not stated in the limited
warranty. Moccamaster USA is not
liable for any claim made by a third
party or made by a buyer or user for a
third party.
This warranty gives you specifi c legal
rights, and you may also have other
legal rights, which vary from state to
state. Some states do not allow the
limitation or exclusion of incidental or
consequential damages, so the above
limitation or exclusion may not apply
to you.
If you believe your brewer is defective,
return it to the location of purchase
(within fi rst 30 days) or contact
Moccamaster USA Customer Service
at support@moccamaster.com, or
855.662.2200.
KEEP ORIGINAL SALES RECEIPT OR
INVOICE AS PROOF OF PURCHASE
FOR WARRANTY PURPOSES.
For out-of-warranty product repair
services visit moccamaster.com
When using electrical appliances,
always follow basic safety
precautions, including:
READ ALL INSTRUCTIONS
• Unwrap the co ee brewer with care.
Remove all packaging materials. Keep
plastic and cardboard packaging out of
reach of children.
• Confi rm the voltage of the brewer
matches your main voltage. The brewer
must be plugged into a socket with
safety grounding.
• Place the brewer on a fl at surface in a
frost-free room.
• Do not touch hot surfaces. Use
handles or knobs.
• Do not place cord, plugs, or brewer in
water or other liquids.
• This brewer is not fi t for use by adults
or children with physical, mental,
or sensory disabilities, or a lack of
knowledge or experience, unless
supervised or instructed on its use by a
person who is held responsible for the
aforementioned individual’s safety.
• Unplug from outlet when not in use
and before cleaning. Allow brewer
to cool before cleaning and before
putting on or taking o parts.
• Do not operate brewer with a
damaged cord or plug, or if the brewer
malfunctions or is damaged in any way.
Return brewer to the nearest authorized
service facility for examination, repair,
or adjustment.
• Using an accessory not recommended
by the manufacturer may cause injury
o r fi r e .
• Do not use outdoors.
• Do not let cord hang over table or
counter edges, and do not let it touch
hot surfaces.
• Do not place on or near a hot gas or
electric burner or in a heated oven.
• To disconnect, turn power switch to
“OFF” position, then remove plug from
wall outlet.
• Do not use brewer for any purpose
other than its intended use.
• Do not remove brew basket or carafe
while brewing.
• Do not pour any liquids other than water
or recommended cleaning products into
water reservoir.
• Always place all lids in the correct
position, as shown in the descriptive
images. Scalding may occur if any
of these parts are removed during
brewing cycles.
• WARNING: Do not remove bottom
panel of brewer; doing so will void
warranty. No user-serviceable parts
inside. Repair must be done by
authorized personnel only.
GLASS CARAFE
• Glass carafe is designed for use with
this appliance.
• Do not set a hot carafe on a
cold surface.
• Never place carafe over open fl ame, hot
range cook-top, or other heat source.
• Do not use a cracked carafe or a carafe
with loose handles.
• Do not clean carafe with abrasive
cleansers, steel wool pads, or
similar materials.
• Never place carafe in an oven or
a microwave.
NOT DISHWASHER SAFE.
THERMAL CARAFE
• Do not use thermal carafe for storing
dairy products or baby food, as these
will curdle if kept hot for a longer period
of time.
• Do not use for carbonated beverages.
• Do not transport carafe in a horizontal
or upside-down position, as it can
lead to leakage. Use special travel lid
for transporting.
• WARNING: Do not drink directly from
thermal carafe. Liquid from carafe may
be very hot.
• Never place thermal carafe on a hot/
warm cooking ring, gas cooker, or other
heat source.
• Never place carafe in an oven or
a microwave.
• Do not clean carafe with abrasive
cleansers, steel wool pads, or
similar materials.
NOT DISHWASHER SAFE.
SAVE THESE INSTRUCTIONS
BEFORE USE
Before the fi rst use of your new co ee
brewer, or if it has not been used for
some time, we recommend running two
brew cycles of plain water to rinse the
water receptacle.
POWER SUPPLY CORD
The power supply cord is short to reduce
risks resulting from becoming entangled in
or tripping over a longer cord. If using an
extension cord, its marked electrical rating
must be at least as great as the co ee
brewer’s electrical rating. The extension
cord must be a grounding type 3 cord. The
extension cord should not drape over the
counter or tabletop where it can be pulled
over by children or tripped over.
ENVIRONMENTAL
RECOMMENDATIONS
Dispose of fi lters and co ee grounds in
an organic waste container or compost
heap where available. If not available,
fi lters and grounds may be disposed of in
normal household waste. Please recycle
all packaging and parts responsibly.
Basic Cleaning
Clean the exterior of your brewer regularly with a moist cloth, wiping dry. Hand-
wash carafe and brew basket with mild dishwashing detergent after each use.
Rinse thoroughly. Carafes are not dishwasher safe. Remove co ee oil stains from
thermal carafes by placing a small amount of dishwasher detergent and water in
the carafe and allowing it to soak overnight, or use Urnex® or Durgol® cleaning
products (follow manufacturer directions).
Descaling Your Brewer
Descale your brewer every 100 cycles
(easily remembered after every box of
100-count fi lters), or a minimum of every
three months. We recommend Urnex®
or Durgol® descaling products (follow
manufacturer directions). You must
descale your co ee brewer regularly
to maintain performance and warranty
coverage. After descaling, always brew
2 full reservoirs of water through the
brewer to clear out any remaining
descaling product.
Extended Storage and
Anti-Frost Protection
If storing the brewer, or if leaving the
unit unused for longer than 1 week:
• Turn the brewer o and unplug from
the electrical outlet.
• Remove the outlet arm.
• Empty any remaining water within
the brewer by holding it upside down
over the sink.
• Replace the outlet arm before using
the brewer again.
WATER VOLUME
(Note: European cup size is 4oz)
MOCCAMASTER 2 TBSP SCOOP
GRAMS
+/ 5
1.8L 15-Cup (Grand) 60oz 10 level scoops 99
1.25L 10-Cup 40oz 7 level scoops 69
1L 8-Cup 32oz 6 level scoops 55
3/4L 6-Cup 24oz 4 level scoops 41
1/2L 4-Cup 16oz 3 level scoops 28
0.3L Cup-One 10oz 2 level scoops 17
REPLACEMENT PARTS
Replacement parts are available through many retailers,
online at www.moccamaster.com, or through Customer Service
at 855.662.2200.
WHAT IS DESCALING?
Over time, minerals from
water accumulate inside
the Moccamaster’s boiling
element, forming scale.
This buildup can slow and
eventually stop the fl ow of
water. It also can a ect the
brewing temperature and
saturation time. If not
descaled regularly, the
brewer can become
permanently damaged.
Descaling products break
down the mineral buildup
inside your brewer,
ensuring consistent brewer
functionality and great co ee.
NOTE: We do not
recommend descaling with
vinegar. It may not e ectively
remove buildup and can be
di cult to thoroughly rinse,
resulting in a lingering odor
that could a ect future brews.
Get started with your Moccamaster co ee brewer following the steps below.
For instructions on your specifi c model, please refer to the brewer guides on the
opposite page. We recommend running two brew cycles of plain water before
brewing your fi rst pot of co ee.
1. Set power switch to o .
2. Firmly attach outlet arm to silicone gasket at the top of the cool water
reservoir; the fi t should feel snug. Caution: outlet arm is HOT while brewing.
3. Fill cool water reservoir to the desired level with fresh, cool water. Place lid
on the cool water reservoir.
4. Place paper fi lter in brew basket. Refer to your specifi c brewer’s guide for
correct fi lter type. Caution: Do not remove lid while brewing; scalding
may occur.
5. Add ground co ee. Refer to the chart below for the recommended formula.
6. Place brew basket on bracket; position outlet arm over center of brew basket.
Place lid on brew basket. For manual-adjust brew basket models, adjust slide
to open position.
7. Place carafe into position. For Cup-One, ensure mug is pressed against studs
or nested in the mug tray.
8. Plug into grounded outlet. Set power switch to “ON” position.
9. Brewing will begin quickly; water will be brought to a boil, rise through the
brewer across the outlet arm, and into the brew basket. Refer to your brewer
guide for brew times.
Now experience the real taste of co ee, perfectly brewed with your
new Moccamaster!
Directions For Use
Best Practices
for Best Results
Cleaning & Maintenance
Recommended
Water-to-Co ee Ratio
The industry standard for optimal fl avor is
2 tbsp. of ground co ee to every 6 oz. of water
– or 55 grams of ground co ee per liter.
Grind Size
Use a medium to medium-coarse grind. We suggest grinding
your co ee either at the time of purchase or at home with a
Moccamaster grinder. Note that most pre-ground, bagged
co ee tends to be too fi nely ground for ideal operation.
Filters
Check your brewer guide for replacement fi lter size. We
recommend using oxygen-whitened fi lters. We advise against
using gold-mesh or other reusable fi lters, as they can cause
inconsistent extraction times and are di cult to clean properly.
Water
If it tastes good to drink, it will make good co ee. We recommend
fresh tap, fi ltered, or bottled water. We do not recommend using
reverse osmosis fi ltered water or distilled water, as it can damage
the brewer’s boiling element.
What's In The Cup
The water-to-co ee ratio we recommend is the approved industry
standard, but your taste preferences may vary. If your co ee is
too strong, add hot water to your fi nished cup. If it’s too weak,
DO NOT add more co ee – instead, try a di erent co ee roast or
growing region.
Brewing at High Altitudes
Moccamaster’s unique copper element brings water to a boil.
At sea-level, the boiling temperature is 212°F. The boiling
temperature can be as low as 198°F at higher elevations, resulting
in cooler brewing temperatures. Rest assured, the brewer is still
making great co ee!
Minimum Brew Volume
We recommend brewing no less than 4 cups (16 oz.) in all 8- to
10-cup brewers.
2
Tbsp
6oz
XXXXX
XXXX XXXXX
SAMPLE
Gerard Clement Smit
Founder and Designer
moccamaster.com
Recyclable, Repairable, Sustainable,
Cleanable, BPA/BPS/BPF and Phthalate Free
Meets ECBC and SCA
GOLDEN CUP
Brewing Standards for 4T’s:
Industry-Leading
5-Year Warranty
Handmade in
the Netherlands
TEMPERATURE
Brews at 196°-205°F
Holds at 175°-185°F
TIME
Full carafe in 4 to 6 minutes
TURBULENCE
Creates perfect bloom and
even extraction
TOTAL DISSOLVED
SOLIDS TDS
Solubles between 18-22%
We’re so glad you’ve joined the Moccamaster family. We
believe your new Moccamaster co ee brewer will give you
the best co ee brewing experience available. Our consistent
quality is the result of innovative engineering driven by a
passion for good co ee. From our copper heating element to
the shape of our brew basket, every thoughtfully designed
component of the Moccamaster works together to brew
delicious co ee to industry standards every time.
Since 1968, when founder Gerard Clement Smit designed
the fi rst Moccamaster co ee brewer, every Moccamaster has
been handmade and tested in our factory in the Netherlands.
Our brewers are energy-e cient, long-lasting, and
recyclable. We are committed to providing our customers with
superior service, so you can be sure that your Moccamaster
experience will be exceptional for years to come.
Welcome, and thank you for your purchase!
All Moccamaster co ee brewers are certifi ed to brew to the strict standards
of the European Co ee Brewing Center (ECBC) and the Specialty Co ee
Association (SCA); certifi cations awarded only after extensive and rigorous
quality control and laboratory testing.
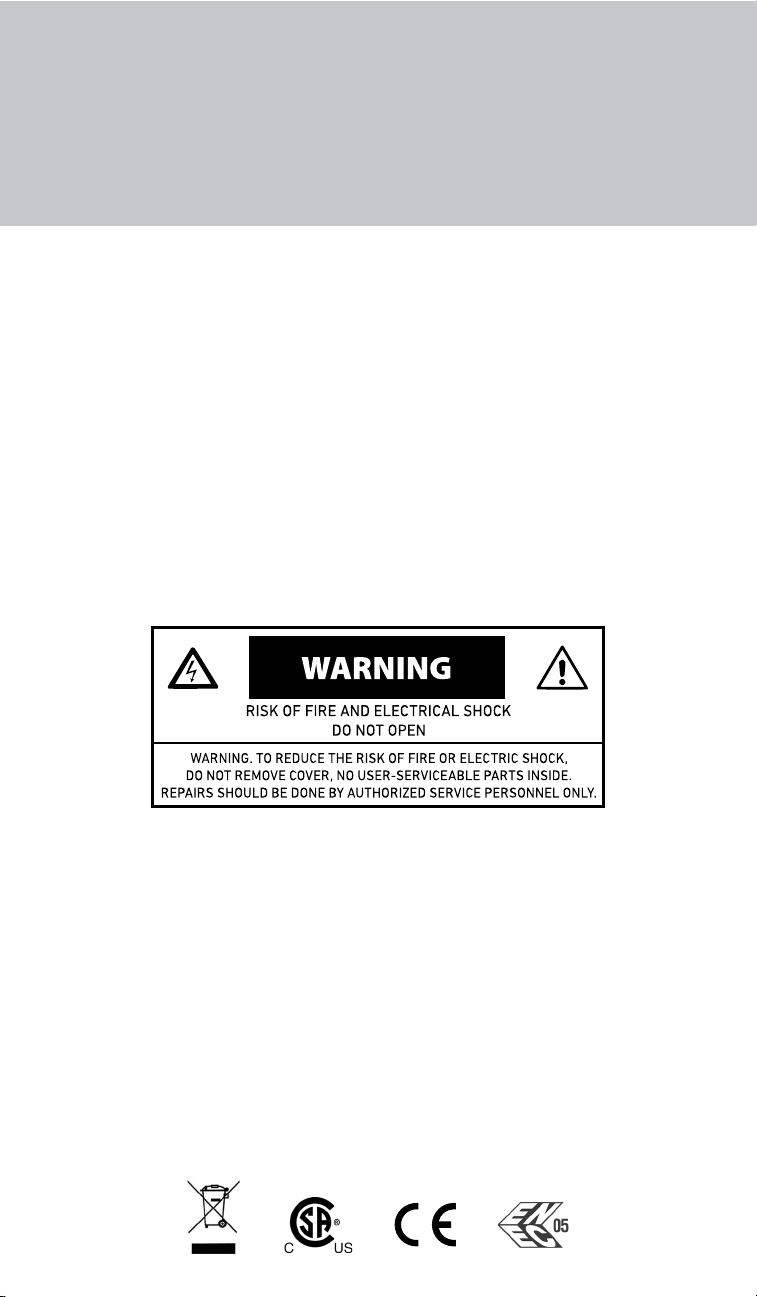