Loading ...
Loading ...
Loading ...

11
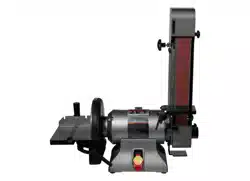
6.6 Sanding tool rest
Loosen screw (A, Figure 6-3) with 6mm hex wrench
and lower sanding arm to horizontal position.
Install tool rest as shown in Figure 6-3, using a 6mm
hex wrench.
Note: The tool rest can remain installed when not in
use. Simply adjust it outward to allow opening and
closing of drive wheel cover. Adjust it inward before
raising arm to vertical position.
Figure 6-3: Sanding tool rest
6.7 Dust port
Install dust port (B, Figure 6-3) over exhaust hole in
sanding arm, with three screws.
It is recommended that a dust collection system
designed for metal dust and shavings be connected
to the two ports on both ends of the machine, using
2-1/2” inside-diameter hose with hose clamp (not
provided). An accessory hose kit is available from
JET; see sect. 11.0.
6.8 Installing sanding disc
1. Remove guard covering lower portion of disc.
2. Peel back about 1/2 of the backing on sanding
disc to expose the adhesive.
3. Carefully position upper part of sanding disc to
the machine disc, matching its outer edge with
that of the machine disc. Continue peeling away
the remainder of the backing as you work
downward to remove any entrapped air,
pressing the sanding disc to the machine’s disc.
4. Reinstall lower guard.
6.9 Installing disc table
Install disc table with two handles and flat washers
(see Figure 6-4). Loosen handles to tilt table
downward. Tighten handles before operating.
To avoid trapping the work or
fingers between table and sanding disc, the
table edge must be positioned 1/16-inch or less
from sanding disc.
Position table at 90° to disc, and check distance
between table edge and sanding disc. If gap is
greater than 1/16-inch, adjust as follows:
1. Look through top access hole and rotate disc
until set screw appears.
2. Insert provided 3mm hex wrench through hole
to loosen set screw. See Figure 6-4.
3. Bump disc toward the table to achieve 1/16-inch
gap. (Remove lower guard if needed.)
4. Tighten set screw. (Reinstall lower guard if
removed.)
Figure 6-4: disc table
6.10 Miter gauge
Insert the miter gauge bar into the end of the disc
table slot. Loosen handle to rotate gauge to desired
angle shown on scale. Always tighten handle before
operating.
If precise angles are needed, verify the miter gauge
setting by placing an angle measuring device
against miter gauge and sanding disc.
7.0 Electrical connections
Electrical connections should
be made by a qualified electrician in compliance
with all relevant codes. This tool must be
properly grounded. Failure to comply may cause
serious or fatal injury.
The IBDG Belt and Disc Sander is prewired for 115V
single phase power, and is supplied with a plug
designed for use on a circuit with a grounded outlet
that looks like the one pictured in A, Figure 7-1. The
sander may also be used with 230V single phase
input power, see sect. 7.3 for instructions.
Before connecting to power source, be sure switch
is in off position.
Loading ...
Loading ...
Loading ...