Loading ...
Loading ...
Loading ...
7. 8.
HOW TO MAKE YOUR FIRST POT OF COFFEE
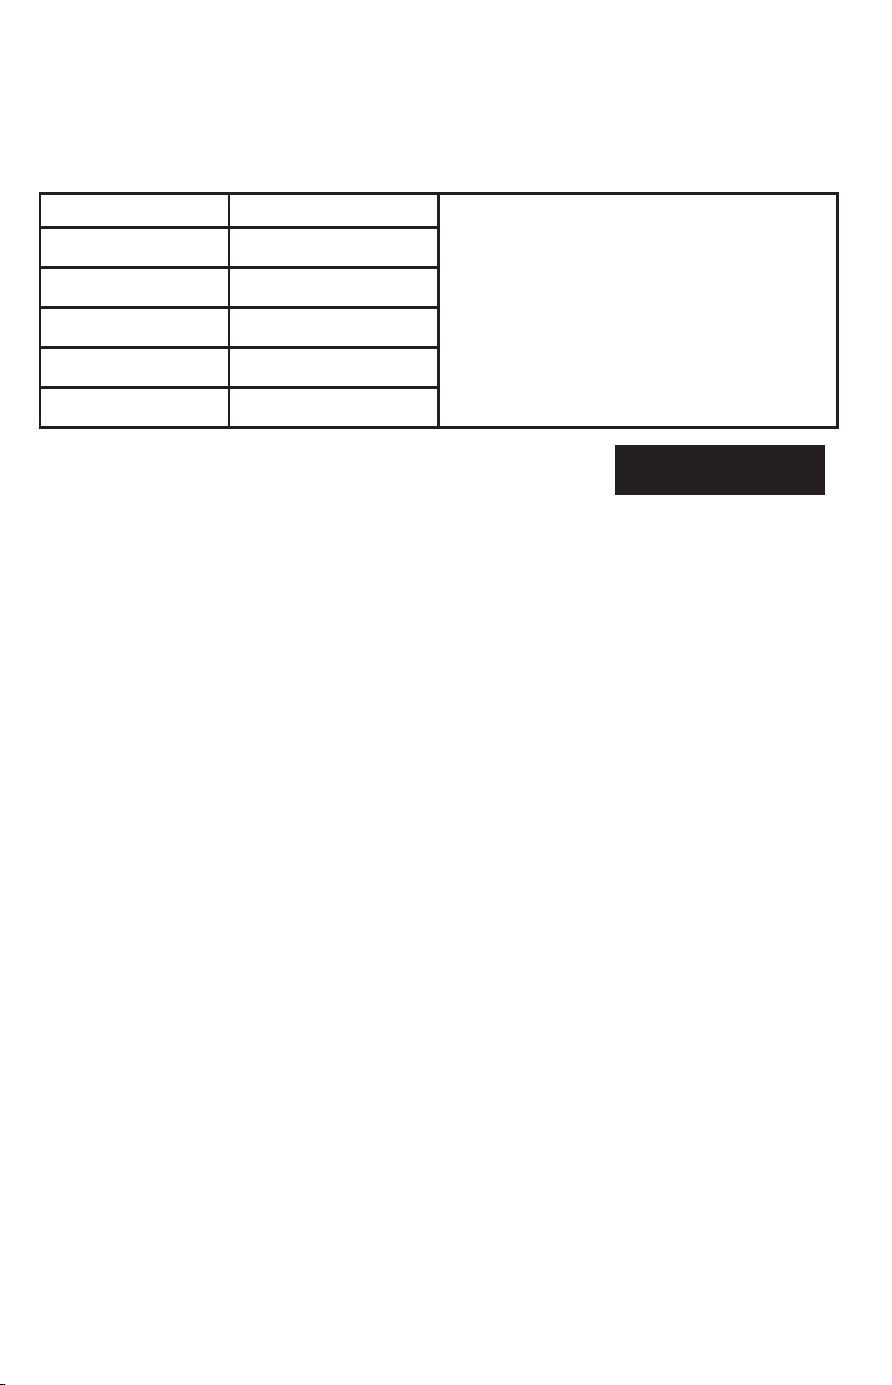
Suggested Coffee Measurement Chart:
For best results, brew 4 or more cups of coffee.
Water To Brew Ground Coffee
1 level tablespoon (tbsp) = 5 gr./0.17
oz.
1 cup = 5 . oz. of brewed coffee
Use more or less coffee to suit your
taste.
12 cups 12 tbs.
10 cups 10 tbs.
8 cups 8 tbs.
6 cups 6 tbs.
4 cups 4 tbs.
*Using ne coffee or decaf may cause overow.
1. Fill the carafe with fresh cold water to the desired
level. One Mr. Coffee “cup” is equivalent to 5 uid ounces. Pour into Water
Reservoir.
NOTE: Some water will be absorbed into the coffee grounds and water
lter during the brewing process.
2. Insert and line the brew basket with a standard basket-style paper lter
(sold separately) or reusable lter (if included).
3. Referencing the chart above, scoop the equivalent amount of coffee
grounds into the lter using a tablespoon.
4. Close the lid.
5. You are ready to press Brew Now!
6. The coffeemaker will beep when brewing is complete.
7. Enjoy fresh coffee every time!
HOW TO USE THE STRONG BREW FUNCTION
1. To enjoy a richer and bolder cup of coffee, follow steps 1 – 4 in the “How
to make your rst pot of coffee” section.
2. Press the STRONG button once.
3. The STRONG white LED light will turn on.
4. Press Brew Now
5. The coffeemaker will beep when brewing is complete.
6. Enjoy!
GETTING STARTED
Unpack your Coffeemaker
1. Unpack your coffeemaker and remove plastic bags, cartons and any tape
on the unit.
WARNING: KEEP PLASTIC BAGS AWAY FROM CHILDREN.
Clean Coffeemaker Before Use
Just follow these simple steps:
1. Wash the carafe, carafe lid, and the brew basket in a mixture of mild
detergent and water. Rinse each thoroughly.
2. Replace all the parts and close the lid. Then, run a brew cycle by adding
only water to the coffeemaker. After adding water, press Brew Now.
3. When brewing is complete, turn your coffeemaker off. Turn your
coffeemaker off by pressing the Brew Now button again.
4. Discard the water in the carafe and rinse the carafe, carafe lid, and brew
basket.
NOTE: Carafe and brew basket are top rack dishwasher safe. Water
Filtration System is NOT!
Setting the Clock
Plug in the coffeemaker and set the current time using the hour and minute
buttons. 5 Seconds of inactivity will set clock at time selected.
Water Filtration System
Using the Mr. Coffee® carbon-based water lter (sold separately, unless
included) during the brewing process helps remove up to 97% of the chlorine
from the water and improves the taste of your coffee. To use the water ltration
system in your Mr. Coffee® Coffeemaker, please follow these steps:
1. Align the red indicator on the frame to the letter that corresponds with the
month that you are using the disk for the rst time. This serves to remind
you to change the disk every month (approx. 50 brewing cycles). To
change the disk, remove the used disk, insert new disk into the frame.
NOTE: For optimum results, use the water ltration system with a
permanent lter.
2. Rinse the water lter in fresh water before use.
3. Position the lter on top of the brew basket, and brew according to your
particular model’s brewing instructions.
4. When you are done brewing your coffee, rinse the water lter with fresh
water. Do not put your water lter in the dishwasher.
Bonus: For a BOLDER
CUP, use heaping TBS
BVMC-MMX23_BVMC-MMX26_BVMC-MSX23-NLY_20ESM1.indd 7-8BVMC-MMX23_BVMC-MMX26_BVMC-MSX23-NLY_20ESM1.indd 7-8 3/19/20 10:043/19/20 10:04
Loading ...
Loading ...
Loading ...