Loading ...
Loading ...
Loading ...

EN
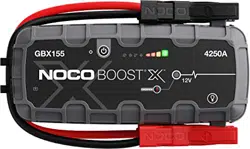
Auto Charger.
The most eective way to charge GBX155 is by using The NOCO Auto Charger (not included).
NOTE: The vehicle must be On / Running for the Auto Charger to Fast Charge the unit.
Power Source.
When charging USB devices, it is important to power on the GBX155 unit first and then plug in the USB device being charged.
NOTE: If the GBX155 unit is not powered on first, it will drain power from the USB device, if it is DRP compatible. To charge GBX155 with a DRP compatible
device (e.g phone, laptop, power bank) ensure GBX155 is powered OFF before making a cable connection between GBX155 and the DRP device.
Step 2: Connect to the Battery.
Carefully read and understand the vehicle owner’s manual on specific precautions and recommended methods for jump starting the vehicle. Make sure to
determine the voltage and chemistry of the battery by referring to your battery owner’s manual prior to using this product. The GBX155 is for jump starting
12-volt lead-acid batteries only. Before connecting to the battery, verify that you have a 12-volt lead-acid battery. The GBX155 is not suitable for any other type
of battery. Identify the correct polarity of the battery terminals on the battery. The positive battery terminal is typically marked by these letters or symbol (POS,P,+).
The negative battery terminal is typically marked by these letters or symbol (NEG,N,-). Do not make any connections to the carburetor, fuel lines, or thin, sheet
metal parts. The below instructions are for a negative ground system (most common). If your vehicle is a positive ground system (very uncommon), follow the
below instructions in reverse order.
1. Connect the positive (red) battery clamp to the positive (POS,P,+) battery terminal and the negative (black) battery clamp to the negative (NEG,N,-) battery
terminal or vehicle chassis.
Step 3: Jump Starting.
1. Make sure all of the vehicle’s power loads (headlights, radio, air conditioning, etc.) are turned o before attempting to jump start the vehicle.
2. Press the power button to begin jump starting, and all LEDs will flash once. If you are properly connected to the battery, the white boost LED will illuminate and
the battery charge LEDs will chase. A 60-second timeout countdown will begin as soon as a battery is detected.
3. Try starting the vehicle. Most vehicles will immediately start. If the vehicle does not start right away, wait 20-30 seconds and try again. After the 60-second
timeout is complete, the unit must be powered o, then back on, to initiate a new jump-start sequence. Do not attempt more than five (5) consecutive jump
starts within a fifteen (15) minute period. Allow the GBX155 to rest for fifteen (15) minutes before attempting to jump start the vehicle again.
4. Once you have started your vehicle, power o the unit, disconnect the battery clamps, and remove the GBX155.
Recharge Time: Charger Rating:
2.7h
60W
Auto Charger.
Loading ...
Loading ...
Loading ...