Loading ...
Loading ...
Loading ...
Owner’s Manual - RG/RADS Series
14
INSTALLATION INSTRUCTIONS
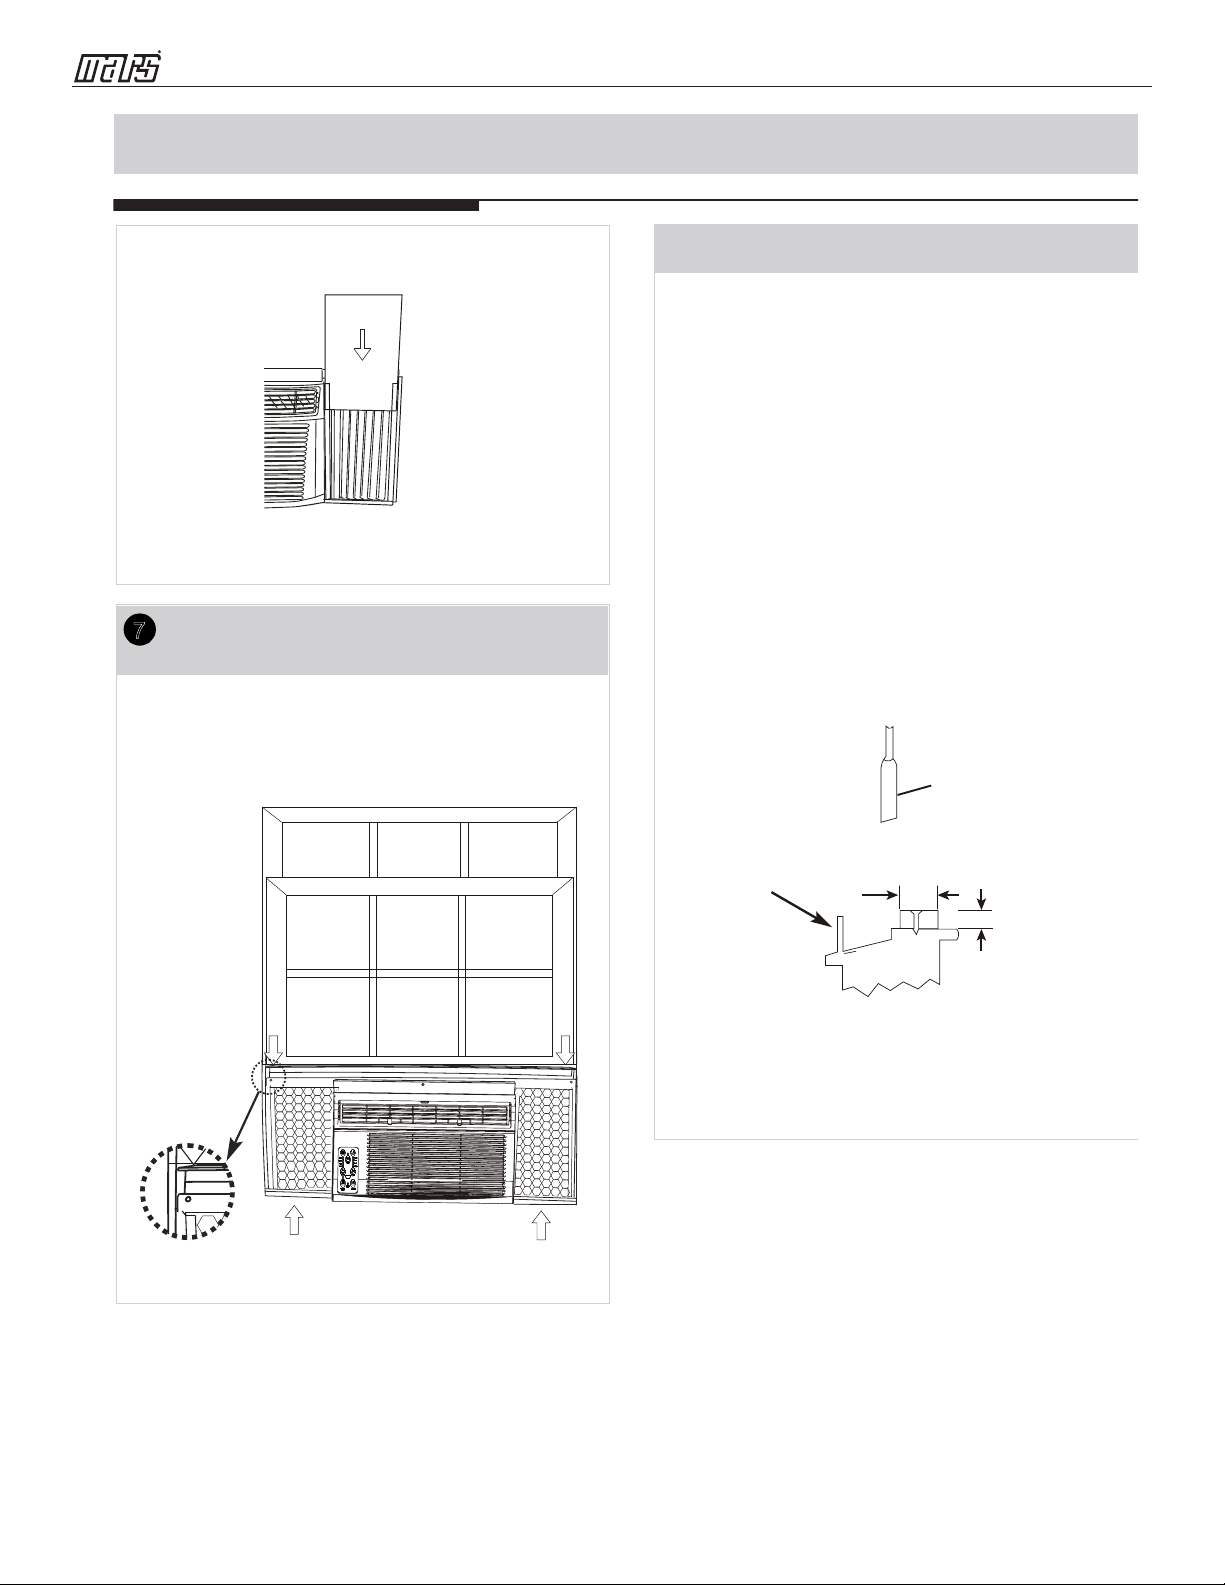
If AC is Blocked by Storm Window
Add wood as shown in Fig.15, or remove storm
window before air conditioner is installed.
If Storm Window Frame must remain, be sure the
drain holes or slots are not caulked or painted shut.
Accumulated Rain Water or Condensation must be
allowed to drain out.
Removing AC From Window
Turn AC off, and disconnect power cord.
Remove sash seal from between windows, and
unscrew safety sash lock.
Remove screws installed through frame and frame-
lock.
Remove the R1 Panel and close (slide) side panels
into frame.
Keeping a firm grip on air conditioner, raise sash
and carefully remove.
Be carefully not to spill any remaining water while
lifting unit from window. Store parts WITH air
conditioner.
Board
thickness
as required,
for proper
pitch to rear,
along entire
sill. Fasten
with nails or
screws.
Fig.15
Storm window
frame or other
obstruction.
SASH
1-1/2"min
(38 mm)
INSTALL WEATHER STRIPPING (only
applicable to Energy star models)
7
In order to minimize air leaks between the room air••
condit••oner and the window opening, trim the
weather
st••ipping •• ••••a proper length, peel off the
protective
backing and plug any gaps if needed
(Fig.14).
Fig.14
Step 4. Repeat on the other side.
Fig.13
Step 3. Slide the R1 insulation panel into the side
curtain, the side with pattern should fac•• the indoor••
side.(Fig.13).
Step 3. Slide the R1 insulation panel into the
side curtain, the side with pattern should face the
indoor side. (Fig.13).
In order to minimize air leaks between the room air
conditioner and the window opening, trim the weather
stripping to a proper length, peel off the protective
backing and plug any gaps if needed (Fig. 14).
Loading ...
Loading ...
Loading ...