Technology for life’s new rhythm
USER MANUAL
ELITE 10

A third-party certification according to ISO 14024
Say hello
to a more sustainable product
IT products are associated with a wide range of sustainability risks
throughout their life cycle. Human rights violations are common in the
factories. Harmful substances are used both in products and their
manufacture. Products can often have a short lifespan because of poor
ergonomics, low quality and when they are not able to be repaired or
upgraded.
This product is a better choice. It meets all the criteria in TCO Certified,
the world’s most comprehensive sustainability certification for IT
products. Thank you for making a responsible product choice, that help
drive progress towards a more sustainable future!
Criteria in TCO Certified have a life-cycle perspective and balance
environmental and social responsibility. Conformity is verified by
independent and approved verifiers that specialize in IT products, social
responsibility or other sustainability issues. Verification is done both
before and after the certificate is issued, covering the entire validity
period. The process also includes ensuring that corrective actions are
implemented in all cases of factory non-conformities. And last but not
least, to make sure that the certification and independent verification is
accurate, both TCO Certified and the verifiers are reviewed regularly.
Want to know more?
Read information about TCO Certified, full criteria documents, news and
updates at tcocertified.com. On the website you’ll also find our Product
Finder, which presents a complete, searchable listing of certified
products.
Toward sustainable IT products

© 2023 GN Audio A/S. All rights reserved. Jabra
®
is a
trademark of GN Audio A/S. The Bluetooth
®
word mark and
logos are registered trademarks owned by the Bluetooth
SIG, Inc. and any use of such marks by GN Audio A/S is under
license.
Declaration of Conformity can be found on
www.jabra.com/doc
Made in China
MODEL: OTE180R / OTE180L
/ CPB180
Rev A

4
ENGLISH
1. Welcome .........................................6
2. Overview ......................................... 7
2.1 Included accessories
2.2 Optional accessories
3. How to wear ...................................9
3.1 How to attach the EarGels
4. How to charge ............................ 11
4.1 Charging the earbuds
4.2 Fast charge the earbuds
4.3 Charging the charging case using USB
4.4 Charging the charging case using the Jabra
wireless charging pad
5. What the LEDs mean ............... 15
6. How to pair .................................. 17
6.1 Pairing with a mobile device
6.2 Swift Pair with Windows computer
6.3 Google Fast Pair with Android
TM
devices
7. How to use ................................. 20
7.1 Power the earbuds o/on
7.2 Music controls
7.3 Call controls
7.4 ANC, HearThrough and Voice assistant controls

5
ENGLISH
7.5 Advanced ANC
7.6 HearThrough
7.7 Sidetone
7.8 Automatic volume adjustment
7.9 Mono earbud use
7.10 Auto-pause music and calls
7.11 Sleep mode
7.12 Spatial Sound and Head Tracking
7.13 MyControls
7.14 Multiple call handling
7.15 Voice assistant
7.16 Audio notifications
7.17 Update firmware
7.18 Reset the earbuds
8. Applications and firmware up-
date ............................................... 37
8.1 Jabra Sound+
9. Support ........................................ 38
9.1 FAQ and technical specifications
9.2 How to care for your earbuds
9.3 Replacement accessories
9.4 Using replacement earbuds
9.5 Using a replacement charging case

6
ENGLISH
1. Welcome
Thank you for using the Jabra Elite 10. We hope
you will enjoy it!
Here are some key features you will benefit
from the Jabra Elite 10:
• Jabra ComfortFit relieves in-ear pressure for all-day
wearing
• Spatial Sound with Dolby Head Tracking for Dolby
Atmos* experience
• 10mm speakers for rich sound
• Up to 2x more noise cancellation with Jabra
Advanced ANC™**
• 6-mic call technology for crystal-clear calls
• Connect to 2 devices at once with Bluetooth
Multipoint
* Compatibility and availability may vary by device,
application, and content
** Compared to Jabra Elite 4
7
ENGLISH
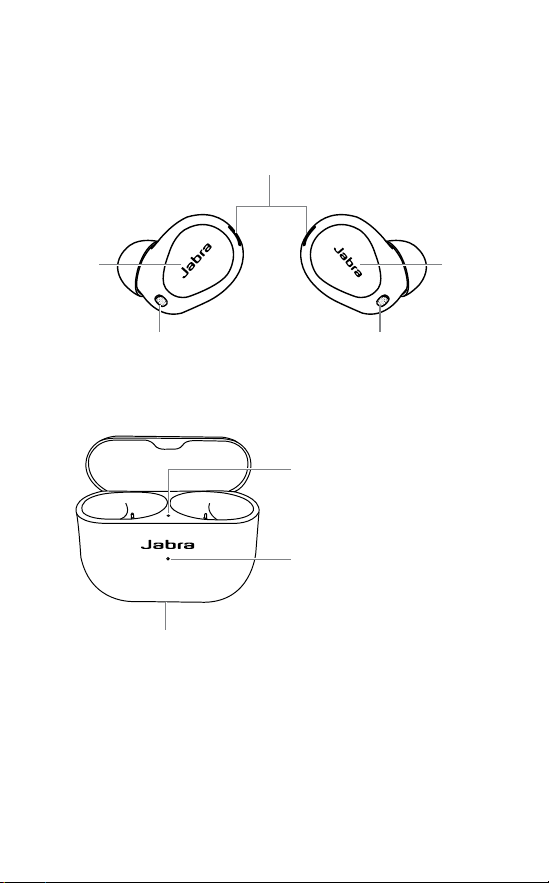
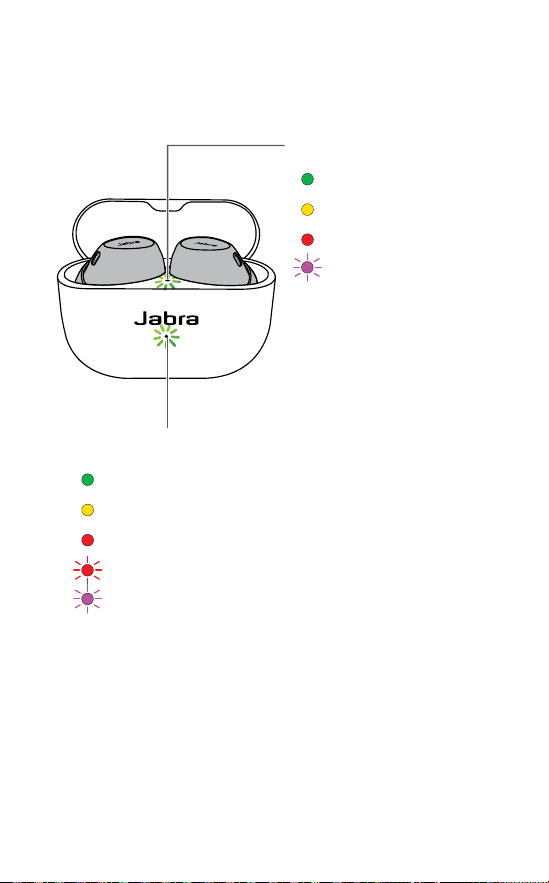
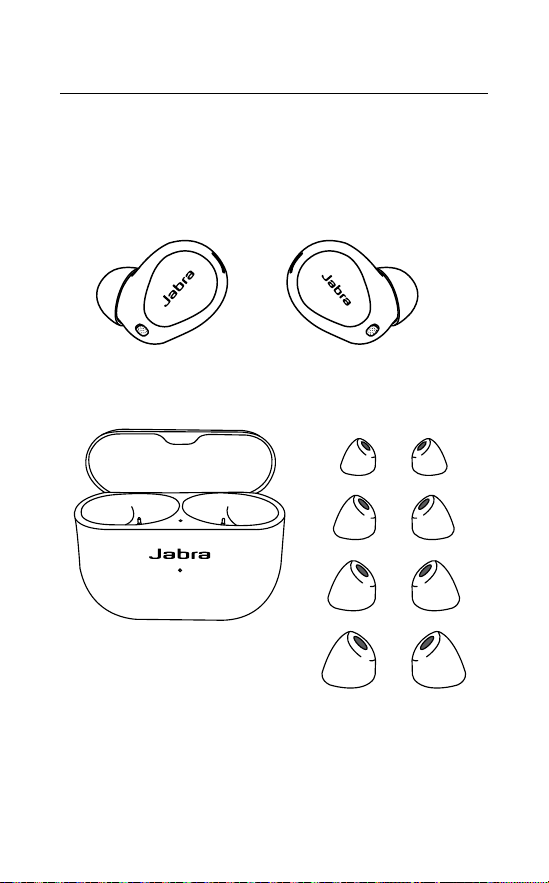
2. Overview
LEFT EARBUD RIGHT EARBUD
Microphones
Microphones Microphones
Left
button
Right
button
Wireless charging case
Charging port
Earbuds battery LED
Charging case battery LED
8
ENGLISH
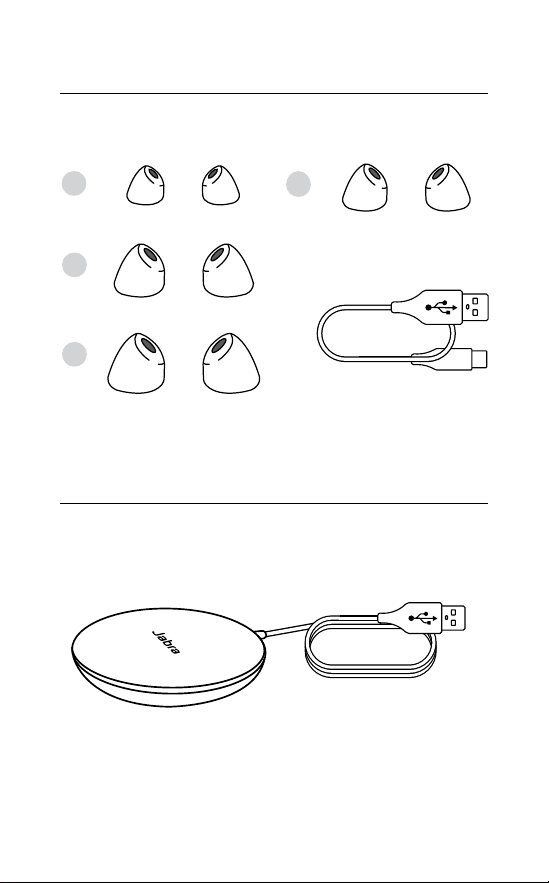
2.1 Included accessories
EarGels
L
XL
S
M
pre-mounted on
the earbuds
USB-C charging cable
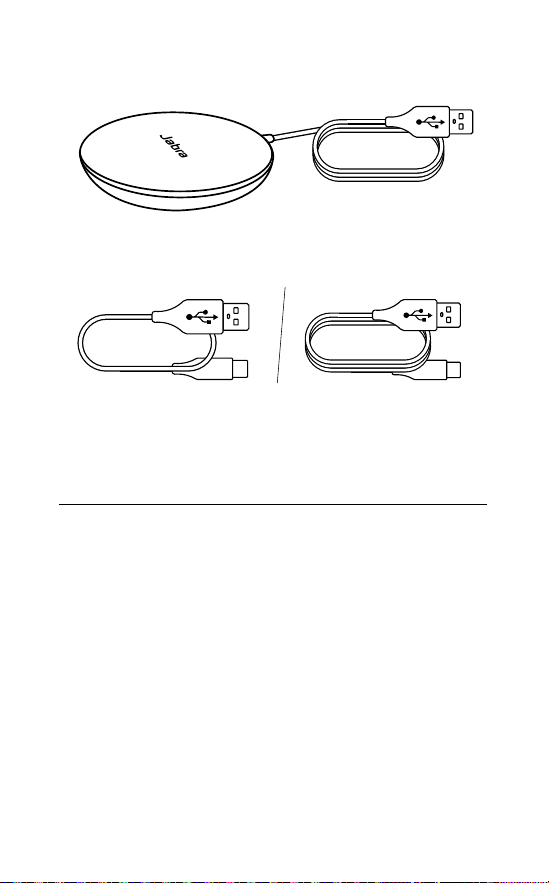
2.2 Optional accessories
Optional accessories are available at jabra.com/
accessories
Wireless charging pad
9
ENGLISH
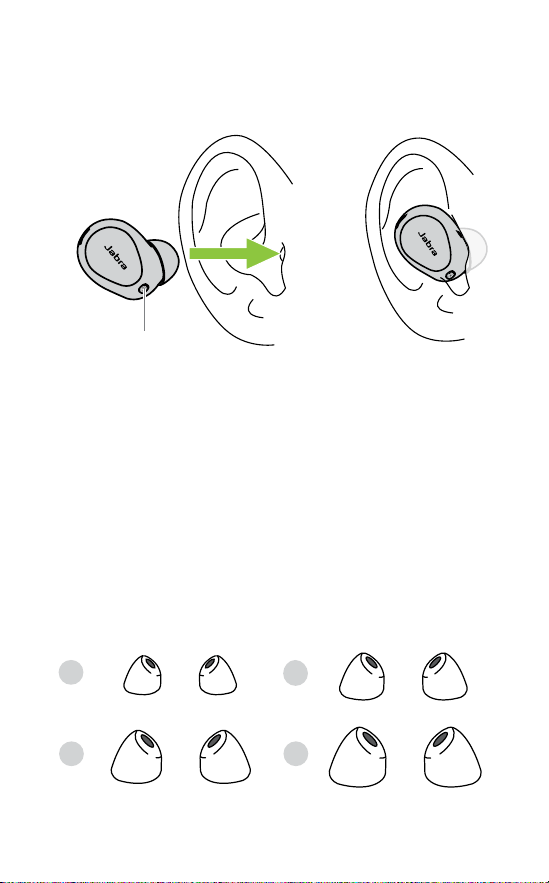
3. How to wear
Microphone
Insert each earbud into your ear and ensure the
microphones are pointed towards your mouth.
It is recommended to try all EarGel sizes with
sound and ANC on to find the right size for you.
Choose the EarGel size that feels comfortable
and that seals your ear canal to get the best
ANC and audio experience. The medium
EarGels are pre-mounted on the earbuds.
L XL
S
M
10
ENGLISH
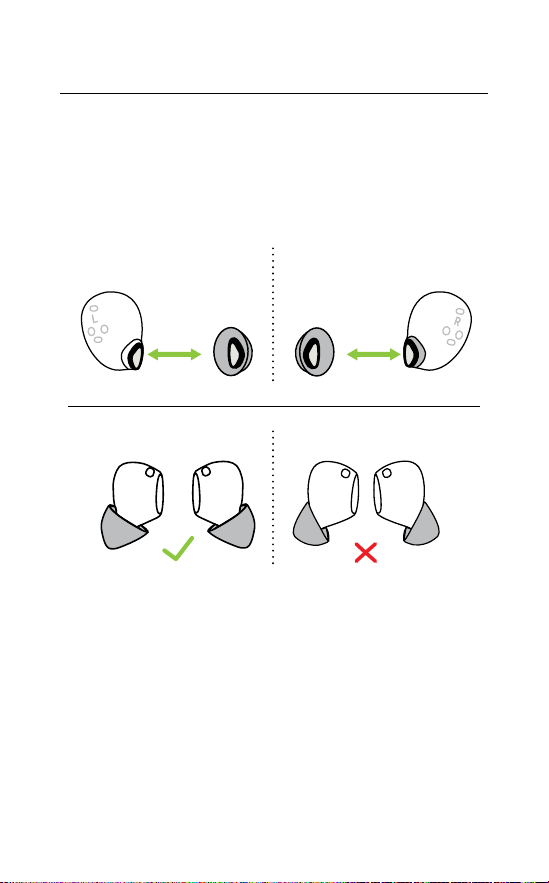
3.1 How to attach the EarGels
Align the triangle on the EarGel and earbud
and firmly press together. To confirm the
EarGel is attached correctly, refer to the
following images.
L R
L R
L R

11
ENGLISH
4. How to charge
Get up to 6 hours on a single charge when
playing music with ANC on, with a total charge
of up to 27 hours with the charging case. If you
use the earbuds without ANC and HearThrough,
you’ll get even more battery, with up to 8 hours
in the earbuds when playing music, and a total
of 36 hours with the charging case.
4.1 Charging the earbuds
Place the earbuds in the charging case and
close the lid. It takes up to 3 hours to fully
recharge the earbuds.
When the charging case is opened, the LED
inside the charging case will light up red, yellow
or green to indicate the battery status of the
earbuds. The LED on the front of the charging
case indicates the battery status of the
charging case.

12
ENGLISH
4.2 Fast charge the earbuds
When the earbuds are at low battery, placing
them in the charging case for 5 minutes will fast
charge the earbuds and give up to 1 hour of
music time. Fast charging the earbuds requires
that the charging case has a minimum of 30%
battery.
You can see the current battery level of the
earbuds and charging case using the Jabra
Sound+ app when the earbuds are connected.
13
ENGLISH
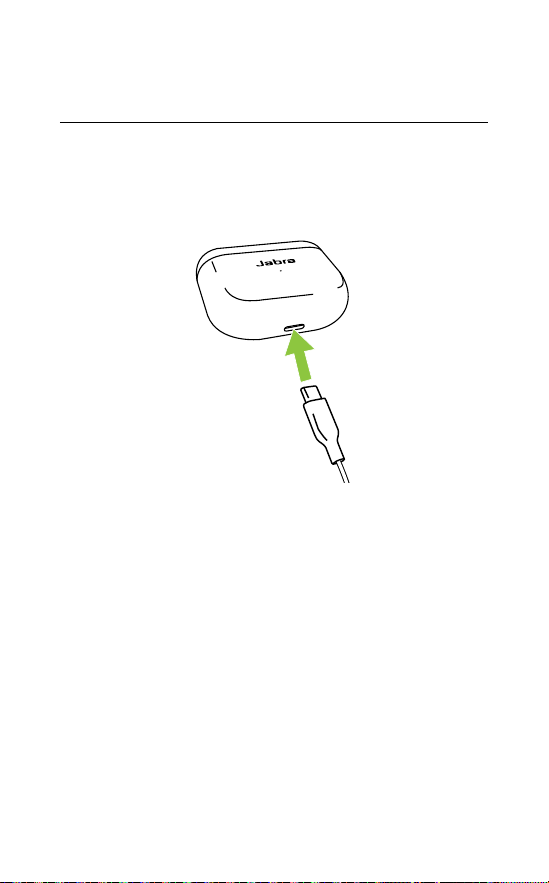
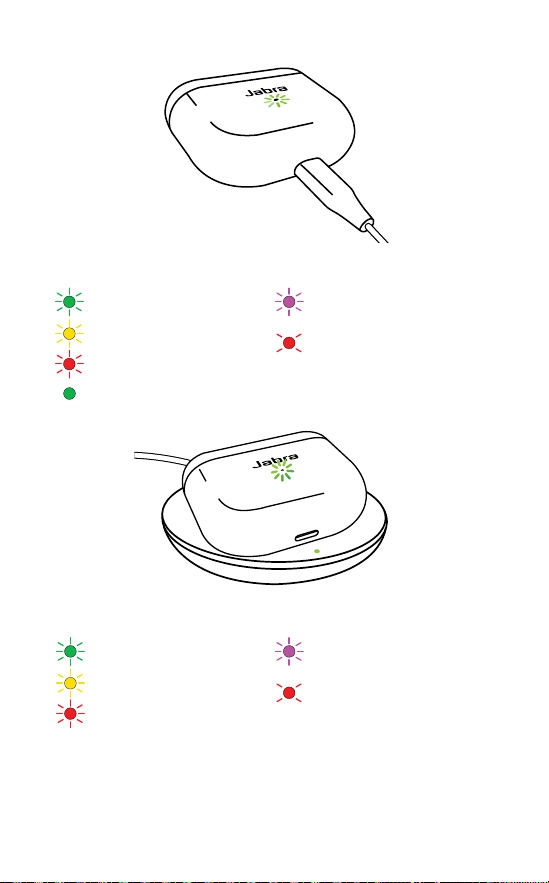
4.3 Charging the charging case
using USB
It takes up to 3 hours to fully charge the
earbuds and the charging case using a USB-C
charging cable.
USB-C
The charging case uses the standard USB
voltage of 5V +- 0.25V. It is not recommended
to charge the earbuds using a power supply
with a higher voltage.
14
ENGLISH
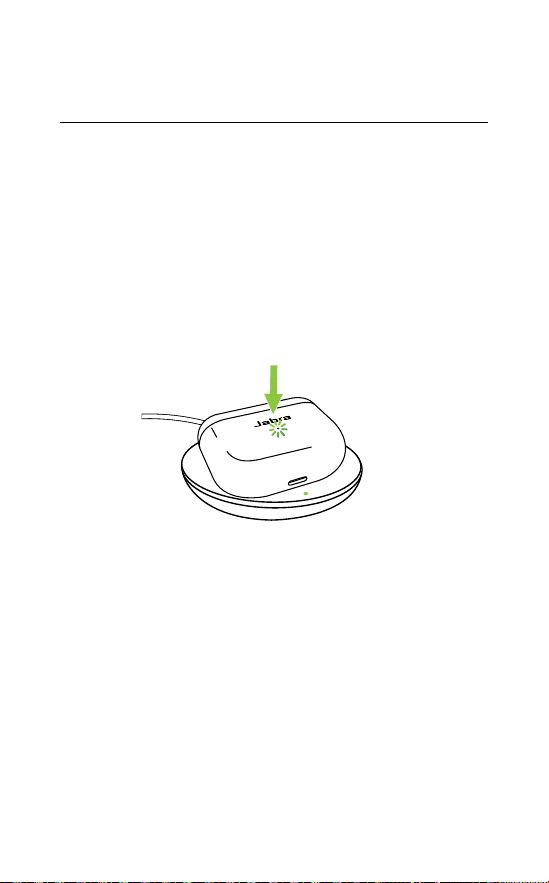
4.4 Charging the charging case using
the Jabra wireless charging pad
Place the charging case in the center of the
Jabra wireless charging pad. The LED on the
charging case will flash to indicate the charging
case is placed correctly. It takes up to 3 hours
to fully charge the earbuds and the charging
case.
PLACE IN CENTER
15
ENGLISH
5. What the LEDs mean
High battery
Medium battery
Low battery
Critically low battery (earbuds not charging)
Firmware update
CHARGING CASE STATUS LED
EARBUD STATUS LED
High battery
Medium battery
Low battery
Resetting
16
ENGLISH
High battery
Medium battery
Low battery
Fully charged
High battery
Medium battery
Low battery
Firmware updating
Firmware update error
(see Section 7.16)
Firmware updating
Firmware update error
(see Section 7.16)
CHARGING CASE STATUS WITH USB CABLE
CHARGING CASE STATUS WITH WIRELESS CHARGING PAD
When fully charged, the LEDs on the charging case and
wireless charging pad will turn off.
17
ENGLISH
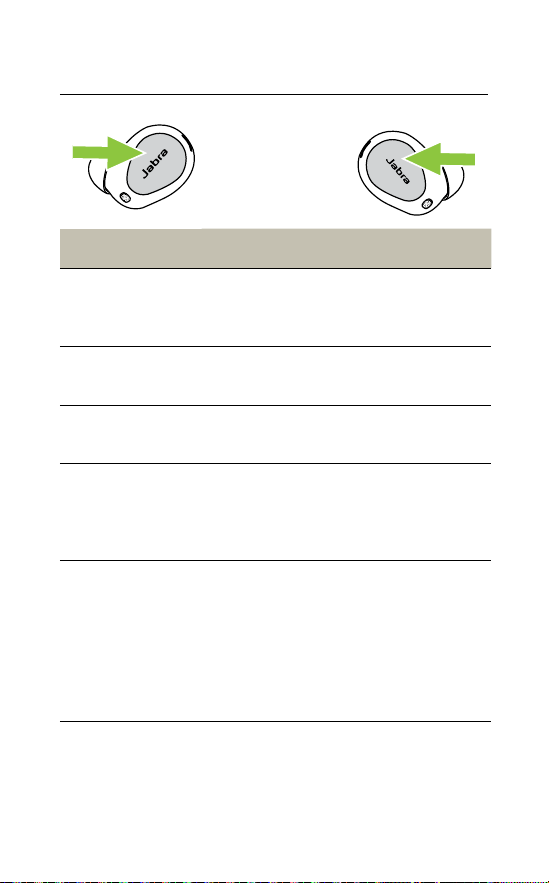
6. How to pair
6.1 Pairing with a mobile device
3 Sec
1. Power on the earbuds by removing them
from the charging case. Alternatively, press
and hold (2 sec) the Left and Right buttons
simultaneously to power the earbuds on.
2. Wear the earbuds and press and hold (3 sec)
the Left and Right buttons simultaneously
until you hear the pairing notification. The
earbuds will now be ready to pair.
3. Follow the voice-guided pairing instructions
to pair with your mobile device.

18
ENGLISH
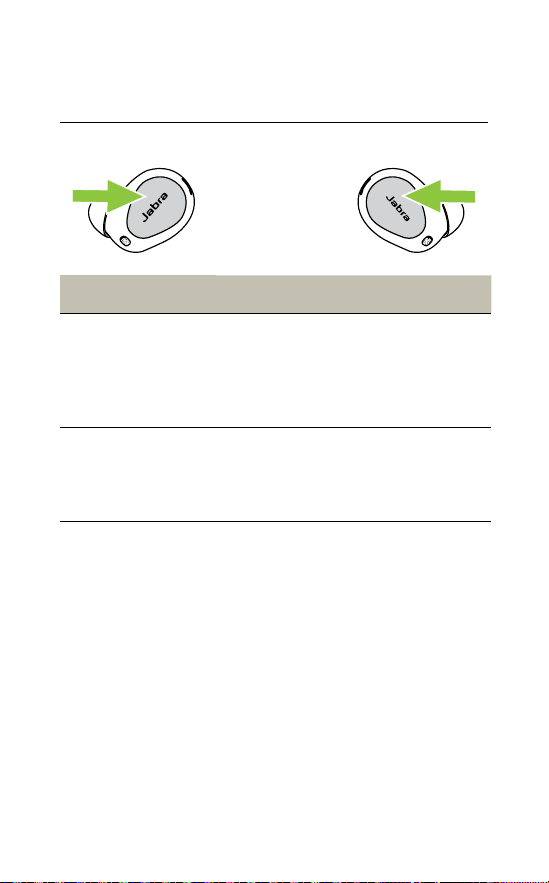
6.2 Swift Pair with Windows computer
1. Power on the earbuds by removing them
from the charging case. Alternatively, press
and hold (2 sec) the Left and Right buttons
to power the earbuds on.
2. Wear the earbuds and press and hold (3 sec)
the Left and Right buttons simultaneously
until you hear the pairing notification. The
earbuds will now be ready to pair with your
Windows computer.
3. Place the earbuds close to your Windows
computer (20cm/8in) and select Connect on
the Windows notification to start pairing.
Note: Swift Pair is available on Windows version 10 and
later. It may not be enabled by default.

19
ENGLISH
6.3 Google Fast Pair with Android
TM
devices
Ensure the version of your Android
TM
device is
6.0 or higher.
1. Power on the earbuds by removing them
from the charging case. Alternatively, press
and hold (2 sec) the Left and Right buttons
to power the earbuds on.
2. Wear the earbuds and press and hold (3 sec)
the Left and Right buttons simultaneously
until you hear the pairing notification. The
earbuds will now be ready to pair with your
Android
TM
device.
3. Place the earbuds close to your Android
TM
device.
4. Select Connect on the notification to start
pairing. A notification will tell you that the
pairing is sucessful.
* Google and Android are trademarks of Google LLC.
20
ENGLISH
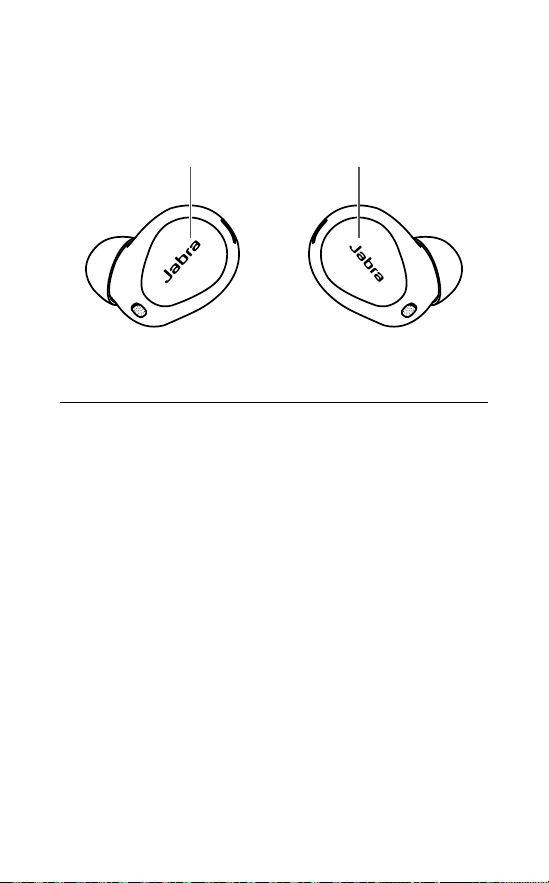
7. How to use
Left button
Right button
7.1 Power the earbuds o/on
To power off the earbuds, place them in the
charging case.
To power on the earbuds, remove them from
the charging case.
Alternatively, the earbuds can be manually
powered off by pressing the Left and Right
buttons on the earbuds simultaneously. To
power on, press and hold (2 sec) the Left or
Right buttons until you hear a tone in each
earbud.
21
ENGLISH
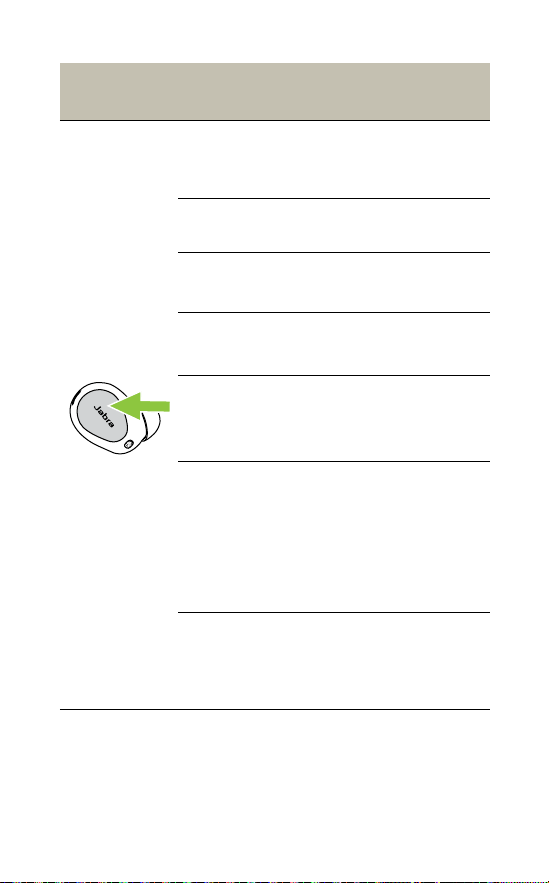
7. 2 Music controls
Left earbud Function Right earbud
Play/pause
music
Press the Right
button when not
on a call
Volume up
Press and hold
the Right button
Press and hold
the Left button
Volume down
Next track
Double-press
the Right button
when listening to
music
Restart track or
previous track
Triple-press the
Right button
when listening to
music
Repeat to skip to
the previous track
Most functions can be reassigned using
MyControls in the Jabra Sound+ app.

22
ENGLISH
7. 3 Call controls
Left earbud Function Right earbud
Press the Left or
Right button
Answer call
Press the Left or
Right button
Double-press
the Left or Right
button
End/Reject call
Double-press
the Left or Right
button
Press the Left or
Right button
Mute/unmute
microphone
Press the Left or
Right button
Volume up
Press and hold
the Right button
Press and hold the
Left button
Volume down
Most functions can be reassigned using
MyControls in the Jabra Sound+ app.
23
ENGLISH
7.4 ANC, HearThrough and Voice
assistant controls
Left earbud Function Right earbud
Press the Left
button when not
on a call
Switch
between
HearThrough
and ANC
Double-press the
Left button when
not on a call
Activate Voice
assistant
Most functions can be reassigned using
MyControls in the Jabra Sound+ app.
To include Off as a Sound mode option, go to
Headset settings > General in the Jabra Sound+
app and select HearThrough, ANC & Off option.
24
ENGLISH
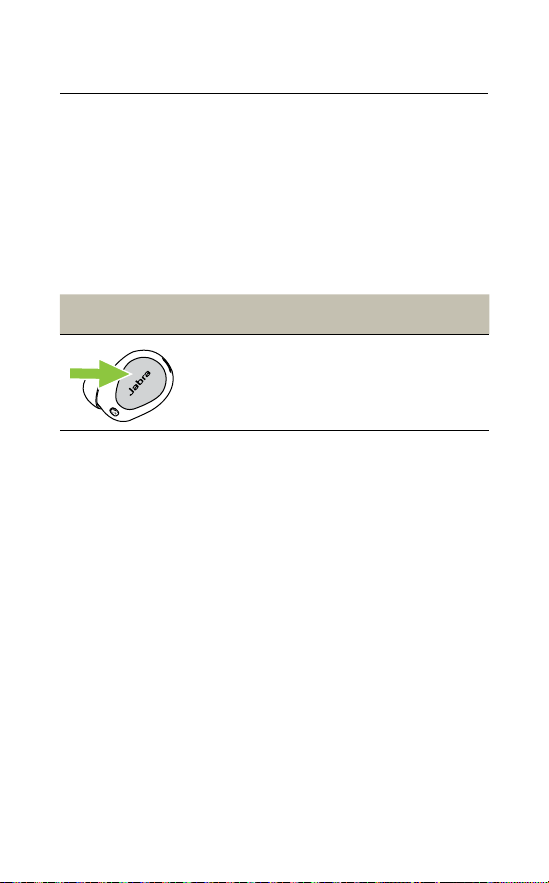
7.5 Advanced ANC
Advanced ANC automatically reduces the
level of surrounding noise, adapts depending
on the shape of your ear and placement of
the earbuds, and adjusts accordingly in quiet,
loud or windy environments to provide an
optimal ANC experience.
Left button ANC
Switch
between
HearThrough
and ANC
Press the Left
button when not on
a call
ANC sound mode can also be turned off using
the Jabra Sound+ app.

25
ENGLISH
7.6 HearThrough
Hearthrough lets you hear surrounding sounds
through the earbuds while wearing them. The
earbuds automatically adapt in windy
environments to ensure an optimal
HearThrough experience.
Left button HearThrough
Switch between
HearThrough
and ANC
Press the Left button
when not on a call
HearThrough sound mode can also be adjusted
and turned off using the Jabra Sound+ app.

26
ENGLISH
7.7 Sidetone
Sidetone enables you to hear your own voice
when you are on a call. The benefit of Sidetone
is that it enables you to determine how loud
you are speaking.
The earbuds automatically adapt in windy
environments to ensure an optimal Sidetone
experience.
Sidetone is on by default during calls and can
be turned off/on and adjusted using the Jabra
Sound+ app.
By default, Sidetone cannot be turned off/on
using the earbuds. However, it can be added to
the earbuds using MyControls in the Jabra
Sound+ app.
7.8 Automatic volume adjustment
During a call, the volume will gradually increase
when going from a quiet environment to a
noisy environment. The volume adjustment
happens automatically in the earbuds.
27
ENGLISH
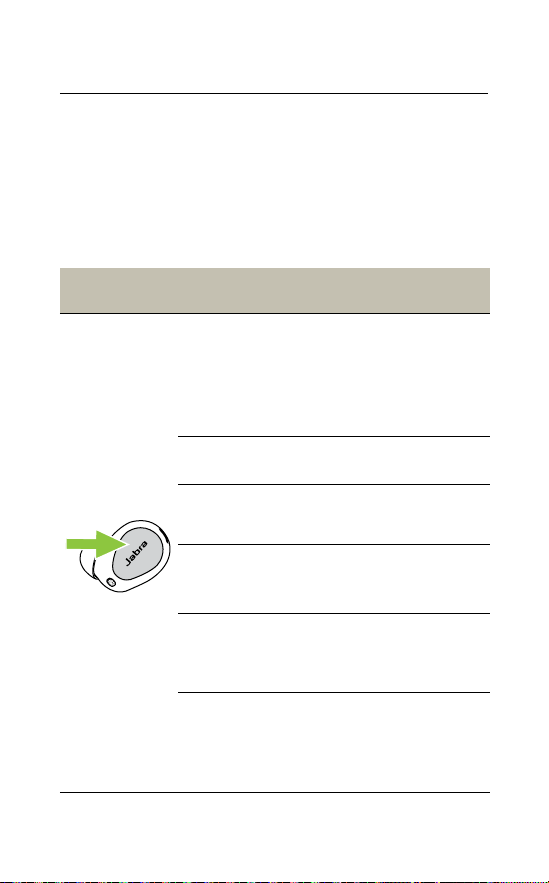
7.9 Mono earbud use
The right or left earbud can be used individually
for music playback or for calls. To activate
mono earbud mode, place the unused earbud
into the charging case. The earbud that is worn
will automatically switch to HearThrough.
Left button Left earbud only
Switch
between
HearThrough
(default) and
ANC
Press the Left button
when listening to
music
Answer call Press the Left button
End/Reject
call
Double-press the
Left button
Mute/unmute
microphone
Press the Left button
when on a call
Activate Voice
assistant
Double-press the Left
button when not on
a call
Adjust volume
Use the volume
controls on the
connected mobile
device
28
ENGLISH
Right button Right earbud only
Play/pause
music
Press the Right button
when listening to
music
Answer call Press the Right button
End/Reject
call
Double-press the
Right button
Mute/unmute
microphone
Press the Right button
when on a call
Next track
Double-press the
Right button when
listening to music
Restart track
or previous
track
Triple-press the Right
button when listening
to music
Repeat to skip to the
previous track
Adjust volume
Use the volume
controls on the
connected mobile
device
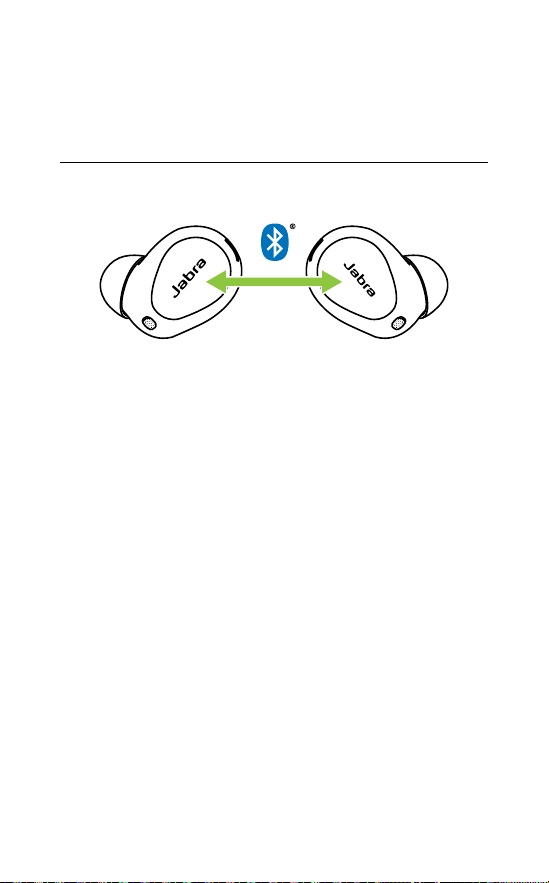
The left and right earbuds will automatically
relink when both are placed in your ear and
switch back to the previous sound mode used.
29
ENGLISH
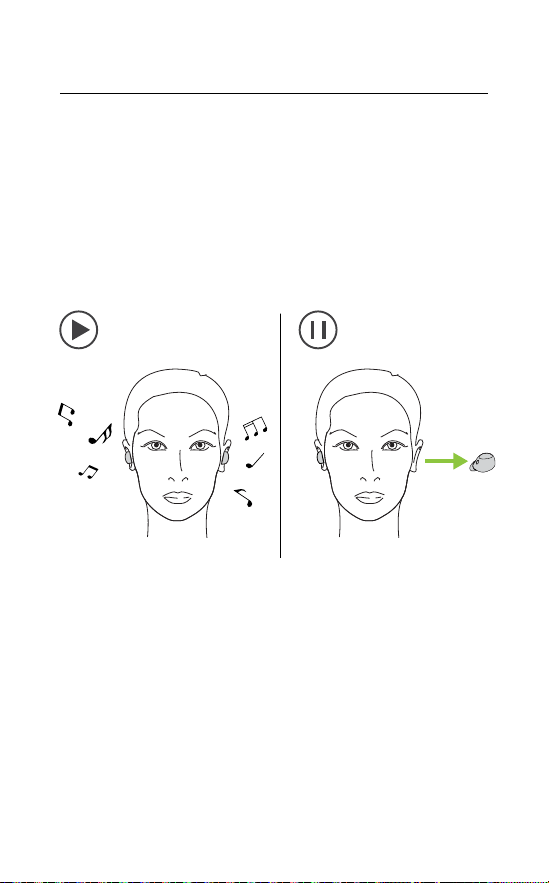
7.10 Auto-pause music and calls
When one of the earbuds is removed from your
ear, music will automatically pause.
To resume the music, return the earbud to your
ear within 60 seconds. After 60 seconds, the
music can be manually resumed by pressing
the Right button.
Auto-pause music and calls can be turned on/
off in the Jabra Sound+ app.

30
ENGLISH
7.11 Sleep mode
To conserve battery, the earbuds will
automatically power off when they are
disconnected from your mobile device for 15
minutes and are not in the charging case, or
when not wearing them and they have been
inactive for 30 minutes.
To exit sleep mode, press and hold (2 sec) the
button on each earbud. Alternatively, place the
earbuds in the charging case and then remove
them from the charging case.
Sleep mode can be configured in the Jabra
Sound+ app.

31
ENGLISH
7.12 Spatial Sound and Head Tracking
Spatial Sound uses virtual surround sound in
your earbuds to optimize your audio for the
most immersive, lifelike sound experience.
Spatial Sound is off by default and it can be
configured using the Jabra Sound+ app.
Head Tracking recalibrates the soundscape
depending on your head movements to
simulate a 360° audio experience.
Head Tracking can be turned on/off using the
Jabra Sound+ app.

32
ENGLISH
7.13 MyControls
MyControls is a feature in the Jabra Sound+
app that enables you to reassign most functions
to each of the earbud buttons, offering you the
flexibility to configure the earbuds precisely to
your personal preference.
By default, the functions listed below cannot
be controlled using the earbuds; however,
these functions can be added to the earbuds
using MyControls in the Jabra Sound+ app.
• Sidetone on/off
• Hold current call and answer incoming call
• Switch between held call and current call

33
ENGLISH
7.14 Multiple call handling
The earbuds can accept and handle multiple
calls at the same time.
Multiple call handling
End current call and
answer incoming call
Press the
Left or Right
button
Reject incoming call,
when on a call
Double-press
the Left or Right
button
The advanced multiple call functions listed
below can be added to the earbuds using
MyControls in the Jabra Sound+ app.
• Hold current call and answer incoming call
• Switch between held call and current call

34
ENGLISH
7.15 Voice assistant
Left button Voice assistant
Activate
Voice
assistant
Double-press the Left
button when not on
a call
Voice assistant settings can be configured
using the Jabra Sound+ app.
7.16 Audio notifications
The earbuds indicate factory reset, battery
level, pairing and Bluetooth connection status
using audio notifications. You can select
between tone or voice notifications using the
Jabra Sound+ app.
The supported languages are English, French,
German, Japanese, Mandarin Chinese and
Korean.

35
ENGLISH
7.17 Update firmware
The Jabra Elite 10 can be updated to the latest
firmware version using the Jabra Sound+ app.
If notifications are enabled in the Jabra Sound+
app, you will receive an automatic notification
when a firmware update is available.
If an error occurs during the firmware update,
the LED on the charging case will slowly flash
red. To complete the update, connect the
charging case to a power supply, remove the
earbuds from the charging case and then place
the earbuds back in the charging case and close
the lid. The firmware update will restart.
36
ENGLISH
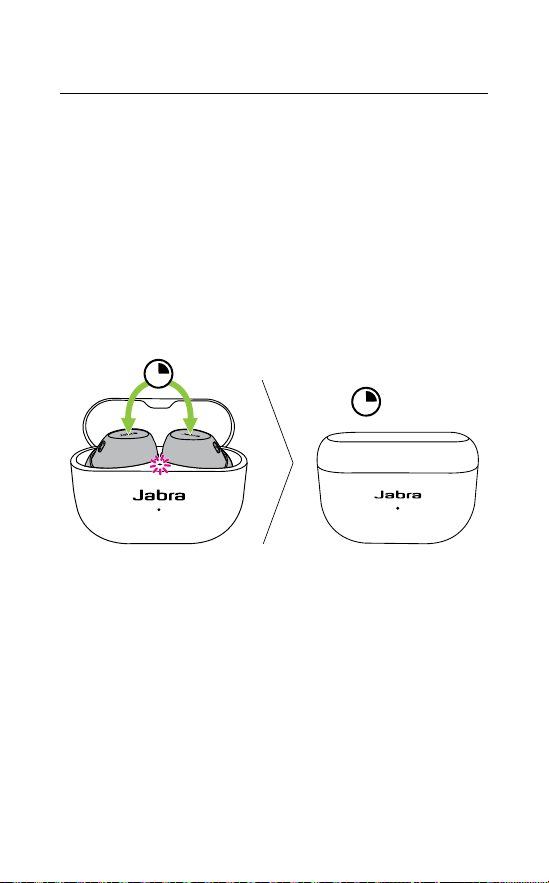
7.18 Reset the earbuds
Resetting the earbuds clears the list of paired
devices and resets all settings.
1. Place both earbuds in the charging case.
2. Press and hold (10 sec) the Left and Right
buttons on the earbuds simultaneously until
the LED inside the charging case flashes pink.
3. Close the lid of the charging case for 5 seconds
to complete the reset.
10 sec
5 sec
The earbuds will need to be re-paired to your
mobile device.
It is highly important to delete/forget the
pairing in the Bluetooth menu on your
previously paired device.
37
ENGLISH
8. Applications and
firmware update
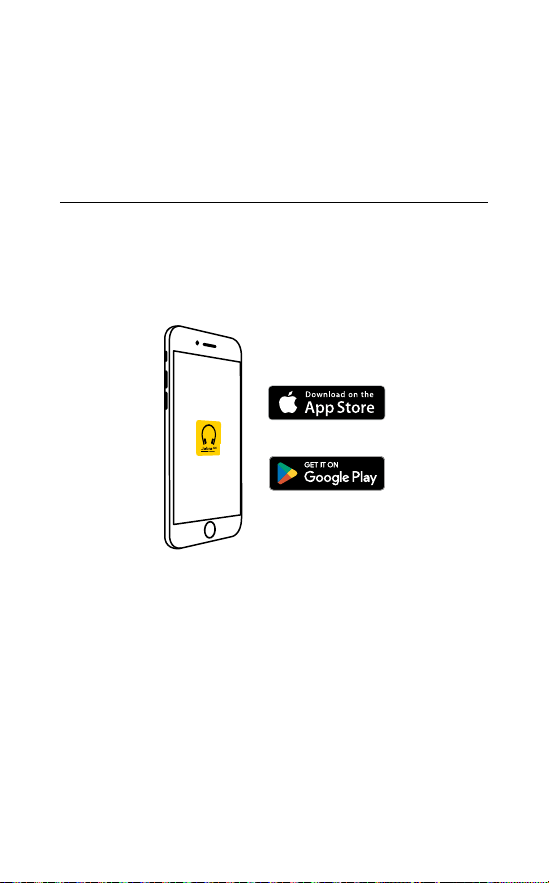
8.1 Jabra Sound+
Jabra Sound+ is a mobile application that
allows you to configure and update the Jabra
Elite 10 based on your needs.

38
ENGLISH
9. Support
9.1 FAQ and technical specifications
The Jabra Elite 10 FAQ, cerfications and technical
specifications are available at jabra.com/support
9.2 How to care for your earbuds
• Always store the earbuds in the charging case
and safely protected.
• To prevent the depletion of the battery
lifetime or capacity, avoid storing the earbuds
in hot or cold environments, such as a closed
car in summer, or in winter conditions.
• It is recommended to store the earbuds
between -20°C and 45°C (-4°F and 113°F).
• Do not store the earbuds for extended periods
of time without recharging them (max. three
months).
• If the earbuds or the charging case become
dirty, it is recommended to clean them with a
soft, lint-free cloth that has been dampened
with clean water.
• The charging case uses the standard USB
voltage of 5v +- 0.25v. It is not recommended
to charge the earbuds using a power supply
with a higher voltage.
• Do not remove the earbud silicone sleeve.
39
ENGLISH
9.3 Replacement accessories
Replacement or additional accessories can be
purchased online at jabra.com/accessories
Left and right earbud set
Charging case EarGels
M
S
L
XL
40
ENGLISH
Jabra wireless charging pad
USB charging cables
0.3 m 1.2 m
9.4 Using replacement earbuds
1. Place the replacement earbuds into the
charging case and close the lid.
2. Open the charging case lid and remove the
earbuds.
3. Wear the earbuds and follow the voice
instructions to pair to your mobile device.
4. Update the earbud firmware using the Jabra
Sound+ app.

41
ENGLISH
9.5 Using a replacement charging case
Before using a replacement charging case for
the first time, it will need to be synced with
your current earbuds and charged for 1 hour.
1. To begin syncing, place your current earbuds
inside the replacement charging case and
close the lid for 10 seconds.
2. If the LED on the charging case flashes pink
this indicates that the firmware is being
updated.
3. Wait until the LED stops flashing pink before
opening the charging case.