Loading ...
Loading ...
Loading ...
Care and Cleaning
I_emakcr
1. Push the selector switch to OFE
2. X_'ait 5 to 10 minutes fi)r the ice to fall into
the storage bin. Remove all ice fl'mn the
storage bin.
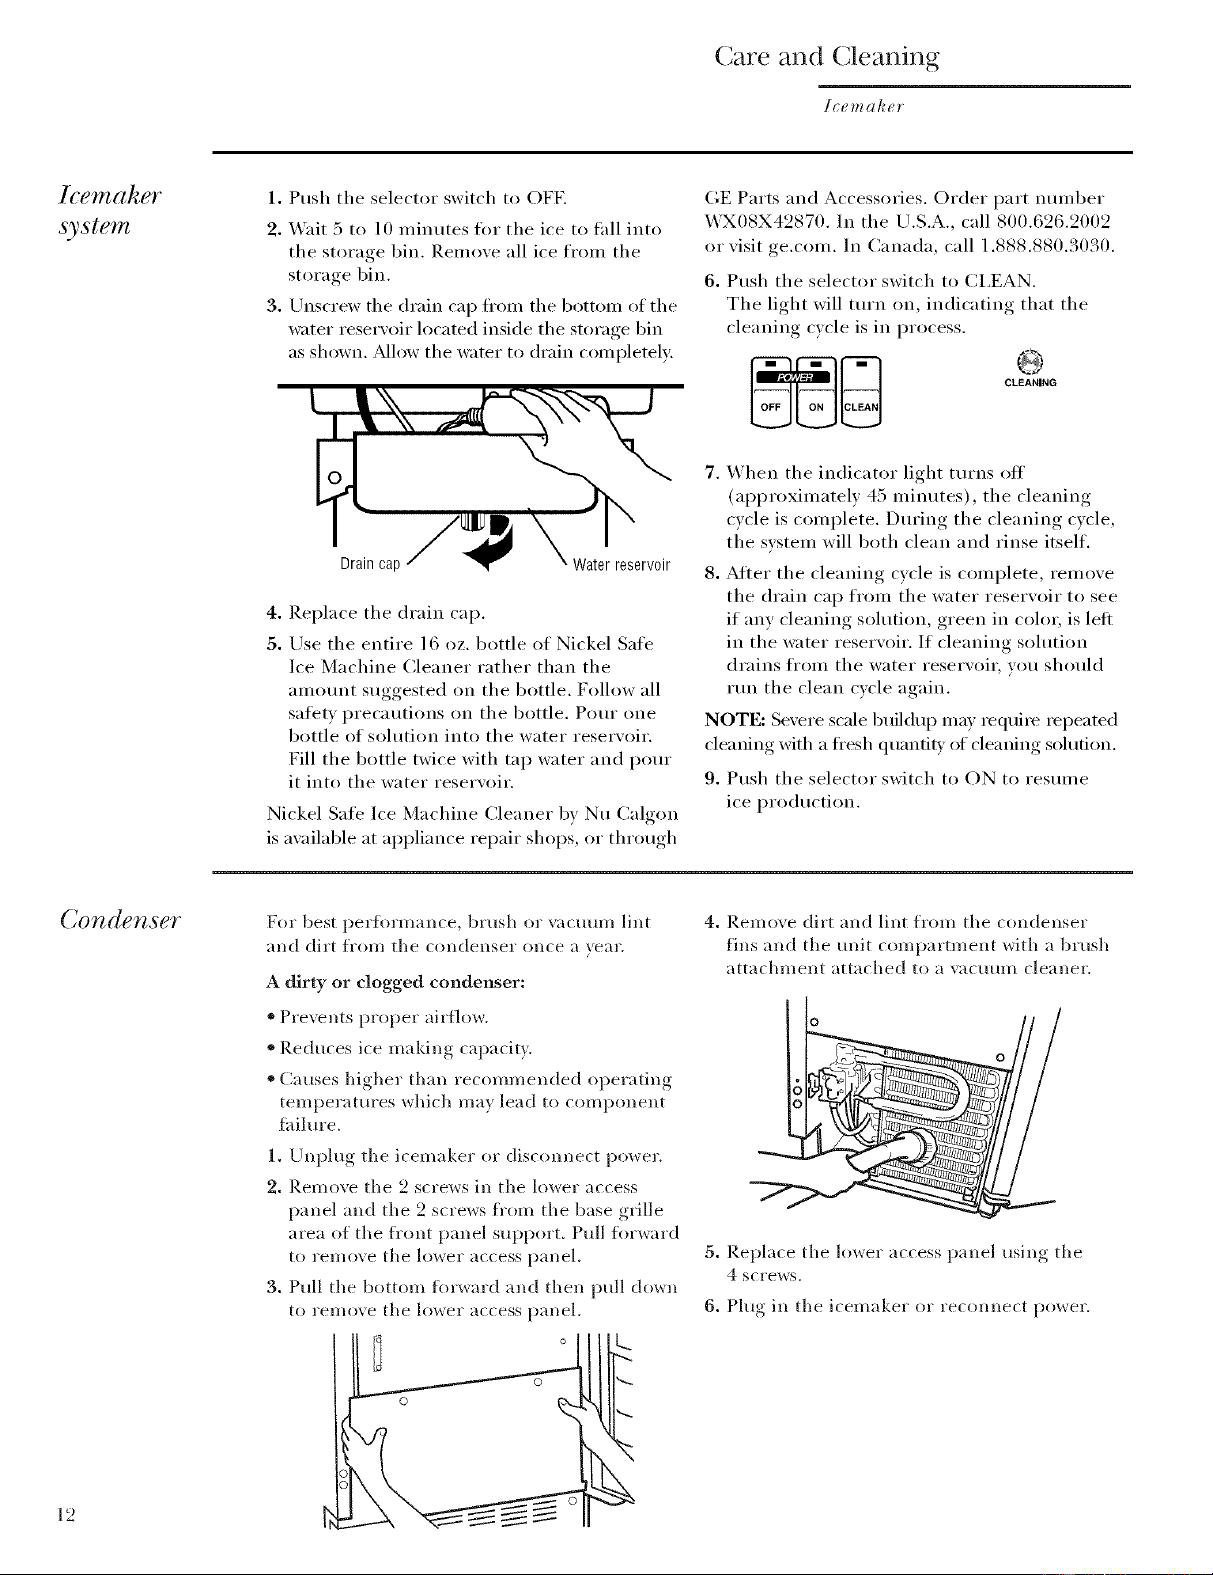
3. Unscrew the drain cap fl'om the bottom of the
water reservoir located inside the storage bin
as shown. _Mlow the water to drain completely:
Draincap Waterreservoir
4. Replace the drain cap,
5. Use the entire 16 oz, bottle of Nickel Safe
Ice Machine Cleaner rather than the
amount suggested on the bottle. Follow all
safety precautions on the bottle. Pour one
bottle of solution into the water reservoir,
Fill the bottle twice with tap water and pour
it into the water reservoir,
Nickel Safe Ice Machine Cleaner by Nu Calgon
is available at appliance repair shops, or through
GE Parts and Accessories. Order part number
WX08X42870. In the U.S.A., call 800.525.2002
or visit ge.com. In Canada, call 1.888.880.3030.
6. Push the selector switch to CI.EAN.
The light will turn on, indicating that the
cleaning cycle is in process.
CLEANING
7. When the indicator light turns off
(approximately 45 minutes), the cleaning
cycle is complete. During the cleaning cycle,
the svstem will both clean and rinse itself.
8. After the cleaning cycle is complete, remove
the drain cap from the water reservoir to see
if any cleaning solution, green in color, is leli
in the water reservoir. If cleaning solution
drains fl'om the water reservoir, you should
tun the clean cycle again.
NOTE: Severe scale buildup may require repeated
cleaning with a fl'esh quanti V of cleaning solution.
9. Push the selector switch to ON to resmne
ice production.
CoTldgTisgr
12
For best perJ()rmance, brush or vacuum lint
and dirt fi'om the condenser once a year.
A dirty or clogged condenser:
* Prevents proper airflow.
* Reduces ice making capacity.
* Causes higher than recommended operating
temperatm'es which may lead to component
fidlm'e.
1. Unplug the icemaker or disconnect power.
2. Remove the 2 screws in the lower access
panel and the 2 screws fi'om the base grille
area of the ti'ont panel support, Pull torward
to remove the lower access panel,
3. Pull the bottom ti)rward allcl then pull down
to reI//ove the lower access pallel.
U
4. Remove dirt and lint from the condenser
fins and the trait compartment with a brush
attachment attached to a _;icl./(/I// cleaner.
5. Replace the lower access panel using the
4 screws,
6, Plug in the icemaker or reconnect power.
Loading ...
Loading ...
Loading ...