Loading ...
Loading ...
Loading ...
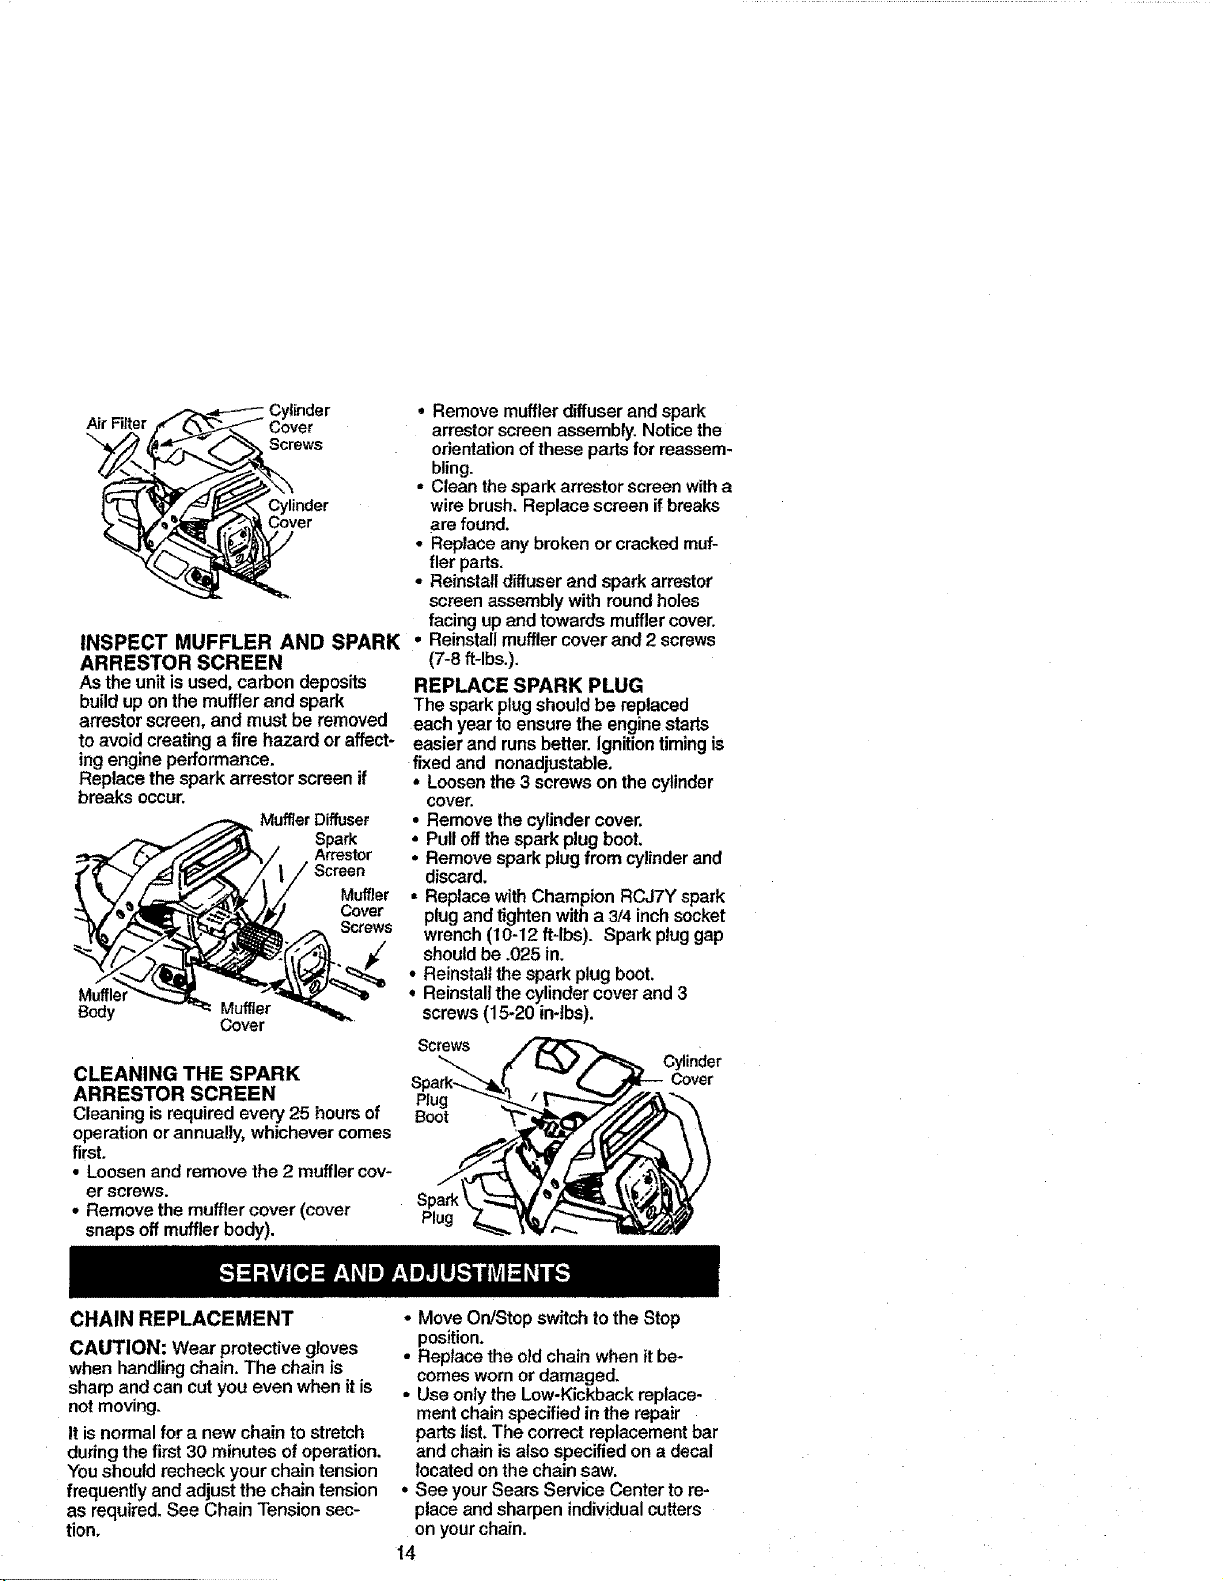
Air Filter
Cylinder
Cover
Screws
Cylinder
Cover
INSPECT MUFFLER AND SPARK
ARRESTOR SCREEN
As the unit is used, carbon deposits
build up on the muffler and spark
arrestor screen, and must be removed
to avoid creating a fire hazard or affect-
ing engine performance.
Replace the spark arrestor screen if
breaks occur.
Muffler Diffuser
Spark
Arrestor
Screen
Muffler
Cover
Screws
Muffle
Body Muffler
Cover
* Remove muffler diffuser and spark
arrestor screen assembly. Notice the
orientation of these parts for reassem-
bling.
- Clean the spark arrestor screen with a
wire brush. Replace screen if breaks
are found.
- Replace any broken or cracked muf-
fler parts.
• Reinstall diffuser and spark arrestor
screen assembly with round holes
facing up and towards muffler cover.
, Reinstall muffler cover and 2 screws
(7-8 ft-lbs.).
REPLACE SPARK PLUG
The spark plug should be replaced
each year to ensure the engine starts
easier and runs better. Ignition timing is
fixed and nonadjustable.
o Loosen the 3 screws on the cylinder
cover.
• Remove the cylinder cover.
• Pull off the spark plug boot,
• Remove spark plug from cylinder and
discard.
• Replace with Champion RCJ7Y spark
plug and tighten with a 3/4 inch socket
wrench (10-12 ft-lbs). Sparkplug gap
should be .025 in.
° Reinstall the spark plug boot,
, Reinstall the cylinder cover and 3
screws (15-20 in-lbs).
Screws
CLEANING THE SPARK
ARRESTOR SCREEN Plug
Cleaning is required every 25 hours of Boot
operation or annually, whichever comes
first.
• Loosen and remove the 2 muffler cov-
er screws.
• Remove the muffler cover (cover Spark
snaps off muffler body). Plug
Cylinder
cover
CHAIN REPLACEMENT
CAUTION: Wear protective gloves
when handling chain. The chain is
sharp and can cut you even when it is
not moving.
It is normal for a new chain to stretch
during the first 30 minutes of operation.
You should recheck your chain tension
frequently and adjust the chain tension
as required. See Chain Tension sec-
tion.
• Move On/Stopswitch to theStop
position.
• Replacetheold chainwhenit be-
comeswornor damaged.
• UseonlytheLow-Kickbackreplace-
mentchainspecified inthe repair
partslist,The correctreplacementbar
and chainisalsospecifiedon a decal
located onthechainsaw.
• See yourSears Service Center tore-
placeand sharpen individualcutters
on yourchain.
14
Loading ...
Loading ...
Loading ...