Loading ...
Loading ...
Loading ...
Aboutthe automatic icemaker.
A newly instafled refrigerator may take 12to 24 hours to begin making ice.
Automatic Icemaker
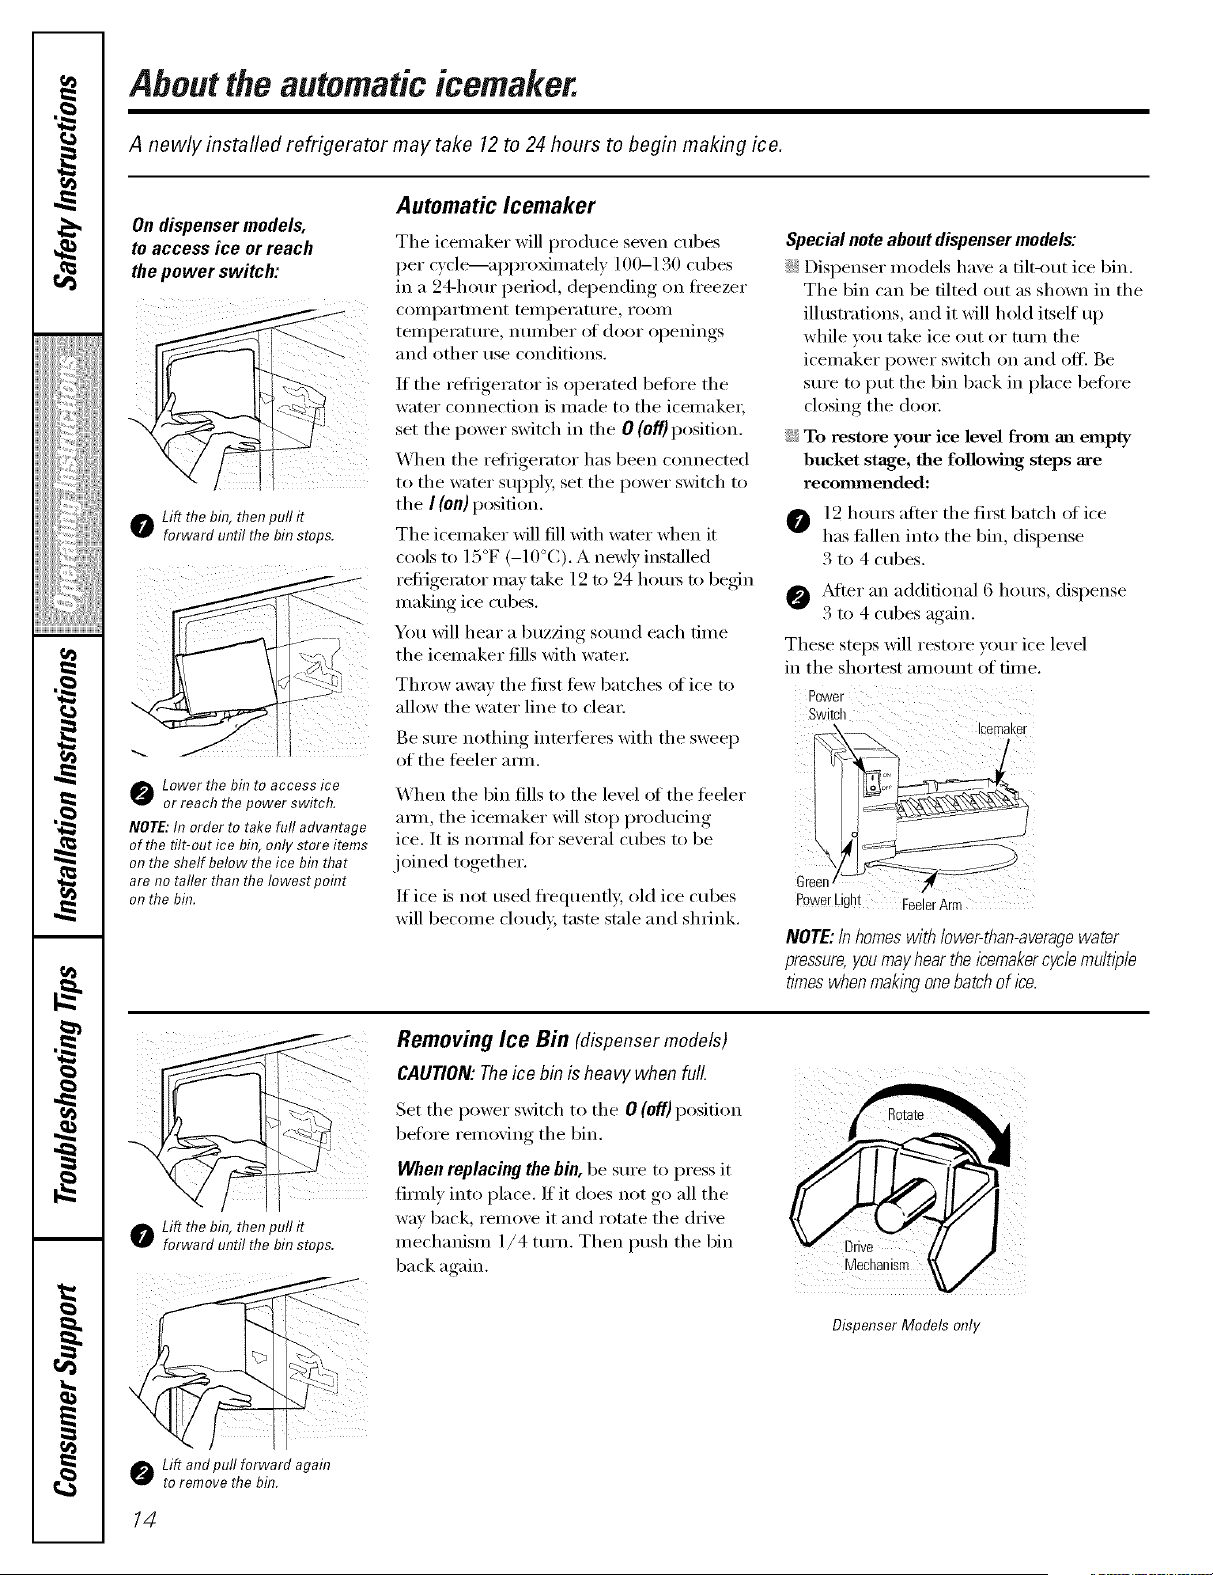
On dispenser models,
to access ice or reach
the power switch:
o Lift the bin, then pull it
forward until the bin stops.
Lower the bin to access ice
or reach the power switch.
NOTE:In order to take full advantage
of the tilt-out ice bin, only store items
on the shelf below the ice bfl7that
are no taller than the Iowest point
on the bhT.
The icemaker will produce seven cubes
per cycle---al)l)roximately ] 00-130 cubes
in a 94-hour period, depending on fl'eezer
COilli)ai'tlllent teillpei'att]i'e_ i'OOill
temperatm'e, nmnber ot door openings
and other use conditions.
If the refl{gerator is operated befi)re the
water connect.ion is made to the icemaket;
set the power switch in the 0 (Off)position.
When the reti-igerator has been com_ected
to the water SUl)pl}; set the power switch to
the I (on) position.
The icemaker will fill with water when it
cools to ] 5°F (-10°C), A newly installed
refi_igemtor may take 12 to 24 hems to begin
making ice cubes.
You will hear a buzzing sotmd each time
the icemaker fills with water
Special note about dispenser models:
iJi::Dispenser models have a tilt-out ice bin.
The bin can be tilted out as shown in the
illustrations, and it will hold itself up
while you take ice ()tit or turn the
icemaker power switch on and off'. Be
sure to put the bin back in place before
closing the doo_:
iJi::To restore your ice level from an empty
bucket stage, the following steps are
recommended:
12 hotu_ after the filSt batch of ice
has fidlen into the bin, dispense
3 to 4 cubes.
@ _MteI" an additional 6 hom_, dispense
3 to 4 cubes again.
These steps will restore your ice level
in the shortest amount of dine.
Throw awm the first tew batches of ice to Power
allow the water line to clem: Switch
Icemaker
ge stlre nothin£_ interferes with the sweep
of the teeler amL
When the bin fills to the level (ff the teeler
am_, the icemaker will stop producing
ice. It is nomml for several cubes to be
joined together.
If ice is not used ti'equentl); old ice cubes
will become chmdy, taste stale and shrink.
Green
P0wer Light Feeler Arm
NOTE:/n homes with lower-than-averagewater
pressure,you may hear the icemakercycle mult/)91e
times when maklhg onehatch of ice.
o Lift the bin, then pull it
forward until the bin stops.
o Lift andpull forward again
to remove the bin.
Removing Ice Bin (dispenser models)
CAUtiON:Theice bin is heavy when full.
Set the power switch to the 0 (otO position
before removing the bin.
When replacing the bin, be sm'e to press it
firefly into place. ]f it does not go all the
way back, remove it and rotate the drive
mechanism 1/4 ttlFn. Then push the bin
back again.
Drive
Dispenser Models on v
14
Loading ...
Loading ...
Loading ...