1
65
2
7
3
8
4
9
FADE CUT
1. Start at the temple and cut all the way around the head to establish
the ultimate location of the fade line. Always cut against the grain
for the shortest cut. Don’t force the blade through the hair. Let the
trimmer do the work.
2. Next, cut around the head again and up the nape of the neck to the
fade line, brushing away the cut hair as you go. Pull the scalp taut
with the thumb for the closest cut. Turn the trimmer upside down
when necessary to keep cutting against the grain. Make sure both
sides of the head are even.
3. For the top of the head, cut with the grain using the individual
guide comb attachments. The smaller the number of the comb,
the shorter the cut. Comb or brush the hair as you cut for an even
end result.
4. To complete the fade, blend the hair at the fade line by trimming
up and out across the line and against the grain all the way around
the head. Then, repeat all around, turning the T-Pro trimmer
upside down and cutting downward. The final objective is to blend
the hair so there is no real line, just a perfect fade from bald to
very short hair. You can achieve this by using the #1 individual
guide comb attachment. Continue combing and cutting until you
achieve the desired effect.
5. To create a part, pick a spot off-center. Pull the scalp tight and with
the end of the blade perpendicular to the head, move the trimmer
back and forth to cut a line. Comb through it and cut again to
make sure the cut is precise.
SHAVING
Wash Up
1) Make sure your hands and fingernails are scrubbed as clean as
possible before touching your face. Irritated skin is very easily
infected by germs.
2) Wash and dry your face thoroughly to unclog pores and whisker
follicles. Use a rough towel to help remove dead skin and invigorate
the skin. Also, consider using an antiseptic lotion.
Brush Up - Use of Beard Brush
3) Brush your beard thoroughly every day with a good scrubbing
action. This is important because it frees ingrown whiskers and
moves the rest around so they don’t take hold and start growing
in. Use the special beard brush provided or any other small, stiff-
bristle brush that can be sanitized (a toothbrush is fine). Keep the
brush clean.
4) Brush your face as often as possible to start training your beard to
grow in one direction. This goes a long way to ensuring a clean,
close shave without skin irritation (you may even want to stop
shaving altogether long enough to establish a brushing pattern).
Most people can expect good results following these brushing
strokes:
• Brush down from each ear, across the cheek and along the
jawbone toward the chin.
• Brush away from the point of the chin on each side, back along
the lines just under the jawbone.
• Brush up from the lower hairline, all around the neck, up to the
lines of the previous stroke.
• Brush from the lower lip down over the chin.
• Brush down from the nose to the upper lip.
5) Shave with Wahl trimmer following the SAME STROKES and going
in the SAME DIRECTION you brushed. Stretch a section of skin
with the fingers of one hand, while holding the shaver blade head
flat against the face with the other hand. Push it forward with
slight pressure in a stroking action across the skin. You may want
to go over the same area several times. Just be sure you always
shave in the same direction each time.
6) Continue this program as long as ingrown hairs and bumps are
a problem. Later, you may wish to switch back to a razor-close
shaving method. But return to use of the Wahl trimmer at the first
sign of the problem coming back. And never stop brushing.
MUSTACHE TRIMMING
1. Comb your mustache. Looking into a well-lit mirror, comb your
mustache in the direction that it grows. This will help reveal stray
hairs and achieve an even, balanced trim.
2. Cut the outline of your mustache. Holding the trimmer in a
vertical position, with the nameplate side facing you, define the line
of your mustache. The extended tips on the blades let you achieve
a clean, well-defined mustache line.
3. Defining. As a finishing step, hold the trimmer with the name-
plate facing you. Using only the bare blades, make a definitive line
at the bottom of your mustache.
4.
Tapering.
Hold the trimmer with the nameplate facing away from
you. Again starting with the middle of your mustache, follow the
lip line and taper out the mustache until a gentle shape is created
on the bottom portion of your mustache.
5.
Defining.
As a finishing step, hold the trimmer with nameplate
facing make a definitive line at the bottom of your mustache.
TRIMMING AND EDGING YOUR BEARD
The following are suggested trimming steps and trimmer positions.
You may find different procedures work better for you.
1. Comb your beard in the direction that it grows to help reveal stray
hairs that may be longer than the others.
2. Attach the longest trimming guide to trim and taper your beard.
Start at each sideburn and stroke downward toward your neck.
Trim toward your chin in smooth, overlapping strokes, following
the lay of your beard. If you trim against the way your beard
naturally lays, the trimmer will cut the hair much shorter and the
result may be patchy.
Use to progressively shorter trimming guides until you reach the
desired length of beard. You may wish to use the shortest
trimming guide attachment to cut closer near the ear and down
under the chin, changing to a longer trimming guide toward
the front of the face and point of your chin. Always be sure the
trimming guide is locked solidly into the desired position before
you start to trim.
3. To cut the outline of your beard, remove the trimming guide.
Starting under your chin and working back toward your jawbone
and ears, cut the outer perimeter of your beard underneath the
jawbone. Continue the line all the way up to the ears and hairline.
4. Accentuate your beard line by using the trimmer in a downward
motion. Start at the line you’ve created and, working from the chin
back toward the ears, trim the area right under your beard line.
5. Define the upper part of your beard using the same technique.
USE YOUR WAHL TRIMMER ON HAIR, TOO
That’s part of its job. You can use it to keep expensive hairstyles
trimmed—shaping hairlines, fading defining parts and trimming
around neck and ears. You can use it to style hair, too, if you wish.
To trim or style hair, first shampoo and dry hair thoroughly.
Holding the Wahl trimmer with toothed edge pointed down, trim off a
little at a time, carefully. It may be best to have someone else help you.
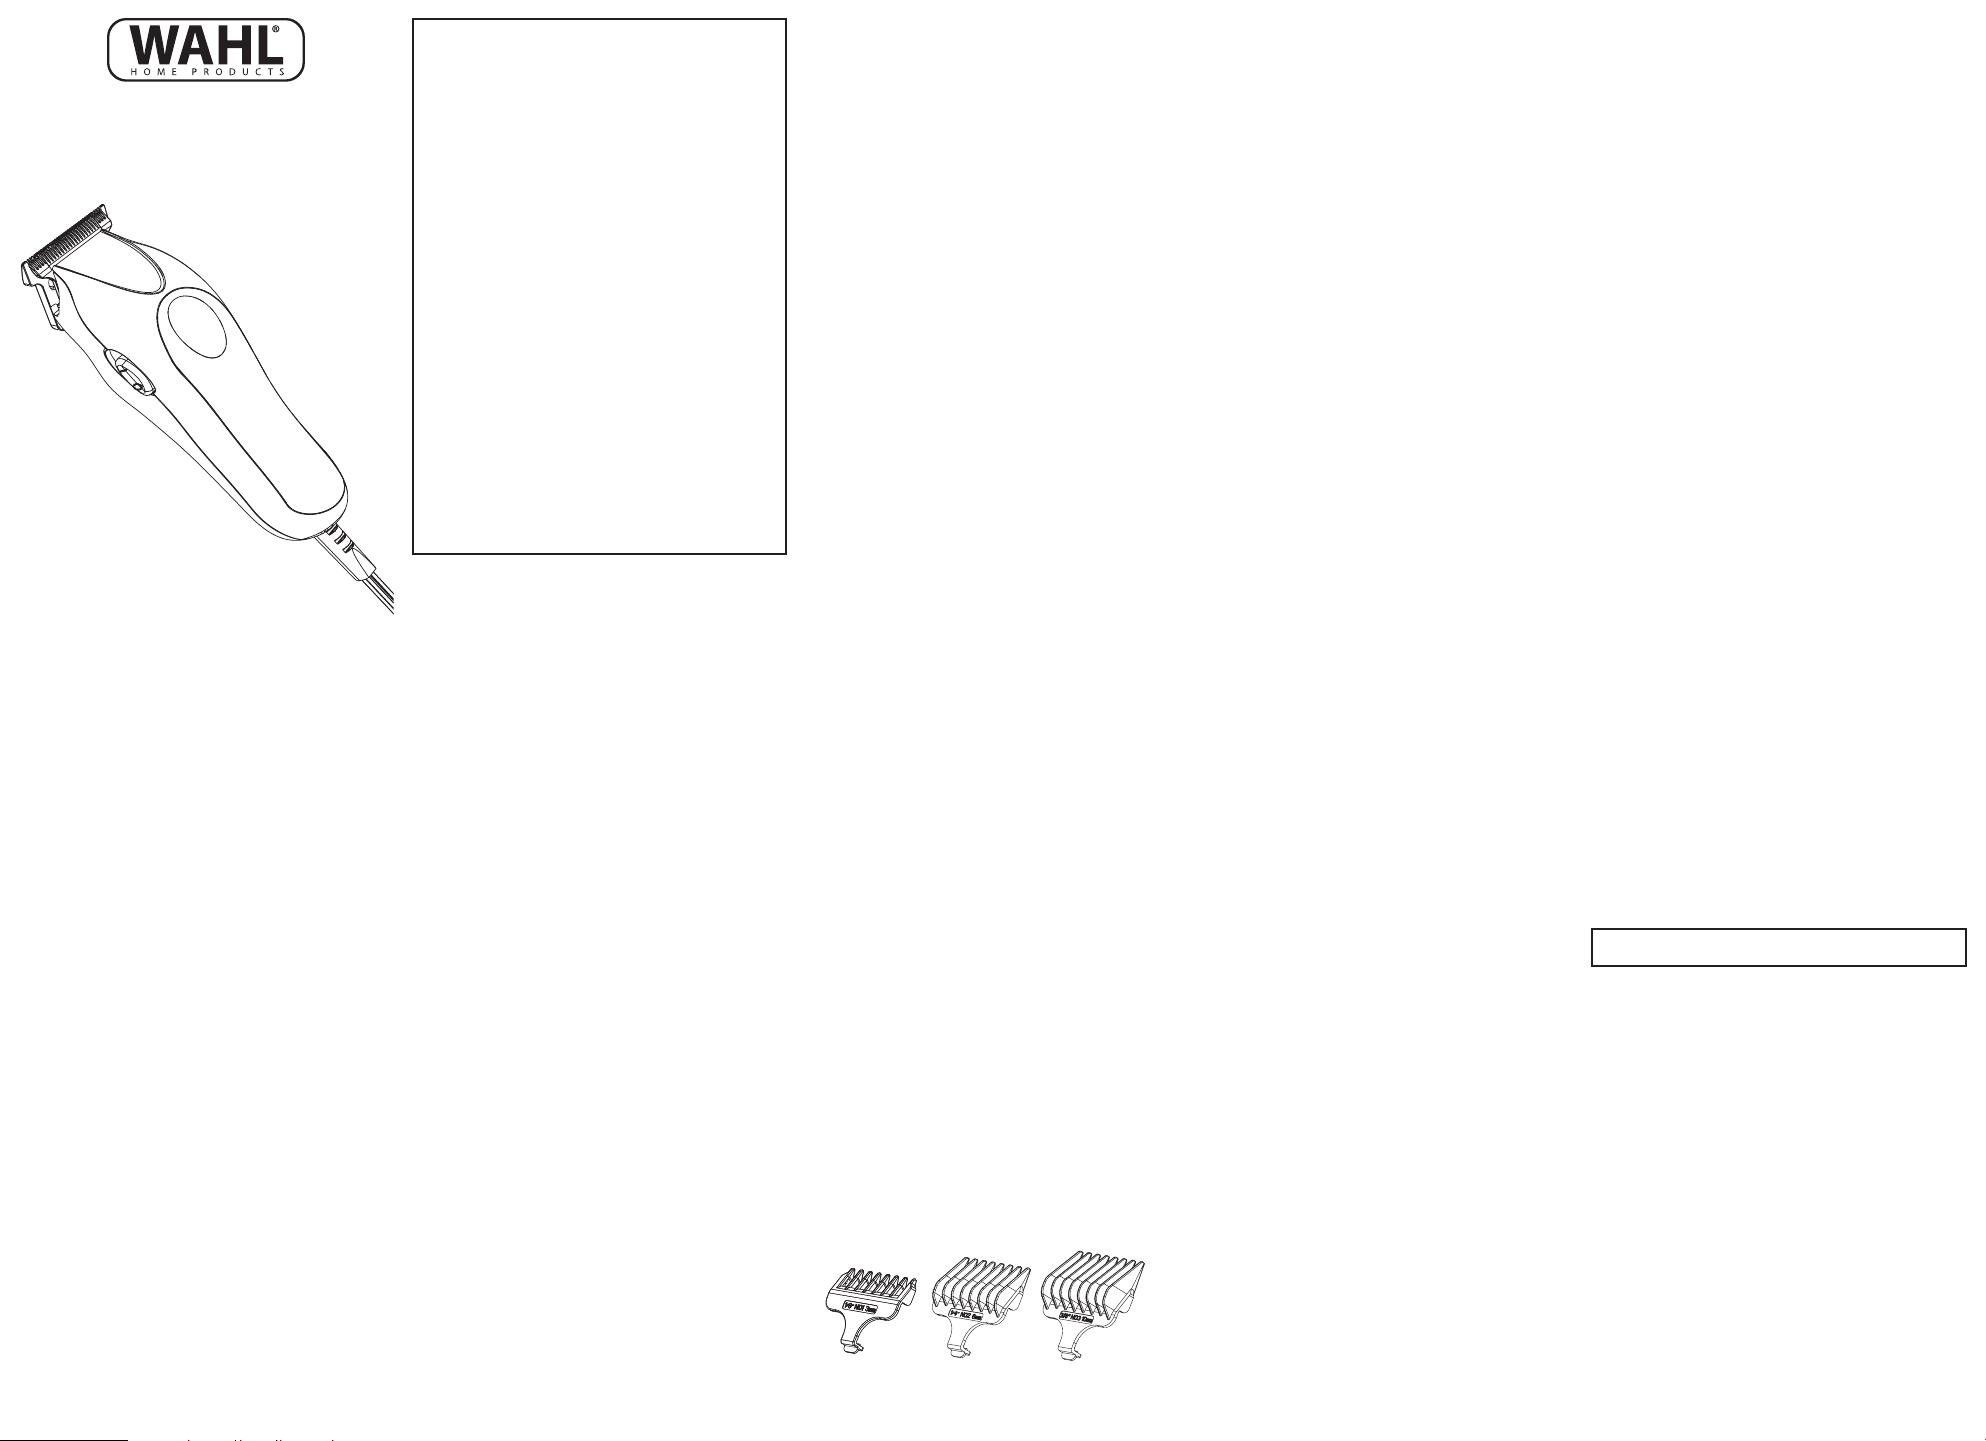
Your trimmer comes with three attachments: #1, #2, and #3. For
fading, use the attachment you desire; #1 for shortest length, #2 for
medium length, and #3 for longest length. Attach the guide comb to
the trimmer, making sure it is secure. Hold trimmer toward the temple
line; begin to cut hair in an upward motion, staying below temple line
for high, tight fades. For high, tight fade or military style fades, use
trimmer with attachment. Cut hair past temple line, working your way
around the head from one side to the other. For blending techniques,
use #2 and #3 attachments to remove bulky hairline.
Eventually, you should develop the skills to stay well groomed by a
quick trim around neck, ears and sideburns.
SAVE THESE INSTRUCTIONS
For Household Use Only
CORD
The cord should not be used to pull the clipper.
Since freedom of movement needs to be
maintained, care should be used to-keep the cord
untwisted and unobstructed. When stored, the cord
should be coiled and the unit placed in original box
or-storage pouch (if provided).
If your clipper has a polarized plug: To reduce the
risk of electric shock, this appliance has a polarized
plug (one blade is wider than the other). This plug
fits in a polarized outlet only one way. In the event
the plug does not fit fully in the outlet, reverse
the plug. In the event it still does not fit, contact a
qualified electrician to install the proper outlet. Do
not change the plug in any way.
SHARPENING
Trimmer blades have precision-ground cutting teeth. Blades should
be handled carefully and never bumped. To keep blades sharp, cut
only clean hair and avoid cutting into dirt or abrasive particles.
Blades should be sharpened or changed in sets only. To remove blades
for sharpening or replacement, loosen and remove two screws on
bottom blade. Replace same and tighten. To have blades sharpened,
return blades (only) along with a check or money order for $6.95
(includes shipping back to you) to:
Wahl Clipper Corporation • Attn: Repair Department
3001 Locust Street • Sterling, IL 61081
Telephone: (800) 767-9245
New replacement blades may be acquired from a Wahl Authorized
Service Center.
For products purchased outside of the United States,
please contact your distributor.
NOW YOU CAN KEEP ON SHAVING WHILE
CLEANING UP INGROWN WHISKERS
Men with very curly facial hair have a special problem with shaving.
Specifically, ingrown whiskers. Their whiskers curl back toward the
skin — and grow in many different directions.
Electric razors can’t pick them up through their slotted or mesh heads.
And safety razors slice them off at a sharp angle. Either way, the
stubble is left in an ideal condition to cause ingrown hair problems.
Continued shaving over the bumps and irritated skin,
of course, makes the condition worse.
But you don’t have to stop shaving altogether. With this Wahl
trimmer and its specially designed T-blade, you can maintain a neat,
shaved appearance while getting help with ingrown whiskers. Its
open-tooth comb action picks up and straightens curly whiskers for
cutting — while its high-speed blades move across at a flat angle to
the whiskers, clipping them off evenly.
CARING FOR YOUR TRIMMER
OILING BLADES
For best results, put one or two drops of Wahl Clipper Oil on
the blades only when necessary, or approximately once a month.
Motor bearings are permanently lubricated—do not attempt to oil.
When oiling your trimmer, turn the trimmer “ON - I,” hold the unit
with the blades facing DOWN and squeeze one or two drops of oil
onto the blades. Wipe off excess oil with soft cloth.
NOTICE—DO NOT OVER OIL!
Excessive oiling or application of liquids will cause damage if
allowed to seep back into motor.
BLADE CARE
Trimmer blades have precision-hardened, ground and lapped
cutting teeth. Blades should be handled carefully and never
bumped or used to cut dirty or abrasive material. Never rinse the
blades with water, or the blades may rust. Clean with the included
brush.
CLEANING/STORAGE
Before storing your trimmer, use the cleaning brush to whisk
any loose hairs from the unit and the blades. For units with a
soft-touch grip, use a damp cloth to wipe down the body of the
trimmer, taking care not to get the blades wet. Store unit in such a
manner so that blades are protected from damage.
When the trimmer is not in use, the trimmer guide/blade guard
attachment should be in place to protect the blades.
Operating Instructions for
the T-Pro Corded Trimmer
Manual de Operación para la
Recortadora T-Pro
8 ft. Cord
Cordon de
8 Pies
grooming.wahl.com
© 2016 Wahl Clipper Corporation
Part No. 1000426
Printed in Vietnam
For more information or Product Registration, visit grooming.wahl.com
3-YEAR LIMITED WARRANTY
Valid in U.S.A. Only
If your Wahl product fails to operate satisfactorily within three
(3) years from the date of original purchase or receipt as a gift,
Wahl will, at our option, repair or replace it and return it to you
FREE OF CHARGE. Do not return this product to store where
purchased. Products needing repair under this warranty should
be returned with postage prepaid to:
Wahl Clipper Corp.
Attn: Repair Department
3001 Locust Street
Sterling, Illinois 61081
Include a note describing the defect and the date of original
purchase or receipt as a gift (if in warranty). Products out of
warranty will be repaired at our standard repair charges.
This warranty is void and no repair or replacement will be made
under this warranty or otherwise if: (1) The product is modified
in any manner or repaired by anyone other than Wahl Clipper
Corporation or Wahl authorized service center. (2) The product
has been used commercially or subjected to unreasonable use.
This warranty gives you specific legal rights and you may
also have other rights which may vary from state to state. No
other written express warranty is given. Any implied warranty,
including any warranty of merchantability which may arise from
purchase or use, is limited to the year period provided in this
express warranty. Some states may not allow such limitation,
so it may not apply to you. No responsibility is assumed for
incidental or consequential damages of any type, or for the use
of unauthorized attachments. Some states may not allow the
exclusion or limitation of incidental or consequential damages, so
the limitation or exclusion may not apply to you. Outside U.S.A.,
check with store for Wahl authorized distributor’s warranty.
T- P r o
™
SERVICE AND REPAIR
If you have problems with your trimmer, send it prepaid
with a note explaining the problem to:
Wahl Clipper Corporation
Attn: Repair Department
3001 Locust Street
Sterling, IL 61081
Telephone (800) 767-9245
For products purchased outside the United States, contact your distributor.
If for any reason within 60 days of purchase of your Wahl
®
trimmer you are not satisfied with your trimmer and would
like a refund, just return your trimmer, together with the sales
receipt, to the retailer from whom you purchased it. Wahl will
reimburse all retailers who accept trimmers within 60 days of
purchase. If you have any questions regarding this money-
back guarantee, please call 1-800-767-9245 in the United
States.
60 Day Money Back Guarantee!

1
65
2
7
3
8
4
9
FADE CUT
1. Start at the temple and cut all the way around the head to establish
the ultimate location of the fade line. Always cut against the grain
for the shortest cut. Don’t force the blade through the hair. Let the
trimmer do the work.
2. Next, cut around the head again and up the nape of the neck to the
fade line, brushing away the cut hair as you go. Pull the scalp taut
with the thumb for the closest cut. Turn the trimmer upside down
when necessary to keep cutting against the grain. Make sure both
sides of the head are even.
3. For the top of the head, cut with the grain using the individual
guide comb attachments. The smaller the number of the comb,
the shorter the cut. Comb or brush the hair as you cut for an even
end result.
4. To complete the fade, blend the hair at the fade line by trimming
up and out across the line and against the grain all the way around
the head. Then, repeat all around, turning the T-Pro trimmer
upside down and cutting downward. The final objective is to blend
the hair so there is no real line, just a perfect fade from bald to
very short hair. You can achieve this by using the #1 individual
guide comb attachment. Continue combing and cutting until you
achieve the desired effect.
5. To create a part, pick a spot off-center. Pull the scalp tight and with
the end of the blade perpendicular to the head, move the trimmer
back and forth to cut a line. Comb through it and cut again to
make sure the cut is precise.
SHAVING
Wash Up
1) Make sure your hands and fingernails are scrubbed as clean as
possible before touching your face. Irritated skin is very easily
infected by germs.
2) Wash and dry your face thoroughly to unclog pores and whisker
follicles. Use a rough towel to help remove dead skin and invigorate
the skin. Also, consider using an antiseptic lotion.
Brush Up - Use of Beard Brush
3) Brush your beard thoroughly every day with a good scrubbing
action. This is important because it frees ingrown whiskers and
moves the rest around so they don’t take hold and start growing
in. Use the special beard brush provided or any other small, stiff-
bristle brush that can be sanitized (a toothbrush is fine). Keep the
brush clean.
4) Brush your face as often as possible to start training your beard to
grow in one direction. This goes a long way to ensuring a clean,
close shave without skin irritation (you may even want to stop
shaving altogether long enough to establish a brushing pattern).
Most people can expect good results following these brushing
strokes:
• Brush down from each ear, across the cheek and along the
jawbone toward the chin.
• Brush away from the point of the chin on each side, back along
the lines just under the jawbone.
• Brush up from the lower hairline, all around the neck, up to the
lines of the previous stroke.
• Brush from the lower lip down over the chin.
• Brush down from the nose to the upper lip.
5) Shave with Wahl trimmer following the SAME STROKES and going
in the SAME DIRECTION you brushed. Stretch a section of skin
with the fingers of one hand, while holding the shaver blade head
flat against the face with the other hand. Push it forward with
slight pressure in a stroking action across the skin. You may want
to go over the same area several times. Just be sure you always
shave in the same direction each time.
6) Continue this program as long as ingrown hairs and bumps are
a problem. Later, you may wish to switch back to a razor-close
shaving method. But return to use of the Wahl trimmer at the first
sign of the problem coming back. And never stop brushing.
MUSTACHE TRIMMING
1. Comb your mustache. Looking into a well-lit mirror, comb your
mustache in the direction that it grows. This will help reveal stray
hairs and achieve an even, balanced trim.
2. Cut the outline of your mustache. Holding the trimmer in a
vertical position, with the nameplate side facing you, define the line
of your mustache. The extended tips on the blades let you achieve
a clean, well-defined mustache line.
3. Defining. As a finishing step, hold the trimmer with the name-
plate facing you. Using only the bare blades, make a definitive line
at the bottom of your mustache.
4.
Tapering.
Hold the trimmer with the nameplate facing away from
you. Again starting with the middle of your mustache, follow the
lip line and taper out the mustache until a gentle shape is created
on the bottom portion of your mustache.
5.
Defining.
As a finishing step, hold the trimmer with nameplate
facing make a definitive line at the bottom of your mustache.
TRIMMING AND EDGING YOUR BEARD
The following are suggested trimming steps and trimmer positions.
You may find different procedures work better for you.
1. Comb your beard in the direction that it grows to help reveal stray
hairs that may be longer than the others.
2. Attach the longest trimming guide to trim and taper your beard.
Start at each sideburn and stroke downward toward your neck.
Trim toward your chin in smooth, overlapping strokes, following
the lay of your beard. If you trim against the way your beard
naturally lays, the trimmer will cut the hair much shorter and the
result may be patchy.
Use to progressively shorter trimming guides until you reach the
desired length of beard. You may wish to use the shortest
trimming guide attachment to cut closer near the ear and down
under the chin, changing to a longer trimming guide toward
the front of the face and point of your chin. Always be sure the
trimming guide is locked solidly into the desired position before
you start to trim.
3. To cut the outline of your beard, remove the trimming guide.
Starting under your chin and working back toward your jawbone
and ears, cut the outer perimeter of your beard underneath the
jawbone. Continue the line all the way up to the ears and hairline.
4. Accentuate your beard line by using the trimmer in a downward
motion. Start at the line you’ve created and, working from the chin
back toward the ears, trim the area right under your beard line.
5. Define the upper part of your beard using the same technique.
USE YOUR WAHL TRIMMER ON HAIR, TOO
That’s part of its job. You can use it to keep expensive hairstyles
trimmed—shaping hairlines, fading defining parts and trimming
around neck and ears. You can use it to style hair, too, if you wish.
To trim or style hair, first shampoo and dry hair thoroughly.
Holding the Wahl trimmer with toothed edge pointed down, trim off a
little at a time, carefully. It may be best to have someone else help you.
Your trimmer comes with three attachments: #1, #2, and #3. For
fading, use the attachment you desire; #1 for shortest length, #2 for
medium length, and #3 for longest length. Attach the guide comb to
the trimmer, making sure it is secure. Hold trimmer toward the temple
line; begin to cut hair in an upward motion, staying below temple line
for high, tight fades. For high, tight fade or military style fades, use
trimmer with attachment. Cut hair past temple line, working your way
around the head from one side to the other. For blending techniques,
use #2 and #3 attachments to remove bulky hairline.
Eventually, you should develop the skills to stay well groomed by a
quick trim around neck, ears and sideburns.
SAVE THESE INSTRUCTIONS
For Household Use Only
CORD
The cord should not be used to pull the clipper.
Since freedom of movement needs to be
maintained, care should be used to-keep the cord
untwisted and unobstructed. When stored, the cord
should be coiled and the unit placed in original box
or-storage pouch (if provided).
If your clipper has a polarized plug: To reduce the
risk of electric shock, this appliance has a polarized
plug (one blade is wider than the other). This plug
fits in a polarized outlet only one way. In the event
the plug does not fit fully in the outlet, reverse
the plug. In the event it still does not fit, contact a
qualified electrician to install the proper outlet. Do
not change the plug in any way.
SHARPENING
Trimmer blades have precision-ground cutting teeth. Blades should
be handled carefully and never bumped. To keep blades sharp, cut
only clean hair and avoid cutting into dirt or abrasive particles.
Blades should be sharpened or changed in sets only. To remove blades
for sharpening or replacement, loosen and remove two screws on
bottom blade. Replace same and tighten. To have blades sharpened,
return blades (only) along with a check or money order for $6.95
(includes shipping back to you) to:
Wahl Clipper Corporation • Attn: Repair Department
3001 Locust Street • Sterling, IL 61081
Telephone: (800) 767-9245
New replacement blades may be acquired from a Wahl Authorized
Service Center.
For products purchased outside of the United States,
please contact your distributor.
NOW YOU CAN KEEP ON SHAVING WHILE
CLEANING UP INGROWN WHISKERS
Men with very curly facial hair have a special problem with shaving.
Specifically, ingrown whiskers. Their whiskers curl back toward the
skin — and grow in many different directions.
Electric razors can’t pick them up through their slotted or mesh heads.
And safety razors slice them off at a sharp angle. Either way, the
stubble is left in an ideal condition to cause ingrown hair problems.
Continued shaving over the bumps and irritated skin,
of course, makes the condition worse.
But you don’t have to stop shaving altogether. With this Wahl
trimmer and its specially designed T-blade, you can maintain a neat,
shaved appearance while getting help with ingrown whiskers. Its
open-tooth comb action picks up and straightens curly whiskers for
cutting — while its high-speed blades move across at a flat angle to
the whiskers, clipping them off evenly.
CARING FOR YOUR TRIMMER
OILING BLADES
For best results, put one or two drops of Wahl Clipper Oil on
the blades only when necessary, or approximately once a month.
Motor bearings are permanently lubricated—do not attempt to oil.
When oiling your trimmer, turn the trimmer “ON - I,” hold the unit
with the blades facing DOWN and squeeze one or two drops of oil
onto the blades. Wipe off excess oil with soft cloth.
NOTICE—DO NOT OVER OIL!
Excessive oiling or application of liquids will cause damage if
allowed to seep back into motor.
BLADE CARE
Trimmer blades have precision-hardened, ground and lapped
cutting teeth. Blades should be handled carefully and never
bumped or used to cut dirty or abrasive material. Never rinse the
blades with water, or the blades may rust. Clean with the included
brush.
CLEANING/STORAGE
Before storing your trimmer, use the cleaning brush to whisk
any loose hairs from the unit and the blades. For units with a
soft-touch grip, use a damp cloth to wipe down the body of the
trimmer, taking care not to get the blades wet. Store unit in such a
manner so that blades are protected from damage.
When the trimmer is not in use, the trimmer guide/blade guard
attachment should be in place to protect the blades.
Operating Instructions for
the T-Pro Corded Trimmer
Manual de Operación para la
Recortadora T-Pro
8 ft. Cord
Cordon de
8 Pies
grooming.wahl.com
© 2016 Wahl Clipper Corporation
Part No. 1000426
Printed in Vietnam
For more information or Product Registration, visit grooming.wahl.com
3-YEAR LIMITED WARRANTY
Valid in U.S.A. Only
If your Wahl product fails to operate satisfactorily within three
(3) years from the date of original purchase or receipt as a gift,
Wahl will, at our option, repair or replace it and return it to you
FREE OF CHARGE. Do not return this product to store where
purchased. Products needing repair under this warranty should
be returned with postage prepaid to:
Wahl Clipper Corp.
Attn: Repair Department
3001 Locust Street
Sterling, Illinois 61081
Include a note describing the defect and the date of original
purchase or receipt as a gift (if in warranty). Products out of
warranty will be repaired at our standard repair charges.
This warranty is void and no repair or replacement will be made
under this warranty or otherwise if: (1) The product is modified
in any manner or repaired by anyone other than Wahl Clipper
Corporation or Wahl authorized service center. (2) The product
has been used commercially or subjected to unreasonable use.
This warranty gives you specific legal rights and you may
also have other rights which may vary from state to state. No
other written express warranty is given. Any implied warranty,
including any warranty of merchantability which may arise from
purchase or use, is limited to the year period provided in this
express warranty. Some states may not allow such limitation,
so it may not apply to you. No responsibility is assumed for
incidental or consequential damages of any type, or for the use
of unauthorized attachments. Some states may not allow the
exclusion or limitation of incidental or consequential damages, so
the limitation or exclusion may not apply to you. Outside U.S.A.,
check with store for Wahl authorized distributor’s warranty.
T- P r o
™
SERVICE AND REPAIR
If you have problems with your trimmer, send it prepaid
with a note explaining the problem to:
Wahl Clipper Corporation
Attn: Repair Department
3001 Locust Street
Sterling, IL 61081
Telephone (800) 767-9245
For products purchased outside the United States, contact your distributor.
If for any reason within 60 days of purchase of your Wahl
®
trimmer you are not satisfied with your trimmer and would
like a refund, just return your trimmer, together with the sales
receipt, to the retailer from whom you purchased it. Wahl will
reimburse all retailers who accept trimmers within 60 days of
purchase. If you have any questions regarding this money-
back guarantee, please call 1-800-767-9245 in the United
States.
60 Day Money Back Guarantee!
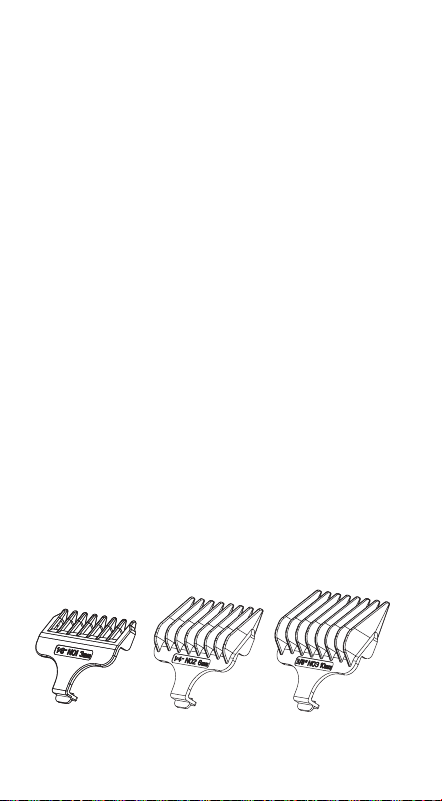
1
65
2
7
3
8
4
9
FADE CUT
1. Start at the temple and cut all the way around the head to establish
the ultimate location of the fade line. Always cut against the grain
for the shortest cut. Don’t force the blade through the hair. Let the
trimmer do the work.
2. Next, cut around the head again and up the nape of the neck to the
fade line, brushing away the cut hair as you go. Pull the scalp taut
with the thumb for the closest cut. Turn the trimmer upside down
when necessary to keep cutting against the grain. Make sure both
sides of the head are even.
3. For the top of the head, cut with the grain using the individual
guide comb attachments. The smaller the number of the comb,
the shorter the cut. Comb or brush the hair as you cut for an even
end result.
4. To complete the fade, blend the hair at the fade line by trimming
up and out across the line and against the grain all the way around
the head. Then, repeat all around, turning the T-Pro trimmer
upside down and cutting downward. The final objective is to blend
the hair so there is no real line, just a perfect fade from bald to
very short hair. You can achieve this by using the #1 individual
guide comb attachment. Continue combing and cutting until you
achieve the desired effect.
5. To create a part, pick a spot off-center. Pull the scalp tight and with
the end of the blade perpendicular to the head, move the trimmer
back and forth to cut a line. Comb through it and cut again to
make sure the cut is precise.
SHAVING
Wash Up
1) Make sure your hands and fingernails are scrubbed as clean as
possible before touching your face. Irritated skin is very easily
infected by germs.
2) Wash and dry your face thoroughly to unclog pores and whisker
follicles. Use a rough towel to help remove dead skin and invigorate
the skin. Also, consider using an antiseptic lotion.
Brush Up - Use of Beard Brush
3) Brush your beard thoroughly every day with a good scrubbing
action. This is important because it frees ingrown whiskers and
moves the rest around so they don’t take hold and start growing
in. Use the special beard brush provided or any other small, stiff-
bristle brush that can be sanitized (a toothbrush is fine). Keep the
brush clean.
4) Brush your face as often as possible to start training your beard to
grow in one direction. This goes a long way to ensuring a clean,
close shave without skin irritation (you may even want to stop
shaving altogether long enough to establish a brushing pattern).
Most people can expect good results following these brushing
strokes:
• Brush down from each ear, across the cheek and along the
jawbone toward the chin.
• Brush away from the point of the chin on each side, back along
the lines just under the jawbone.
• Brush up from the lower hairline, all around the neck, up to the
lines of the previous stroke.
• Brush from the lower lip down over the chin.
• Brush down from the nose to the upper lip.
5) Shave with Wahl trimmer following the SAME STROKES and going
in the SAME DIRECTION you brushed. Stretch a section of skin
with the fingers of one hand, while holding the shaver blade head
flat against the face with the other hand. Push it forward with
slight pressure in a stroking action across the skin. You may want
to go over the same area several times. Just be sure you always
shave in the same direction each time.
6) Continue this program as long as ingrown hairs and bumps are
a problem. Later, you may wish to switch back to a razor-close
shaving method. But return to use of the Wahl trimmer at the first
sign of the problem coming back. And never stop brushing.
MUSTACHE TRIMMING
1. Comb your mustache. Looking into a well-lit mirror, comb your
mustache in the direction that it grows. This will help reveal stray
hairs and achieve an even, balanced trim.
2. Cut the outline of your mustache. Holding the trimmer in a
vertical position, with the nameplate side facing you, define the line
of your mustache. The extended tips on the blades let you achieve
a clean, well-defined mustache line.
3. Defining. As a finishing step, hold the trimmer with the name-
plate facing you. Using only the bare blades, make a definitive line
at the bottom of your mustache.
4.
Tapering.
Hold the trimmer with the nameplate facing away from
you. Again starting with the middle of your mustache, follow the
lip line and taper out the mustache until a gentle shape is created
on the bottom portion of your mustache.
5.
Defining.
As a finishing step, hold the trimmer with nameplate
facing make a definitive line at the bottom of your mustache.
TRIMMING AND EDGING YOUR BEARD
The following are suggested trimming steps and trimmer positions.
You may find different procedures work better for you.
1. Comb your beard in the direction that it grows to help reveal stray
hairs that may be longer than the others.
2. Attach the longest trimming guide to trim and taper your beard.
Start at each sideburn and stroke downward toward your neck.
Trim toward your chin in smooth, overlapping strokes, following
the lay of your beard. If you trim against the way your beard
naturally lays, the trimmer will cut the hair much shorter and the
result may be patchy.
Use to progressively shorter trimming guides until you reach the
desired length of beard. You may wish to use the shortest
trimming guide attachment to cut closer near the ear and down
under the chin, changing to a longer trimming guide toward
the front of the face and point of your chin. Always be sure the
trimming guide is locked solidly into the desired position before
you start to trim.
3. To cut the outline of your beard, remove the trimming guide.
Starting under your chin and working back toward your jawbone
and ears, cut the outer perimeter of your beard underneath the
jawbone. Continue the line all the way up to the ears and hairline.
4. Accentuate your beard line by using the trimmer in a downward
motion. Start at the line you’ve created and, working from the chin
back toward the ears, trim the area right under your beard line.
5. Define the upper part of your beard using the same technique.
USE YOUR WAHL TRIMMER ON HAIR, TOO
That’s part of its job. You can use it to keep expensive hairstyles
trimmed—shaping hairlines, fading defining parts and trimming
around neck and ears. You can use it to style hair, too, if you wish.
To trim or style hair, first shampoo and dry hair thoroughly.
Holding the Wahl trimmer with toothed edge pointed down, trim off a
little at a time, carefully. It may be best to have someone else help you.
Your trimmer comes with three attachments: #1, #2, and #3. For
fading, use the attachment you desire; #1 for shortest length, #2 for
medium length, and #3 for longest length. Attach the guide comb to
the trimmer, making sure it is secure. Hold trimmer toward the temple
line; begin to cut hair in an upward motion, staying below temple line
for high, tight fades. For high, tight fade or military style fades, use
trimmer with attachment. Cut hair past temple line, working your way
around the head from one side to the other. For blending techniques,
use #2 and #3 attachments to remove bulky hairline.
Eventually, you should develop the skills to stay well groomed by a
quick trim around neck, ears and sideburns.
SAVE THESE INSTRUCTIONS
For Household Use Only
CORD
The cord should not be used to pull the clipper.
Since freedom of movement needs to be
maintained, care should be used to-keep the cord
untwisted and unobstructed. When stored, the cord
should be coiled and the unit placed in original box
or-storage pouch (if provided).
If your clipper has a polarized plug: To reduce the
risk of electric shock, this appliance has a polarized
plug (one blade is wider than the other). This plug
fits in a polarized outlet only one way. In the event
the plug does not fit fully in the outlet, reverse
the plug. In the event it still does not fit, contact a
qualified electrician to install the proper outlet. Do
not change the plug in any way.
SHARPENING
Trimmer blades have precision-ground cutting teeth. Blades should
be handled carefully and never bumped. To keep blades sharp, cut
only clean hair and avoid cutting into dirt or abrasive particles.
Blades should be sharpened or changed in sets only. To remove blades
for sharpening or replacement, loosen and remove two screws on
bottom blade. Replace same and tighten. To have blades sharpened,
return blades (only) along with a check or money order for $6.95
(includes shipping back to you) to:
Wahl Clipper Corporation • Attn: Repair Department
3001 Locust Street • Sterling, IL 61081
Telephone: (800) 767-9245
New replacement blades may be acquired from a Wahl Authorized
Service Center.
For products purchased outside of the United States,
please contact your distributor.
NOW YOU CAN KEEP ON SHAVING WHILE
CLEANING UP INGROWN WHISKERS
Men with very curly facial hair have a special problem with shaving.
Specifically, ingrown whiskers. Their whiskers curl back toward the
skin — and grow in many different directions.
Electric razors can’t pick them up through their slotted or mesh heads.
And safety razors slice them off at a sharp angle. Either way, the
stubble is left in an ideal condition to cause ingrown hair problems.
Continued shaving over the bumps and irritated skin,
of course, makes the condition worse.
But you don’t have to stop shaving altogether. With this Wahl
trimmer and its specially designed T-blade, you can maintain a neat,
shaved appearance while getting help with ingrown whiskers. Its
open-tooth comb action picks up and straightens curly whiskers for
cutting — while its high-speed blades move across at a flat angle to
the whiskers, clipping them off evenly.
CARING FOR YOUR TRIMMER
OILING BLADES
For best results, put one or two drops of Wahl Clipper Oil on
the blades only when necessary, or approximately once a month.
Motor bearings are permanently lubricated—do not attempt to oil.
When oiling your trimmer, turn the trimmer “ON - I,” hold the unit
with the blades facing DOWN and squeeze one or two drops of oil
onto the blades. Wipe off excess oil with soft cloth.
NOTICE—DO NOT OVER OIL!
Excessive oiling or application of liquids will cause damage if
allowed to seep back into motor.
BLADE CARE
Trimmer blades have precision-hardened, ground and lapped
cutting teeth. Blades should be handled carefully and never
bumped or used to cut dirty or abrasive material. Never rinse the
blades with water, or the blades may rust. Clean with the included
brush.
CLEANING/STORAGE
Before storing your trimmer, use the cleaning brush to whisk
any loose hairs from the unit and the blades. For units with a
soft-touch grip, use a damp cloth to wipe down the body of the
trimmer, taking care not to get the blades wet. Store unit in such a
manner so that blades are protected from damage.
When the trimmer is not in use, the trimmer guide/blade guard
attachment should be in place to protect the blades.
Operating Instructions for
the T-Pro Corded Trimmer
Manual de Operación para la
Recortadora T-Pro
8 ft. Cord
Cordon de
8 Pies
grooming.wahl.com
© 2016 Wahl Clipper Corporation
Part No. 1000426
Printed in Vietnam
For more information or Product Registration, visit grooming.wahl.com
3-YEAR LIMITED WARRANTY
Valid in U.S.A. Only
If your Wahl product fails to operate satisfactorily within three
(3) years from the date of original purchase or receipt as a gift,
Wahl will, at our option, repair or replace it and return it to you
FREE OF CHARGE. Do not return this product to store where
purchased. Products needing repair under this warranty should
be returned with postage prepaid to:
Wahl Clipper Corp.
Attn: Repair Department
3001 Locust Street
Sterling, Illinois 61081
Include a note describing the defect and the date of original
purchase or receipt as a gift (if in warranty). Products out of
warranty will be repaired at our standard repair charges.
This warranty is void and no repair or replacement will be made
under this warranty or otherwise if: (1) The product is modified
in any manner or repaired by anyone other than Wahl Clipper
Corporation or Wahl authorized service center. (2) The product
has been used commercially or subjected to unreasonable use.
This warranty gives you specific legal rights and you may
also have other rights which may vary from state to state. No
other written express warranty is given. Any implied warranty,
including any warranty of merchantability which may arise from
purchase or use, is limited to the year period provided in this
express warranty. Some states may not allow such limitation,
so it may not apply to you. No responsibility is assumed for
incidental or consequential damages of any type, or for the use
of unauthorized attachments. Some states may not allow the
exclusion or limitation of incidental or consequential damages, so
the limitation or exclusion may not apply to you. Outside U.S.A.,
check with store for Wahl authorized distributor’s warranty.
T- P r o
™
SERVICE AND REPAIR
If you have problems with your trimmer, send it prepaid
with a note explaining the problem to:
Wahl Clipper Corporation
Attn: Repair Department
3001 Locust Street
Sterling, IL 61081
Telephone (800) 767-9245
For products purchased outside the United States, contact your distributor.
If for any reason within 60 days of purchase of your Wahl
®
trimmer you are not satisfied with your trimmer and would
like a refund, just return your trimmer, together with the sales
receipt, to the retailer from whom you purchased it. Wahl will
reimburse all retailers who accept trimmers within 60 days of
purchase. If you have any questions regarding this money-
back guarantee, please call 1-800-767-9245 in the United
States.
60 Day Money Back Guarantee!

21
76
3
8
4
9
5
10
EL CORTE BALD FADE
1. Comience a cortar a la altura de la sién, siguiendo después todo
alrededor de la cabeza, para establecer la linea de sombra. Corte
siempre en la dirección contraria al crecimiento natural del cabello
para conseguir el estilo de cabello más corto. No fuerce la hoja a
través del cabello. Deje que la recortadora haga el trabajo.
2. Seguidamente, corte alrededor de la cabeza otra vez y desde la
nuca hacia arriba, hasta la linea de sombra, eliminando el cabello
ya cortado, al mismo tiempo. Estire el cuero cabelludo con sus
dedos para conseguir un corte de cabello más cerrado. Vire
la recortadora cuando sea necesario realizar el corte en la dirección
contraria al crecimiento natural del cabello. Asegúrese de que
ambos lados de la cabeza estén iguales.
3. Para el corte en la parte superior de la cabeza, corte en la dirección
del crecimiento natural del cabello utlizandolos peines guías .
Cuanto más pequeño es el número del peine, más corto es el
corte. Vaya peinando o cepillando al mismo tiempo que va usted
cortando, para conseguir un resultado proporcionado.
4. Para completar el resultado, mezcle el cabello de la linea de
sombra, cortando las puntas hacia arriba y hacia fuera de la linea,
y en dirección contraria al crecimiento natural del cabello, todo
alrededor de la cabeza. Después, repita el corte otra vez alrededor
de la cabeza, pero dándole la vuelta a la recortadora “T-Pro” , y
cortando hacia abajo. Puedes alcanzar esto usando el accesorio
individual del peine de la guía #1. Continue peinando y cortando
hasta conseguir el resultado deseado.
5. Para crear la raya o una división, seleccione una zona fuere del
centro de la cabeza. Estire su cabellera , y con la parte del final
de la hoja, perpendicular a la cabeza, mueva la cortadora de atrás
hacia adelanate, para crear una linea. Peine la zona y corte otra vez,
asegurándose de que el corte es preciso.
piel. Tal vez deba recorrer la misma área varias veces. Simplemente
cerciórese de afeitarse en el mismo sentido cada vez.
6) Continúe con este programa siempre y cuando los pelos encarnados
y los sobresaltos sean un problema. Posteriormente, puede cambiar a
un método de afeitado bien corto estilo cuchilla de afeitar. Pero vuelva
a usar la recortadora Wahl ante el primer indicio de que el problema
haya regresado. Y jamás deje de cepillarse.
RECORTE DEL BIGOTE
1. Peine el bigote.
Al mirarse en un espejo bien iluminado, peine
el bigote en el sentido del crecimiento. Eso ayuda a revelar pelos
sueltos y a que el recorte sea más parejo y equilibrado
2. Corte el trazo del bigote.
Sosteniendo la recortadora en
posición vertical con la placa de identificación frente a usted, defina
la línea del bigote. Las puntas extendidas de las cuchillas permiten
que la línea del bigote quede bien definida y nítida.
3. Definición.
Como paso de acabado, sostenga la recortadora con
la placa de identificación frente a usted. Al usar solamente las
cuchillas, haga una línea definitiva en la parte inferior del bigote.
4. Sesgo.
Sostenga la recortadora con la placa de identificación en
el lado opuesto al suyo. De nuevo, empezando en la mitad del
bigote, siga el margen del labio y sesgue el bigote hasta crear una
forma suave en la porción inferior del bigote.
5. Definición.
Como paso de acabado, sostenga la recortadora con
la placa de identificación hacia usted, haga una línea definitiva en la
parte inferior del bigote.
RECORTE Y DESBASTADO DE LA BARBA
Los siguientes son pasos de recorte y posiciones sugeridas para
la recortadora. Tal vez encuentre distintos procedimientos que le
resulten más útiles.
1. Peine la barba en la dirección del crecimiento para exponer pelos
sueltos y más largos que los demás.
2. Conecte la guía de recorte más larga para recortar y sesgar la
barba. Empiece con cada patilla y recorra hacia abajo, hacia
el cuello. Recorte hacia la barbilla con recorridos uniformes y
sobrepuestos, siguiendo el crecimiento de la barba. Si recorta en
contra del crecimiento de la barba, la recortadora corta más corto
CUIDADO DE LA RECORTADORA
LUBRICACIÓN DE LAS HOJAS
Para obtener los mejores resultados, ponga una o dos gotas de
aceite Wahl Clipper en las hojas sólo cuando sea necesario, o
aproximadamente una vez al mes. Los cojinetes del motor están
lubricados permanentemente. No trate de lubricarlos.
Al lubricar su recortadora, enciéndala “ON – I” y sujétela con las
hojas apuntando HACIA ABAJO y exprima una o dos gotas de
aceite en las hojas. Limpie el exceso de aceite con un paño suave.
AVISO: ¡NO LUBRIQUE EXCESIVAMENTE!
La lubricación o aplicación de líquidos excesiva causará daños si
se deja que se filtre y llegue al motor.
CUIDADO DE LAS HOJAS
Las hojas de la recortadora tienen dientes de corte endurecidos
con precisión, rectificados y pulidos. Las hojas deben manipularse
con cuidado y no golpearse nunca ni usarse para cortar materiales
sucios o abrasivos. No enjuagar la cuchilla con agua, o las hojas
se pueden oxidar. Limpiar con el cepillo incluido.
LIMPIEZA/ALMACENAMIENTO
Antes de guardar la recortadora, use el cepillo de limpieza para
retirar los pelos sueltos de la unidad y hojas. Para las unidades
con un agarre suave al tacto, utilice un paño húmedo para limpiar
el cuerpo del recotador, teniendo cuidado para que no obtenga las
hojas mojadas. Guarde la unidad de tal manera que las hojas estén
protegidas contra los daños.
Cuando no se use la recortadora, el accesorio de guía de
recortadora/protector de hojas debe estar colocado para proteger
las hojas.
AFILADO
Las hojas afiladas tienen unos dientes de corte pulido de precisión.
Las hojas deben ser manejadas cuidadosamente y nunca deben de
golpearse. Para mantener las hojas afiladas corte solamente pelo
limpio y evite cortar sobre suciedad o partículas abrasivas.
Solamente puede afilar o cambiar los juegos completos de hojas.
Para remover las hojas, ya sea para afilarlas o reemplazarlas, afloje y
quite los dos tornillos de la hoja inferior. Coloquelas del mismo modo
y asegúrelas.
Para afilar las hojas, regreselas (solamente) con un cheque o una
orden de pago por U$6.95 (incluye el envio de regreso) a:
Wahl Clipper Corporation
Attn: Repair Department
3001 Locust Street • Sterling, IL 61081
Teléfono: 800 767 9245
Los reemplazos nuevos de hojas se encuentran disponibles en su
tienda favorita más cercana, o bien en
Wahl Clipper Corporation.
Para productos comprados fuera de Estados Unidos, comuníquese
con su distribuidor.
AHORA USTED PUEDE SEGUIR AFEITANDO
MIENTRAS LIMPIA ENCIMA DE LAS BARBAS
DE INGROWN
Los hombres con el pelo facial muy rizado tienen un problema especial
al afeitar. Específicamente con las barbas del ingrown. Sus barbas se
encrespan hacia la piel - y crecen en diversas direcciones.
Las afeitadoras eléctricas no pueden tomar a través de sus cabezales.
Y las afeitadoras de seguridad las rebanan apagado a un ángulo
agudo. Cualquier manera, el stubble es la causa principal a los
problemas del pelo del ingrown. El afeitar continuo sobre los
topetones y la piel irritada, por supuesto, marcan la condición peor.
Pero no tienes que parar de afeitar. Con esta recortadora de Wahl
y su diseno de “Lámina T” , es especificamente disenado para
mantener un aspecto afeitado , mientras que consigue ayuda con las
barbas del ingrown. Este tipo de diente abierto endereza las barbas
rizadas para que las laminas puedan cortar en el angulo plano,
mientras que sus láminas de alta velocidad van a ir cortando los pelos
de una forma pareja.
AFEITADO
Lávese
1) Asegurase de que las manos y las uñas hayan sido cepilladas y estén
tan limpias como sea posible antes de tocarse la cara. Los microbios
infectan la piel irritada con mucha facilidad.
2) Lávese la cara y séquela completamente para despejar los poros y los
folículos. Use una toalla áspera para ayudar a soltar la piel muerta y
seca. Además, piense en usar una loción antiséptica.
Cepíllese – Uso del cepillo para la barba
3) Cepíllese la barba completamente todos los días con una buena
acción de fregado. Eso es importante puesto que suelta los pelos
encarnados y mueve el resto para que no penetren ni se encarnen.
Use el cepillo especial para la barba incluido o cualquier otro
cepillo pequeño con cerdas fuertes que se pueda desinfectar (un
cepillo de dientes está bien). Mantenga limpio el cepillo.
4) Cepíllese la cara con la mayor frecuencia posible para empezar
a entrenar la barba para que crezca en un sentido. Eso sirve
bastante para asegurar una afeitada corta y nítida sin irritación de
la piel (tal vez quiera dejar de afeitarse durante un buen tiempo
para establecer un patrón de cepillado). La mayoría a la gente
puede esperar buenos resultados al seguir estos recorridos de
cepillado:
• Cepíllese desde cada oreja, por toda la mejilla y a lo largo de la
mandíbula hacia el mentón.
• Cepíllese desde la punta del mentón en cada lado, hacia atrás,
a lo largo de las líneas justo por debajo de la mandíbula.
• Cepíllese hacia arriba desde la parte baja del margen del
cabello, alrededor de todo el cuello, hasta las márgenes del
recorrido anterior.
• Cepíllese desde el labio inferior hacia abajo del mentón.
• Cepíllese hacia abajo de la nariz al labio superior.
5) Aféitese con la recortadora Wahl siguiendo los MISMOS RECORRIDOS
y en el MISMO SENTIDO en que se cepilló. Estire una sección de la
piel con los dedos de una mano, mientras sostiene la cuchilla del
cabezal de la afeitadora contra la cara con la otra mano. Empújela
hacia adelante con un poco de presión en un recorrido a lo largo de la
TAMBIÉN USE LA RECORTADORA WAHL
PARA EL PELO
Eso es parte de su trabajo. La puede usar para mantener los cortes
costosos — darle forma al margen del pelo, a las partes de definición
que se desvanecen y cortar alrededor del cuello y las orejas. También
la puede usar para darle estilo al cabello.
Para recortar o darle estilo al cabello, primero lávelo con champú y
séquelo completamente. Al sostener la recortadora Wahl con el borde
dentado apuntando hacia abajo, recorte poco a poco, con cuidado.
Tal vez sea mejor que alguien le ayude. La recortadora viene con
tres accesorios: #1, #2, y #3. Para desvanecer, use el accesorio que
prefiera; #1 para la menor longitud, #2 para una longitud intermedia, y
el #3 para la mayor longitud. Póngale el peine de guía a la recortadora,
cerciorándose de que quede fijo.
Sostenga la recortadora contra la línea de la sien; empiece a cortar
el pelo con movimientos ascendentes, permaneciendo por debajo
de la sien para un desvanecimiento alto y corto. Para darle un
desvanecimiento alto y corto o estilo militar, use la recortadora con
el accesorio. Corte el pelo más allá de la línea de la sien, recorriendo
alrededor de la cabeza de un lado al otro. Para las técnicas de
convergencia, use los accesorios #2 y #3 para cortar el margen del
pelo voluminoso.
Poco a poco usted desarrolla la habilidad para mantenerse acicalado al
hacer cortes rápidos alrededor del cuello, las orejas y las patillas.
GUARDE ESTAS INSTRUCCIONES
Solamente Para Uso Residencial
CABLE
El cable no debe usarse nunca para sujetar la
cortadora. Debido a que ha de mantenerse la
libertad de movimiento, hay que procurar que el
cable no se doble o retuerza o se obstruya. Cuando
guarde la cortadora, el cable ha de ser enroscado,
y la cortadora ha de guardarse en la caja original o
en el espacio proveído en el paquete (Si se provee).
Si su cortadora posee un enchufe polarizado: Para
reducir el riesgo de electrocución, este aparato
eléctrico posee un enchufe polarizado (una de
las “patas” es más ancha que la otra). Este tipo
de enchufe encaja perfectamente en una toma de
corriente, solamente en una dirección. En el caso
de que el enchufe no encaje perfectamente en la
toma de corriente, invierta el enchufe y pruebe de
nuevo. En caso de que aún así, no encaje, contacte
con un electricista cualificado para instalar la toma
de corriente adecuada. No intente modificar el
enchufe de ninguna forma.
GARANTÍA LIMITADA DE TRES AÑOS
Válida solo en los Estados Unidos
Si su producto Wahl deja de funcionar satisfactoriamente durante
el período de tres (3) años a partir de la fecha de compra original
o de haberlo recibido como regalo, Wahl reparará o reemplazará el
producto a su criterio y se lo devolverá gratuitamente. No devuelva
este producto a la tienda dónde usted lo ha comprado. Los
productosque necesiten ser reparados bajo los términos de esta
garantía, deben ser enviados, con franqueo pagado a:
Wahl Clipper Corp.
Attn: Repair Department
3001 Locust Street
Sterling, Illinois 61081
Incluya una nota describiendo el problema y la fecha de la compra
original o recibo del regalo (si aún está bajo garantía). Los productos
fuera de garantía serán reparados a nuestros precios regulares de
reparación.
Esta garantía quedará anulada y no se efectuará ninguna reparación
o reemplazo en el caso de que: (1) Si el producto se modifica
de cualquier manera o es reparado por cualquier otra persona
con excepción de Wahl Clipper Corporation o centro de servicio
autorizado Wahl. (2) El producto se ha utilizado comercialmente o se
ha sujetado al uso desrazonable.
Esta garantía le otorga derechos legales específicos y usted podrá
tener otros derechos que pueden variar de un estado a otro. No
existe otro documento como tal y no se dará ningún otro por
escrito. Cualquier otra garantía implícita, incluyendo cualquier
garantía mercantil que pueda surgir de la compra de este producto
o de su uso, está limitada al período de años mencionado en esta
garantía expresa. Es posible que algunos estados no permitan
dichas limitaciones, y por tanto puede que esta limitación no sea
aplicable a su caso. No se asume ninguna responsabilidad por
daños incidentales o daños causados por la utilización inadecuada,
o por el uso de accesorios sin autorización del fabricante. Puede
que algunos estados no permitan la exclusión o la limitación de
daños incidentales o por daños debidos a la utilización inadecuada
de este producto, de modo que la exclusión o limitación pueda no
ser aplicable a su caso. Esta garantía es solo válida en los Estados
Unidos. Fuera de los Estados Unidos, pregunte en la tienda por la
garantía del distribuidor autorizado de Wahl.
Para mas informacion o Registracion de Producto
visite grooming.wahl.com
SERVICIO Y REPARACIÓN
Si tiene problemas con la recortadora, envíela con franqueo
prepagado y una nota explicando el problema a:
Wahl Clipper Corporation
Attn: Repair Department
3001 Locust Street • P.O. Box 578
Sterling, IL 61081
Teléfono (800) 767-9245
Para productos comprados fuera de Estados Unidos,
póngase en contacto con su distribuidor.
Si por cualquier razón entre los 60 días de la compra de su
recortadora de Wahl no esta satisfecho con su compra y
desea una devolución de su dinero, regrese la recortadora
junto con su recibo de compras a la tienda donde lo
compro. Wahl reembolsara a las tiendas quienes acepta
las recortadoras entre los 60 días de su compra. Si tiene
preguntas tocantes esta Garantía, por favor llamanos al
1-800-767-9245 en los Estados Unidos.
GARNATÍA 60 DIAS PARA DEVOLUCIÓN DE SU DINERO
y el resultado puede ser disparejo.
Use las guías de recorte progresivamente más cortas hasta llegar
a la longitud de barba deseada. Tal vez quiera poner el accesorio
de guía de recorte más corto para cortar más alrededor de la oreja
y por debajo de la barbilla, cambiando a una guía de recorte más
larga para el frente de la cara y la punta de la barbilla. Cerciórese de
que la guía de recorte siempre esté enganchada firmemente en la
posición deseada, antes de empezar a recortar.
3. Quite la guía de recorte para cortar la silueta de la barba.
Empezando por debajo de la barbilla, recorriendo hacia atrás, hacia
la mandíbula y las orejas, corte el perímetro externo de la barba,
por debajo de la mandíbula. Siga la línea completamente hasta las
orejas y el margen del cabello.
4. Acentúe el margen de la barba al usar la recortadora con un
movimiento descendente. Empiece donde creó la línea y con
movimientos de la barbilla hacia las orejas, recorte el área justo
debajo del margen de la barba.
5. Defina la parte superior de la barba siguiendo la misma técnica.
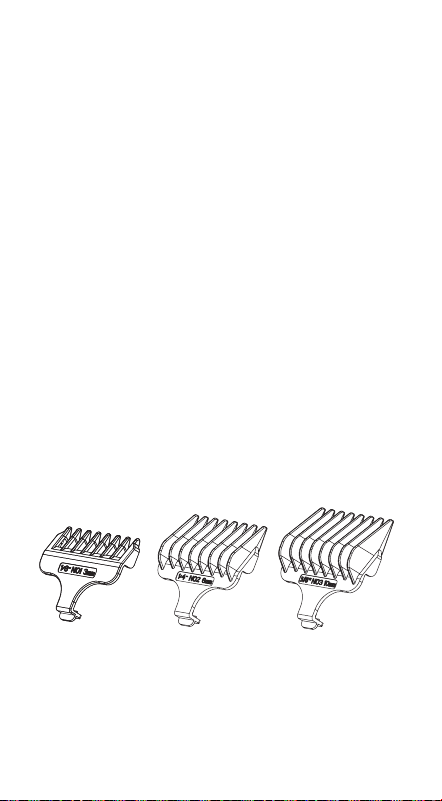