Loading ...
Loading ...
Loading ...
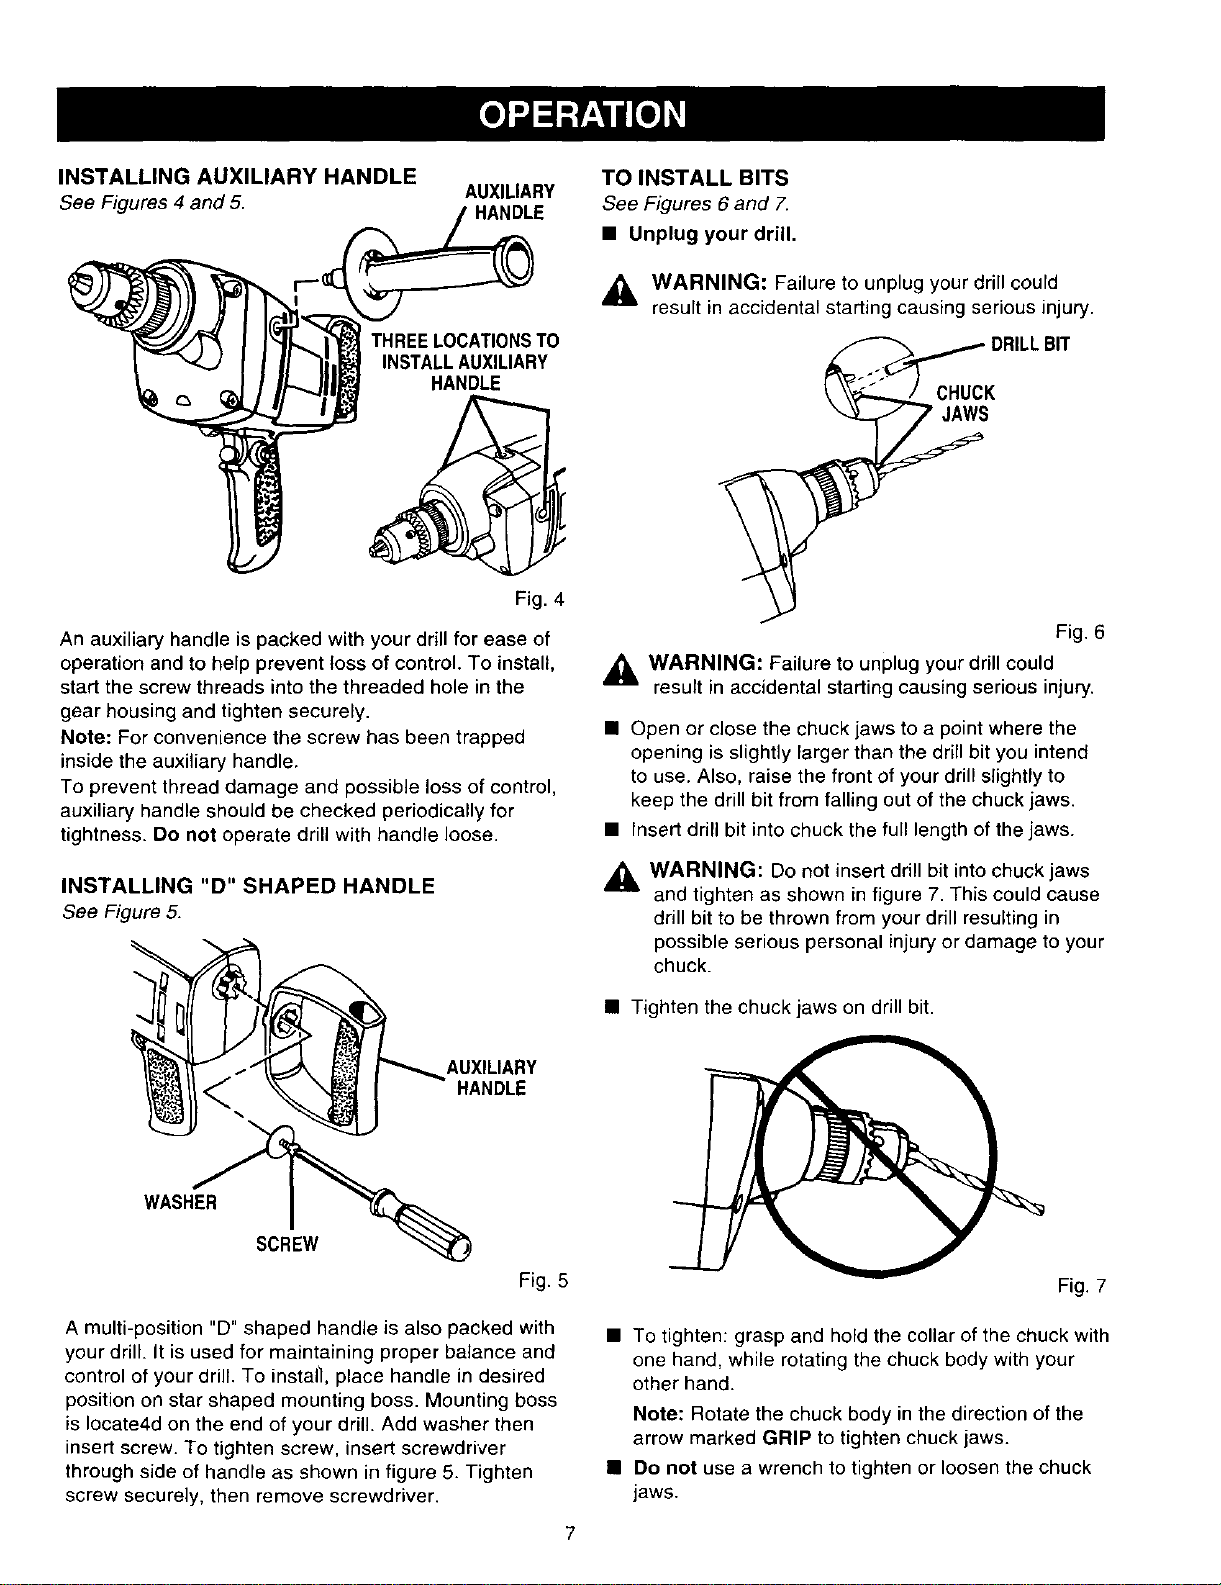
INSTALLING AUXILIARY HANDLE
See Figures 4 and 5.
AUXILIARY
HANDLE
TO INSTALL BITS
See Figures 6 and 7.
• Unplug your drill.
THREELOCATIONSTO
INSTALLAUXILIARY
HANDLE
Fig. 4
An auxiliary handle is packed with your drill for ease of
operation and to help prevent toss of control. To install,
start the screw threads into the threaded hole in the
gear housing and tighten securely.
Note: For convenience the screw has been trapped
inside the auxiliary handle.
To prevent thread damage and possible loss of control,
auxiliary handle should be checked periodically for
tightness. Do not operate drill with handle loose.
INSTALLING "D" SHAPED HANDLE
See Figure 5.
AUXILIARY
HANDLE
WASHER
SCREW
Fig. 5
WARNING: Failure to unplug your drillcould
result in accidental starting causing serious injury.
I_CHuc:RILL BIT
Fig. 6
,_ WARNING: Failure to unplug your drill could
resurt in accidental starting causing serious injury.
• Open or close the chuck jaws to a point where the
opening is slightly Fargerthan the drill bit you intend
to use. Also, raise the front of your drill slightly to
keep the drill bit from falling out of the chuck jaws.
• Insert drill bit into chuck the full length of the jaws.
_k WARNING: Do not insert drill bit into chuck jaws
and tighten as shown in figure 7. This could cause
drill bit to be thrown from your drill resulting in
possible serious personal injury or damage to your
chuck.
• Tighten the chuck jaws on drill bit.
Fig. 7
A multi-position "D" shaped handle is also packed with
your drill. It is used for maintaining proper balance and
control of your drill. To install, place handle in desired
position on star shaped mounting boss. Mounting boss
is Iocate4d on the end of your drill. Add washer then
insert screw. To tighten screw, insert screwdriver
through side of handle as shown in figure 5. Tighten
screw securely, then remove screwdriver.
• To tighten: grasp and hold the collar of the chuck with
one hand, while rotating the chuck body with your
other hand.
Note: Rotate the chuck body in the direction of the
arrow marked GRIP to tighten chuck jaws.
• Do not use a wrench to tighten or loosen the chuck
jaws.
Loading ...
Loading ...
Loading ...