Loading ...
Loading ...
Loading ...
Page 25
mrcool.com
Outdoor Unit Installation
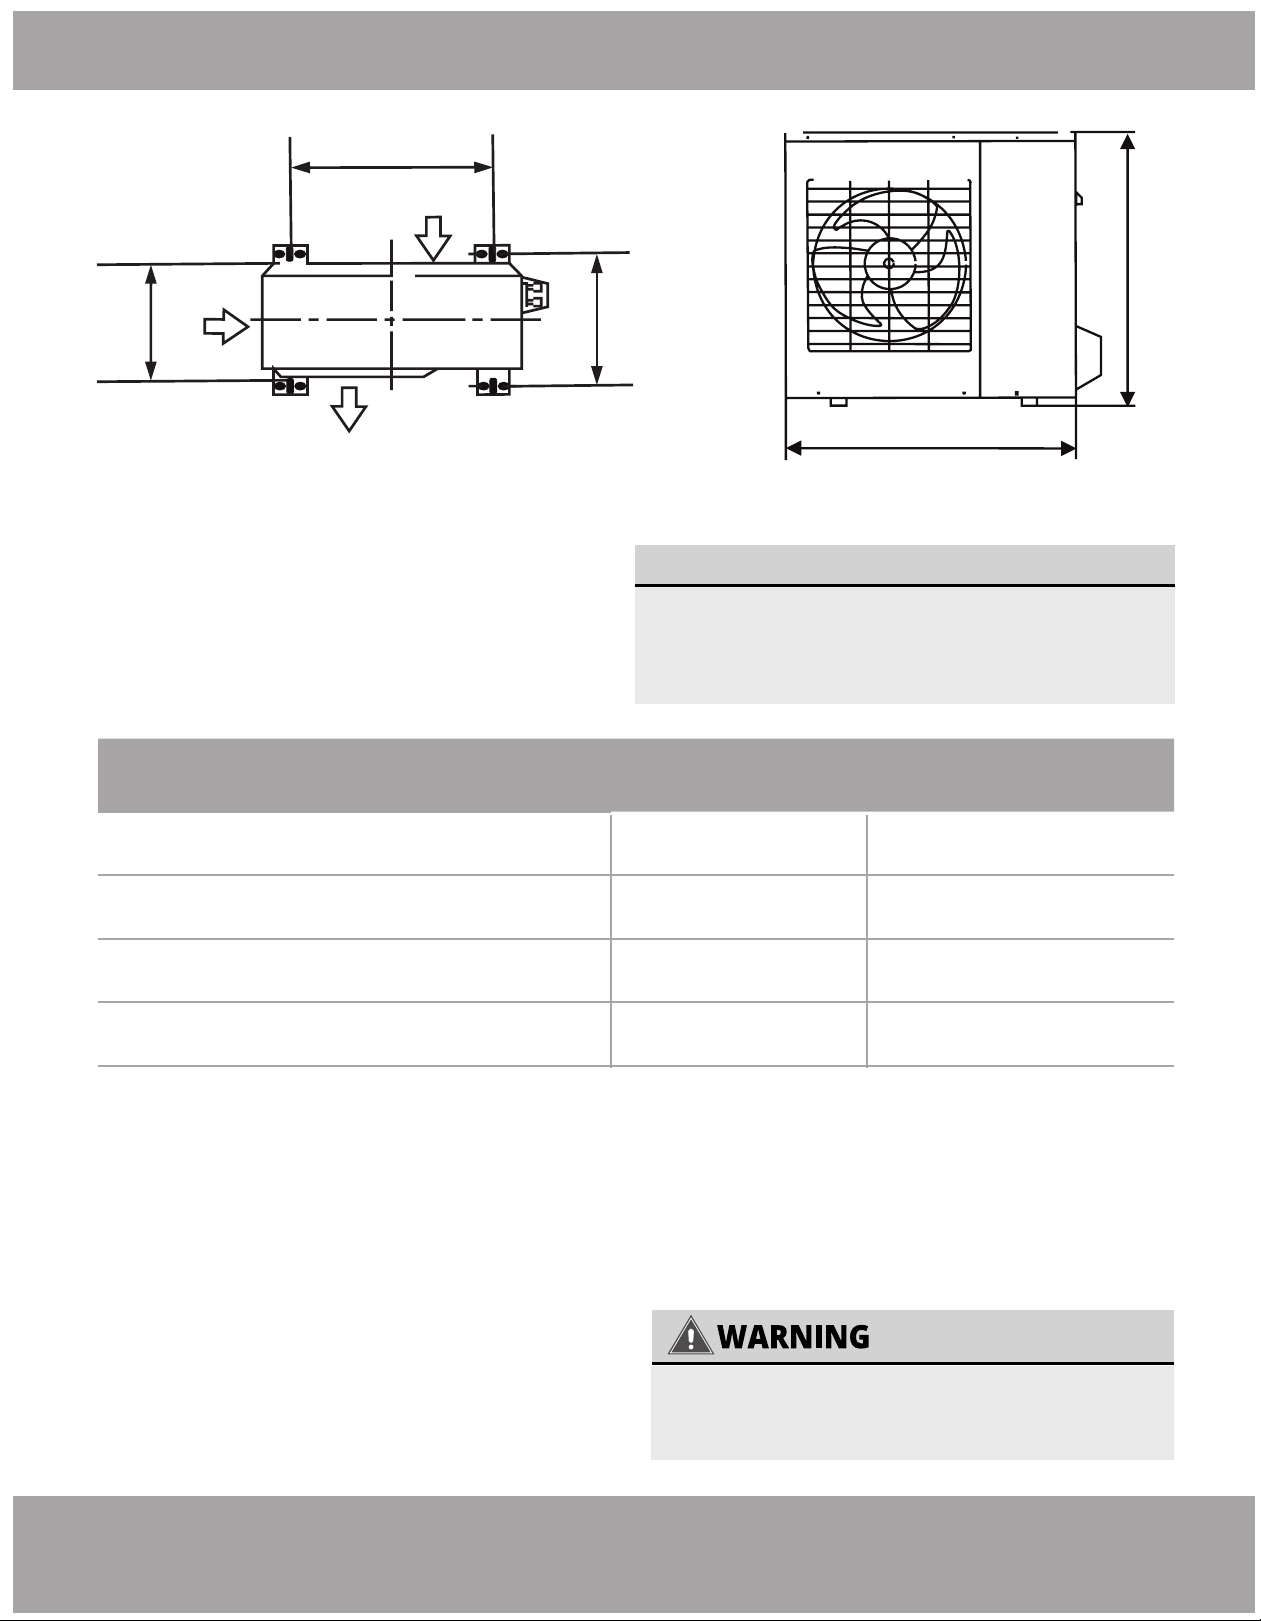
Outdoor Unit Dimensions (inches)
Width (W) x Height (H) x Depth (D)
Mounting Dimensions (inches)
Width (A) Depth (B)
31.5 x 21.8 x 13.1 (inches)
800 x 554 x 333 mm
20.24 in.
514 mm
13.39 in.
340 mm
37.21 x 31.9 x 16.53 (inches)
946 x 810 x 420 mm
26.5 in.
673 mm
15.87 in.
403 mm
33.25 x 27.63 x 14.29 (inches)
845 x 702 x 363 mm
21.26 in.
540 mm
13.8 in.
350 mm
37.21 x 31.9 x 16.53 (inches)
946 x 810 x 420 mm
26.5 in.
673 mm
15.87 in.
403 mm
DIY-12-HP-C-115B
DIY-24-HP-C-230B
DIY-18-HP-C-230B
DIY-36-HP-C-230B
WHEN DRILLING INTO CONCRETE,
EYE PROTECTION IS RECOMMENDED
AT ALL TIMES.
W
H
D
Air Inlet
A
B
Air Outlet
Air Inlet
Fig. 5.5
If you will install the unit on the ground or on a
concrete mounting platform, do the following:
1. Mark the positions for four expansion bolts based
on dimensions in the Unit Mounting Dimensions
chart.
2. Pre-drill holes for expansion bolts.
3. Clean concrete dust away from holes.
4. Place a nut on the end of each expansion bolt.
5. Hammer expansion bolts into the pre-drilled
holes.
Step 3: Anchor outdoor unit
The outdoor unit can be anchored to the ground
or to a wall-mounted bracket.
UNIT MOUNTING DIMENSIONS
The following is a list of different outdoor unit
sizes and the distance between their
mounting feet. Prepare the installation base
of the unit according to the dimensions below.
6. Remove the nuts from expansion bolts, and
place outdoor unit on bolts.
7. Put washer on each expansion bolt, then
replace the nuts.
8. Using a wrench, tighten each nut until snug.
Loading ...
Loading ...
Loading ...