Loading ...
Loading ...
Loading ...
77
76
75
74
42
2
1
85
84
32L
81
37
35
37
82
35
32R
13
13
42
74
75
76
77
36
36
64
ASSEMBLY INSTRUCTIONS
10
L
R
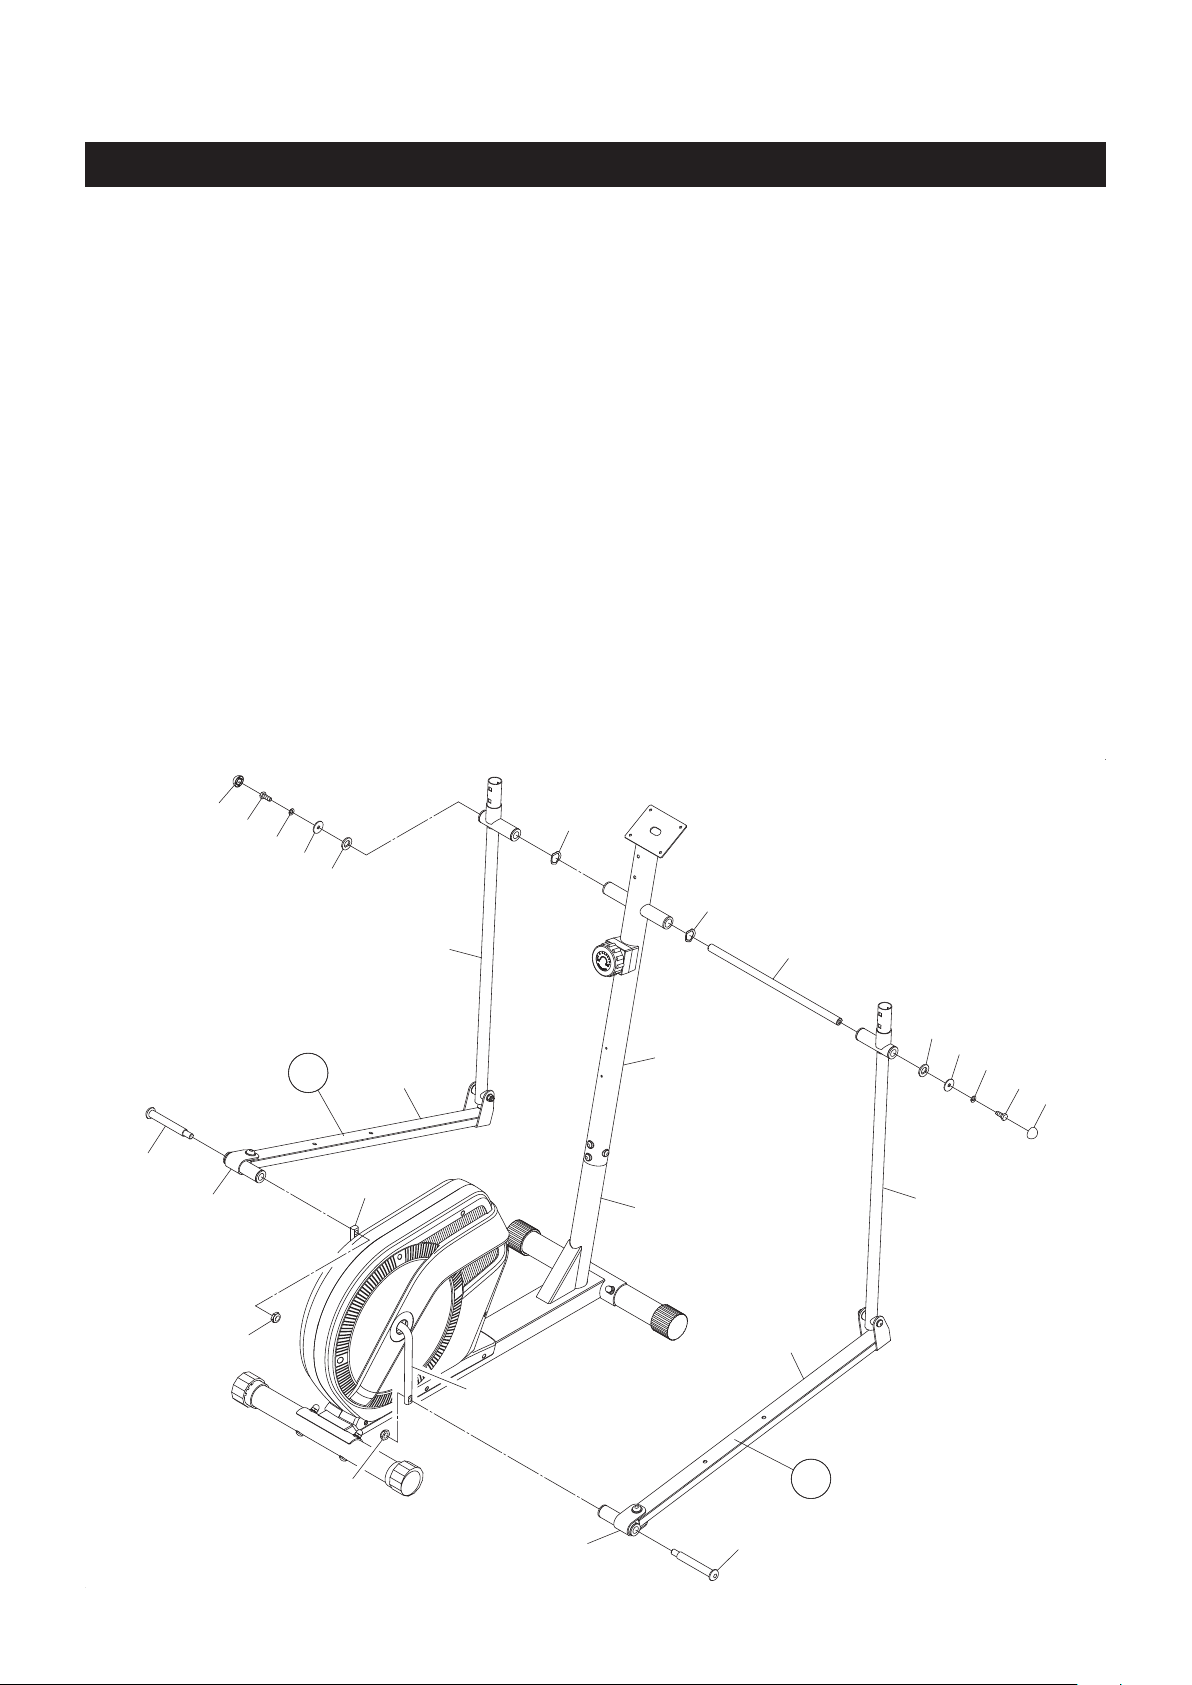
STEP 4: There is an “L” decal on the LEFT PEDAL ARM ASSEMBLY(32L), and an “R” decal on the
RIGHT PEDAL ARM ASSEMBLY(32R). Insert the SHAFT(64) through the tube on the UPRIGHT(2).
Place a WAVE WASHER(S16)(36) on each side of the SHAFT(64). Slide the PIVOTING ARMS(35) on
the LEFT and RIGHT PEDAL ARM ASSEMBLY(32L, 32R) onto the SHAFT(64) on both sides and secure
with D HOLE WASHERS(77), LARGE WASHERS(M8xø28mm)(76), LOCK WASHERS(M8)(75), and HEX
HEAD BOLTS(M8x1.25x20mm)(74). You need to use two wrenches to tighten the HEX HEAD BOLTS
(M8x1.25x20mm)(74) at both ends of the SHAFT(64) at the same time. Place a NUT CAP(42) onto the
HEX HEAD BOLTS(M8x1.25x20mm)(74).
NOTE: Make sure the D HOLE WASHERS(77) t onto the D shaped ends of the SHAFT(64) before securely
tighten the HEX HEAD BOLTS(M8x1.25x20mm)(74).
STEP 5
NOTE: The LEFT SHAFT BOLT(81) has L stamped on the end of the bolt. The RIGHT SHAFT BOLT(82)
has R stamped on the end of the bolt. The LEFT SHAFT BOLT(81) and LEFT THIN NYLOCK
NUT(1/2”-20)(84) are in brass color, both of them have left hand threads and are tightened by
turning counterclockwise. The RIGHT SHAFT BOLT(82) and RIGHT THIN NYLOCK NUT(1/2”-20)
(85) have right hand threads and are tightened by turning clockwise.
Connect the back end of the RIGHT PEDAL ARM(32R) to the right side of the CRANK(13) with the RIGHT
SHAFT BOLT(82) and tightening securely. Thread the RIGHT THIN NYLOCK NUT(1/2”-20)(85) onto the
RIGHT SHAFT BOLT(82) and tighten securely. Repeat on the left side.
Loading ...
Loading ...
Loading ...