Loading ...
Loading ...
Loading ...

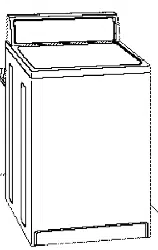
ReversibleSuperWideSide-SwingDoor
5
6=
3
1. Place towel (1) on top of dryer to protect surface.
2. Open dryer door. Remove bottom screws from cabinet side of
hinges (4). Loosen (do not remove) top screws from cabinet
side of hinges.
3. Liftdoor untiltop screws in cabinet are in large part of hinge
slot. Pulldoor forward off screws. Set door (handle side up)on
top of dryer. Remove top screws from cabinet.
4. Remove screws attaching hinges to door.
5. Remove screws at top, bottom and side of door (4 screws).
Holding door over towel on dryer, grasp sides of outer door
and carefully lift to separate itfrom innerdoor. Do NOT pry
apart with putty knife. Do NOT pull on door seal or plastic
door catches.
6,
Be careful to keep cardboard spacer centered between doors.
Reattach outer door panel to inner door panel so handle is on
the side where hinges were just removed.
7. Attach door hinges to door so large parf of hinge slot is at
bottom of hinge.
8,
Remove door strike (5) from cabinet. Use a small, fiat-blade
screwdriver to carefully remove 4 hinge hole plugs (6) on left
side of cabinet. Insert plugs in hinge holes on right side of
cabinet.
g,
Insert screws in bottom holes on left side of cabinet. Tighten
screws halfway. Position door so large end of door hinge slot
is over screws. Slide door up so screws are in bottom of slots.
_ghtan screws. Insert and tighten top screws in hinges.
10. Remove door strike plug (2). Insert the door strike you
removed in Step 8 in hole and secure with screw. Insert door
strike plug in original door strike hole end secure with screw.
11. Close door and check that door strike aligns with door catch
(3). If needed, slide door catch left or right within slot to adjust
alignment.
CompleteInstaUation
1. Checkto be sure all parts are now installed. Ifthere isan extra
part, go back through the steps to see which step was
skipped.
2. Check to be sure you have all of your tools.
3. Dispose of all packaging materials.
4. Check the dryer's final location. Be sure the vant is nct
crushed or kinked.
5. Check to be sure the dryer islevel. (See "Level DryeE'_
6. Plug into a grounded outlet. Turn power on.
7. Remove the blue protective film on the console and any tape
remaining on the dryer.
8. Read your "Dryer User Instructions."
9. Wipe the dryer drum interior thoroughly with a damp cloth to
remove any duet.
10. Set the dryer on a full heat cycle (not an air cycle) for 20
minutes end start the dryer.
If the dryer will not start, cheek the following:
• Controls are set in a running or "On" position.
• Start button has been pushed firmly.
• Dryer isplugged into a grounded outlet.
• Electrical supply is connected.
• House fuse is intact and tight; or circuit breaker has not
tripped.
• Dryer door isclosed.
11. When the dryer has been runningfor 5 minutes, open the
dryer door end feel for heat.
If you do not feel heat, turn the dryer off and check the
following:
There may be 2 fusee or circuit breakers for the dryeE
Checkto make sure both fuses are intact and tight, orthat
both circuit breakers have nottripped. Ifthere is still no
heat, contact a qualified technician.
NOTE: You may notice a burning odor when the dryer is first
heated. This odor iscommon when the heating element isfirst
used. The odor will go away.
7
Loading ...
Loading ...
Loading ...
