Loading ...
Loading ...
Loading ...
Page 10
CONNECTING THE GRILL TO NATURAL GAS
1)
Before proceeding, ensure the unit is fitted for natural gas. Connecting to an improper gas type will
result in poor performance and increased risk of damage or injury.
2)
For Natural Gas installations, an installer must supply a gas shutoff valve that is easily accessible
to the grill with ease of access for emergency gas shutoff.
3)
Always disconnect the Grill and close its individual manual shutoff valve, when conducting pressure
tests of the gas supply piping system at pressures which exceed 1/2 psi (3.5 kPa).
4)
Always isolate the Grill from the gas supply piping system by closing its individual manual shutoff
valve
5)
Manifold pressure with natural gas (operating): 4" W.C. (non-operating): 4.5" W.C. Optimum supply
line pressure: 7" W.C.
NATURAL GAS CONNECTION:
Your VINTAGE Grill for use with Natural Gas comes equipped with its own regulator which MUST NOT be
removed. If this regulator needs to be replaced use only the type specified by VINTAGE Grills for this appliance.
1)
Remove the rear panel from the BBQ to gain access to the regulator and Gas connection point.
2)
Attach a 1/2" male-to-female elbow to the regulator as shown in Fig. 3.
3)
.Attach a 1/2" x 1/2' flare fitting to the elbow as shown in Fig. 3.
4)
Connect flare fitting to gas supply using a 1/2" min. dia. flexible stainless steel gas hose, no more
than 48" in length.
5)
To ensure proper heating performance of this appliance, verify that the gas line supply pressure is
adequate (7” W.C supply pressure is preferred) to maintain 4.5" W.C, manifold pressure. Use a
minimum 1/2" ID flex hose to prevent gas starvation.
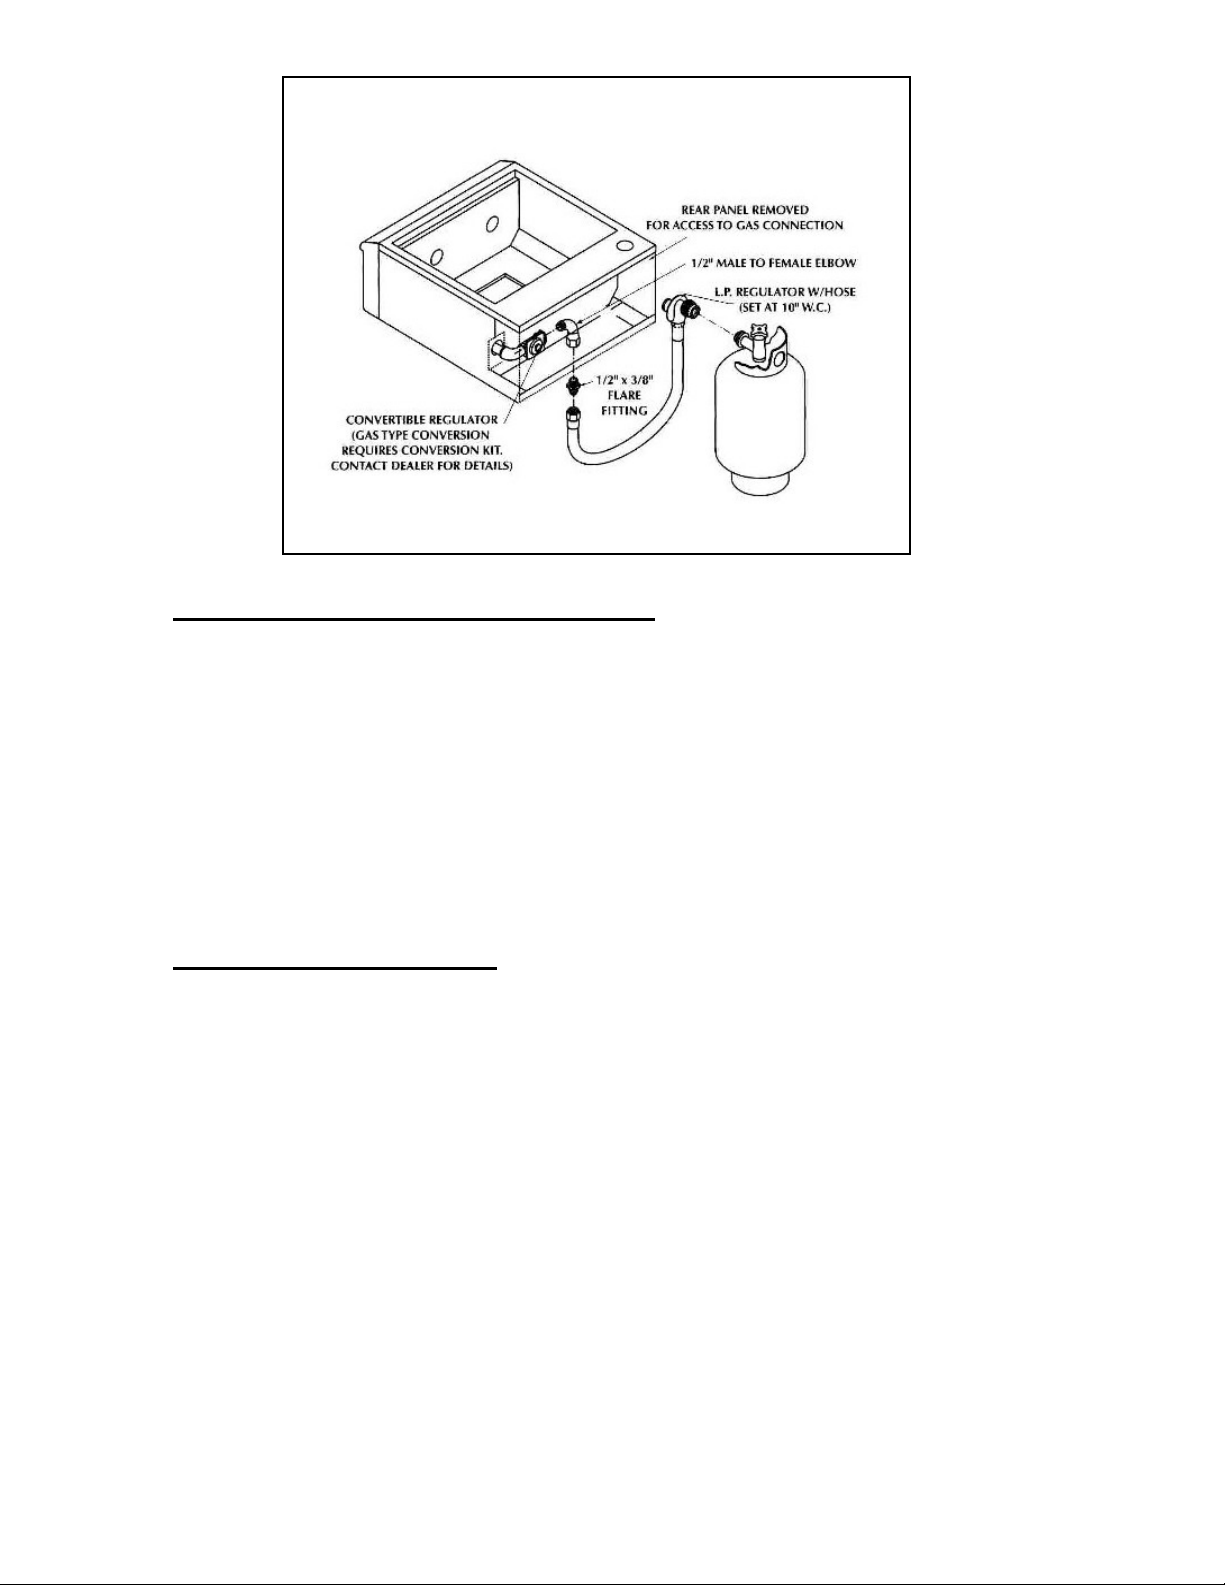
Figure 2- L.P. Gas Connection.
Loading ...
Loading ...
Loading ...