
Loading ...
Loading ...
Loading ...
OPTION 1, EMPTYING MANUALLY
1. Pull out the bucket, grasping upper and
lower handles.
2. Carry the bucket by grasping the inside
handle of the bucket.
3. After emptying the bucket, replace the
bucket in the dehumidifier.
NOTE: Dehumidifier will not work when the
BUCKET FULL light is on or without the
bucket properly placed in the unit.
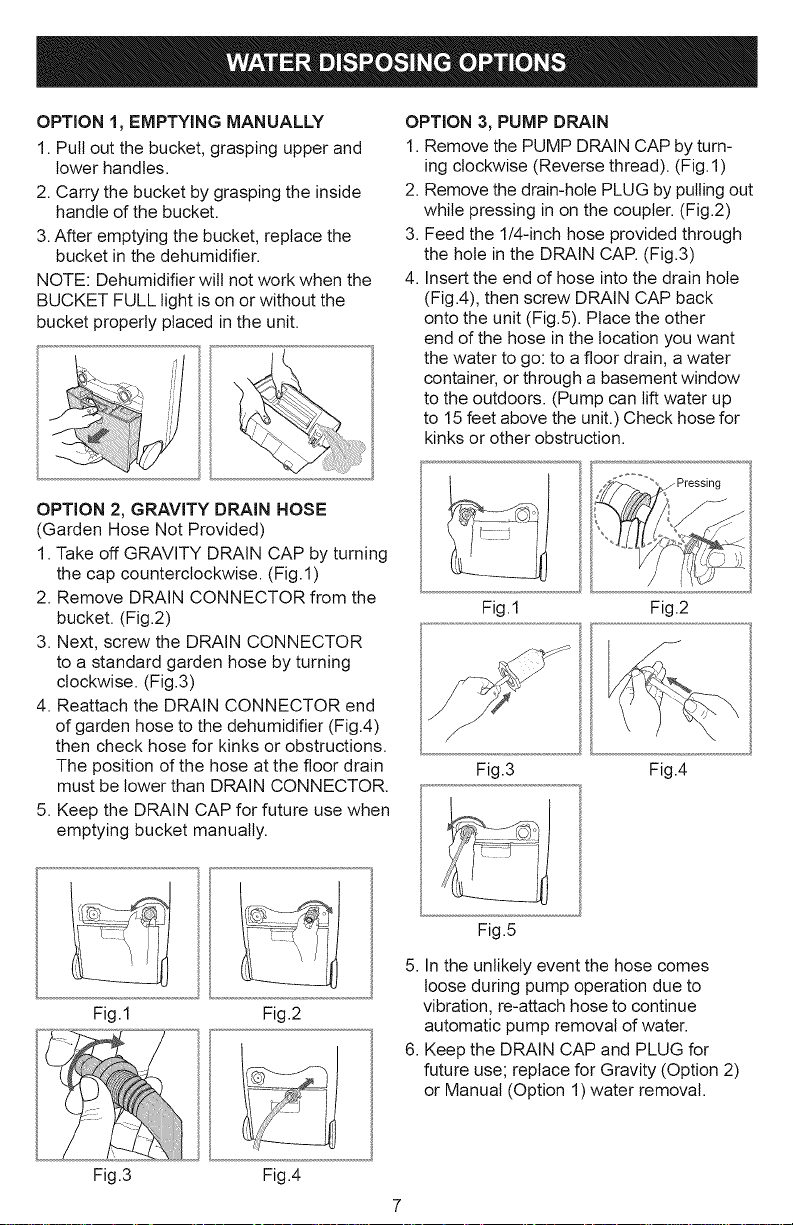
OPTION 3, PUMP DRAIN
1. Remove the PUMP DRAIN CAP by turn-
ing clockwise (Reverse thread). (Fig. 1)
2. Remove the drain-hole PLUG by pulling out
while pressing in on the coupler. (Fig.2)
3. Feed the 1/4-inch hose provided through
the hole in the DRAIN CAP. (Fig.3)
4. Insert the end of hose into the drain hole
(Fig.4), then screw DRAIN CAP back
onto the unit (Fig.5). Place the other
end of the hose in the location you want
the water to go: to a floor drain, awater
container, or through a basement window
to the outdoors. (Pump can lift water up
to 15 feet above the unit.) Check hose for
kinks or other obstruction.
OPTION 2, GRAVITY DRAIN HOSE
(Garden Hose Not Provided)
1. Take off GRAVITY DRAIN CAP by turning
the cap counterclockwise. (Fig.l)
2. Remove DRAIN CONNECTOR from the
bucket. (Fig.2)
3. Next, screw the DRAIN CONNECTOR
to a standard garden hose by turning
clockwise. (Fig.3)
4. Reattach the DRAIN CONNECTOR end
of garden hose to the dehumidifier (Fig.4)
then check hose for kinks or obstructions.
The position of the hose at the floor drain
must be lower than DRAIN CONNECTOR.
5. Keep the DRAIN CAP for future use when
emptying bucket manually.
Fig.1
_ Pressing
Fig.2
Fig.3 Fig.4
Fig.1 Fig.2
Fig.5
5. In the unlikely event the hose comes
loose during pump operation due to
vibration, re-attach hose to continue
automatic pump removal of water.
6. Keep the DRAIN CAP and PLUG for
future use; replace for Gravity (Option 2)
or Manual (Option 1) water removal.
Fig.3 Fig.4
Loading ...
Loading ...
Loading ...