
Loading ...
Loading ...
Loading ...
19
Installation
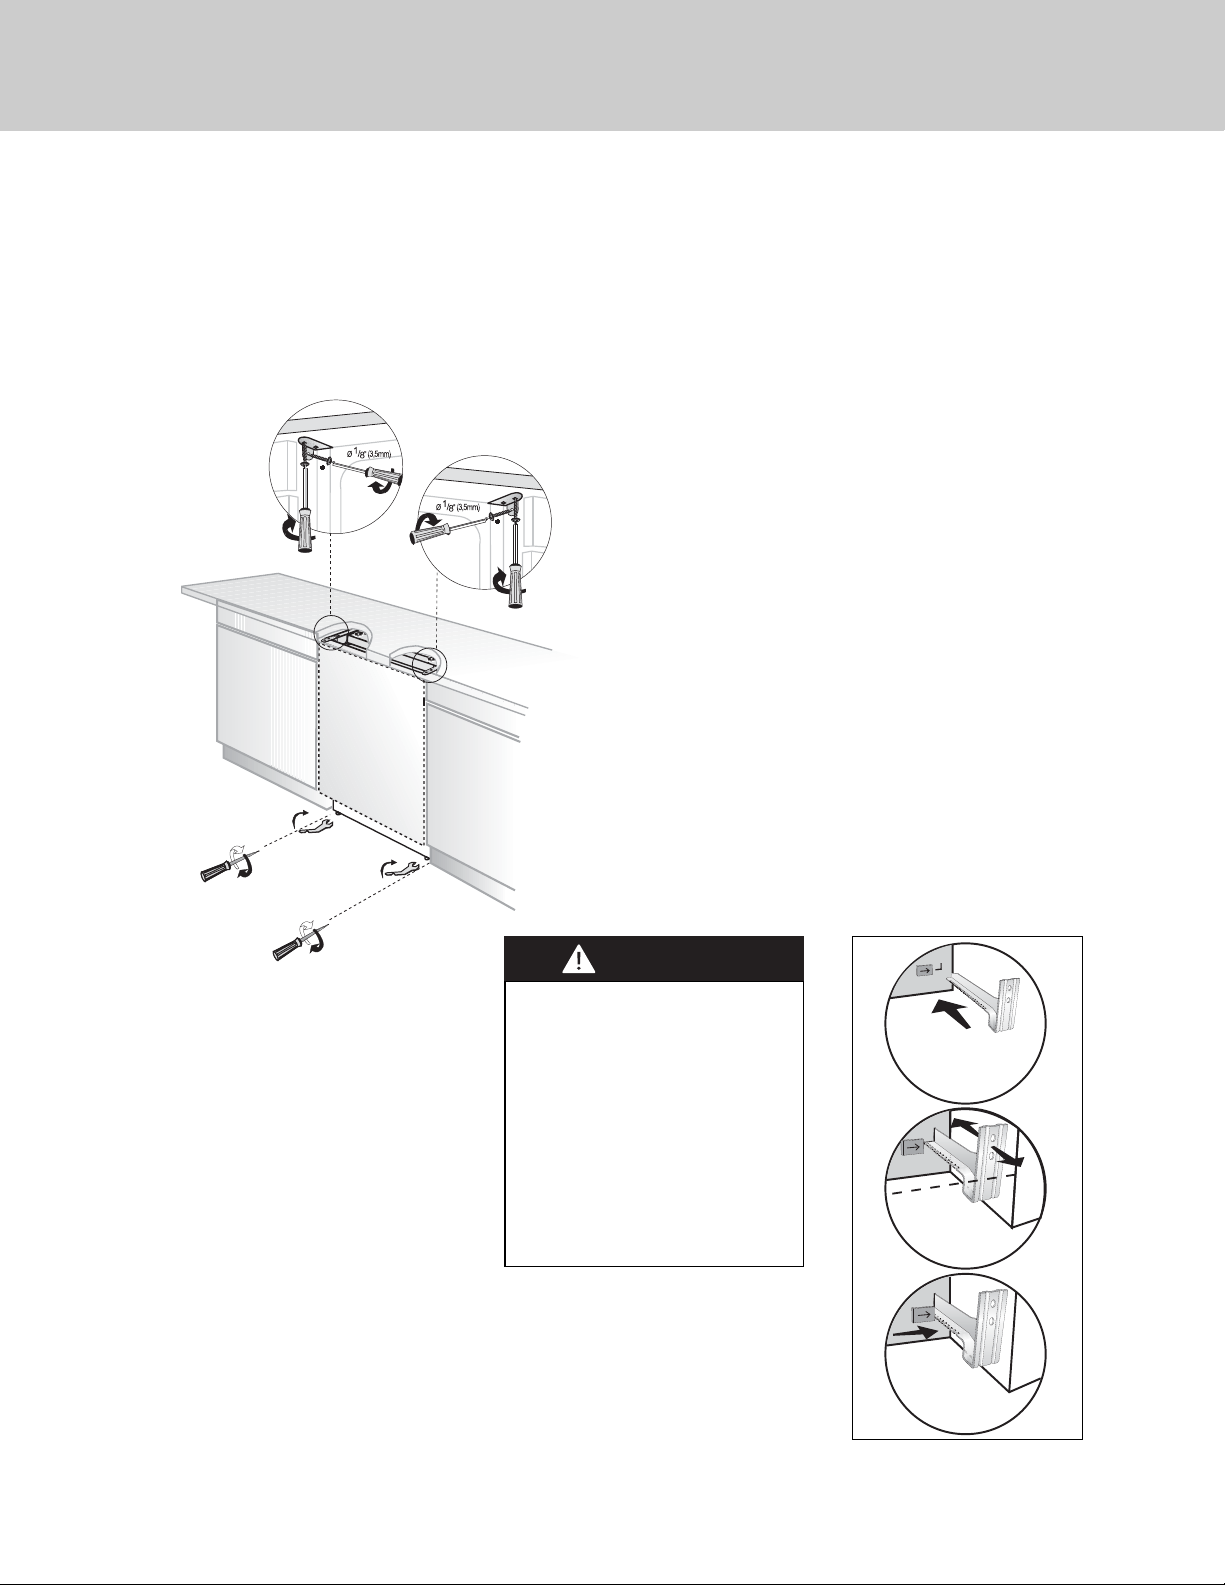
Readjusting Leveling Legs
Adjusting the Movable
Kickplate
Now that you have successfully
installed the dishwasher, you
need to attach the kickplate to
the dishwasher. The two-piece
kickplate can be adjusted to the
height and depth needed for
your kitchen. Be sure to use the
slotted kickplate in the front and
the other behind it. They slide
into each other.
1. Insert the movable kickplate
brackets into the channel (A).
2. Make sure that the plastic tab
to the left of the “L” opening
on the dishwasher has not
closed the channel you will
push the bracket through.
3. Now attach the kickplate to
the bracket with the two
(Ø 3/16”x1/4”-Ø 4mmx6mm)
screws and the caps provided
as follows.
Now that the dishwasher is in the cabinet,
you must readjust the leveling legs to bring
the dishwasher up to the required height
and attach it underneath the countertop.
• Readjust the front leveling leg with
adjusting wrench to balance the
dishwasher and raise it up under the
countertop; make sure the unit is level.
• Readjust the rear leveling leg with a
screwdriver to balance the dishwasher
and raise it to the required height using
the brackets supplied.
• Attach the dishwasher underneath the
countertop with the four screws supplied
(Ø 1/8”x1/8”-Ø 3.5mmx14mm). Make
sure you do not go through the top of the
countertop or damage granite.
A
B
C
NOTICE
There is a left and a right
bracket.
• Adjust the kickplate
brackets forward or
backwards so that they will
align with the kitchen
kickplate (B).
• Lock the kickplate
brackets as shown with the
plastic tab on the
dishwasher into the teeth
of the bracket (C).
Loading ...
Loading ...
Loading ...