Loading ...
Loading ...
Loading ...
REPLACESPARKPLUG
Replacethesparkplugeachyearto
ensuretheenginestartseasierand
runsbetter.Setsparkpluggapat
0.025inch.Ignitiontimingisfixedand
nonadjustable.
REPLACINGTHELINE
1. Twist,thenpulloffsparkplugboot.
2. Removesparkplugfromcylinder
anddiscard.
3. ReplacewithChampionRCJ-6Y
sparkplugandtightensecurelywith
a3/4inchsocketwrench.
4. Reinstallthesparkplugboot.
Pre-woundspoolsofferthemostcon-
venientmethodforreplacinglineand
ensuringoptimumperformance.
•Replacementspoolsarecolor-coded
toensureuseofthecorrectspoolwith
yourunit.Besuretousethesame
colorspoolastheexistingspool.
NOTE:Alwayscleardirtanddebris
fromcuttingheadcomponentswhen
performinganytypeofmaintenance.
•Holdspoolandunscrewcapbyturn-
inginthedirectionshownontopofthe
cap.
•Removelineguideringandspool.
Lineguidering
Useapre-woundspoolorrefillspool
withline.Ifusingapre-woundspool,
removetapestripfromlineandspool.
REFILLINGTHESPOOLWITHLINE
_IWARNING:Useonly0.080"(2
ram)diameterroundline.Other
sizesandshapesoflinewillnotad-
vanceproperlyandwillresultinim-
propercuttingheadfunctionorcan
causeseriousinjury.Donotuseother
materialssuchaswire,string,rope,
etc.Wirecanbreakoffduringcutting
andbecomeadangerousmissilethat
cancauseseriousinjury.
1. Cutalengthof30feetof0.080"(2
mm)diameterroundCraftsman
brandline.
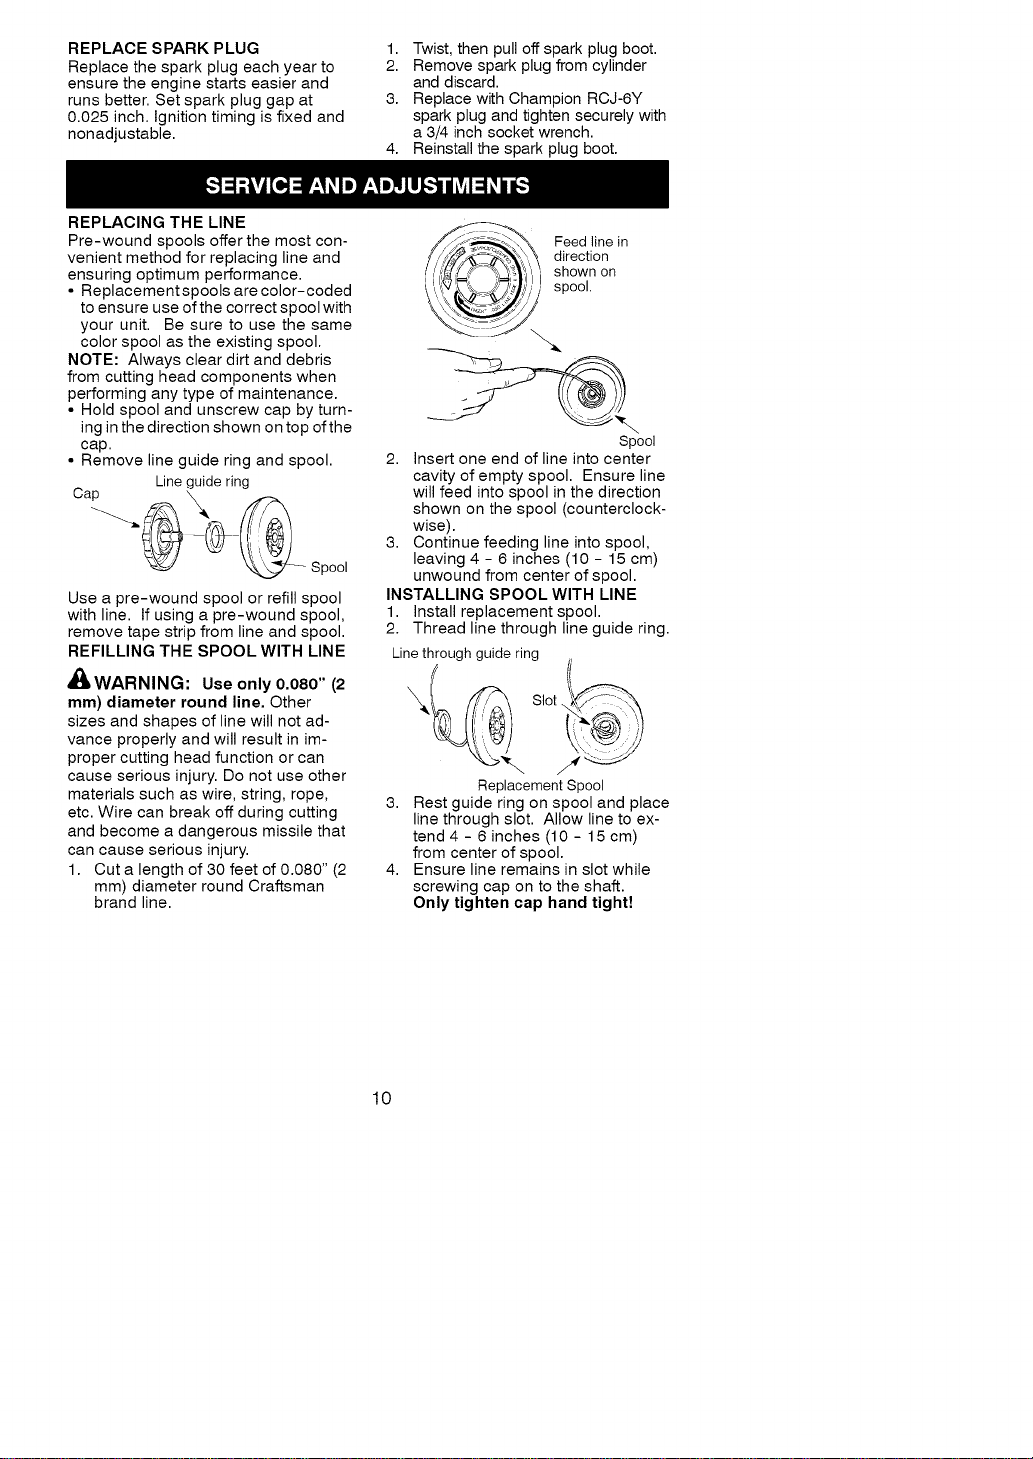
_z_.\ Feedlinein
direction
shownon
i l, ,, /_ spool.
Spool
2. Insert one end of line into center
cavity of empty spool. Ensure line
will feed into spool in the direction
shown on the spool (counterclock-
wise).
3. Continue feeding line into spool,
leaving 4 - 6 inches (10 - 15 cm)
unwound from center of spool.
INSTALLING SPOOL WITH LINE
1. Install replacement spool.
2. Thread line through line guide ring.
Linethrough guide ring
\ S,et
Replacement Spool
3. Rest guide ring on spool and place
line through slot. Allow line to ex-
tend 4 - 6 inches (10 - 15 cm)
from center of spool.
4. Ensure line remains in slot while
screwing cap on to the shaft.
Only tighten cap hand tight!
10
Loading ...
Loading ...
Loading ...