Loading ...
Loading ...
Loading ...
4
Dehumidifying and cooling operation
The operating range for cooling operation is 60°F - 90°F,
and the operating range for dehumidifying is 68°F-88°F.
Power source
• The AC socket must be fi rm and reliable.
• Don’t connect the portable air conditioner to a multiple socket
outlet which is also being used for other electrical appliances.
• Insert the AC power plug securely into the AC socket before
using the unit, when it beeps after two seconds, press ON/
OFF button, the unit begins to run.
LCDI power cord information
All Friedrich portable air conditioners are shipped from the
factory with a Leakage Current Detection Interrupter (LCDI)
equipped power cord. The LCDI device meets the UL and
NEC requirements for cord connected air conditioners effec-
tive August 2004.
To test your power supply cord:
1. Plug power supply cord into a grounded 3 prong outlet.
2. Press RESET (See drawing below).
3. Press TEST (listen for click; Reset button trips and pops out).
4. Press and release RESET (listen for click; Reset button
latches and remains on). The power supply cord is ready
for operation.
NOTE: LCDI device is not intended to be used as a switch.
Once plugged in the unit will operate normally without the
need to reset the LCDI device.
If the device fails to trip when tested or if the power supply
cord is damaged it must be replaced with a new supply cord
from the manufacturer. We recommend you contact our Tech-
nical Assistance Line at (800) 541-6645. To expedite service,
please have your model and serial number available.
WARNING: NEVER
CUT OR REMOVE
THE GROUNDING
PRONG FROM
PLUG. NEVER USE
EXTENSION CORDS
TO OPERATE AN
AIR CONDITIONER.
TEST
RESET
Test Button
Reset Button
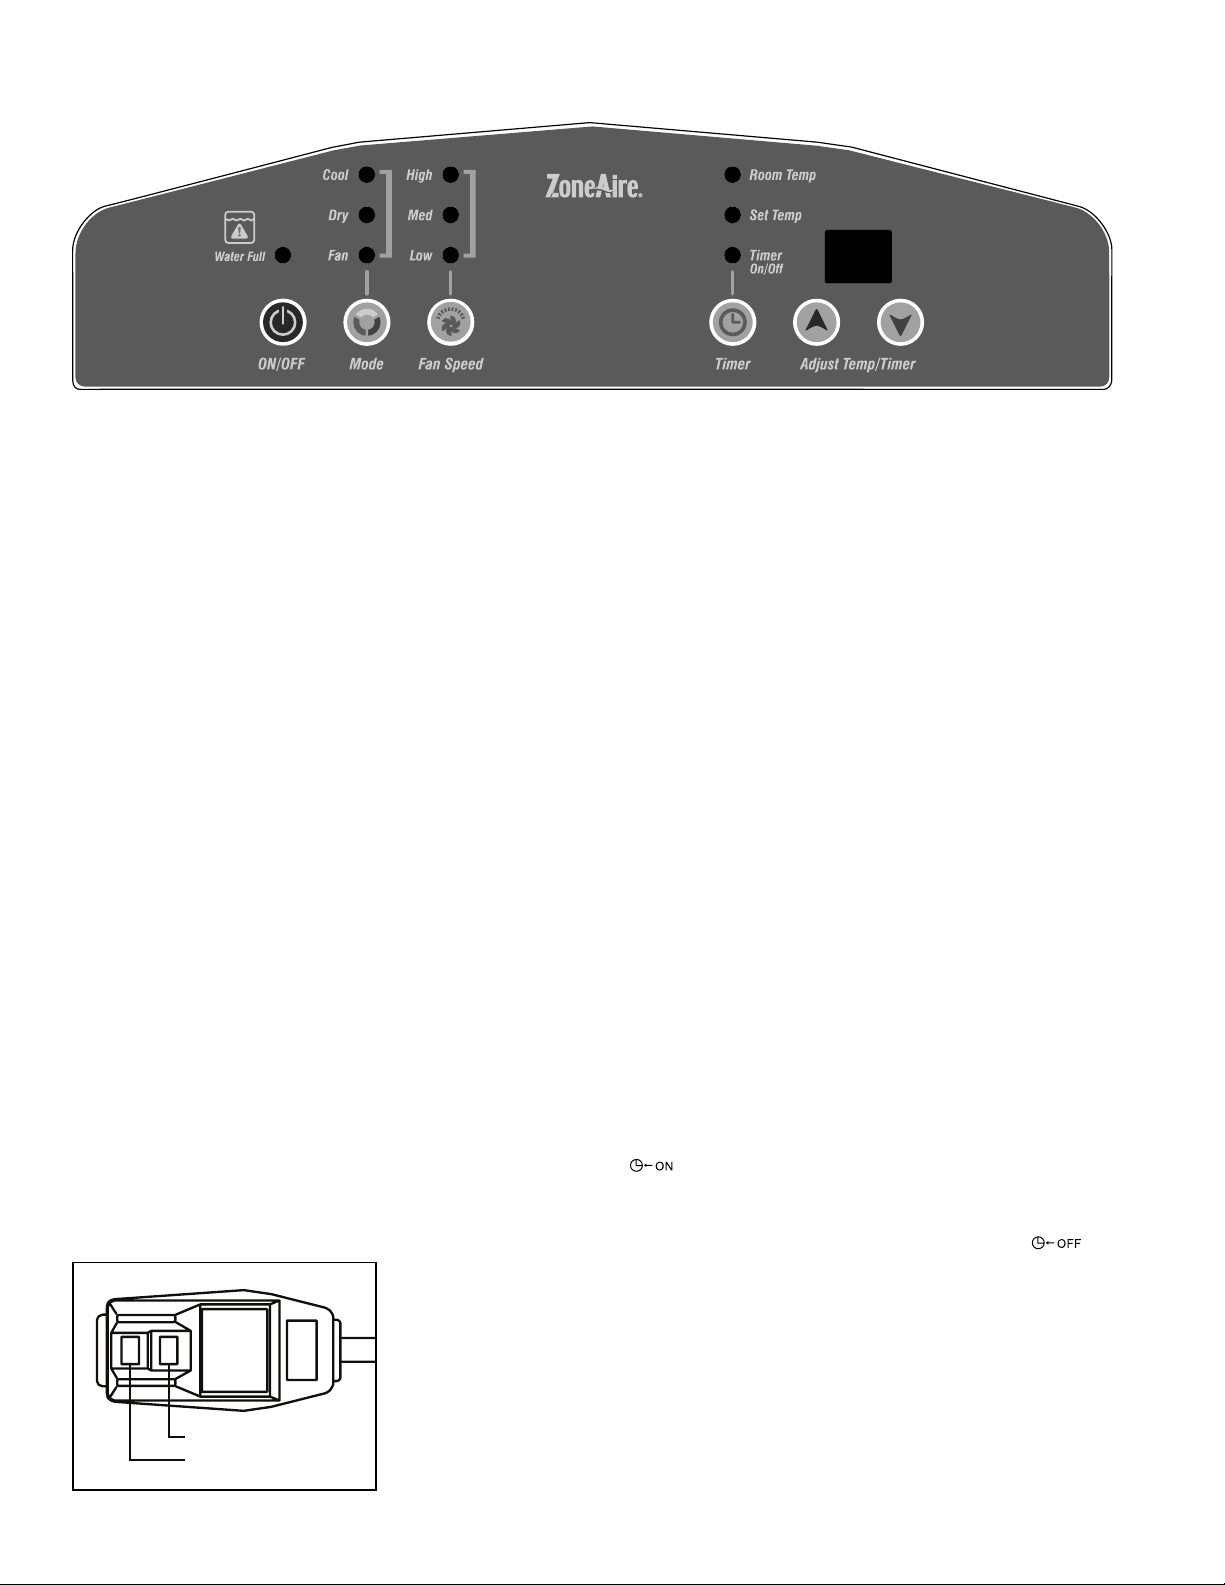
Control Panel Operation
Mode control
The mode control has three settings– Cool, Dehumidify and
Fan. The settings are adjusted with the Mode Control button.
A light will indicate which setting is currently being used.
Cooling operation
1. Press MODE button to choose the cooling mode, LCD
window will show “cool”.
During the cooling operation, always place the air exhaust
hose through an open window.
2. Repeatedly press TEMP+ or TEMP- button to set a proper
room TEMP. between 60°F - 90°F.
3. Press FAN SPEED button to choose between low and high
speeds.
NOTE:
In order to improve the cooling effi ciency:
a) If your room is directly exposed to the sun, draw the curtains.
b) Do not place near other heat source.
Dehumidifying Operation
1. Keep the windows and the doors closed to aid in effectively
dehumidifying the room.
2. Press MODE button to choose the dehumidifying mode, LCD
window will show “DRY”, the fan speed cannot be adjusted.
When used as dehumidifi er only it is not necessary to install
the exhaust hose.
Time Set Function
To set the time to start the machine, with the unit off (but power
supplied), press TIMER button, the LCD window will show “
”, continually press the TIMER button, set the preferred
start time. The setting range is 1-24 hours.
To set the time to stop the machine, with the unit running,
press TIMER button, the LCD window will show “ ”, con-
tinually press the TIMER button ,set the preferred time to stop
the machine. The setting range is 1-24 hours
NOTE: During timer mode if the TIMER button is pressed
again it will cancel the timer operation.
Warning Light
Condensed water may accumulate in the unit. If the internal
tank becomes full, the Warning Light will come on and the unit
will not operate until the unit has been drained.
Loading ...
Loading ...
Loading ...