Loading ...
Loading ...
Loading ...
6 7
IMPORTANT NOTES:
•If either of the chargers is plugged into the spotlight while it is operating, the unit will not charge.
The unit will begin charging once the spotlight is turned off.
•If either of the chargers is plugged into the spotlight while the built-in low voltage protection is
activated, the unit will automatically turn off and begin charging.
•If the on/off power knob is turned on when charging, the spotlight may not operate until the charger
is disconnected and the spotlight is turned off, then on again.
•Once the unit begins charging, the spotlight will not operate until the charger is disconnected.
•When the battery/charge status LED indicator lights green, a “beep” will sound to indicate the
charging process is completed.
OPERATING INSTRUCTIONS
IMPORTANT NOTE: When either charger is plugged into the 12 volt DC port, the unit is in charging
mode. The spotlight will not run with either of the chargers plugged in.
CAUTION: TO REDUCE THE RISK OF PROPERTY DAMAGE:
•Never operate this spotlight unless the rubber “O” ring, rubber bezel and lens are intact and
properly seated; and the waterproof end cap is securely in place.
•Never operate the spotlight in areas with high strength magnetic fields, such as in the vicinity of AC
power generator, etc.
•Never operate this spotlight at depths greater than 6 feet.
•Never operate this spotlight in water temperatures other than between 41ºF and104ºF (5ºC and
40ºC).
•This spotlight is designed to operate for up to one hour under water.
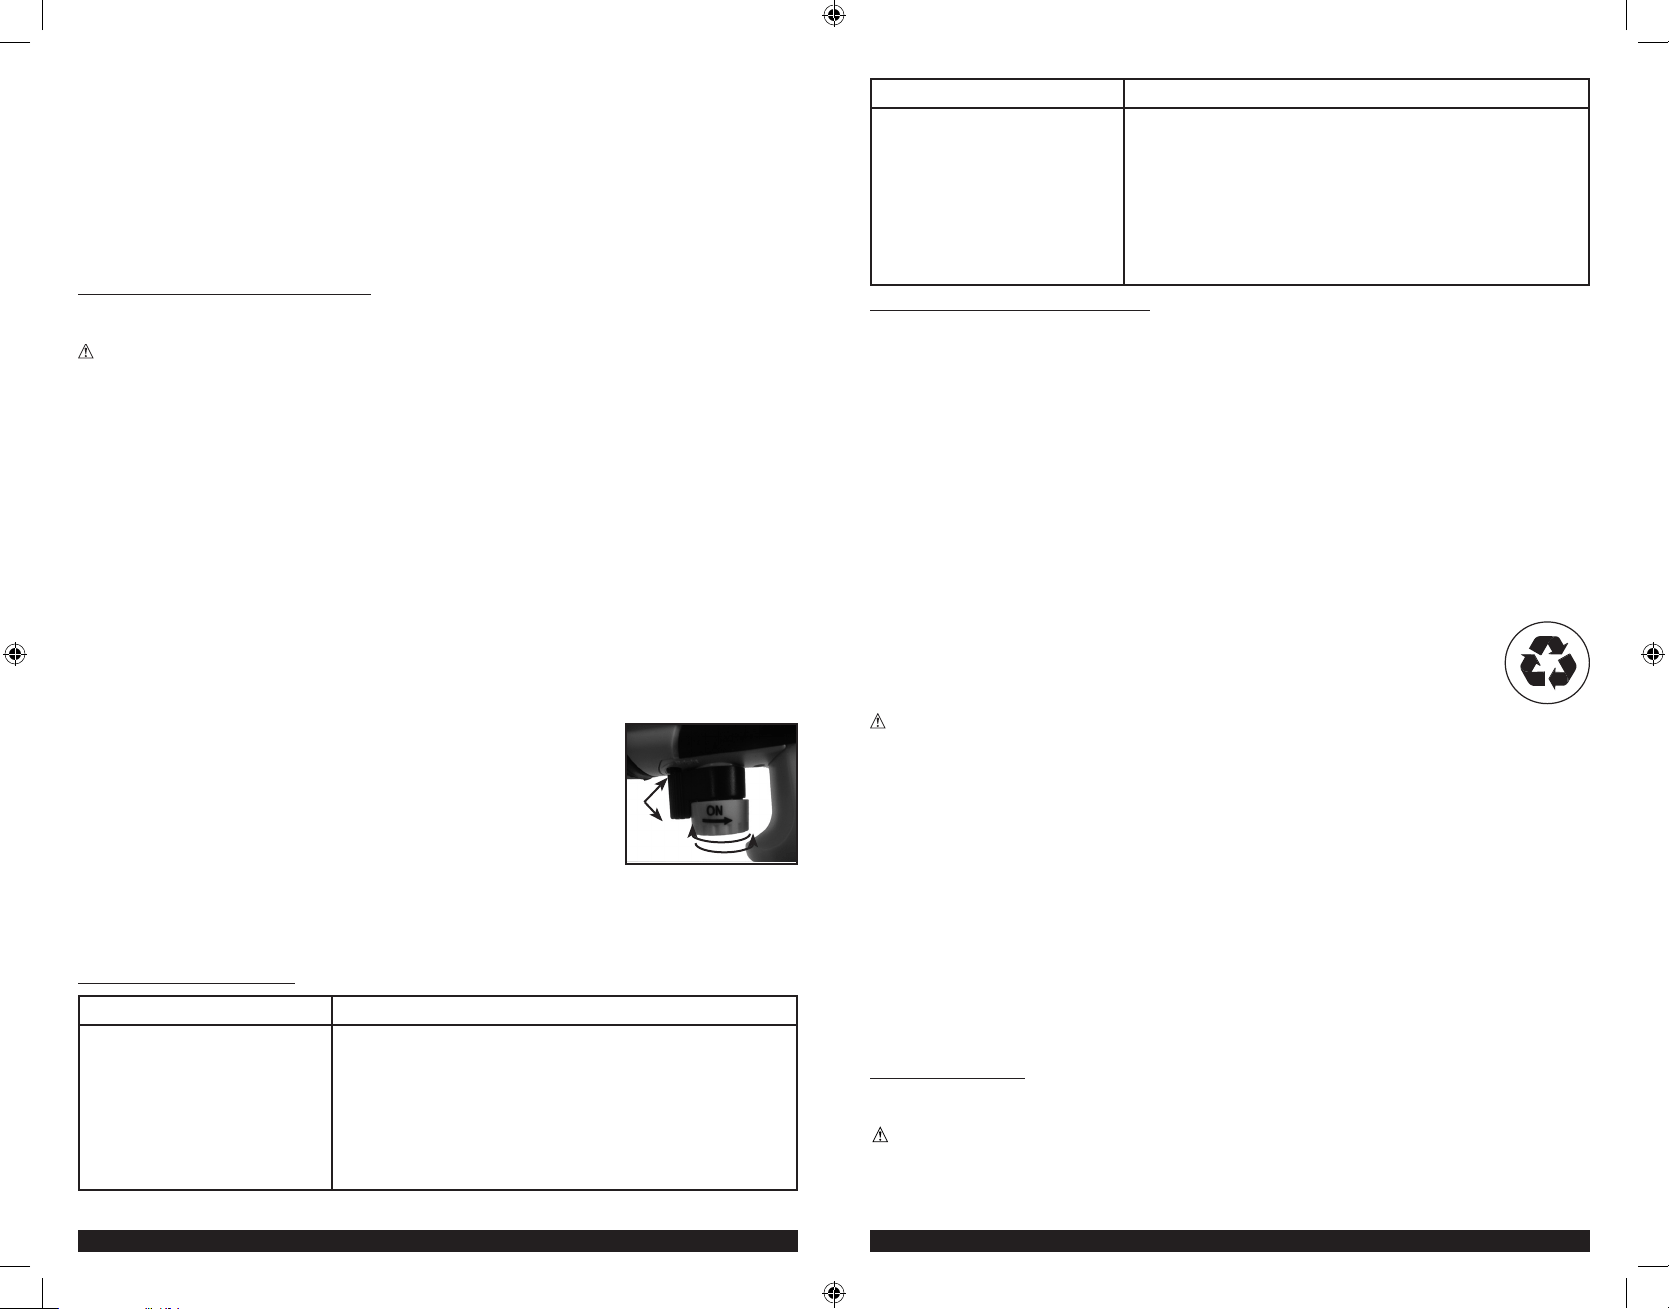
Operating the spotlight
1. Disconnect from charger.
2. The on/off power knob is located in the front of the handle of the spotlight and underneath the
dimmer selector knob.
3. To turn on the spotlight, rotate the on/off power knob to the furthest position counterclockwise.
4. To turn off the spotlight, rotate the on/off power knob to the furthest position clockwise.
Note:
The battery/charge status LED indicator will light in one of three colors (as described in the “Reading the Battery/Charge Status
LED” section) to indicate the battery status. It is visible through the translucent waterproof end cap.
Using the dimmer selector
The dimmer selector knob that adjusts the light intensity is located above
the on/off power knob. Push and turn it to the left, then hold for 2 seconds
to select a brighter setting. Push and turn it to the right, then hold for
2 seconds to select a dimmer setting.* A “beep” will sound twice when
the spotlight has been adjusted to its minimum (dimmest) and maximum
(brightest) settings.
* The battery/charge status LED indicator will flash red to indicate the light is
adjusting to a brighter setting or flash green to indicate the light is adjusting to
a dimmer setting.
OFF
ON
DIM
BRIGHT
On a single charge, the spotlight will provide steady illumination for approximately 10 hours on its
minimum (dimmest) setting; approximately 1 hour on its maximum (brightest) setting.
IMPORTANT: To avoid sustaining damage, this spotlight should not be used under water for any
longer than one hour.
TROUBLESHOOTING
Problem
Solution
The battery/charge status indicator
LED does not light when charging
1. The battery is in overheat protection after extensive use.
Allow the spotlight to cool down for several minutes before
recharging.
2. The spotlight will not charge when operating. Make sure the
spotlight is turned off.
3. Check connection to the 12 volt DC charging port.
4. Check connection to AC or DC power source.
5. Confirm there is a functioning AC or DC current.
Problem
Solution
Unit will not operate
1. The battery is in overheat protection after fully charging
or recharging. Allow the spotlight to cool down for several
minutes before operating.
2. The spotlight will not operate when charging. Be sure all
adapters are disconnected before spotlight use.
3. The battery may be completely discharged. Charge the unit
following the directions.
4. If the spotlight does not operate after recharging as directed,
contact manufacturer at 877-571-2391.
CARE AND MAINTENANCE
Make sure the unit is thoroughly dry before storage. If the unit has been submerged, wipe it dry with
a soft cloth.
If the unit gets dirty, gently clean the outer surfaces of the spotlight unit with a soft cloth moistened with
a mild solution of water and detergent.
There are no user-replaceable parts. Periodically inspect the condition of adapters, connectors and
wires. Contact manufacturer to replace any components that have become worn or broken.
All batteries lose energy from self-discharge over time and more rapidly at higher temperatures. When
the unit is not in use, we recommend that the battery is charged at least every 30 days.
Battery replacement/disposal
BATTERY REPLACEMENT
The battery should last the service life of the unit. Service life is dependent on a number of factors
including but not limited to the number of recharge cycles, and proper care and maintenance of the
battery by the end user. Contact manufacturer for any information you may need.
SAFE BATTERY DISPOSAL
This unit contains a nickel metal hydride rechargeable battery pack, which must be
disposed of properly when it will no longer retain a charge. Recycling is
required, contact your local authority for information. Failure to comply with local, state
and federal regulations can result in fines, or imprisonment.
Contact your local waste management authority to dispose of this product.
PLEASE
RECYCLE
WARNINGS:
• Do not dispose of the battery in fire as this may result in an explosion.
• Before disposing of the battery, protect exposed terminals with heavy-duty electrical tape to
prevent shorting (shorting can result in injury or fire).
• Do not expose battery to fire or intense heat as it may explode.
12 volt DC charger plug fuse replacement
The fuse in the plug end of the 12 volt DC charger protects the adapter’s charging circuit. If the 120 volt AC
charger operates, but the DC charging adapter does not, then this fuse may be opened (blown).
To replace the fuse:
1. Unscrew the end cap of the DC plug (counterclockwise).
2. Remove spring center contact and fuse.
3. Check fuse with a continuity checker.
4. If blown, locate a replacement 5 amp/250 volt fuse.
5. Replace the fuse, spring, contact and end cap.
6. Screw end cap clockwise until it is finger tight – DO NOT OVER-TIGHTEN.
7. Test for proper operation of the 12 Volt DC Charging Adapter.
ACCESSORIES
Recommended accessories for use with this unit may be available from the manufacturer. If you need
assistance regarding accessories, please contact manufacturer at 1-877-571-2391.
WARNING: The use of any accessory not recommended for use with this appliance could be
hazardous.
FL3WBD_ManualENSP_071713.indd 6-7 7/17/2013 7:26:49 PM
Loading ...
Loading ...
Loading ...