User Manual Instant Pot 140-3090-01 Air Fryer with ClearCook
WHAT’S IN THE BOX
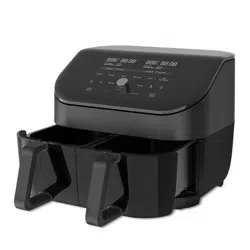
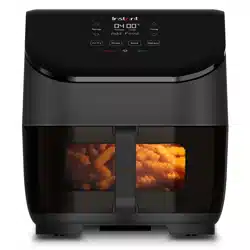
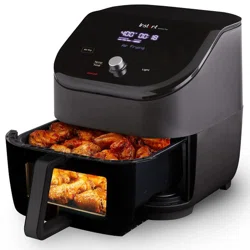
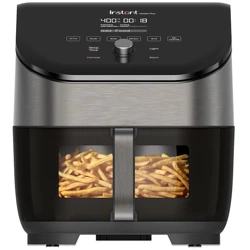
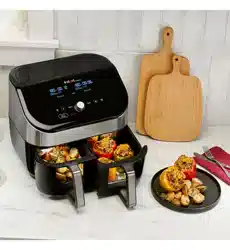
Air Fryer
Parts + accessories

Remember to recycle!
We designed this packaging with sustainability in mind. Please recycle everything that can be recycled where you live. Be sure to keep this Guide, along with the Safety and Warranty insert for reference.
USING YOUR VORTEX PLUS
Control panel
We’ve designed the control panel to be simple to use and easy to read.
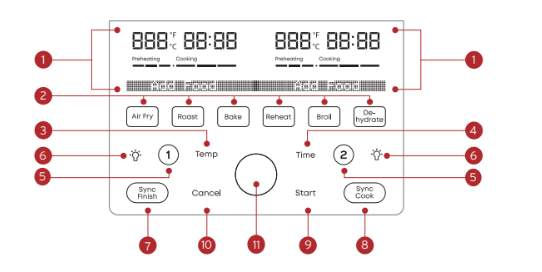
1. Left + Right Basket Status Display
-
Cooking temperature
-
Cooking time
-
Messages
-
Error codes
2. Smart Programs
3. Temperature Control
4. Time Control
5. Left (1) + Right (2) Basket Selectors
6. Light
7. SyncFinish
8. SyncCook
9. Start
10. Cancel
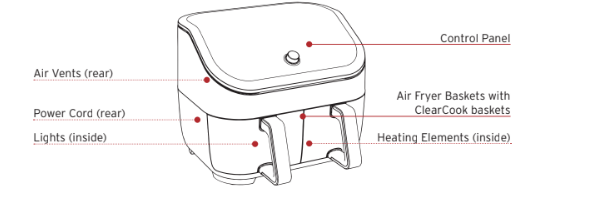
11. Control Panel
Turning the sound On/Off
You can set notification sounds to ON or OFF.
- When in Ready or cooking modes. press and hold Time and Temp for 5 seconds until the display shows Sound On or Sound Off.
Error alerts cannot be turned off.
Choosing the temperature scale
You can display cooking temperature in either Fahrenheit or Celsius.
- When in Ready or Cooking modes. press and hold Temp for 5 seconds until the display shows °F or °C.
Reset Smart Programs to original settings
Reset individual Smart Programs
- Once you’ve selected the Smart Program. press and hold that Smart Program button for 3 seconds.
The Smart Program’s button blinks and the cooking time and temperature are restored to the factory default setting.
Reset all Smart Programs
- With the cooker in Ready mode. press and hold the Control Dial for 3 seconds until the cooker beeps.
All Smart Program cooking times and temperatures are restored to the factory default setting.
INITIAL SET UP
Unpack
- Remove your new Vortex Plus from the box.
- Remove all the packaging material from in and around the air fryer.
- Make sure to remove all the accessories from inside the air fryer.
- Don’t remove the safety warning stickers or the rating label from the air fryer.
Clean before use
- Wipe the interior with a damp cloth. Use a clean. soft cloth to dry.
- Wash the accessories with hot water and dish soap. Rinse with warm. clear water and use a soft cloth to dry.
Placement
- Place your Vortex Plus on a stable. level surface. away from combustible material and external heat sources. Do not place your Vortex Plus on top of another appliance.
- Make sure to leave at least 5 in / 13 cm of space above and around all sides of the appliance to allow for sufficient air flow.
Test run
Before using your new Vortex Plus for the first time. perform a test run to ensure everything is working correctly.
To perform a test run:
- Follow the instructions for cooking on page 7.
- Insert the cooking basket. but do not add food.
- Select basket 1.
- The Air Fry program activates by default.
- Change the cooking temperature to 400°F / 205°C.
- Change the cooking time to 18 minutes.
- Select basket 2.
- The Air Fry program activates by default.
- Change the cooking temperature to 400°F / 205°C.
- Change the cooking time to 18 minutes.
- Press Start and the air fryer starts the test run.
- When the display shows Add Food, just wait 10 seconds for the program to resume (do not add any food).
- When the display shows Turn Food, just wait 10 seconds for the program to resume.
- After the cooking session is done, let the unit cool.
Now you’re ready to cook a meal in your Instant Vortex Plus!
COOKING
The Vortex Plus uses rapid air circulation to crisp or cook food. giving your meals all the rich. crispy flavor of deep frying. with little to no oil.
WARNING
HOT SURFACES
The air fryer will be hot during and after cooking. Always exercise extreme caution when removing food from the hot cooking chamber. Touching hot surfaces may result in personal injury. and/or property damage.
MUST ALLOW AIR FLOW
To prevent personal injury. do not block air intake or air vents.
What to cook in
The cooking basket and cooking tray are perforated to allow air to flow under and around your food. and should be used for most foods. like wings and cauliflower bites.
You can place food right on the cooking tray. without using foil or other coverings.
For the Baking program only. you can use a metal or glass baking dish to hold things like batter for cakes and dough for breads. Place the baking dish inside the cooking basket for baking.
How to cook
These instructions explain how to cook using one basket at a time. See below for information on using both baskets.
Prep
Thaw, cut, season or batter your ingredients according to your recipe.
Preheat
- Insert the cooking basket into the air fryer.
- Press 1 (to cook in left basket) or 2 (to cook in right basket). The Air Fry button blinks and the display shows the default time and temperature.
- If you want to select a smart program other than Air Fry. press the button for the program you want to use. The default time and temperature are displayed for that smart program.
- If you want to adjust the cooking time. press Time and use the Control Dial to increase or decrease it.
- If you want to adjust the cooking temperature. press Temp and use the Control Dial to increase or decrease it.
- Press Start to begin. The status bar shows Preheating.
- When the cooker reaches the target temperature. the display shows Add Food.
Note: Add Food applies to Air Fry. Roast. Bake and Broil only.
Cook
- Remove the cooking basket and place your food into the basket.
- Insert the cooking basket into the air fryer.
- Cooking begins and the cooking countdown timer starts.
Turn
- Part way through the cooking cycle the display shows Turn Food. If you do not remove the basket after Turn Food displays. cooking will proceed after 10 seconds.
- Remove the basket and carefully turn. flip. or rotate your food.
- Insert the basket again. Cooking continues.
Finish
- When the smart program completes. the air fryer beeps and the display shows End.
The air fryer beeps after 5 minutes. 20 minutes. and 60 minutes to remind you that cooking has completed.
Cooking in both baskets
Read the instructions for “using both baskets” on page 14 to learn how to:
- Use both baskets with different settings.
- Use both baskets with matching settings.
- Use both baskets with different settings. and have both programs finish at the same time.
Changing cooking time during cooking
You can change the cooking time after you’ve started a smart program:
- Press 1 or 2 to select the basket you want to change.
- Press Time and use the Control Dial to increase or decrease it.
- Then press the Control Dial to confirm the change.
- Press Start to continue cooking.
If you don’t press Start. cooking continues using the former settings.
Changing cooking temperature during cooking
You can change the cooking time after you’ve started a smart program:
- Press 1 or 2 to select the basket you want to change.
- Press Temperature and use the Control Dial to increase or decrease it.
- Then press the Control Dial to confirm the change.
- Press Start to continue cooking.
If you don’t press Start. cooking continues using the former settings.
Cancel cooking during cooking
You can cancel cooking at any time after you’ve started a smart program:
- Press 1 or 2 to select the basket you want to cancel.
- Press Cancel.
If you press Cancel without selecting a basket. both baskets will be canceled.
SMART PROGRAMS
Air Fry
You can air fry foods like fries, cauliflower bites, wings, nuggets and more.

To air fry
- Follow the basic instructions for Cooking.
- Select “Air Fry” as the Smart Program.
Roast
You can roast foods like beef, lamb, pork, poultry, vegetables and scalloped potatoes, for a deliciously tender inside and browned outside.

To roast
- Follow the basic instructions for Cooking.
- Select “Roast” as the Smart Program.
Bake
You can bake foods like breads. cakes. pastries and buns. with the Vortex as your own “mini oven”.

To bake
- Follow the basic instructions for Cooking.
- Select “Bake” as the Smart Program.
- There is no need to turn the food partway through cooking.
Leave approximately 1 in / 2.5 cm of space around all sides of the baking dish to allow heat to circulate evenly.
Broil
Broiling cooks using direct top-down heating, perfect for melting cheese on French onion soup, and nachos.

To broil
- Follow the basic instructions for Cooking.
- Select “Broil” as the Smart Program.
- There is no need to turn the food partway through cooking.
Dehydrate
Dehydrating uses low heat over a long period of time to safely dry out food items. like dried fruit. jerky and dried veggies.

To dehydrate
- Follow the basic instructions for Cooking.
- Select “Dehydrate” as the Smart Program.
- There is no need to turn the food partway through cooking.
Reheat
Bring the crisp and crunch back to leftover fries. pizza and stale bread. in just a few minutes.
[
To reheat
- Follow the basic instructions for Cooking.
- Select “Reheat” as the Smart Program.
Once this Smart Cooking function starts, the display will show the target temperature and cooking time immediately, there’s no preheating time.
USING BOTH BASKETS
The Vortex Plus Dual Air Fryer let you use cook in both baskets at the same time. with 3 options:
Cook in both baskets
Cook in both baskets at the same time. using different programs and settings.
SyncCook
Cook in both baskets at the same time. using the same program and settings for both.
SyncFinish
Cook in both baskets at the same time. using different programs and settings for each. but finish cooking at the same time.
How to cook in both baskets
- Follow the instructions for Cooking on page 7 and any specific instructions for the smart program you want to use.
- Set up your first program in the left basket (select 1). including any changes to time and temperature settings if you want.
- Press 2 to start setting up a second smart program in the right basket including any changes to time and temperature settings if you want.
- Then press Start and continue following the instructions for Cooking.
You can also start the first program in the right basket (select 2) and then set up the left basket (select 1).
How to SyncCook
- Follow the instructions for Cooking on page 7 and any specific instructions for the smart program you want to use.
- After you’ve set up your first program (in either basket) but before pressing Start. press SyncCook. The SyncCook icon displays.
- Then press Start and continue following the instructions for Cooking.
About SyncCook
- You can change the cooking time and temperature settings for both baskets (SyncCook will remain ON) by adjusting the cooking time or temperature.
- You can change the cooking time and temperature settings for either basket (SyncCook will turn OFF) by pressing 1 or 2 to select a basket to change and then adjusting the cooking time or temperature.
- If you remove one basket during cooking. the other basket will keep cooking. The display will still show the SyncCook icon. but the cooking times will be different in the two baskets.
How to SyncFinish
- Follow the instructions for Cooking on page 7 and any specific instructions for the smart program you want to use.
- Set up your first program in either basket (select 1 or 2) including any changes to time and temperature settings if you want.
- Press 1 or 2 to select the other basket and start setting up a smart program in that basket. including any changes to time and temperature settings if you want.
- Press SyncFinish. The SyncFinish icon displays.
- Press Start and continue following the instructions for Cooking.
The air fryer will calculate the cooking times and start cooking each basket at the appropriate time so they finish together.
About SyncFinish
- If you need to remove one of the baskets during cooking. cooking in the other basket will pause to keep the two in sync.
Ending SyncCook
You can end SyncCook at any time to make changes to one or both cooking programs.
- Press 1 or 2 to select the basket you’d like to make changes to. SyncCook stops and the icon no longer displays.
- Adjust the cooking time or temperature settings and press the Control Dial to confirm the changes.
- Press Start to continue cooking. with each basket cooking with its own program and settings.
Ending SyncFinish
You can end SyncFinish if you need to make changes to the cooking programs by pressing Cancel. After that. reselect a program and settings for each basket.
CLEANING
Clean your Instant Vortex Plus after each use. Always let all parts cool to room temperature before cleaning. Before use or storing. make sure all surfaces are dry.
WARNING
To prevent electric shock. unplug before cleaning.
DO NOT immerse power cord. plug or the appliance in water or other liquid. which may result in electric shock.

* Some discoloration may occur after machine washing. but this will not affect the cooker’s safety or performance.
In the manual