Loading ...
Loading ...
Loading ...
5
EN
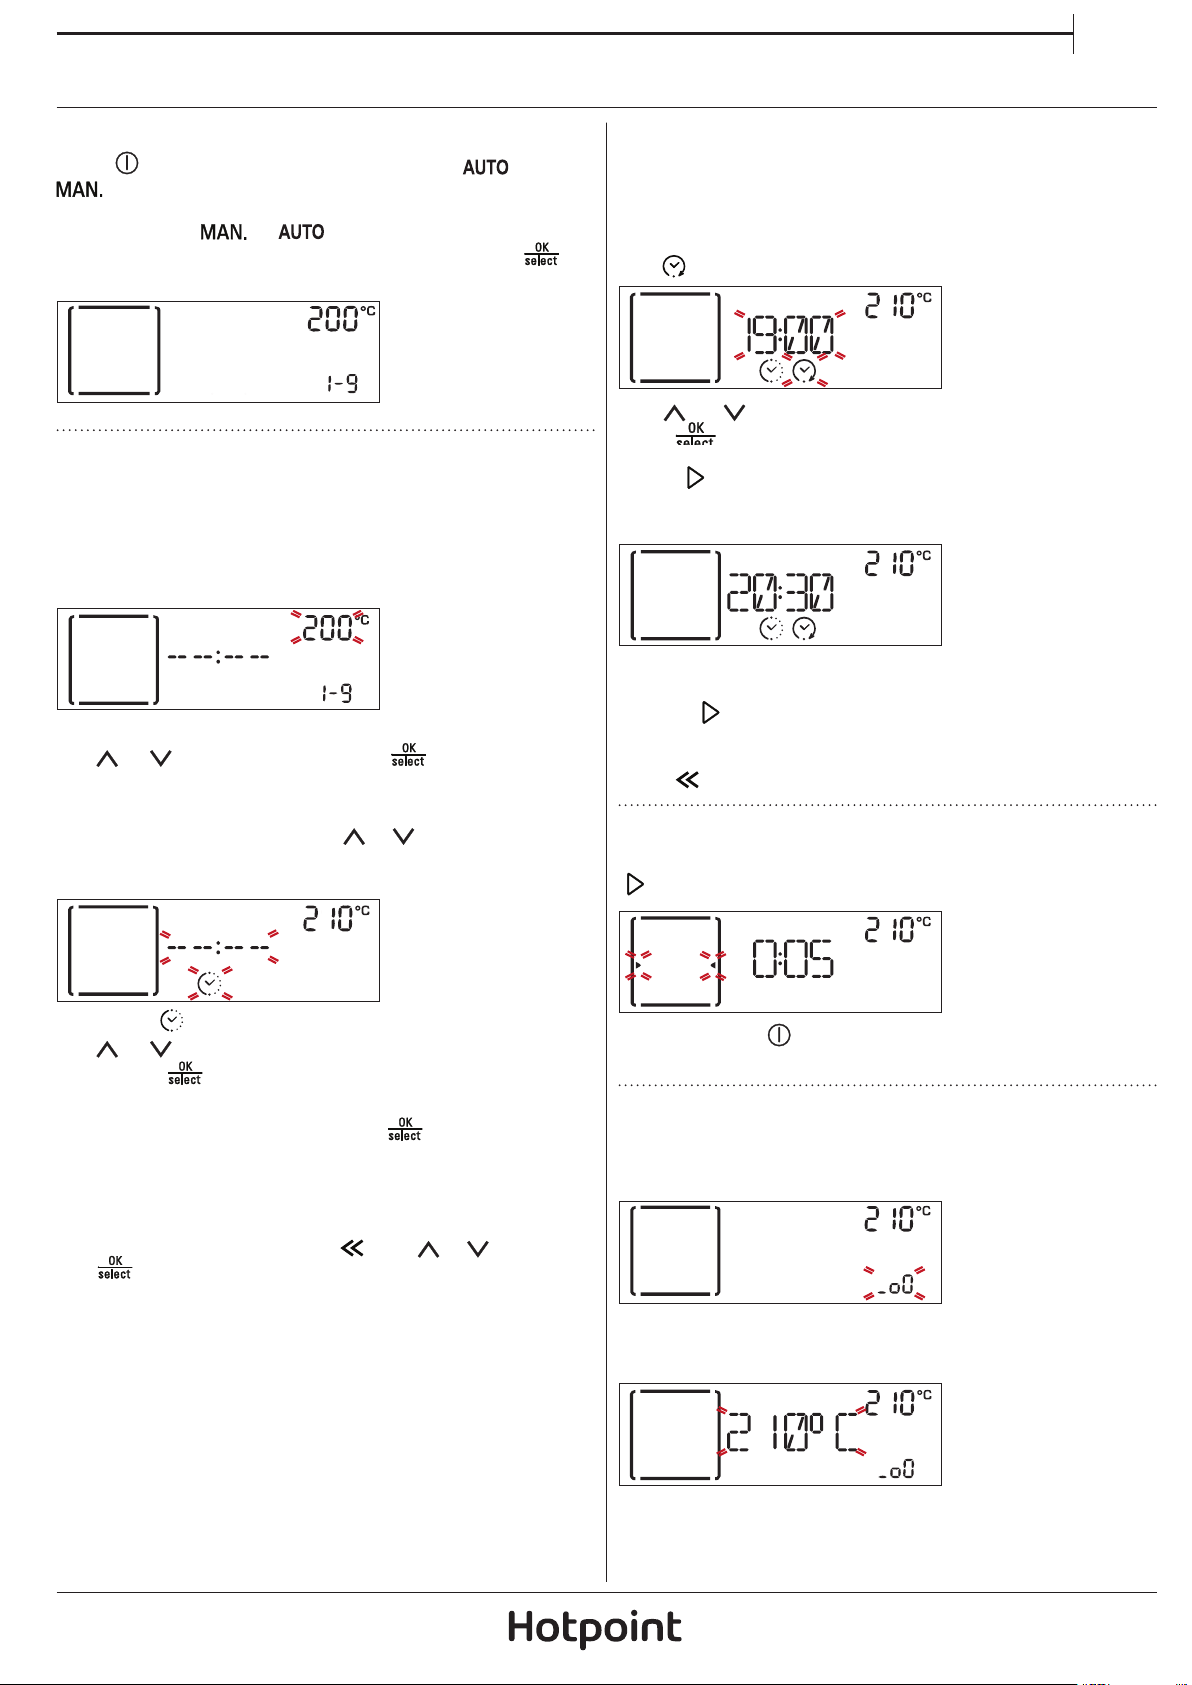
DAILY USE
1. SELECT A FUNCTION
Press
to switch on the oven, then use or
to scroll through the menus of the manual and
automatic functions.
Keep pressing
or until the function you
require is shown on the display and then press
to
confirm.
CONVE
2. SET THE FUNCTION
After having selected the function you require, you
can change its settings.
The display will show the settings that can be
changed in sequence.
TEMPERATURE/GRILL LEVEL
When the value flashes on the display,
use
or change it, then press to confirm and
continue to alter the settings that follow (if possible).
Please note: Once the function has been activated, you can
adjust the temperature by using or .
DURATION
When the icon ashes on the display,
use
or to set the cooking time you require and
then press
to confirm.
You do not have to set the cooking time if you want to
manage cooking manually: Press
to confirm and
start the function.
In this case, you cannot set the end cooking time by
programming a delayed start.
Please note: You can adjust the cooking time that has been
set during cooking by pressing
: Use or to adjust it
and to conrm.
SETTING THE END COOKING TIME
(DELAYED START)
In many functions, once you have set a cooking time
you can delay starting the function by programming
its end time.
The display shows the current end time that is set and
the
icon flashes.
Use or to set the desired end cooking time, and
press
to confirm.
Insert the food into the oven, close the door, and
press
to activate the function: the oven will switch
on automatically after the period of time calculated
for the cooking to end at the set time.
Please note: whatever the case, it is possible to cancel the
waiting time and activate the function immediately by
pressing .
This setting also deactivates the oven's preheating phase.
Press at any time to change the previously set value.
3. ACTIVATE THE FUNCTION
Once you have applied the settings you require, press
to activate the function.
You can press at any time to pause the function
that is currently active.
4. PREHEATING
Some functions have an oven preheating phase: Once
the function has started, the display indicates that the
preheating phase has been activated.
PRE
Once this phase has finished, an audible signal will
sound and the display will indicate that the oven has
reached the set temperature:
At this point, open the door, place the food in the
oven, close the door and start cooking.
Loading ...
Loading ...
Loading ...