Loading ...
Loading ...
Loading ...

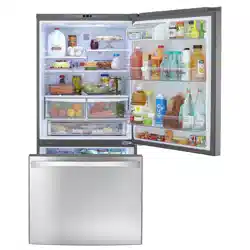
10 Reverse door stops.
o Locate door stop at bottom edge of refrigerator doer
Unscrew two Phillips screws to remove door stop,
Remove the two Phillips screws on opposite edge
of door, Mount door stop on opposite side,, Replace
remaining screws in empty mounting holes
• Repeat the above instructions to reverse door stop
on freezer door,
A Door B Door stop
11 Reverse doors by performing the following steps:
• Remove plugs and screws in opposite side of
refrigerator cabinet. Insert in holes left from hinge
removal..
12 Mount bottom, center, and top hinges with shims on
opposite side of cabinet
• Replace bottom hinge on opposite side of cabinet..
Verify hinge shims are in position before screwing
into place After placing hinge pin into outside hole,
replace round shims Some bottom hinges may
have plugs in holes, tn case of this, remove plug
from outside hole, put pin in hole, and replace plug
in empty hole
° Replace top hinge and shims, but allow enough
clearance to slide hinge side of refrigerator door into
place Tighten down top hinge to securely hold door
° Use a dime at top to space door _1/,_"(18ram)
from cabinet
• Handle side of door should be approximately
'/8" (3 mm) higher than hinge side. Door will
become level when it is loaded with foo&
11/16"
(18 ram)
118"
(3 mm)t
13. Mount refrigerator handle on opposite side of door
using mounting screws removed in previous step.
° Snap handle trim into place and replace screw,
14_ Mount freezer handle to opposite side of door using
mounting screws removed in previous step,
• Angle front edge of handle cap downward toward
back lip of freezer handle Verify bottom tab on
freezer cap slides under rear lip of freezer handle..
Snap rear edge of handle cap in place.
!5 Check unil for proper leveling following instructions in
section titied Leveling Refrigerator, starting with step
3
16. Replace toe grille and bottom hinge cover,
Important: Look for arrow printed on inside of grille to
insure proper placement
- Snap top portion into place first Press down on
lower part of grille until bottom portion snaps into
place
Connect ice maker water supply line (some
models).
l DANGER 1
To avoid electrical shock which can cause severe
personal injury or death,. Disconnect power to
refrigerator before connecting water supply,
CAUTION
Observe the following to avoid property damage:
. Make sure water pressure to water valve is between
20 and 120 pounds per square inch°
° Tighten adapter fitting and nuts with pliers and
wrenches. Do not overtighteno
- Check for water leaks and correct if necessary
before returning refrigerator to normal location After
24 hours check again for leaks..
Important
• Before connecting watter supply, contact a plumber to
connect coper tubing to household plumbing in
compliance with local codes and ordinances.
° DO NOT use piercing type or _/_" saddle valves!
Both reduce water flow, become clogged with time and
in addition, may cause leaks if repair is attempted. The
correct type of shuhoff valve requires a 1,4"hole to be
drilled in the water supply pipe before valve attachment.
- Do not instalt copper tubing in area where temperatures
drop below 32°F (0°C)
Materials Required
V4" O D (6 ram) flexible copper tubing is required. Length
of copper tubing must reach from water supply
connection to water valve inlet port on back of
refrigerator, plus additional 8 ft (2 m) of tubing for a
service loop. A service loop witl allow refrigerator to be
pulled away from the wafl without disconnecting tubing
I11
Z
¢)
r"
I
Loading ...
Loading ...
Loading ...