

Preparation:
Before beginning assembly, read all warnings and safety
precautions!
WARNINGS & CAUTIONS:
Warnings:
To reduce the risk of electric shock, connect pump only to a
Ground Fault Circuit Interrupter (GFCI) outlet.
Do not exceed the voltage shown on the pump.
Always disconnect the pump from the power source before
performing any maintenance or work on the pump, light(s) or
any fountain fittings.
Inspect the power cord for damage before installation and/or
maintenance. Replace the entire pump if damage is found.
Thank you for choosing Sunnydaze Decor. If you have any questions,
comments or concerns please feel free to contact us by phone at: 888-881-4668,
by email: customerservice@serenityhealth.com, or you could also email us
via our contact us page at: www.SerenityHealth.com/contact-us/.
We stand behind our brand and the quality of the items we sell. We will send
new parts, or replace products at our discretion within the one year warranty
period. Before we can help, you will need to provide proof of purchase with the
date of purchase and photos of the defective merchandise. We will use the
photos to determine the cause of defect and for future quality control.
Cautions:
Use a proper power source as indicated on the pump label.
Keep the cord away from high temperatures and/or heat
sources.
Do not lift the pump by its power cord.
Keep the fountain out of reach of children.
Do not let the pump run dry. Pump must be completely
submerged for proper operation and cooling.
Do not pump heated liquids.
Operate with freshwater only. Avoid heavily chlorinated water
and water with high PH levels.
REMARK:
Please be sure that the assembly process is team works. Due
to the individual product designing difference, may have a gap
with specifications content more or less, we are sorry but we
cannot inform besides, understand please.
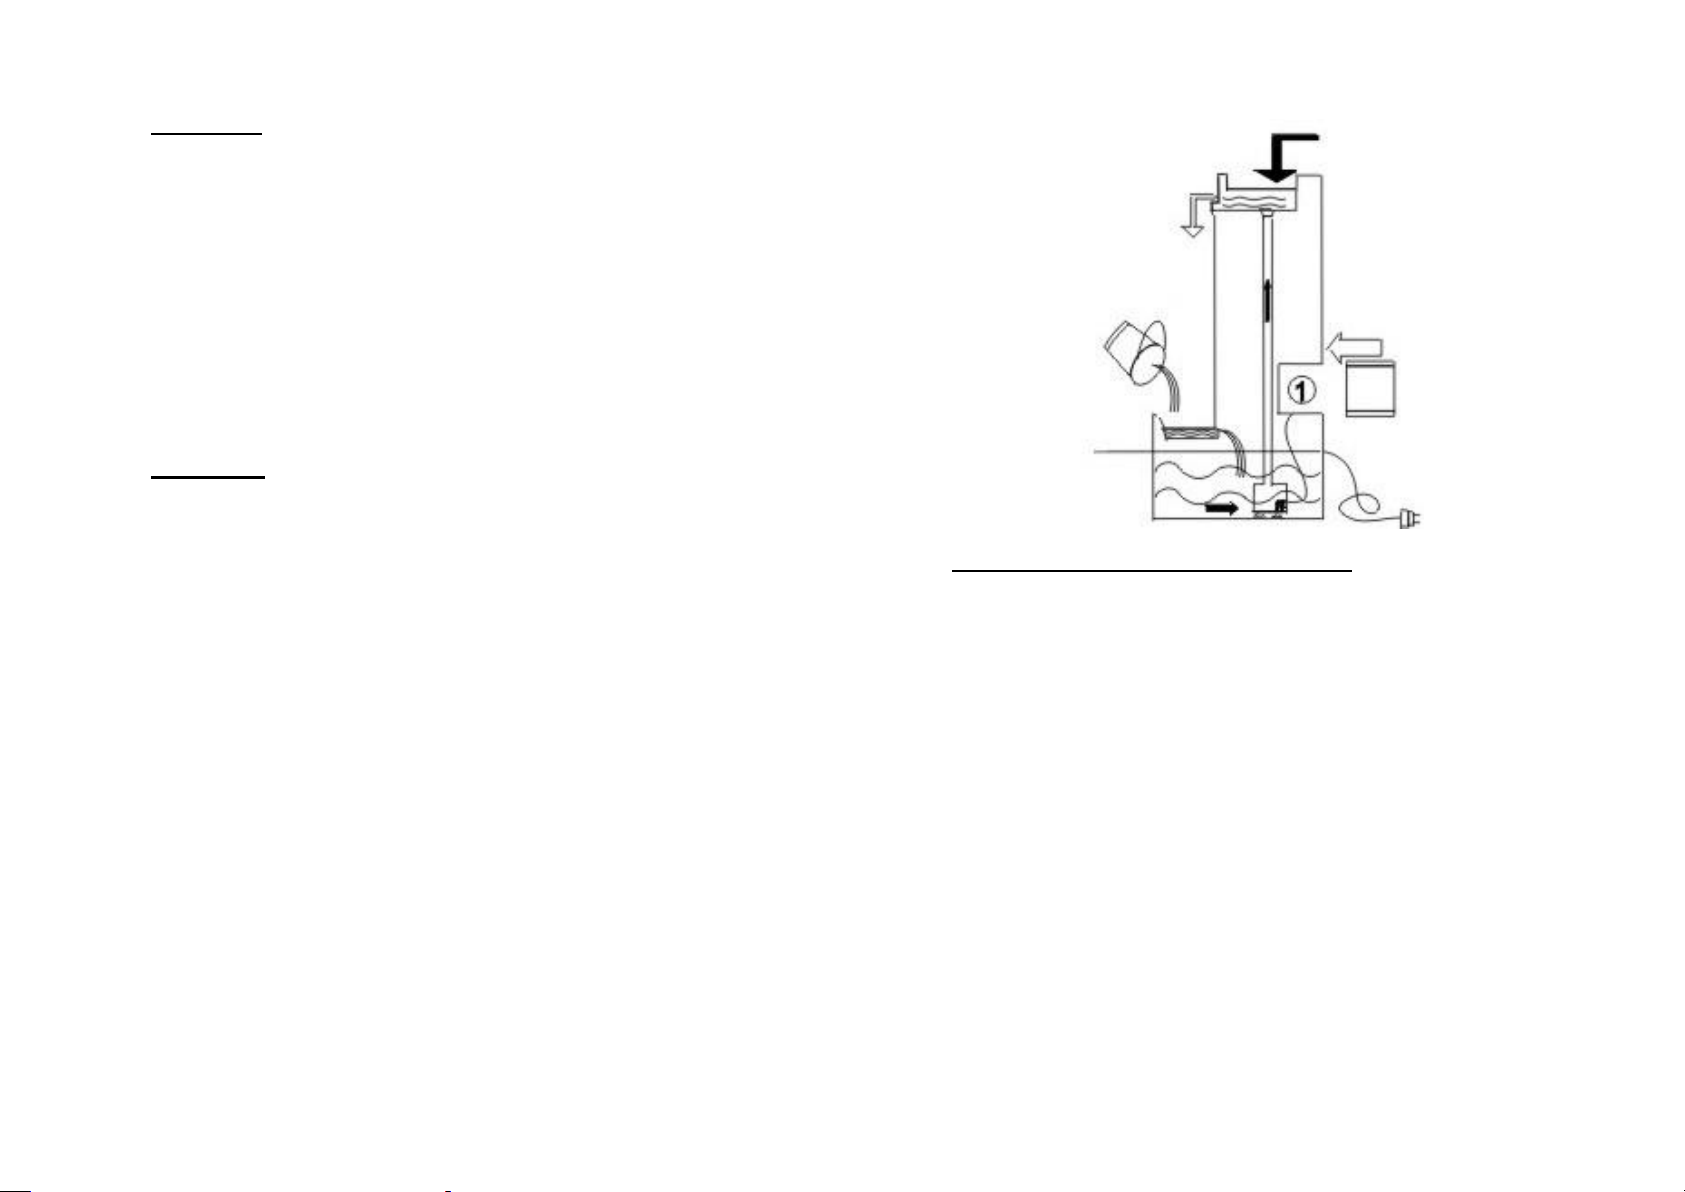
Diagram of water circulation for a whole unit fountain.
PUMP ASSEMBLY INSTRUCTIONS:
1. Remove the pump from the package and untie the power
cord. Adjust the flow rate (if applicable) to the maximum (+)
position.
2. Drag out one end PVC tube from the fountain back (as
shown in Fig.①.) to connect with the pump. Place the pump in
a desired location in the fountain. Close the cover plate (The
individual product is not with any cover plate because of
structure difference). Always keep the plug out.
3. Add water according to what picture shows. Make sure that
water level does not exceed the front and back rock bottom.
4. Connect the power cord from the pump to a properly
grounded, grounding type receptacle (GFCI). Processing
circuit.
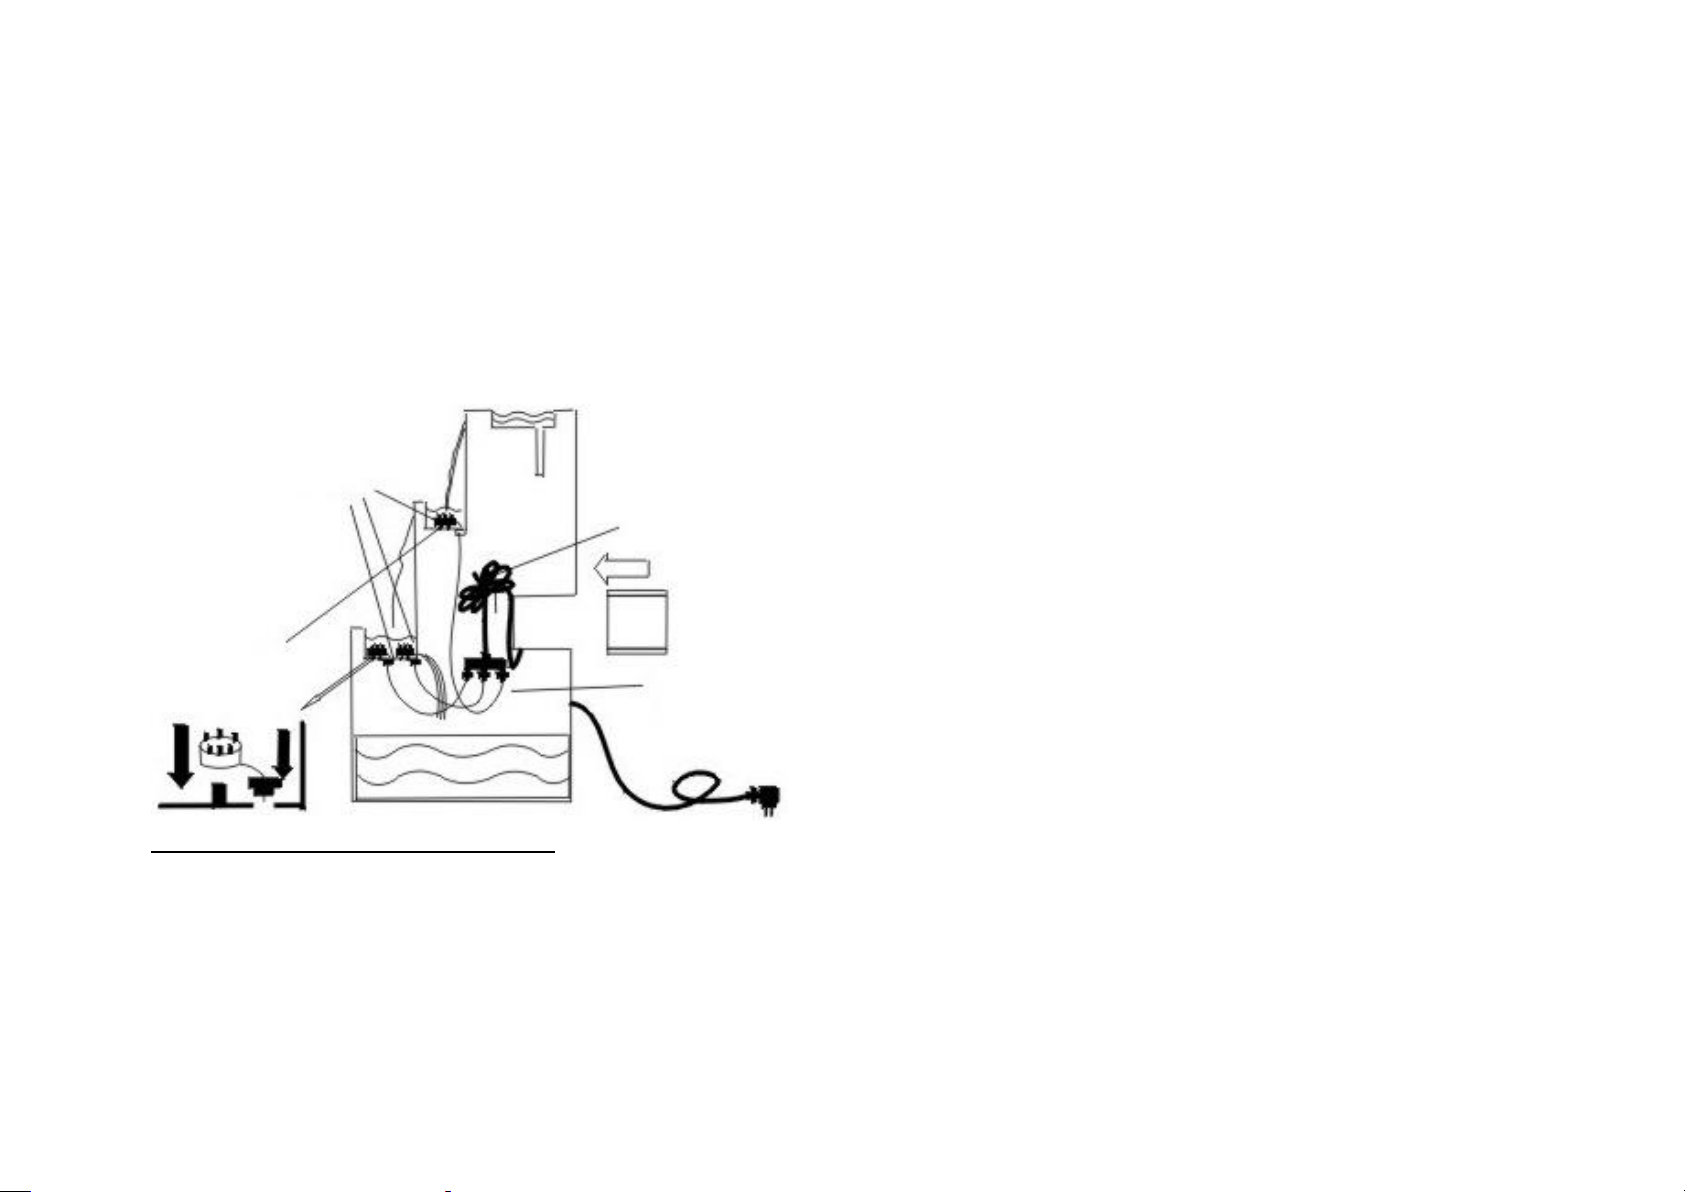
Diagram of water circulation for one set fountain with two
pieces, by the perpendicularity links up.

PUMP ASSEMBLY INSTRUCTIONS:
1. Remove the pump from the package and untie the power
cord. Adjust the flow rate (if applicable) to the maximum (+)
position.
2. Drag out one end PVC tube from the bottom of Fountain
Upright (as shown in Fig.①.) to connect with the pump. Place
the pump in a suited location in the Fountain Cistern, and
assembled the Fountain Upright on the Fountain Cistern at
the same time (as what picture shows). Make sure they fitted
well.
3. Add water according to what picture shows. Make sure that
water level does not exceed the front and back rock bottom.
4. Connect the power cord from the pump to a properly
grounded, grounding type receptacle (GFCI). Processing
circuit.
Diagram of water circulation for twist and lock style
fountain.
PUMP ASSEMBLY INSTRUCTIONS:
1. Remove the pump from the package and untie the power
cord. Adjust the flow rate (if applicable) to the maximum (+)
position. Pass the power cord through the middle of the Basin
and Pedestal, drag the power cord out from the hole of
Pedestal bottom (as what picture shows).
2. Tighten the screws to assemble the Basin and the Pedestal
(as shown in Fig.①. & Fig.②.).
3. Drag out one end PVC tube from the bottom of the Fountain
Upper-end to connect with the pump. Place the pump in a
suited location in the Basin (as shown in Fig.②.).
4. Tighten the screws to assemble the Fountain Upper-end
and the Basin (as shown in Fig.②. & Fig.③.).
5. Add water according to what picture shows. Make sure that
water level cover the pump fitly just completely.
6. Connect the power cord from the pump to a properly
grounded, grounding type receptacle (GFCI). Processing
circuit.
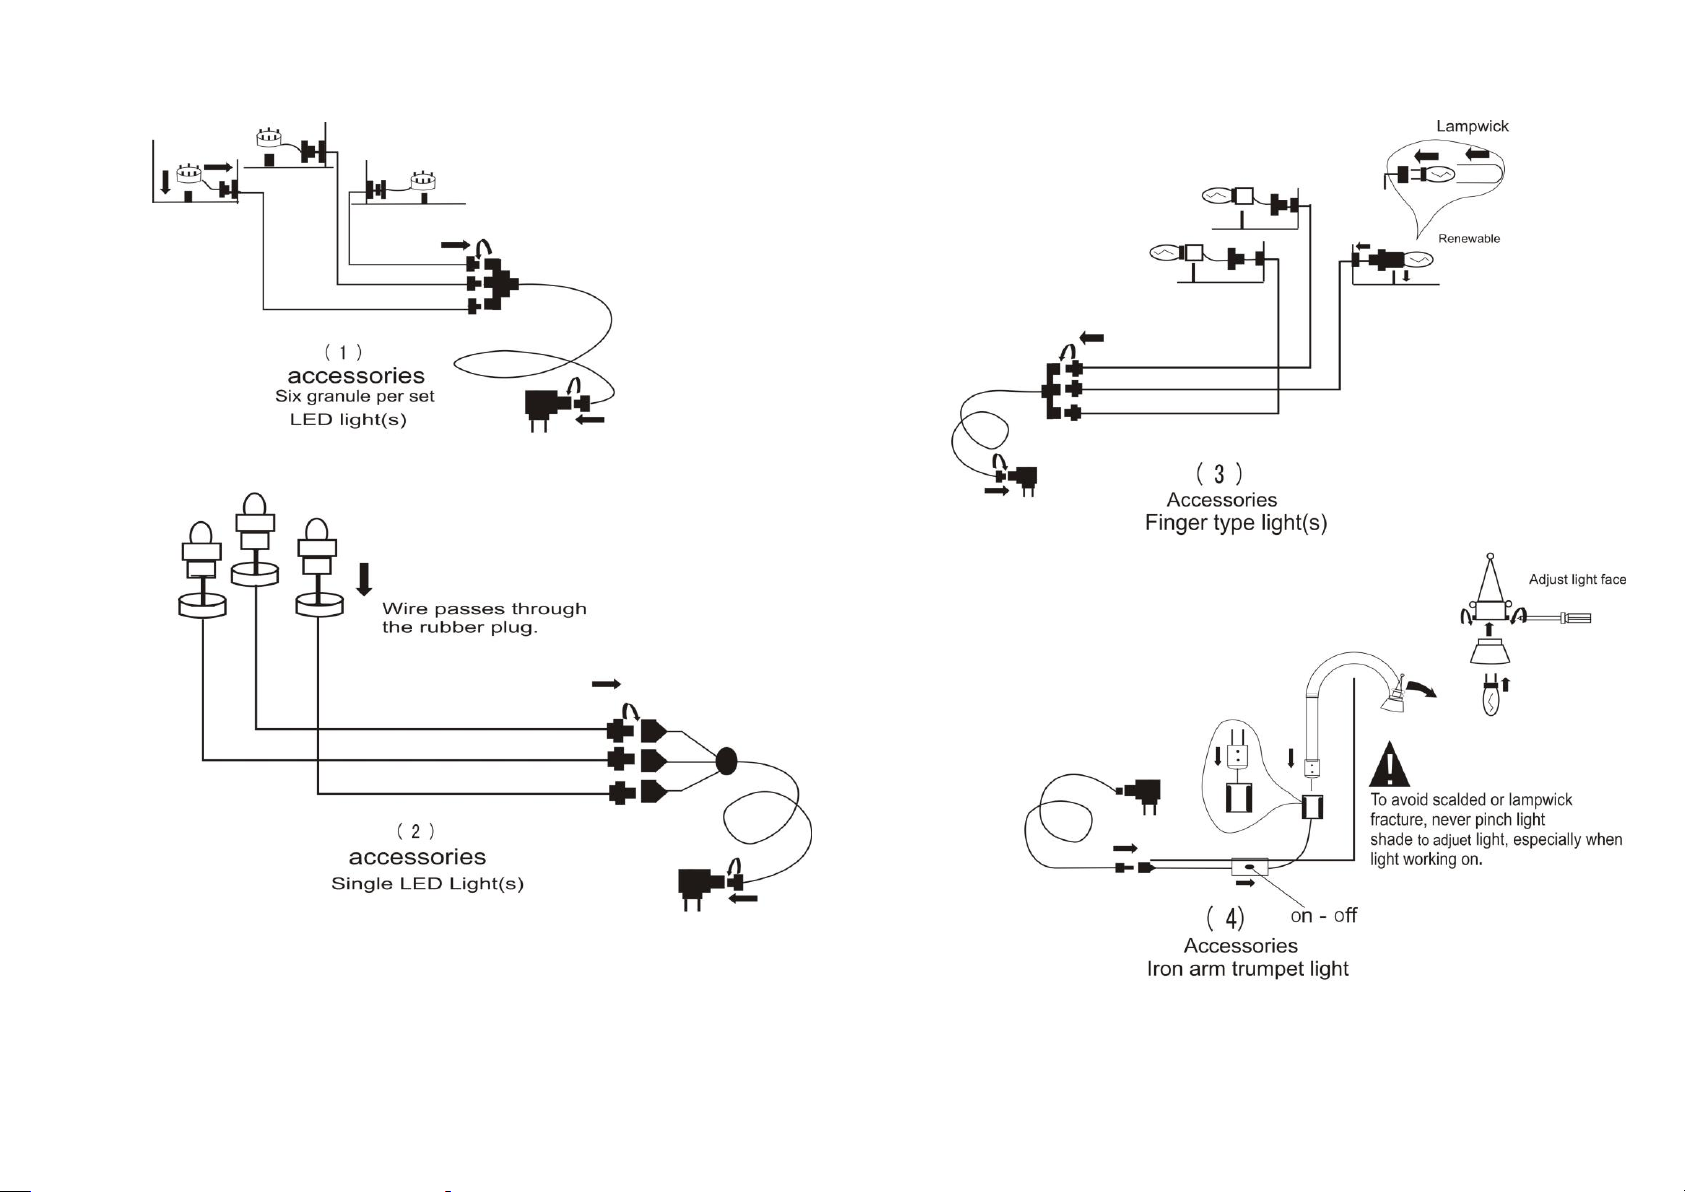
Diagram of fountain light(s)
LIGHT ASSEMBLY INSTRUCTIONS:
1. If product design does not contain light, ignore this chapter
please
2. Please check accessories light(s) and wiring strategy if the
product should attach any light.
3. Remove the transformer from the package.
4. Drag the light(s) cord attachment plug out the fountain,
connect it to the transformer.
5. Connect the transformer to a properly grounded, grounding
type receptacle (GFCI). Processing circuit.
REMARK:
6. Specifically for the fountain like Page 4., part of light
sometimes attached to the Fountain Upright. First of all,
please drag the light cord attachment plug out the Fountain
Upright, connect it to the light attachment Fountain
Infrastructure with a black PVC connector. The other step
please invites reference points 2,3,4,5.
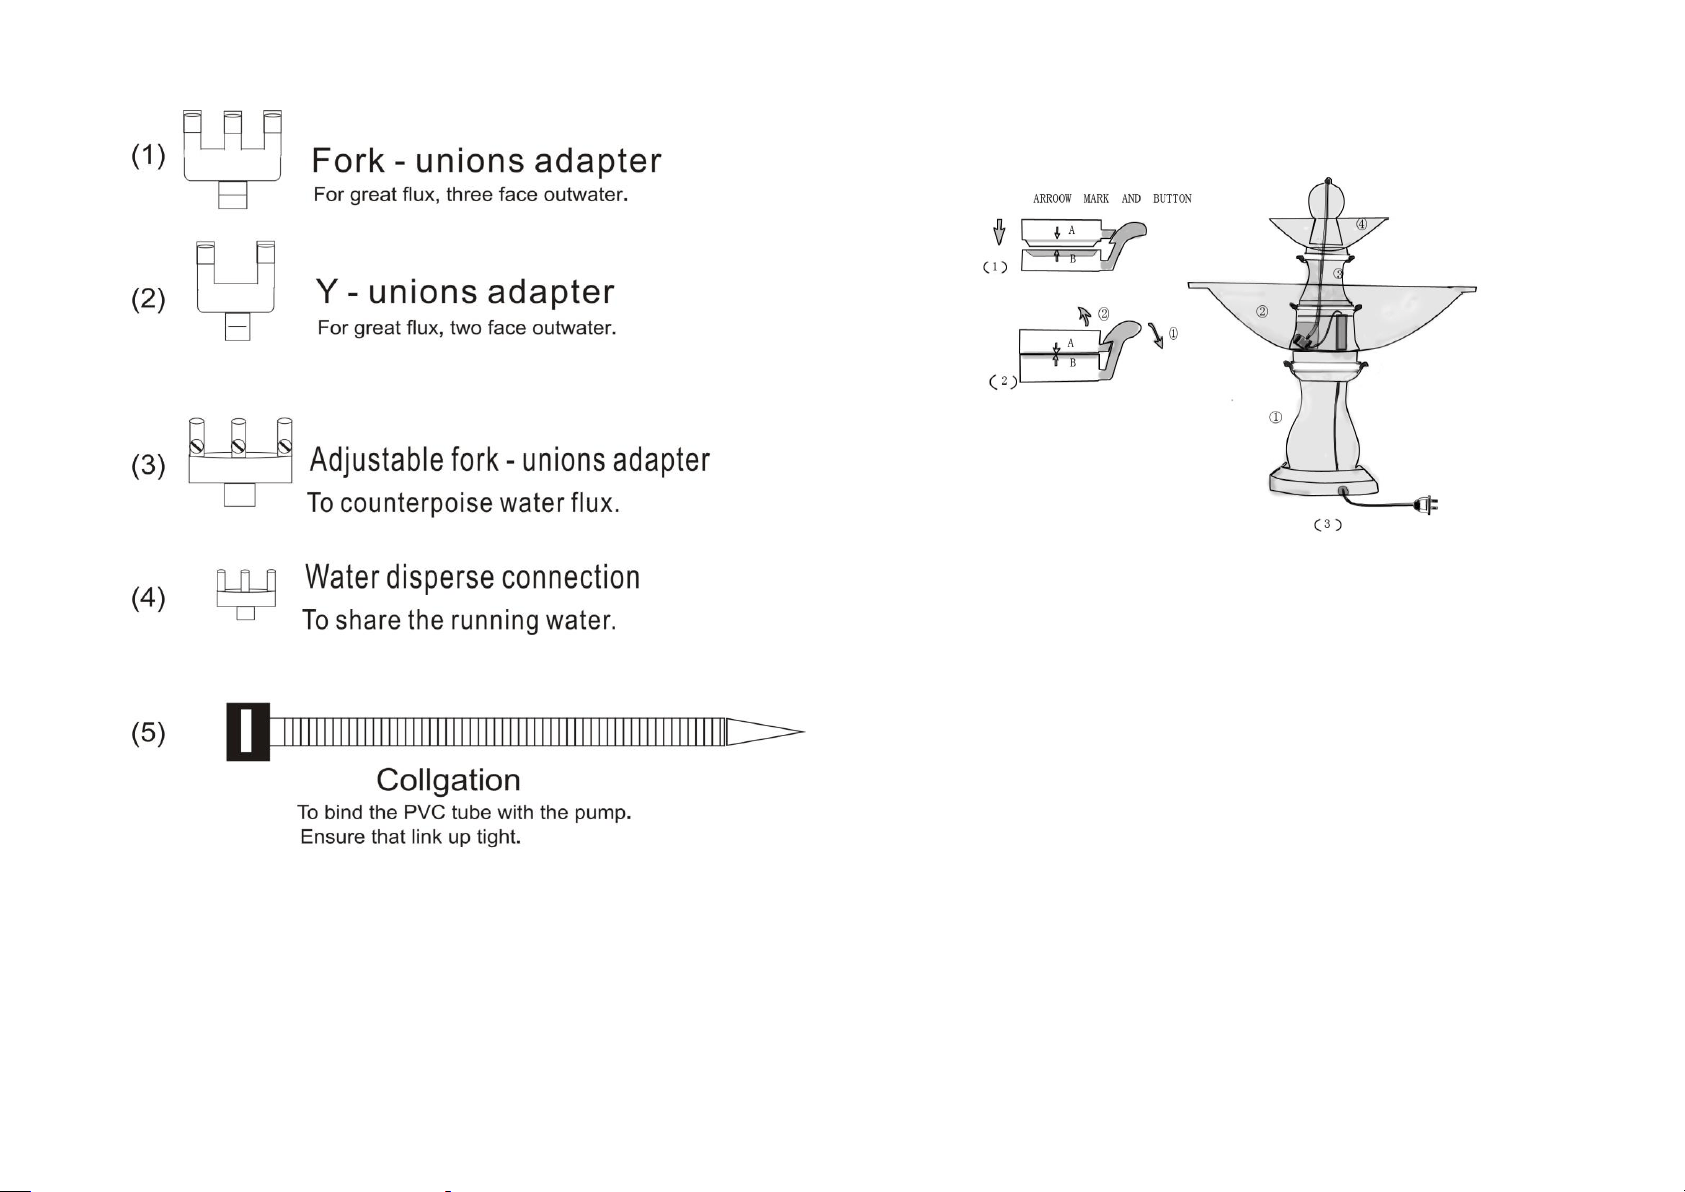

ASSEMBLY INSTRUCTIONS:
1 Place the Pedestal on the ground lift the Basin up and
find Arrow Mark and Button as picture(1) then set the Basin
on the Pedestal and make sure the button is closed tightly
Remove the pump from the package and untie the power code
Adjust the flow rate(if applicable) to the maximum(+) position
Pass the power cord through the middle of the Basin and Pedestal
then take the plug out as shown in picture(3)
Lift the Fountain Top up, through the water pipe from Middle
Pedestal find Arrow Mark and Button then connect them together
make sure the button is closed tightly
Pick up the end of water pipe connect it with the pump and put
the pump in the suitable location then close the cover
Fill water into Basin make sure that water level cover the pump
fitly just completely
Connect the pump plug to a properly grounded grounding type
receptacle (GFCI) Processing circuit
.,
,
.
.
.
,
.
,,
.
,,
,.
,
.
..
①②
②
①
④
③
2
3
4
5
6
.
.
.
.
.