Loading ...
Loading ...
Loading ...
18 19
OPERATING INSTRUCTIONS
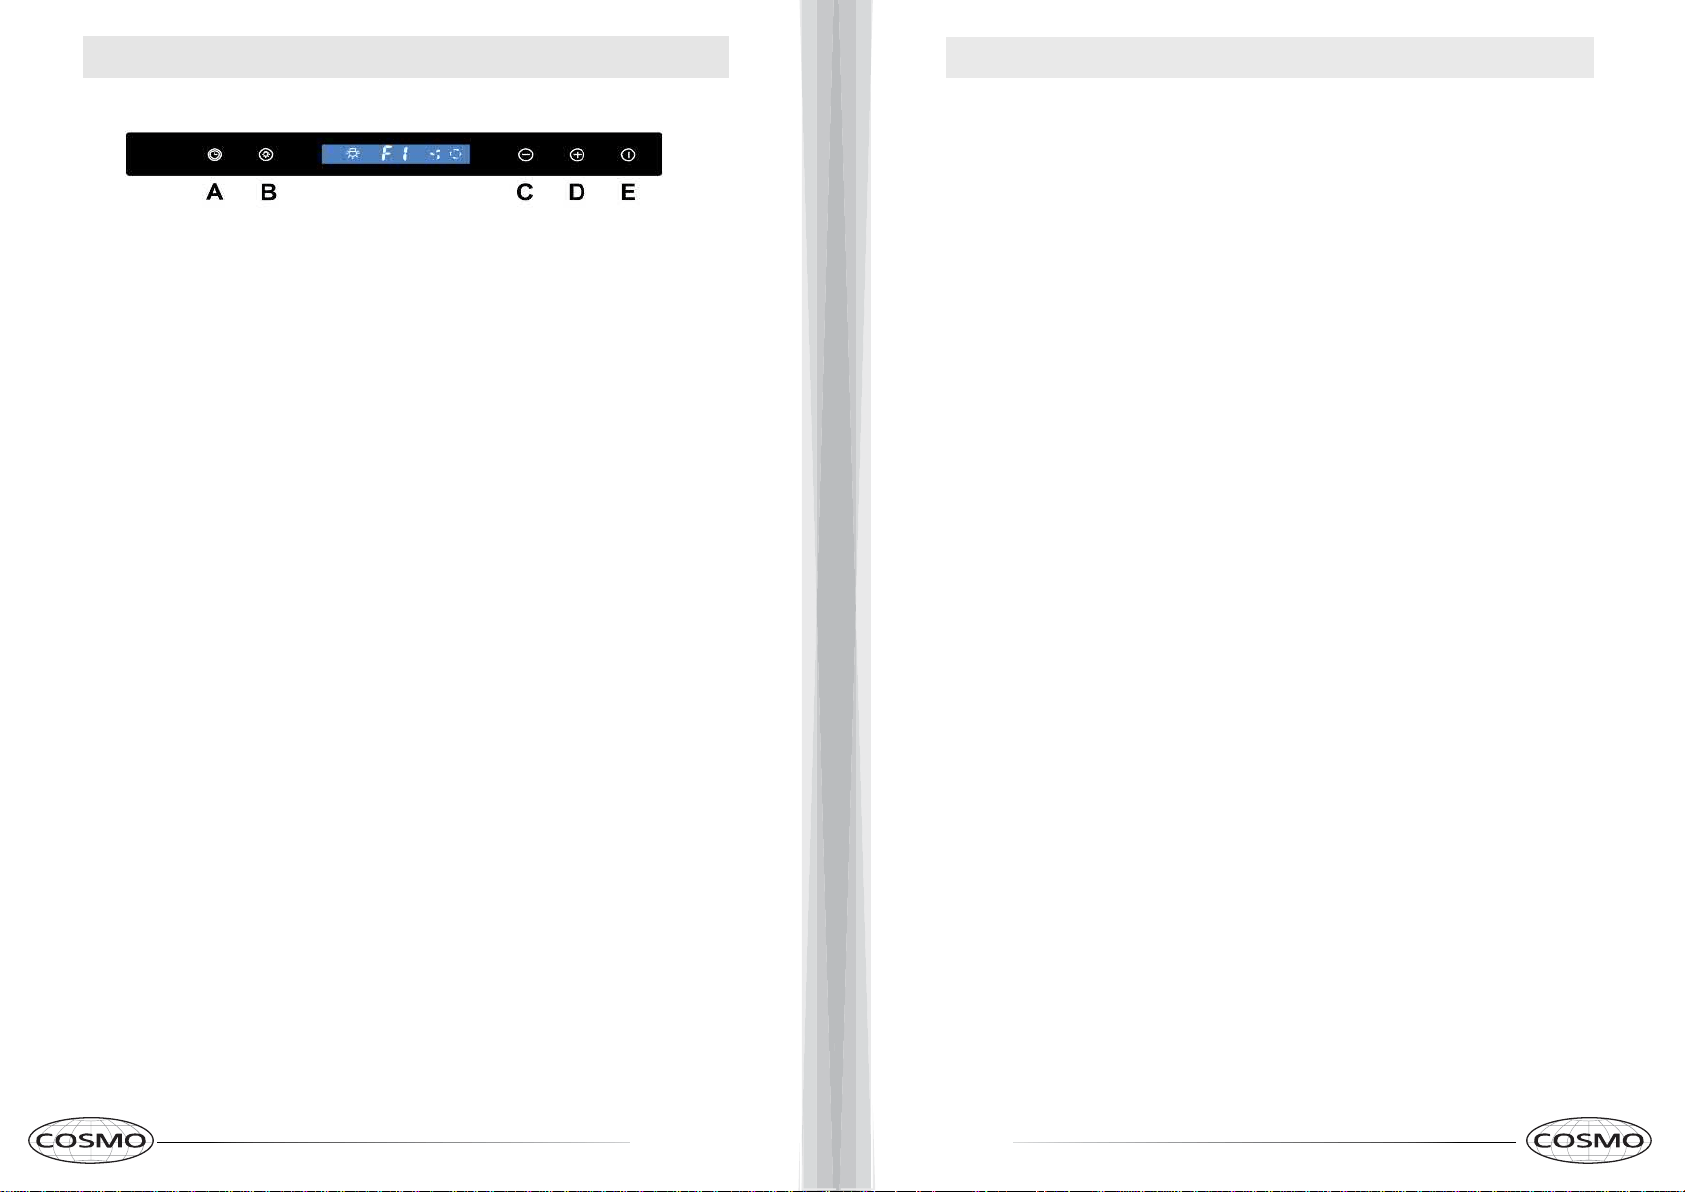
Soft Touch Controls
A. Timer Button - Only works when the range hood fan is running;
touch once. The timer has a default setting of 1 minute.
Use (+) plus or (-) minus to increase or decrease time duration up to 15
minutes depending on how much time you require.
Setting The Time:
Press the Clock symbol (A) when the range hood fan is not running, the
time will light up and blink.
Immediately use the (+) and (-) signs to adjust the hours.
Press the clock symbol again and immediately use the (+) and (-) signs to
adjust the minutes.
After 3 seconds of no buttons being pushed, the time will save.
The clock is in standard 12-hr format.
B. Light. Press to turn light on / off.
C. Minus Button - Used to decrease settings.
(Quick High Speed On)
With the unit OFF, press once as a shortcut to turn on with high speed setting.
D. Plus Button. Used to increase settings.
(Quick Low Speed On)
With the unit OFF, press once as a shortcut to turn on with low speed setting.
E. Power. Press to turn control panel on / off.
MAINTENANCE
CAUTION:
NEVER PUT YOUR HAND INSIDE OF THE UNIT WHILE ITS OPERATING.
FOR THE BEST PERFORMANCE CLEAN YOUR RANGE HOOD REGULARLY.
CLEANING
1. Use only mild soap or cleaning solutions to clean the range hoods
outer surface. Dry surfaces using a soft cloth.
2. Stainless Steel cleaner may be used on the external surface.
3. Cleaning the Baffle Filters: For daily cleaning, use hot, soapy wa-
ter and a soft cloth. Wipe dry and finish with a damp micro-fiber
cloth. Baffle filters can also be cleaned in the dishwasher.
4. Clean the Range Hood assembly once every 6 months.
5. DO NOT clean the motor or electrical components with water or
any other liquid.
REPLACING LIGHT BULBS
CAUTION: LAMP UNIT MAY BE HOT! WAIT UNTIL THE UNIT IS COOL. BEFORE
ATTEMPTING TO REPLACE THE LIGHT BULBS MAKE SURE THE UNIT IS
POWERED OFF AND UNPLUGGED.
Note: Bulb Size GU10.
1. Remove the baffle filters
2. Reach behind the bulb, twist counter clockwise and push the
bulb out of the panel. 3. Plug in new bulb and twist clockwise to
lock into place.
5. Reinstall the baffle filters.
Loading ...
Loading ...
Loading ...