Loading ...
Loading ...
Loading ...
Getting Started
5
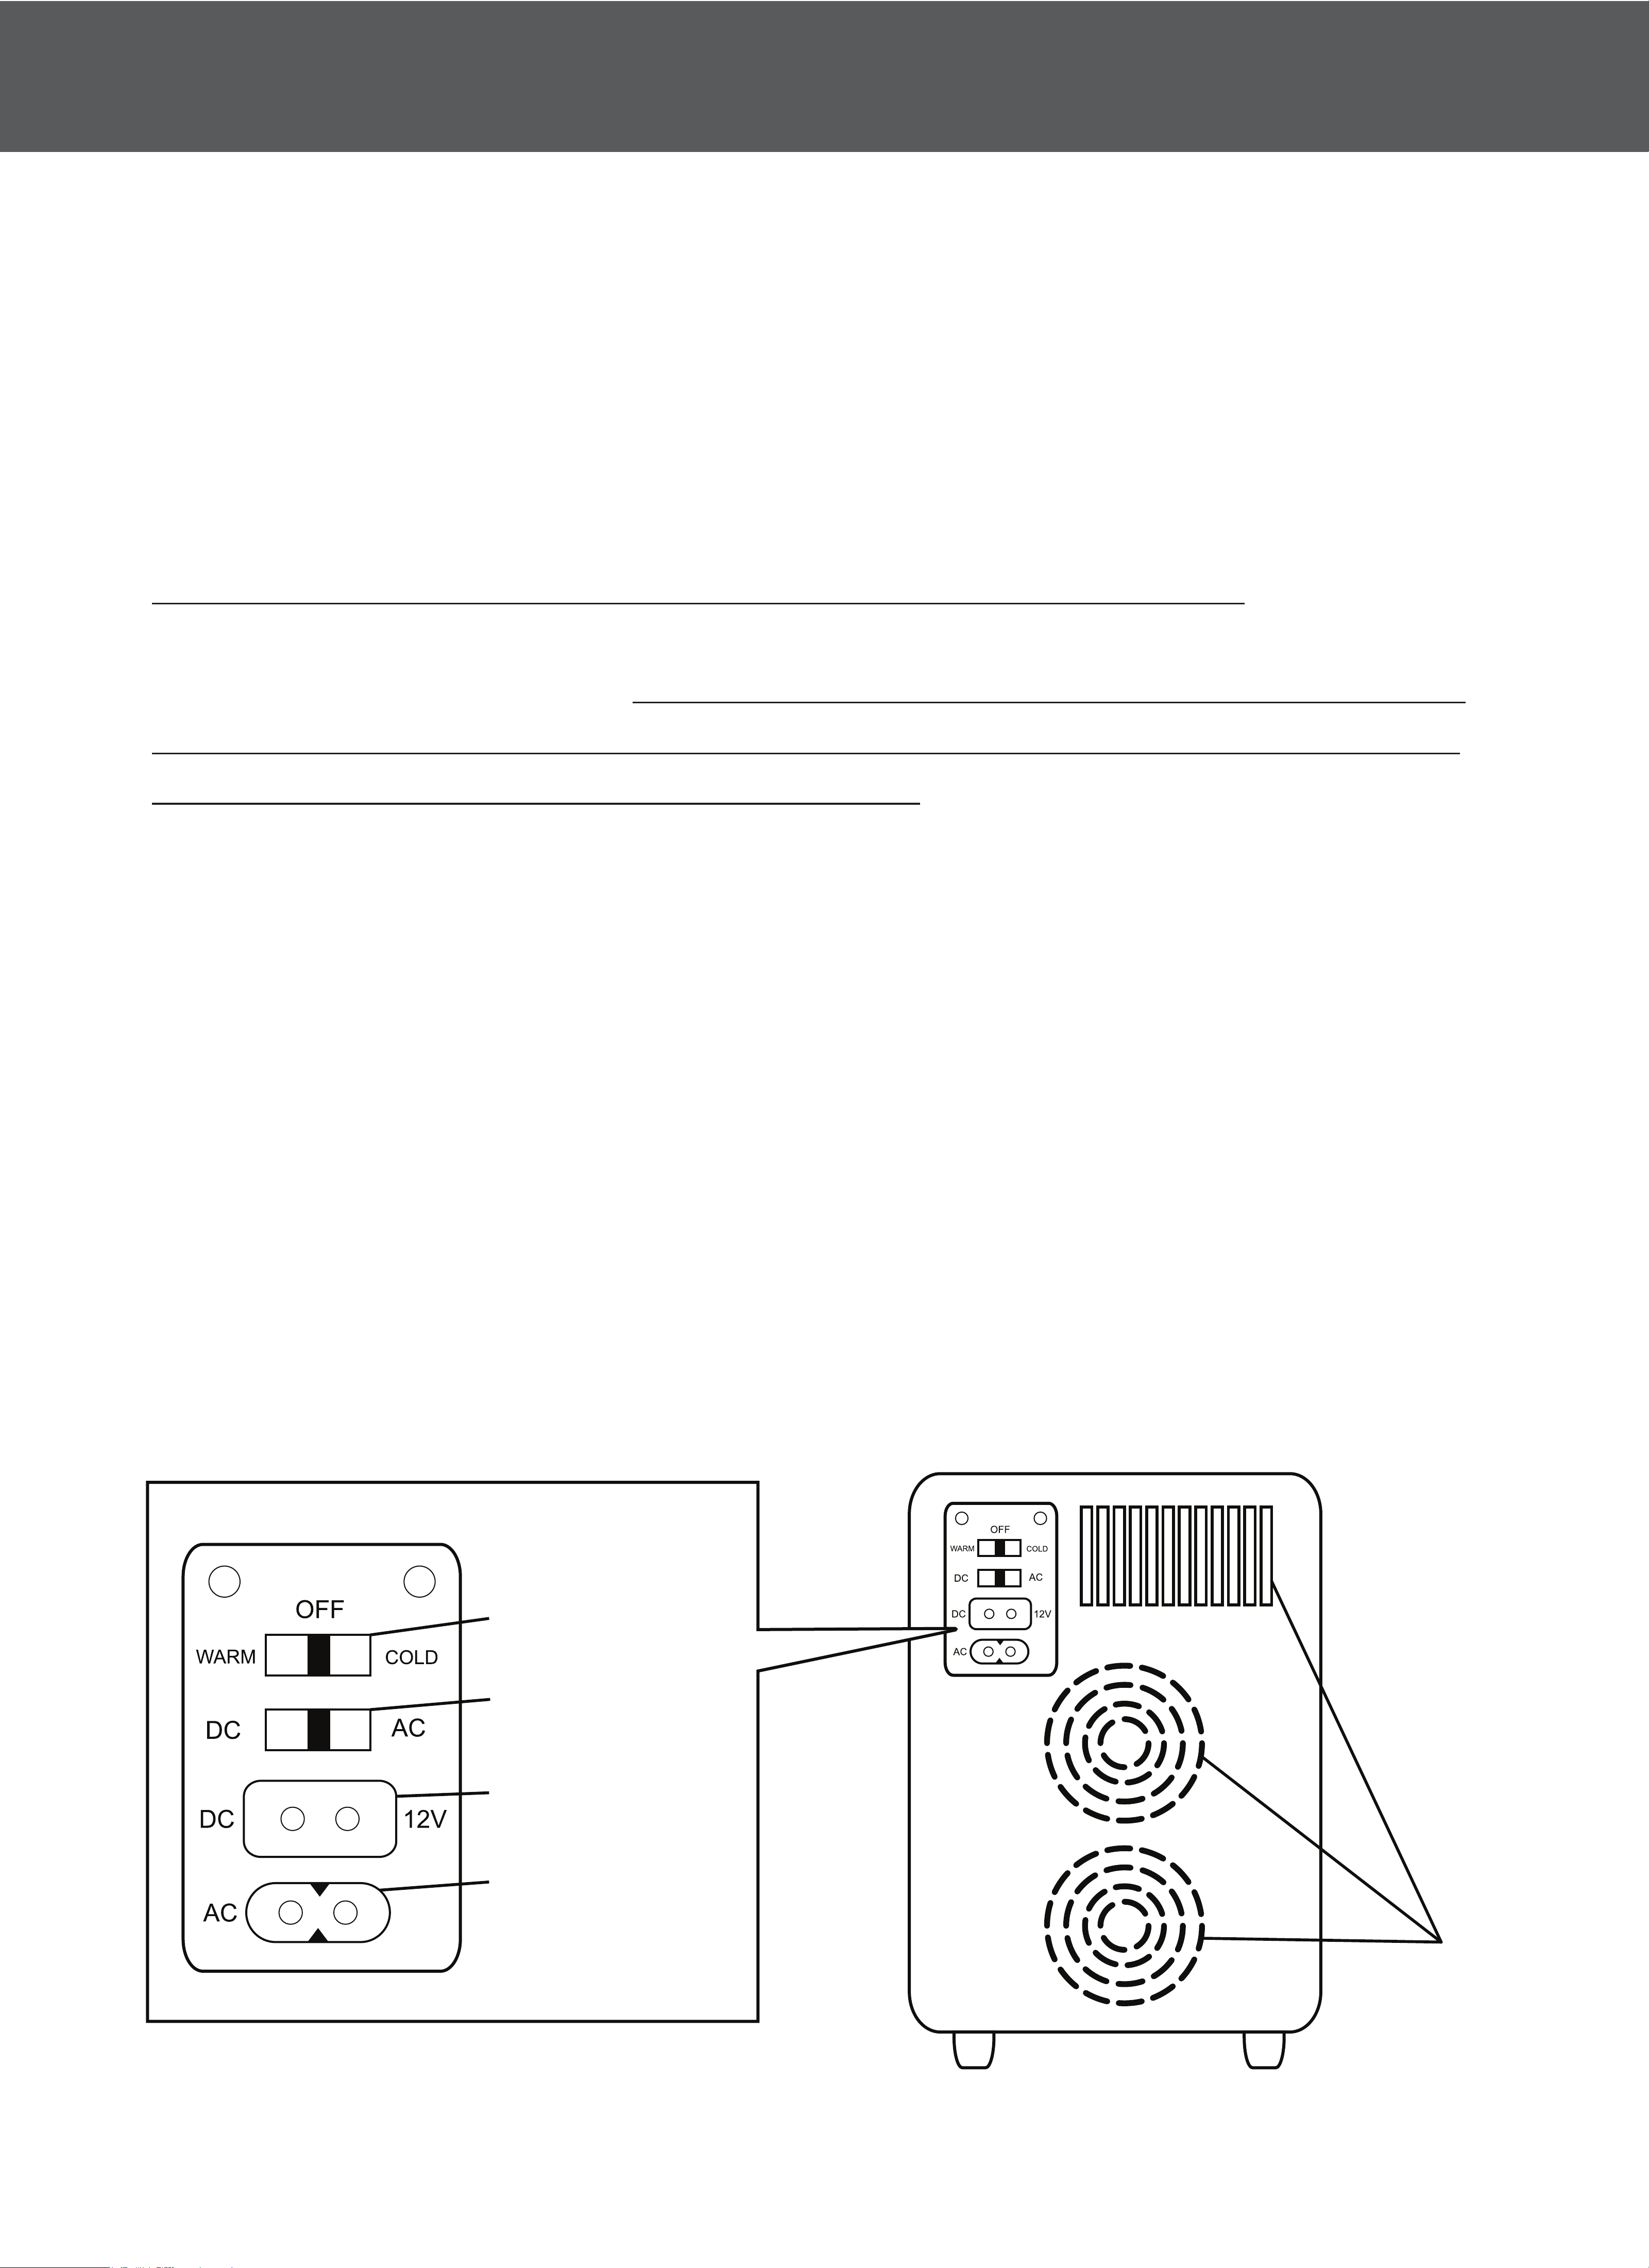
Fig. 5
Fig. 6
Vents
COLD/WARM SWITCH
AC/DC SWITCH
DC PORT
AC PORT
Before plugging in the cooler/warmer unit: make sure the switch on the back of the unit is
set to the OFF setting.
A minimum 2" vent clearance is required for proper ventilation.
For home application: Use the supplied AC power cord (see Fig. 2) by inserting AC
connector into unit’s AC port (see Fig. 5) and inserting AC plug into wall outlet.
This unit works on 100-240V (in compliance with worldwide standards).
For motor vehicle application: Car engine MUST be turned on first before plugging in
the cooler/warmer. This precaution prevents a power surge that can lead to the unit
overheating and/or becoming a potential fire risk. Use the supplied DC power cord (see
Fig. 3) and insert DC connector into unit’s DC port (see Fig. 5) and the DC plug into the
appropriate cigarette-lighter outlet.
For Cooling: Set the power switch to the COLD setting. A green light will turn on to
indicate that the unit is in cooling mode.
For Warming: Set the power switch to the WARM setting. A red light will turn on to
indicate that the unit is in warming mode.
Turning on your unit:
1.
2.
4.
Plugging in your unit:3.
100-
240V
100-
240V
Loading ...
Loading ...
Loading ...