Loading ...
Loading ...
Loading ...
To clean the outside of the machine,
wipe off dirt with a cloth dampened in
warm water and mild detergent. DO not
use solvent or petroleum based prod-
ucts to clean the machine.
Read "Before you begin cleaning"
instructions on page 9.
1. Fill clean solution tank (upper tank)
with HOOVER Carpet/Upholstery
Detergent according to instructions for
Figs. 2-8to 2-14.
2. Move speed selector to LO for gen-
tle cleaning or HI for normal cleaning.
3. Dry hands and plug cord into a prop-
erly grounded outlet.
Do not clean over floor electrical out-
lets.
4. To avoid walking on damp carpet,
start at the end of the room farthest from
the door or path to sink where tanks will
be emptied and filled.
Step on handle release pedal and lower
handle to operating position; turn deep
cleaner ON.
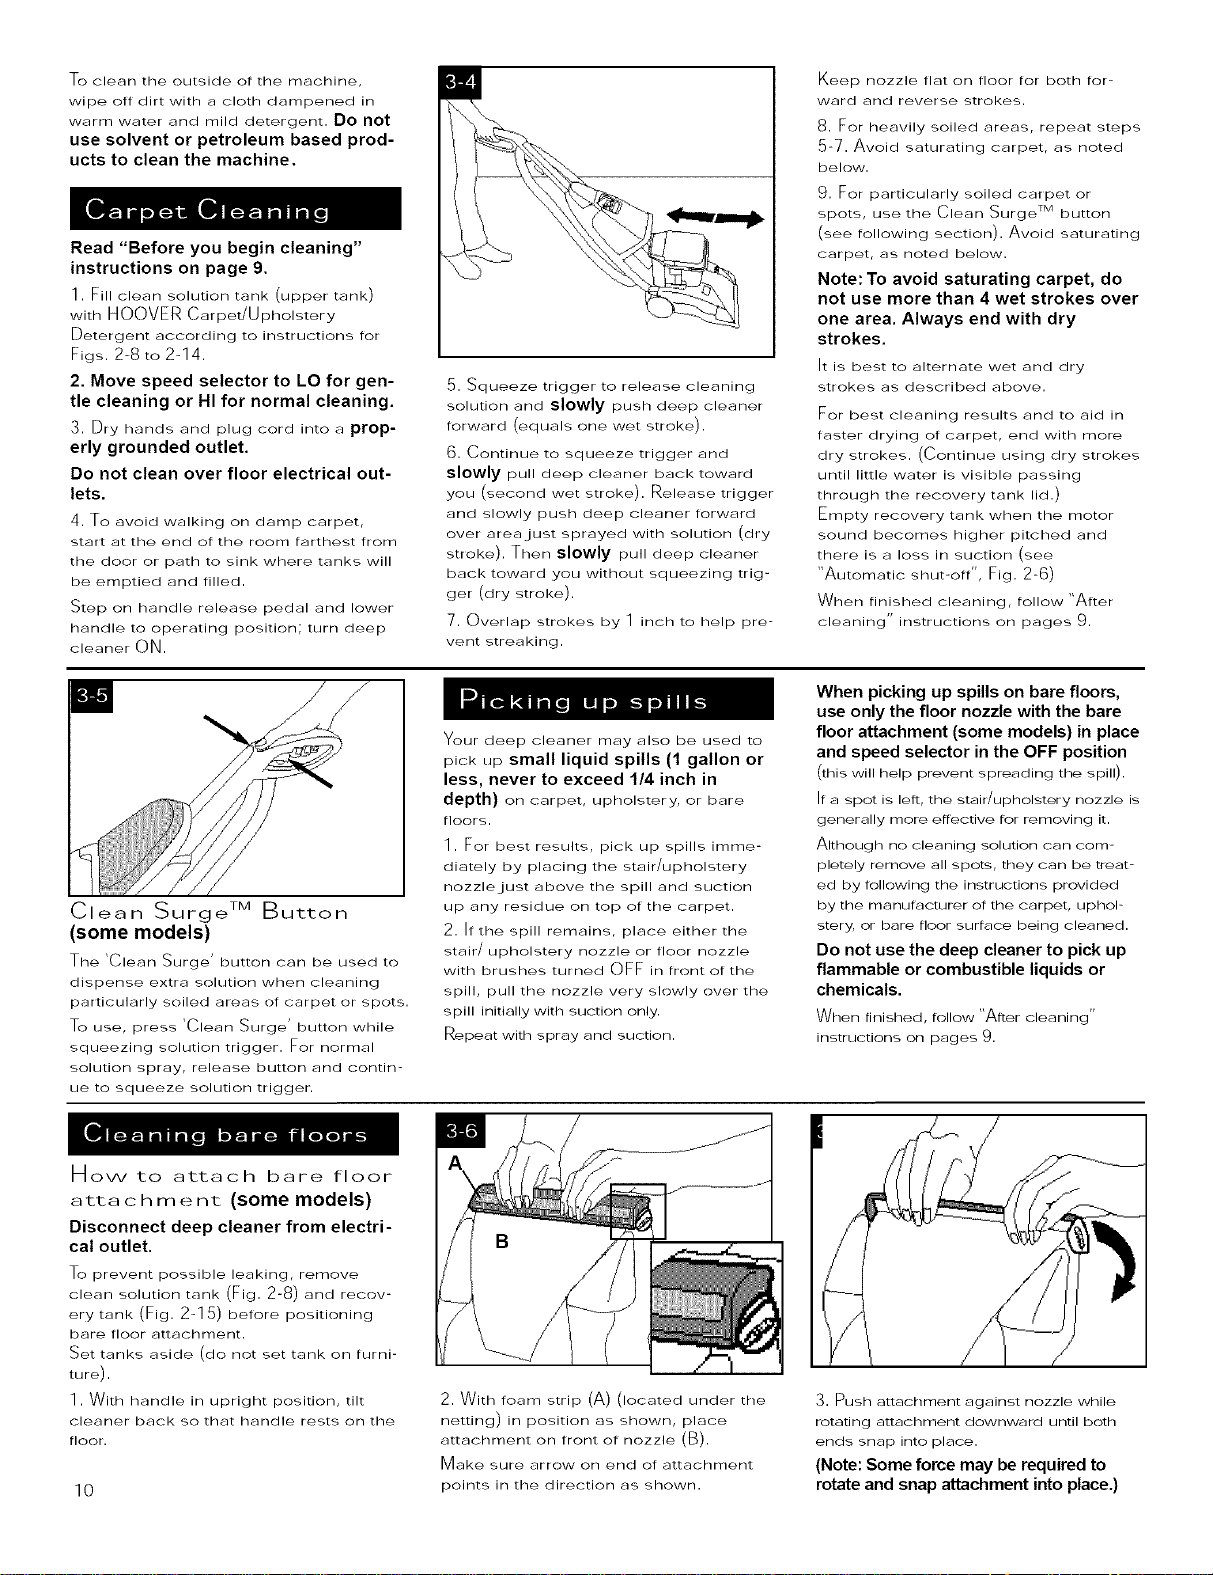
5. Squeeze trigger to release cleaning
solution and slowly push deep cleaner
forward (equals one wet stroke).
6. Continue to squeeze trigger and
slowly pull deep cleaner back toward
you (second wet stroke). Release trigger
and slowly push deep Gleaner forward
over area just sprayed with solution (dry
stroke). Then slowly pull deep cleaner
back toward you without squeezing trig-
ger (dry stroke).
7. Overlap strokes by 1 inch to help pre-
vent streaking.
Keep nozzle flat on floor for both for-
ward and reverse strokes.
8. For heavily soiled areas, repeat steps
5-7. Avoid saturating carpet, as noted
below.
9. For particularly soiled carpet or
spots, use the Clean Surge TM button
(see following section). Avoid saturating
carpet, as noted below.
Note: To avoid saturating carpet, do
not use more than 4 wet strokes over
one area. Always end with dry
strokes.
It is best to alternate wet and dry
strokes as described above.
For best Gleaning results and to aid in
faster drying of carpet, end with mor_
dry strokes. (Continue using dry strokes
until little water is visible passing
through the recovery tank lid.)
Empty recovery tank when the motor
sound becomes higher pitched and
there is a loss in suction (see
"Automatic shut-off", Fig. 2-6)
When finished cleaning, follow "After
cleaning" instructions on pages 9.
Clean Surge TM Button
(some models)
The 'Clean Surge' button can be used to
dispense extra solution when cleaning
particularly soiled areas of carpet or spots.
To use, press 'Clean Surge' button while
squeezing solution trigger. For normal
solution spray, release button and contin-
ue to squeeze solution trigger.
Your deep cleaner may also be used to
pick up small liquid spills (1 gallon or
less, never to exceed 1/4 inch in
depth) on carpet, upholstery, or bare
floors.
1. For best results, pick up spills imme-
diately by placing the stair/upholstery
nozzle just above the spill and suction
up any residue on top of the carpet.
2. If the spill rernains, place either the
stair/ upholstery nozzle or floor nozzle
with brushes turned OFF in front of the
spill, pull the nozzle very slowly over the
spill initially with suction only.
Repeat with spray and suction.
When picking up spills on bare floors,
use only the floor nozzle with the bare
floor attachment (some models) in place
and speed selector in the OFF position
(this will help prevent spreading the spill).
If a spot is left, the stair/upholstery nozzle is
generally mor_ effective for r_moving it.
Although no cleaning solution can com-
pletely rernove all spots, they can be treat-
ed by following the instructions provided
by the manufa_cturer of the carpet, uphol-
stery, or bare floor surface being Gleaned.
Do not use the deep cleaner to pick up
flammable or combustible liquids or
chemicals.
When finished, follow "After cleaning"
instructions on pages 9.
How to attach bare floor
attachment (some models)
Disconnect deep cleaner from electri-
cal outlet.
To prevent possible leaking, remove
clean solution tank (Fig. 2-8) and recov-
ery tank (Fig. 2-15) before positioning
bare floor attachment.
Set tanks aside (do not set tank on furni-
ture).
1. With handle in upright position, tilt
cleaner back so that handle rests on the
floor.
10
2. With foam strip (A) (located under the
netting) in position as shown, place
attachment on front of nozzle (B).
Make sure arrow on end of attachment
points in the direction as shown.
3. Push attachment against nozzle while
rotating attachment downward until both
ends snap into place.
(Note: Some force may be required to
rotate and snap attachment into place.)
Loading ...
Loading ...
Loading ...