
wvvw.GEAppliances.com
©
Safety Instruc_tions ......... 9-9
Operating Instruc_tions
Lower Oven Control Panel ...... 93
Lower Oven Controls ....... 93-39
Lower Oven Thermostat ....... 37
Microwave Control Panel . . .]0, ]]
Microwave Oven Controls .... ] 0-92
Probe ................... ,9,1,34
Self-Cleaning I,ower Oven . . . 38, ,9,9
Sensor Controls ........... ] 6-] 8
Care and Cleaning
Broiler Pan and Grid .......... 42
Door ...................... 41
Light Bulb ..................... 43
Microwave Oven ............. 40
Probe ........................ 49
Shelves ..................... 43
Troubleshooting Tips ..... 44-47
Consumer Support
Consumer Support .... Back Cover
Product Registration ....... 49, 50
_4'arranty ................... 51
JT965-30" Double W_lll ChJen
The microwave oven in this
cooking center is I000 watts.
©
©
QJ
Write the model and serial
numbers here:
Model #
Serial #
You can find them on a label inside
the upper oven on the lett side.
164D4290P355 49-80202 07-03 JR
IMPORTANTSAFETYINFORMATION.
READALLINSTRUCTIONSBEFOREUSING.
WARNING!
For your safe_, the information in this manual must be followed to minimize the risk of fire or
explosion, electric shock, or to prevent property damage, personal injury, or loss of life.
PRECAUTIONSTOAVOIDPOSSIBLEEXPOSURETOEXCESSIVE
MICROWAVEENERGY
Do not attempt to operate this oxen with
tile door open since open-door operation
can result in ha_3nflll exposure to
microwaxe energ?'. It is importantnot to
defeat or tamper with the safety interlocks.
Do not place any object between the oxen
flont face and file door or allow soil or
cleaner residue to accumulate on sealing
Slliqqaces,
The oxen should not be adjusted oi
repaired by anyone except properly
qualified service personnel.
Do not operam file ox>n if it is damaged.
It is particularly important fllat file oven
door close properly and that there is no
damag_ to the:
[] door (bent),
[] hinges and latches (broken oi
loosened),
[] door seals and sealing surthces.
IMPORTANTSAFETYNOTICE
The California Safe Drinking Water and ToxicEnforcement Act requires the Governor of California to
publish a list of substances known to the state to cause cancer, birth defects or other reproductive
harm, and requires businesses to warn customers of potential exposure to such substances.
The fiberglass insulation in self-clean ovens gives off a very small amount of carbon monoxide during
the cleaning cycle. Exposure can be minimized by venting with an open window or using a ventilation
fan or hood.
2
vvww.GEAppliances.com
SAFETYPRECAUTIONS
When using electrical appliances, basic safety precautions should be followed, including the following:
WARNING-aroundingInstructions:
This appliance mnst be connected to a
grounded, metallic, permanent wiring
sysmm, or an equipment grounding
conductor should be run with tim citvuit
conductors and connecmd m flae equipment
grounding mrminal or lead on rite
appliance.
WARNING-Toreduce therisk of burns,
electric shock,fire, injury topersonsor
exposure toexcessive microwave energy:
Use this appliance only for its inmnded
use as described ira this manual. Do not
use con_osix> chemicals or vapors in this
appliance. This cooking center is
q)ecifically designed to heat or cook tbod,
and is not inte.raded for laborato W or
industrial use.
Be sure your appliance is properly
installed and grounded by a qualified
technician in accordance with the
proxqded Installation Instructions.
Haxe the installer show you the location of
the circuit breaker or flrse. Mark it for easy
reference.
Be snre the cooking cenmr is securely
installed ira a cabinet that is firmly attached
to the house structure. _A/eight on flae oven
door could cause the oven to tip and
result ira ir_tn_vi. Nex>r allow awone to
climb, sit or hang on the ox>n door
This appliance should be serviced only
by qualified service personnel. Contact
nearest authorized service fi_cility for
examination, tei)air or adjusmaent. Do not
repair or rep]ace any part of this appliance
unless specifically ,ecommended ira this
manual. All oilier servicing should be
_eDn-ed to a qualified technician.
Do not store this appliance outdoors.
Do not use this product near water--
for example, ira a wet basement, or near
a swimming pool.
Before perforating any service, disconnect
the cooking cenmr power supply at the
household distribution panel 1)y removing
the fllse or switching off the circuit
breaker.
Do not operam flais appliance if it has a
damaged cord or ping, if it is not working
properly or if it has been damag>d or
dropped.
Do not leave children alone--children
should not be left alone or unattended ira
an a_ea where appliance is ira use. They
should nex>r be allowed m sit or stand on
any part of the appliance.
Don't allow anyone m climb, stand or
hang on tim door They could damag>
tim cooking cenmr and cause sex>re
personal ir_mLv.
CAUTION:Items of interest to
children should not be stored in cabinets
above an oven; children climbing on the
oven to teach imms could be seriously
ir_m_ed.
Teach children not to pl W with the
controls or any other part of the
cooking cenmn
i,arg> scratches or impacts m glass door
can lead to broken or shatm_ed glass.
VVearproper clothing. I,oose-fitting or
hanging gammnts should nex>r be worn
while using the appliance. Flammable
mamrial could be ignimd if brought in
contact with hot heating elements and
may cause sex>re bnrns.
3
IMPORTANTSAFETYINFORMATION.
READALLINSTRUCTIONSBEFOREUSING.
•_iiii..... >,,
WARNIN61
SAFETYPRECAUTI'ONS
Do not use water on grease fires. Never pick up a flaming pan. Smother flaming pan by covering
pan completely with well-fitting lid, cookie sheet or fiat tray. Flaming grease outside a pan can be
put out by covering with baking soda or,if available, a multi-purpose dry chemical or foam-type
fire extinguisher.
Use onl V&T pot holders--moist or damp
pot holders on hot surt_aces may result ill
burrls from smam. Do not let pot holders
touch hot heating elements. Do not use a
towel or other bulky cloth. Such clodls call
catch fire on a hot element.
'Always kee I) dish towels, dishcloths, pot
holders and other linens a safe distance
fron/ YO/lI" oven.
i
Always kee I) wooden spoons and plastic
utensils and canned food a safe distance
away fron/vo/lr oxen.
'Always kee I) combustible wall coxe_ing_,
curtains or drapes a safe distance flom
VO/lr o'_n,
Do not store flammable material ill all
o_en or near the cooking center
Do not coxer or block an V openings on
the appliance.
For vour safety, nex_r use your appliance
for wanning or heating the room.
Do not leme paper products, cooking
utensils or food ill the oxen when not
ill use.
Do not store or use combnsuble mamrials,
gv_soline or other flammable vapors and
liquids in the vicinit Vof this or any other
appliance.
Do not let cooking grease or other
flammable mamrials accunmlate ill or
near rite cooking center
Do not touch headng elements or inm_ior
snrface of tile o\>n. These surt_aces m W be
hot enough to burn even though the Vare
dark ill color Dining and after use, do not
much, or let clothing or other flammable
mam_ials contact aW inm_ior area of die
ox>n; allow sufficient dine for cooling first.
Potentially hot surfaces include ox>n \>nt
opening:s, surfaces near tile opening:s and
crevices around the oxen door
REMEMBER:The inside surPace of the
oxen ma Vbe hot when the door is opened.
COOKMEATANDPOULTRYTHOROUGHLY...
o
Cookmeat andpoultry thoroughly--meat toat least an INTERNALtemperatureof 160Fandpoultry
toat least an INTERNALtemperatureof 180°ECookingto thesetemperaturesusuallyprotectsagainst
foodbomeillness.
4
vvww.GEAppliances.com
MICROWAVEOVEN
Read and follow the specific "Precautions to Avoid Possible Exposure to Excessive Microwave
Energy" section in this manual.
Toreduce the risk offire in the evencavity:
Do not overtook food. Careflllly atterad
appliance if paper, plastic or oilier
combustible mateiials are placed inside
file ox.en to t_acilitam cooking.
Remox.e wire twist-des flom paper or
plastic containers before placing bags
ira ox.erl,
Do not use your microwm.e ox.en to dry
newspapers.
Do not pop popcorn ira your microwm.e
ox.en unless ira a special microwm.e
popcorn accesso W or unless you use
popcorn labeled for use ira microwm.e
ox.eras.
Do not ox.ercook potatoes. They could
dehydiam and catch fire, causing damag.e
to your oven.
Do not operam the oven while empty to
ax_id damag.e to tim oven and ti_e dang.er
of fire. If by accident tile ox.en should run
empty a minum or two, no harm is done.
Howex.ei; tiT to avoid operating the ox.en
empty at any time--it saves energy' and
prolongs tile lid of tile ox.en.
Do not use tile oxen for storag.e puq)oses.
Do not leax.e paper products, cooking
utensils or food ira tile ox.en when not
ira use.
If mamrials inside tile oven should ig)aim,
kee I) oxen door closed, turn ox.en off
and shut off power at the fllse or ciivuit
breaker panel. If tile door is opened,
tile fire may spread.
This microwm.e oven is not approx.ed or
tesmd for marine use.
Some products such as whole eg_s and
sealed containers for example, closed
jars will explode and should not be
heated ira this microwm.e ox.en. Such use
of the microwax.e ox.en could I.esult ira
iojury.
Do not operate file microwax.e oven
without tile umatable and support ira place.
Avoid heating baby food ira glass jars, ex.en
wifl) file lid off'. Make sure all infant food
is fl/oroughly cooked. Stir food to
distribute file heat evenly. Be carefill to
pr.ex.ent scalding when warming formula
or breast milk. The container may Del
cooler titan tile milk really is. Alwws rest
tile milk befoi.e Deding tile baby.
Do not boil eggs in a microwax.e ox.en.
Piessure will build up inside tile egg
yolk and will cause it m burst, possibly
resulting ira ioju U.
Foods witiI unbroken outer "skin" such
as potatoes, sausag.es, tomatoes, apples,
egg yolks, chicken lix.ers and otiaer giblets
should be pierced to allow steam to escape
darting cooking.
Don't defrost fiozen bexerag.es ira
naiTow-necked bottles (especially
carbonated beverag.es). Even if the
container is opened, pressure can build
up. This can cause tile container m burst,
possibly resulting ira inju U.
Hot foods and steam can cause bums.
Be caI.eflll when opening any containers
of hot food, including popcorn bags,
cooking pouches and boxes. To prex.ent
possible injm T, dii.ect steam away flom
hands and thce.
As witiI any appliance, close supervision is
necessai T when used by children.
5
IMPORTANTSAFETYINFORMATION.
READALLINSTRUCTIONSBEFOREUSING.
WARNING!
MICROWAVE-SAFECOOKWARE
Make sure aft cookware used in your microwave oven is suitable for microwaving. Most glass
casseroles, cooking dishes, measuring cups, custard cups, pottery or china dinnerware which does
not have metallic trim or glaze with a metallic sheen can be used. Some cookware is labeled
"suitable for microwaving."
ff you are not sure ff a dish is microwa\e-safe,
use this rest: Place in the men 1)oth the dish
you are testing and a glass measuring cup
flled with 1 cup of wamr--set the measuring
cup either in or next m the dish. Microwa\e
35-45 seconds at high./f tim dish heats,
it should r_ot be used for microwaving.
/f the dish remains cool and only the wamr in
the cup heats, then the dish is micmwa\e-safe.
/f you use a meat thermomemr while
cooking, make sure it is safe for use in
I]IicI'owa\_ O\_IIS,
Do not use recycled paper products.
Recycled paper towels, napkins and waxed
paper can contain metal flecks which may
cm_se arcing or ignite. Paper products
containing nylon or nylon filaments should
be a\_ided, since they may also ignite.
Some Styrofoam trays (like those that meat
is packaged on) ha\e a thin suip of metal
eml)edded in the 1)ottom. X,\]mn
microwa\ed, the metal can 1)urn the floor
of the o\'en or ignim a paper towel.
Not all plastic wrap is suitable for use in
microwa\e o\ens. Check the package for
proper use.
Paper towels, waxed paper and plastic
wrap can be used m co\er dishes in order to
retain moisture and pre\>nt spatmring. Be
sure m \>nt plastic wrap so smam can escape.
Oversized food or oversized metal cookware
should not be used in a micmwa\> men.
Elecuical shock or fire could occm:
X,\]file paper plains may be used for timed
cooking and deflosting, do not use them
with Aura Sensor cooking. Use micmwa\v-
safe plains or 1)owlsfor reheating. Co\er with
plastic wrap.
Cookware may 1)ecome hot 1)ecause of
heat transferred fiom the heated food.
Pot holders may be needed to handle the
cookware.
"goilable" cooking pouches and tightly
closed plastic bags should be slit, pierced or
\ented as directed by package./f they are
not, plastic could 1)urst during or
immediately after cooking, possibly resuhing
in injury. Also, plastic storage containers
should be at least partially unco\_red
1)ecause they form a tight seal. X,\_mn cooking
with containers dghtly co\ered with plastic
wrap, rename co\ering carefiflly and direct
smam awW fiom hands and face.
Use foil only as directed in this manual. TV
dinners mW be microwa\_d in foil uays less
than 3/4" high; remo\'e the top foil co\er
and return the uW to the box. When using
foil in the micmwa\'e o\'en, kee I) the foil at
least I inch away fom the sides of the men.
Plastic cookware - Plastic cookware
designed for microwave cooking is \ery
usefifl, but should be used carefiflly. E\'en
microwa\'e-safe plastic may not be as tolerant
of o\ercooking conditions as are glass or
ceramic mamrials, and may soften or char if
subjecmd m short periods of o\ercooking.
In long>r exposures m o\ercooking, the food
and cookware could ignim.
Followtheseguidelines:
[]
Use microwme_afe plastics only
and use flmm in suict compliance
with the cookware manu£_cttue_ s
recommendations.
[] Do not microwave empty containers
[] Do not permit children to use
plastic cookware without complete
supervision.
www.GEAppliances.com
ARCING
If Vousee arcing, press the CLEAR/OFFpad and correct the problem.
Arcing is the microwave term forsparks in the
oven.Arcing is caused by:
Metal or foil touching tile side of tile oven.
Foil not molded to food (upturned edges
act like antennas).
Metal, such as twist-ties, pouluy' pins or
gold-rimmed dishes in tile microwax_.
Recycled paper towels containing small
metal pieces being used in file microwax>.
SUPERHEATEDWATER
Microwaved water and other liquids do not alwavs bubble when thev reach the boiling point.
Thev can actually get super heated and not bubble at all.
Super heated liquid will bubble up out of
the cup when it is moved or when something
like a spoon or ma bag is put into it.
To i)_exent this flom happening and causing
injm-y, do not heat any liquid for more than
9 minums per cup.
Alter heating, let tile cup stand in the
microwme for 30 seconds before moving
it or pntung anything into it.
Spontaneousboiling
Under certain special circumstances, liquids
mag start to bo# during or shortly after removal
from the microwave oven.
To prevent burns flora splashing liquid, we
iecommend tile following befoie iemoving
the container flom file oxen:
Allow file container to stand in file oxen
for 30 to 40 seconds after tile oxen has
shut off'.
Do not boil liquids in narrow-necked
containeis such as soft drink bottles, wine
flasks and especially naiTow-necked coffbe
cups. Even if the container is opened,
excessixe steam can build up and cause it
to burst or o\_rflow.
IMPORTANTSAFETYINFORMATION.
READALLINSTRUCTIONSBEFOREUSING.
ALLTHESETHINGSARENORMALWITHYOURMICROWAVE
iiiiiiiiiiii_iii
iiiiiiiiiiii_iii
iiiiiiiiiiii_iii
iiiiiiiiiiii_iii
Steam oF xapoF escaping from aFound
tile dooI:
Light Feflection aFound tile dooF of tile
outeF case.
Dimming of die oxen ligilt and change
in tile blower sound may OCClli while
opeFafing at power lexels otheF than high.
Tile microwave fan m W opeFate with both
oxens off. It is cooling tile conuol and will
mm itself off.
Some TV-Fadio inmFference might be
noticed while using youi microwa_> oven.
It's similaF to tile inmFference caused by
other small appliances and does not
indicam a problem _,ith your o_n.
A dull thumping sound while tile oxen
is operating.
8
vvww.GEAppliances.com
WARNING!
SELF-CLEANINGLOWEROVEN
Do not use aluminum foil to line oven bottoms, except as suggested in this manual. Improper
installation of aluminum foil may result in a risk of electric shock or fire.
Stand away flora the oven when opening
the ox.en doon Hot air or smam which
escapes call cause bni-rls to hands,/_ace
and/or eyes.
Do not heat unopened food containers.
Piessure could build/l I) and file container
could burst, causing all iIIjury.
Kee I) the ox.en x.ent unobstructed.
Kee I) the oven flee flom g_ease buildup.
Kee I) the cooking cenmr clean and fiee
of accumulations of grease or spillox.ers,
which m W ignim.
Nex.er lem.e the ox.en door open when you
ai.e not watching file cooking cenmn
Place file ox.en shelf in the desiI.ed
position while the ox.en is cool. If shelx.es
nmst be handled when hot, do not let
pot holder contact the heating elements.
_Allen using cooking or roasting bags
ill file oven, follow file manu/_acturer's
diI.ecfions.
Pulling out the shelf to tile stop4ock
is a com.enience ill lifting hem?' foods.
It is also a precaution agvdnst bums
flom ranching hot surfaces of the door
or ox.en walls.
Do not use tile oxen for a storage area.
hems stored ill all oxen call ignite.
Do not leme paper products, cooking
utensils or food ill the oxen when not
ill use.
Alter broiling, always take the broiler
pan out of the ox.en and clean it. Leftox.er
gi.ease ill the broiler pan call catch fire
next time you use file ox.en.
Do not use the ox.en to dIT newspapers.
If ox.eflleated, filey call catch on fire.
Nex.er lem.ejars or cans of fi_t drippings
ill or Ileal vonr ox.en.
Clean only parts listed ill this Owner's
Manual.
Do not clean file door gasket. Tile door
gasket is essential for a g_od seal. Care
should be taken not to nil), damag.e or
mox.e tile gasket.
Do not use ox.en cleaners. No commercial
ox.en cleaner or oven liner promctive
coating of any kind should be used in or
around any part of tile ox.en. Residue fiom
ox.en cleaners will damag.e the inside of
the ox.en when the self-clean cycle is used.
Before self-cleaning the ox.en, remox.e
the probe, broiler pan, grid and other
cookware.
Be sure to wipe/l I) excess spillag.e before
starting a seltkleaning cycle.
If the self-<leaning mode malfimctions,
tnFQ file ox.en off and disconnect file
power supple Have it seIwiced by a
qualified mchnician.
iJsten for a fan--a/_an noise should be
heard sometime during file cleaning
cycle. If not, call for service befoi.e
self<leaning again.
READANDFOLLOWTHISSAFETYINFORMATIONCAREFULLY.
SAVETHESEINSTRUCTIONS
9
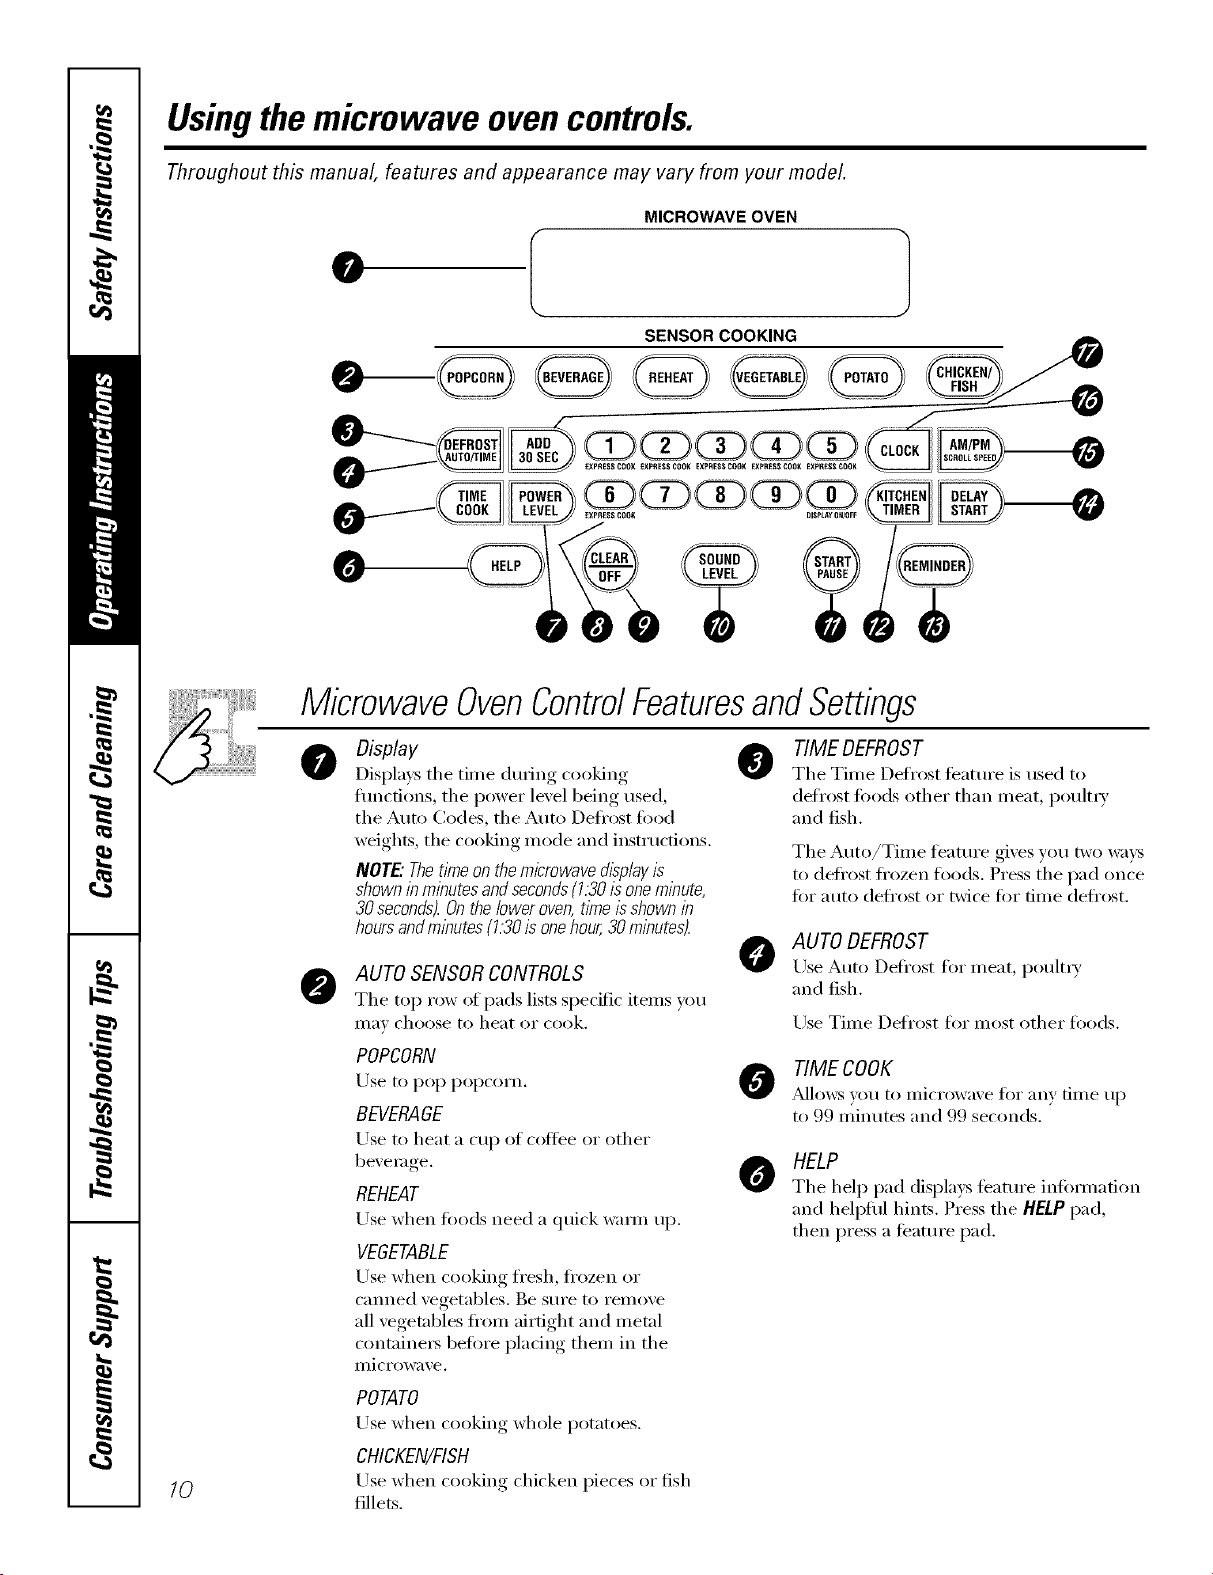
Usingthemicrowave ovencontrols.
Throughout this manual, features and appearance may vary from your model.
0
MICROWAVE OVEN
SENSOR COOKING
10
MicrowaveOvenControlFeaturesandSettings
Display
Displays the time during cooking
flmcfions, the power level being used,
the Auto (:odes, the Auto Defrost tood
weights, the cooking mode and instructions.
NOTE."Thet/Yneon the microwave d/splayis
shown in minutesandseconds(1.30tsone minute,
30 seconds).Onthelower oven,t/Yne/sshown in
hours andm/nutes(1.30is onehour,30 minutes).
AUTO SENSORCONTROLS
The top row of pads lists specific items you
II1_1_choose to heat or cook.
@
TIME DEFROST
The Time Defl'ost teatm'e is used to
defrost foods other than meat, i)oult_T
and fish.
The Auto/Time featm'e gives you two waxs
to defl'ost fl'ozen foods. Press the pad once
fi)r auto defl'ost or twice for time defl'ost.
@
AUTO DEFROST
Use Auto Defl'ost fin" meat, i)oult_?'
and fish.
Use Time Defrost fin" most other fi)ods.
POPCORN
Use to pop i)opcorn.
BEVERAGE
Use to heat a cup of coffee or other
bexemge.
REHEAT
Use when foods need a quick wam_ up.
VEGETABLE
Use when cooking fresh, fl'ozen or
cmmed vegetables. Be sure to remove
all vegetables fl'om airtight and metal
containers betore placing them in the
microwave.
TIME COOK
J_dlotvs _Otl to microwaxe fk)r _llly time tl I)
to 99 minutes and 99 seconds.
0
HELP
The help pad displays teatm'e intbm_afion
and hell)lift hints. Press the HELP pad,
then press a teatm'e pad.
POTATO
Use when cooking whole potatoes.
CHICKEN/FISH
Use when cooking chicken pieces or fish
fillets.
vvww.GEAppliances.com
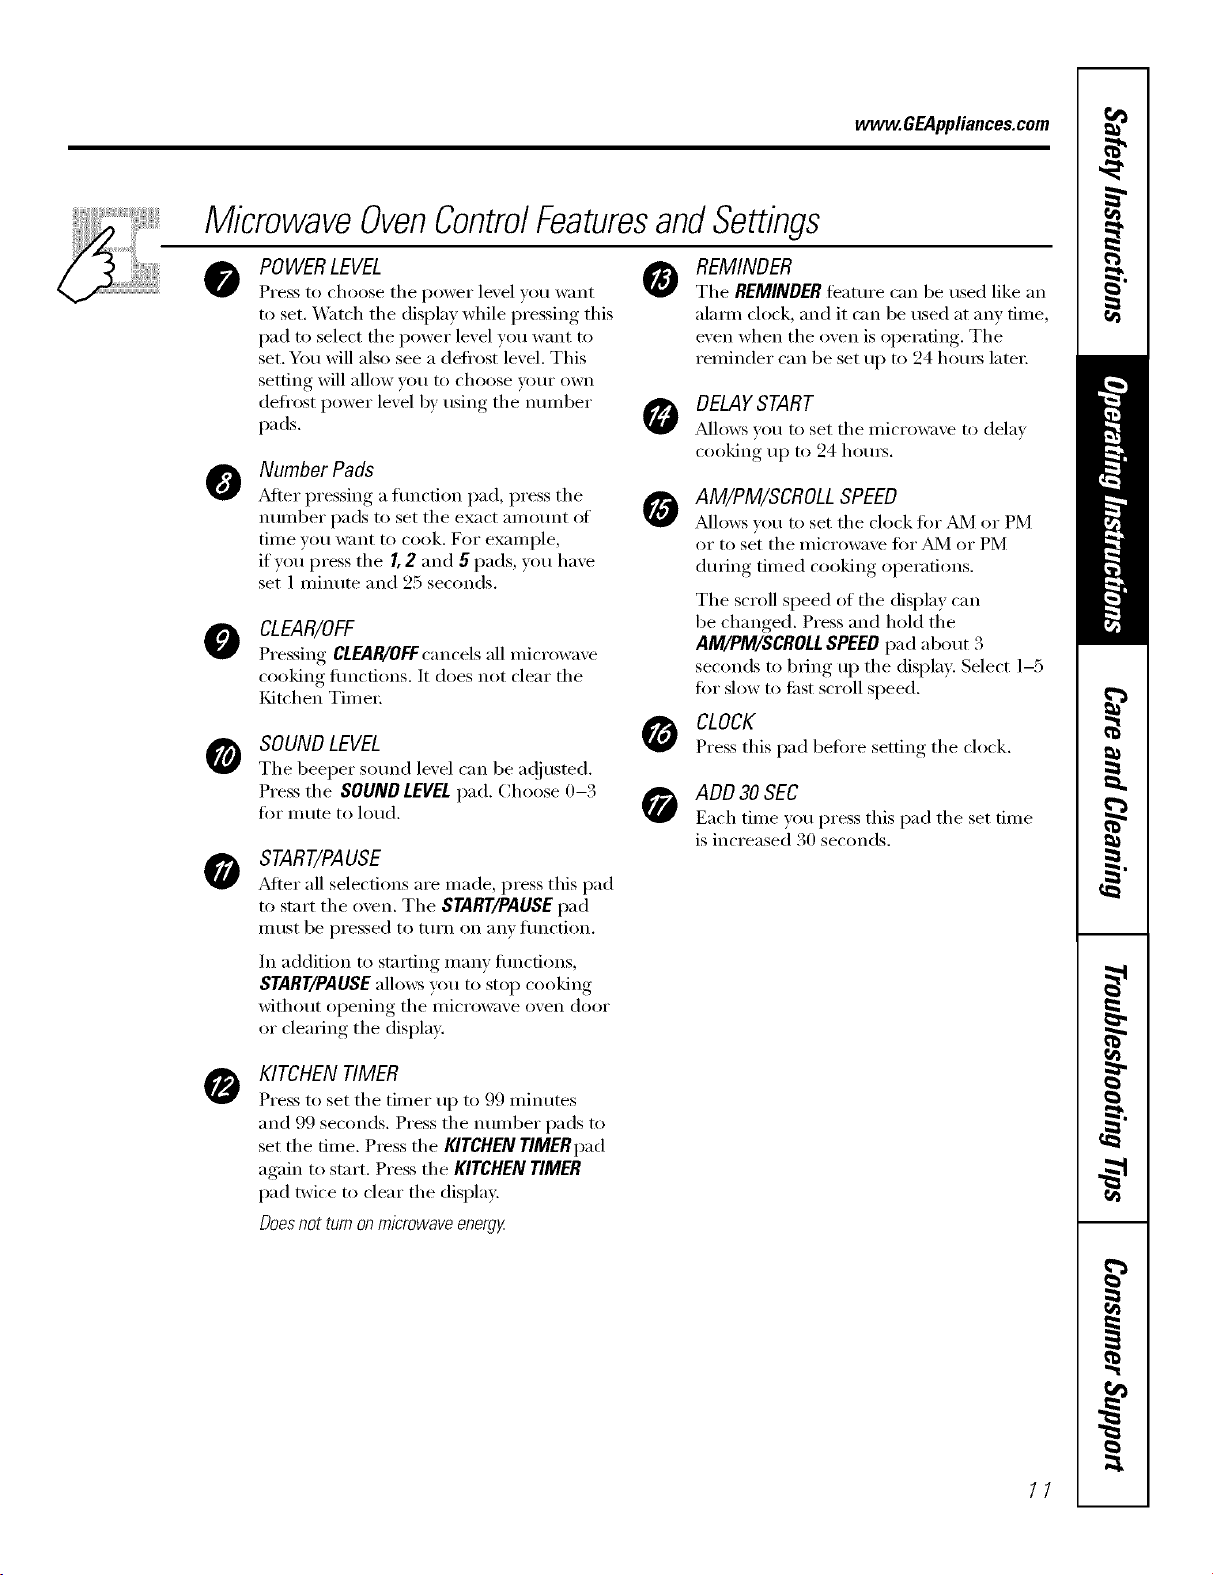
MicrowaveOvenControlFeaturesandSettings
• 0
0
0
0
0
POWER LEVEL
Press to choose tile power level you want
to set. _*\'atch tile display while pressing this
pad to select tile power level you want to
set. You will also see a defl'ost level. This
setting will allow wm to choose veto" own
defl'ost power level by using tile nmnber
pads.
Number Pads
_Mter pressing a fimcfion pad, press tile
number pads to set tile exact amount of
time wm want to cook. For example,
if you press tile I, 2 and 5 pads, you have
set 1 minute and 25 seconds.
CLEAR/OFF
Pressino CLEAR/OFFcancels all microwave
cooking fimcfions. It does not clear the
Kitchen Time_:
SOUND LEVEL
Tile beeper so/md level can be a_!justed.
Press tile SOUNDLEVELpad. Choose 0-3
for mute to loud.
START/PAUSE
J_dter all selections are made, press this pad
to start tile oven. Tile START/PAUSE pad
IlltlSt be pressed to ttlI'n on anv ftlnction.
In addition to starting many flmcfions,
START/PAUSEallo_vs you to stop cooking
without opening tile microwave oven door
or clearing tile display.
REMINDER
Tile REMINDER featm'e can be used like an
alam/clock, and it can be used at any time,
even when tile oven is operating. Tile
reminder can be set up to 24 hems later:
DELAYSTART
a]lows VOtl to set tile i/li(Towa',e to delax
cooking, tlI) to 24 hom_.
AM/PM/SCROLL SPEED
Mlows you to set tile clock fin" _dVl or PM
or to set tile microwave fi)r _dVl or PM
dtwing timed cooking operations.
The scroll speed of tile display can
be changed. Press and hold tile
AM/PM/SCROLL SPEED pad about 3
seconds to bring up tile display. Select 1-5
fin" slow to first scroll speed.
CLOCK
Press this pad before ,setfino_tile clock.
ADD 30 SEC
Each time )ou press this pad tile set time
is increased 30 seconds.
O
KITCHEN TIMER
Press to set tile timer up to 99 minutes
and 99 seconds. Press tile number pads to
set tile time. Press tile KITCHEN TIMERpad
again to start. Press tile KITCHEN TIMER
pad twice to clear tile display.
Doesnot turnonmicrowave energg
11
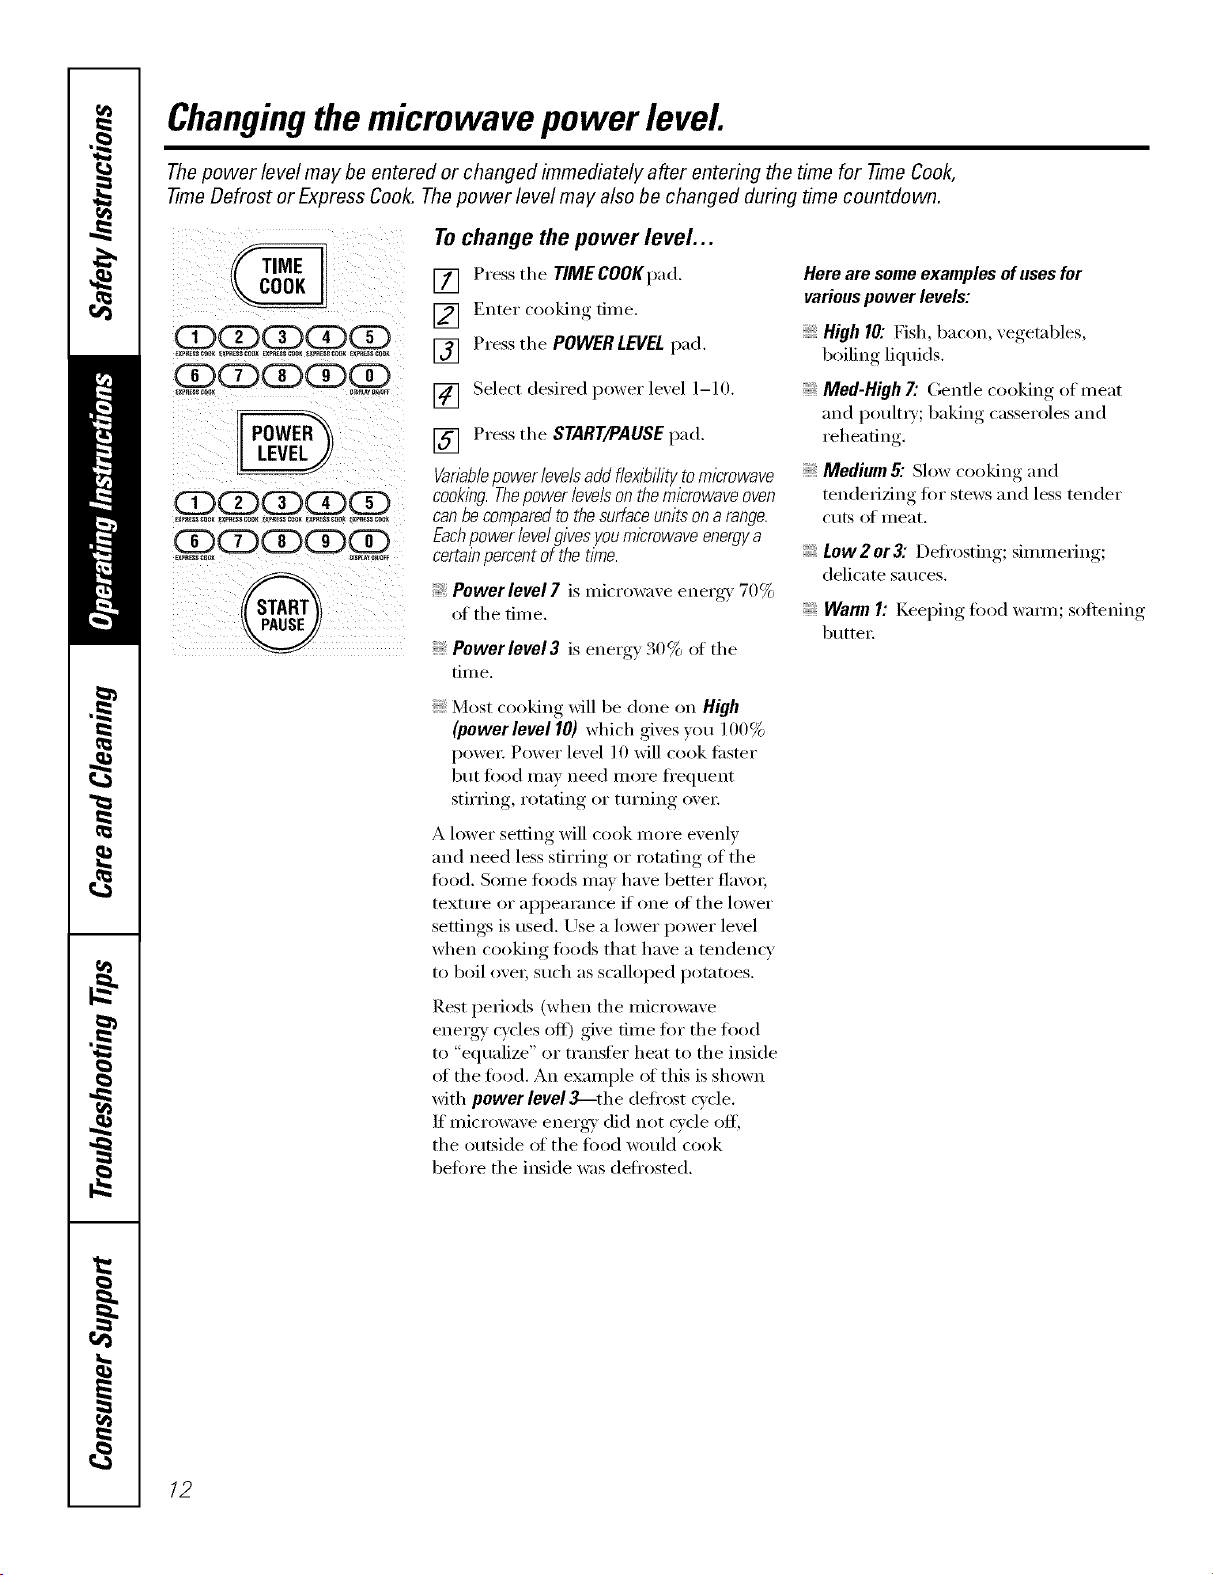
Changingthemicrowave power level.
Thepower level may be entered or changed immediately after entering the time for -time Cook,
-time Defrost or Express Cook. Thepower level may also be changed during time countdown.
OQQQQ
_xe_ssco_ _ssc_o_ _s_oK _XPRESe_O__X_SiCOn_
QQQ Q
_xp_ssco_ _mAvu_
QQQQQ
Tochange the power level...
[] Press the TIMECOOKpad.
[] Enter cooking time.
[] Press the POWERLEVEL pad.
[] Select desired power level l-lO.
[] Press the START/PAUSE pad.
Variablepower levels addflex/bihtyto microwave
cooking.Thepower levelson themicrowave oven
canbe comparedto the surfaceunits on arange.
Eachpower levelgives youmicrowave energya
certainpercent of the time.
_Powerlevel7ismicrowaveenerg\70%ofthe tim e.
Pewerlevel3 is energy 30% of the
tim e.
Here are some examples of uses for
various power levels:
High 10: Fish, bacon, vegetables,
boiling liquids.
Med-High 7".Gentle cooking of meat
and poult_T; baking casseroles and
reheating.
Medium & Slow cooking and
tenderizing fi)r stews and less tender
cuts of meat.
Low2 or3".Defrosting; simmering;
delicate sauces.
WarmI: Keeping fi)()(l wam_; softening
butte_:
Most cooking Mll be done on High
(powerleve110) which gives you 100%
power: Power level l 0 will cook tilster
but fi)od may need more fl'equent
stirring, rotating or tm'ning ox'e_:
A lower setting will cook more evenly
and need less stirring or rotating of the
fi)o(l. Some foods may have better fla\'m;
texture or appearance if one (ff the lower
settings is used. Use a lower power level
when cooking fi)o(ls that have a mndencv
to boil ove_; such as scalloped potatoes.
Rest periods (when the microwave
energy' cycles off) give time for the food
to "equalize" or transfer heat to the inside
of the food. An example of this is shown
with power level ,_-the defl'ost cycle.
If microwave ener_' did not cycle off;
the outside _ff the food would cook
befi)re the inside was deti'osted.
12
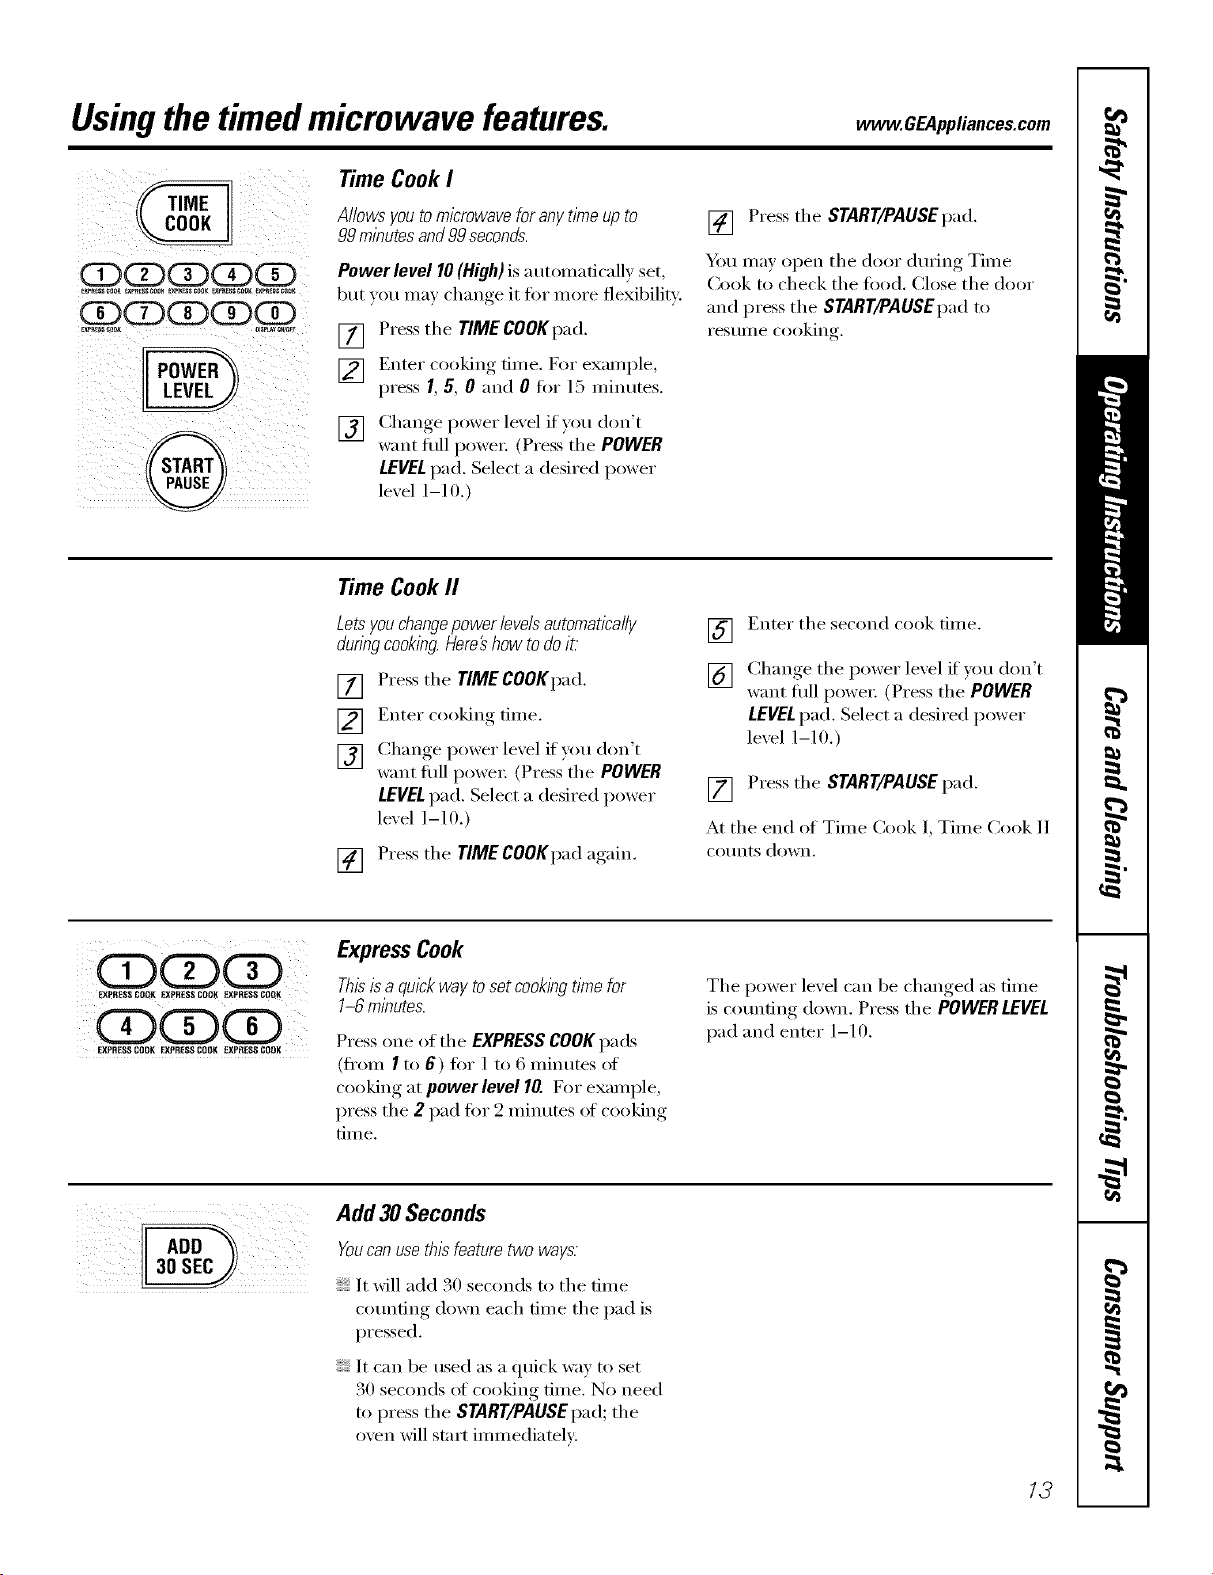
Usingthe timedmicrowave features. OEApplia,cescom
(DODCD(Z)G
G)ODOD(!)OD
ExPa_ssco_ os_f
G
Time CookI
Allowsyoutomicrowaveforanytimeupto
99minutesand99seconds.
Power level 10(High) is a utonmfically set,
but you ma) change it for more flexibility:
[] Press the TIME COOKpad.
[] Enter cooking time. For exanq)le,
press 1, 5, 0 and 0 fi)r 15 minutes.
[] Change power lexel if you don't
want flfll I)owex: (Press the POWER
LEVELpad. Select a desired power
lexel 1-10,)
[] Press the START/PAUSEpad.
You may open the door during Time
())ok to check the food. (:lose the door
and press the START/PAUSEI)ad to
I'eS/lllle cooking.
Time CookII
Letsyou changepower levelsautomatically
duringcooking.Here#how todo iL
[] Press the TIMECOOKpad.
[] Enter cooking time.
[] Change power lexel if you don't
want fldl power: (Press'the POWER
LEVELpad. Select a desired power
level 1-10.)
[] Press the T/ME COOKpad again.
] Enter the second cook time.
[] Chanoe,_ the power lexel if you don't
want flfll power: (Press the POWER
LEVELpad. Select a desired power
lexel 1-10.)
[] Press the START/PAUSE pad.
At the end of Time Cook l, Time Cook 11
CO/liltS dowIl.
EXpRES_ICOOK _pRESS COOK EXPR[SSCOOl(
EXPItESSCO01( EXPI1ESSCO01( EXPRIESSCOOK
ExpressCook
]-hisisa quickway toset cookingtime for
1-6 minutes.
Press one of the EXPRESSCOOKpads
(fl'om I to 6) for 1 to 6 minutes ot
cooking at powerleve110. For example,
press the 2 pad for 2 minutes of cooking
[ilIle.
The power level can be changed as time
is counting down. Press the POWERLEVEL
pad and enter 1-10.
Add 3OSeconds
__ It xfill add _0 seconds to the time
counting down each time the pad is
pressed.
It can be used as a quick way to set
30 seconds of cooking time. No need
to press the START/PAUSEpad; the
oven will start immediately:
13
Usingthetimedmicrowave features.
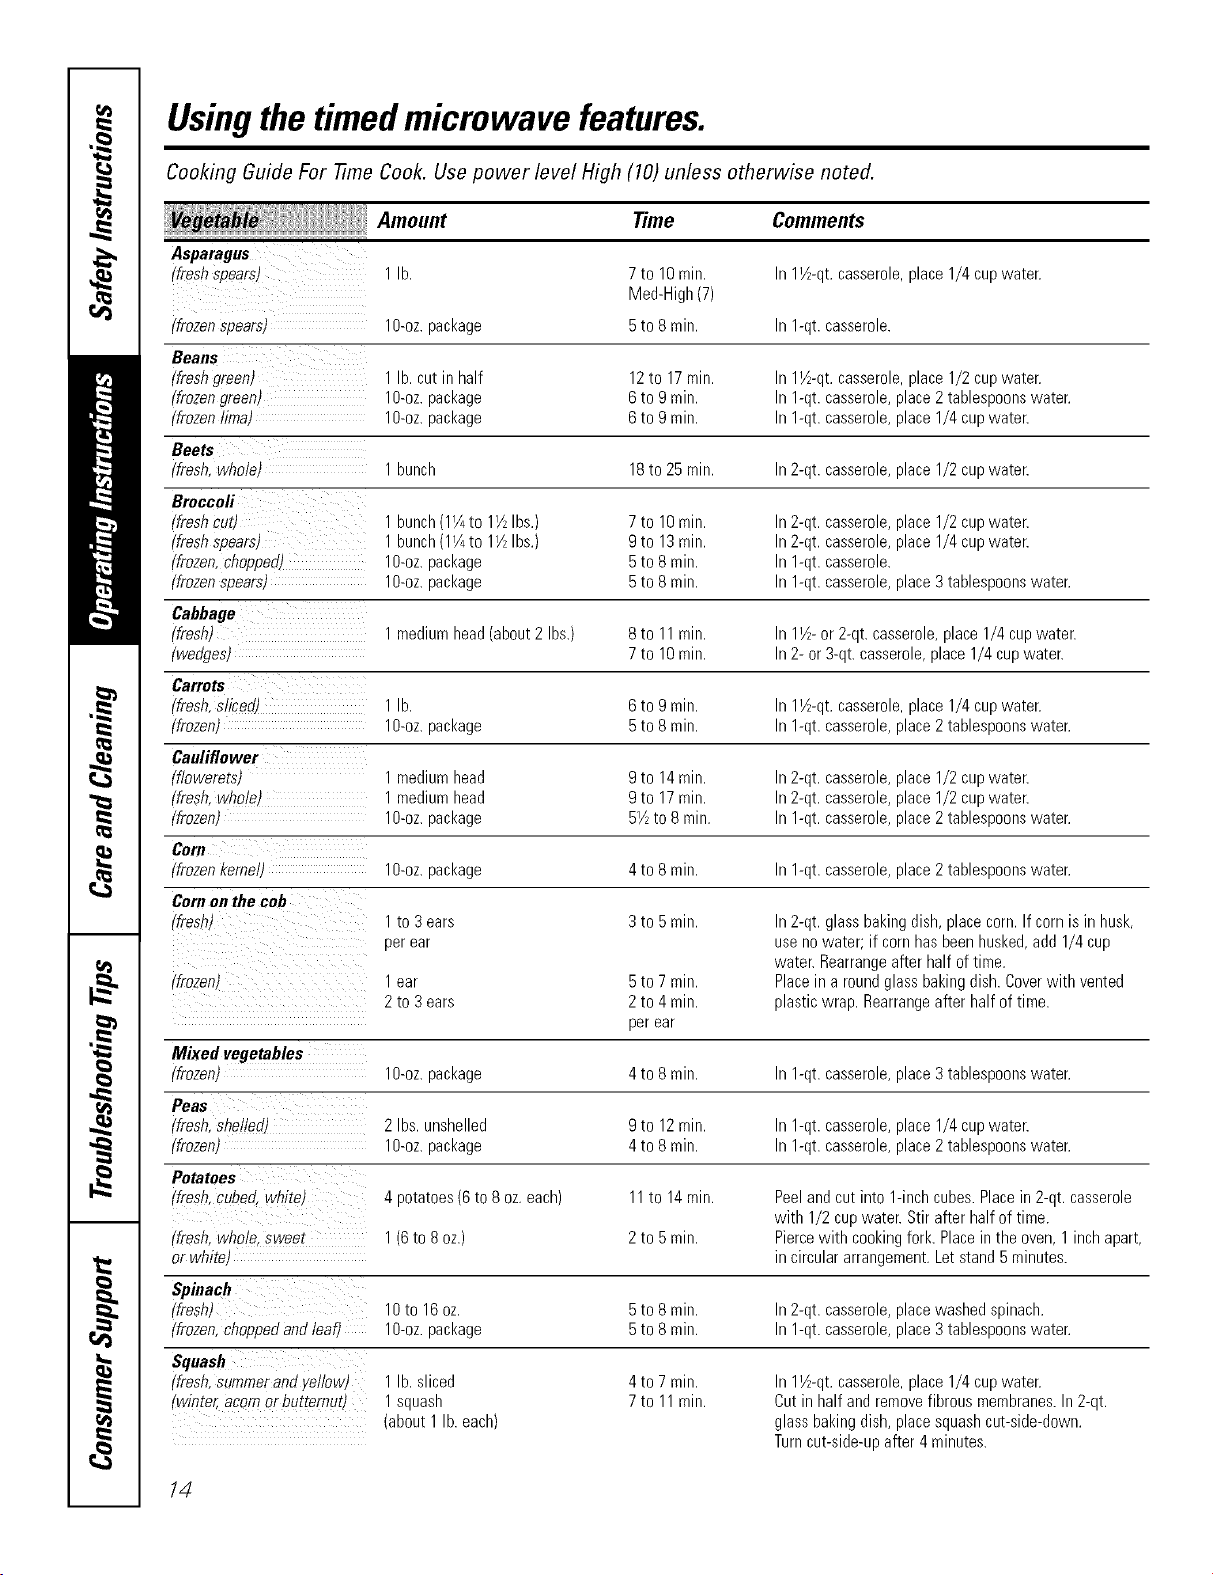
Cooking Guide For -time Cook. Use power level High (10) unless otherwise noted.
Amount Time
Asparagus
(fresh spears) 1lb.
Comments
7 to 10 rain. In 11_-qt. casserole, place 1/4 cup water.
Med-High (7)
(frozen spears) l O-oz.package 5 to 8 rain. In 1-qt. casserole.
Beans
(fresh green) 1 lb. cut in half 12 to 17 rain. hr 11½-qt.casserole, place 1/2 cup water.
(frozen green) 1O-oz.package 6 to 9 rain. In 1-qt. casserole, place 2 tablespoons water.
(frozen lima) l O-oz.package 6 to 9 min. In 1-qt. casserole, place 1/4 cup water.
Beets
,'fresh. whele_ 1 bunch 18 to 25 rain. hr 2-qt. casserole, place 1/2 cup water.
Broccofi
tfresh cut, 1 bunch (11/4to 11AIbs.) 7 to 10 rain. hr 2-qt. casserole, place 1/2 cup water.
(fresh spearsJ 1 bunch (11/4to 11/zIbs.) 9 to 13 rain. In 2-qt. casserole, place 1/4 cup water.
/frozen. choppea, l O-oz.package 5 to 8 min. In 1-qt. casserole.
!frozen sonars l O-oz.package 5 to 8 min. In 1-qt. casserole, place 3 tablespoons water.
Cabbage
tfresh 1 medium head (about 2 Ibs.) 8 to 11 min. hr 11A-or 2-qt. casserole, place 1/4 cup water.
fwenges/ 7 to 10 min. In 2- or 3-qt. casserole, place 1/4 cup water.
Carrots
/fresh. sliceay 1 lb. 6 to 9 rain. hr 11Z-qt. casserole, place 1/4 cup water.
(frozen 1g-oz. package 5 to 8 min. In 1-qt. casserole, place 2 tablespoons water.
Cauliflower
{flewerets) 1 medium head 9 to 14 rain. hr 2-qt. casserole, place 1/2 cup water.
•'fresh. whole' 1 medium head 9 to 17 min. In 2-qt. casserole, place 1/2 cup water.
/frozen) lO-oz, package 51/2to 8 rain. In 1-qt. casserole, place 2 tablespoons water.
Corn
,frozen kemeJ 1O-oz.package 4 to 8 rain. In 1-qt. casserole, place 2 tablespoons water.
Corn on the cob
/fresh) 1 to 3 ears 3 to 5 rain. In 2-qt. glass baking dish, place corn. If corn is in husk,
per ear use nowater; if corn has been husked, add 1/4 cup
water. Rearrange after half of time.
1 ear 5 to 7 min. Place in a round glass baking dish. Cover with vented
2 to 3 ears 2 to 4 rain. plastic wrap. Rearrange after half of time.
per ear
/frozen)
Mixed vegetables
/frozen) 1g-oz.package 4to 8 min. In1-qt.casserole,place3tablespoonswater.
Peas
,fresh.shellee 2Ibs.unshelled 9to 12rain. hr1-qt.casserole,place1/4cupwater.
tfmzen) 1g-oz.package 4to 8 min. In1-qt.casserole,place2tablespoonswater.
Potatoes
!fresh.cubed wnite, 4potatoes(6 to8 oz.each) 11to 14min. Peelandcutinto 1-inchcubes.Placein 2-qt. casserole
with 1/2 cupwater.Stir afterhalf of time.
•fresh.whole sweez 1(6to 8oz.) 2to 5min. Piercewith cookingfork.Placein the oven,1inchapart,
or white) in circulararrangement.Letstand5 minutes.
Spinach
(fresh) 10to 16oz. 5to 8 rain. In2-qt.casserole,placewashedspinach.
(frozen,choppedandleaf) 1O-oz.package 5 to 8rain. In1-qt.casserole,place3tablespoonswater.
Squash
(fresh,summeranflyellow) 1lb.sliced
(winter,acornor butternut) 1squash
(about1lb.each)
4to 7 min.
7to 11min.
In11½-qt.casserole,place1/4 cupwater.
Cutin half andremovefibrousmembranes.In2-qt.
glassbakingdish,placesquashcut-side-down.
Turncut-side-upafter4minutes.
14
www.GEAppliances.com
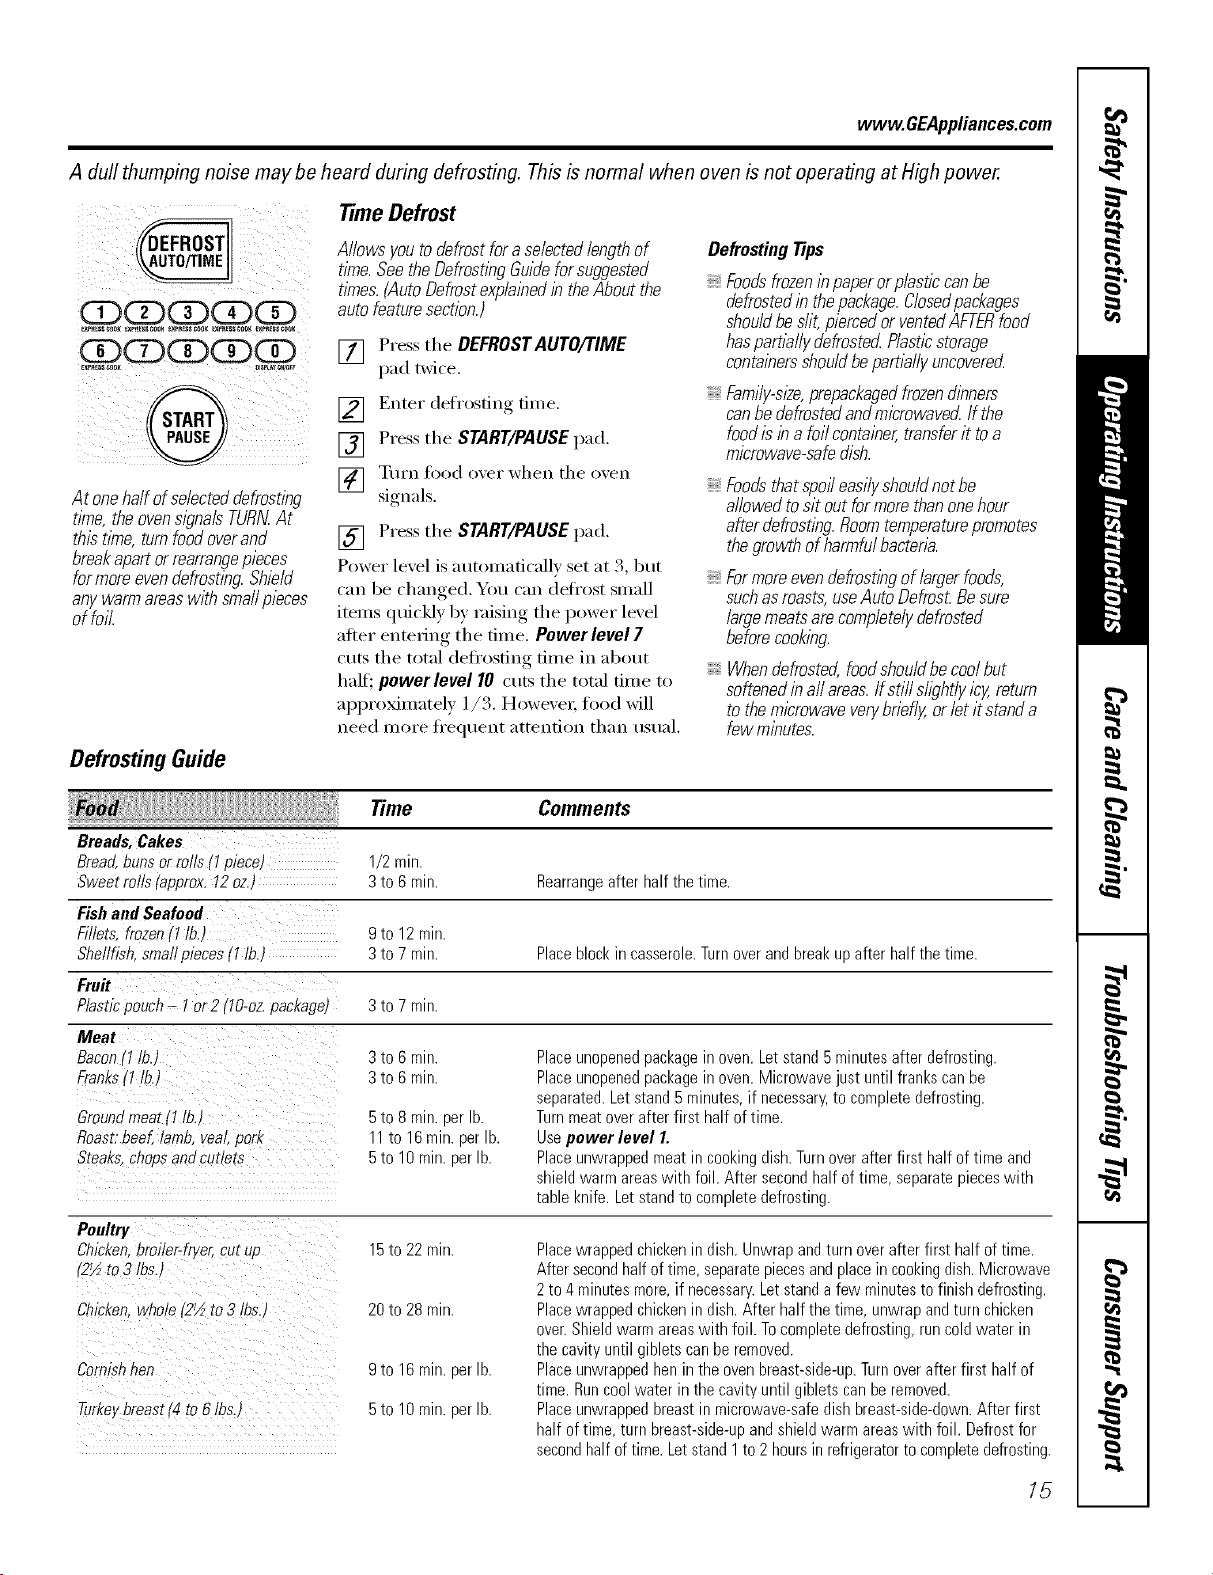
A duff thumping noise may be heard during defrosting. This is normal when oven is not operating at High power.
i i
(ZXZXZPdZPQ :¸
/!
Atonehalfofselecteddefrosting
time,theovensignalsTURNAt
thist/Yne,turnfoodoverand
breakapartorrearrangepieces
formoreevendefrosting.Shield
anywarmareaswithsmallpieces
offoil.
DefrostingGuide
TimeDefrost
Allowsyoutodefrostfora selectedlengthof
time.SeetheDefrostingGuideforsbggested
times.(AutoDefrostexplainedintheAboutthe
autofeaturesection.)
[] Presstile DEFROSTAUTO/TIME
pad twice.
[] Enter defrosting time.
[] Press tile START/PAUSEpad.
] TtlFn lk)od o_ei" when tile o',en
signals.
[] Press tile START/PAUSEpad.
Power level is automatically set at 3, but
can be changed. You can defl'ost small
items quickly by raising tile power level
after entering tile time. Power level 7
cuts tile total defl'osting time in about
halt'; powerlevel 10 cuts tile total time to
approMmately 1/3. However; food will
need more fl'equent attention than usual
DefrostingTips
Foodsfrozeninpaperorplasticcanbe
defrostedin thepackage.Closedpackages
shouldbeslit,piercedorventedAFTERfood
haspartbllydefroste_Plasticstorage
containersshouldbepartb/lybncovererL
Family-slOe,prepackagedfrozendinners
canbedefrostedandmicrowave_If the
foodisina foilcontainer,transferit toa
microwave-safedish.
Foodsthatspoileasilyshouldnotbe
allowedtositoutformorethanonehour
afterdefrosting.Roomtemperaturepromotes
thegrowthofharmfulbacterb.
Formoreevendefrostingoflargerfoods,
suchasroasts,useAutoDefros£Besure
largemeatsarecompletelydefrosted
beforecooking.
Whendefrosted,foodshouldbecoolbut
softenedinaftareas.Ifstillshght/yicy,return
tothemicrowaveverybriefly,orletitstanda
fewminutes.
Time Comments
Breads, Cakes
Bread buns or rolls (1 bieceJ 1/2 mitt.
Sweet roos ,approx. 12oz. 3 to 6 min. Rearrange after half tbe time.
Fish and Seafood
Fillets. frozen 11lb./ 9 to 12 mirr.
Shefifish. smaa oieces 11lb. 3 to 7 min. Place block in casserole. Turn over and break up after half the time.
Fru#
Plastic _ouch- 1or2 tlO-oz pacKagE
Meat
Bacon11lb.)
Franl_s11ti2
Ground meat (1 lb.
RoasL beeL lamb. veal. pork
Steaks cnobs ana curie,s
3to 7 min.
3to 6 min.
3to 6 min.
5to 8 min.perlb.
11to 16min.perlb.
5to 10min.perlb.
Poultry
Chicken. broiler-fryer, cu_ up
t2½ to 3 tbs.
Chicken. vvno,a 12½ to 3 lbs.)
Cornishhen
Turke,breastf4to 6/bs.)
15to 22min.
20to 28min.
9to 16min.perlb.
5to 10min.perlb.
Place unopened package in oven. Let stand 5 minutes after defrosting.
Place unopened package in oven. Microwave just until franks can be
separated. Let stand 5 minutes, if necessary, to complete defrosting.
Turn meat over after first half of time.
Use power level 1.
Place unwrapped meat in cooking dish. Turn over after first half of time and
shield warm areas with foil. After second half of time, separate pieces with
table knife. Let stand to complete defrosting.
Placewrappedchickenin dish.Unwrapandturn overafter first half oftime.
Aftersecondhalfoftime,separatepiecesandplaceincookingdish.Microwave
2to4 minutesmore,if necessary.Letstandafew minutestofinishdefrosting.
Placewrappedchickenin dish.Afterhalf the time, unwrapandturn chicken
over.Shieldwarmareaswith foil.Tocompletedefrosting,runcoldwater in
the cavityuntilgiblets canbe removed.
Placeunwrappedhenin theovenbreast-side-up.Turnoverafter first half of
time.Runcoolwaterin the cavityuntil gibletscanberemoved.
Placeunwrappedbreastin microwave-safedishbreast-side-down.After first
half oftime, turnbreast-side-upandshieldwarmareaswith foil. Defrostfor
secondhalfoftime. Letstand1to2 hoursin refrigeratorto completedefrosting.
15
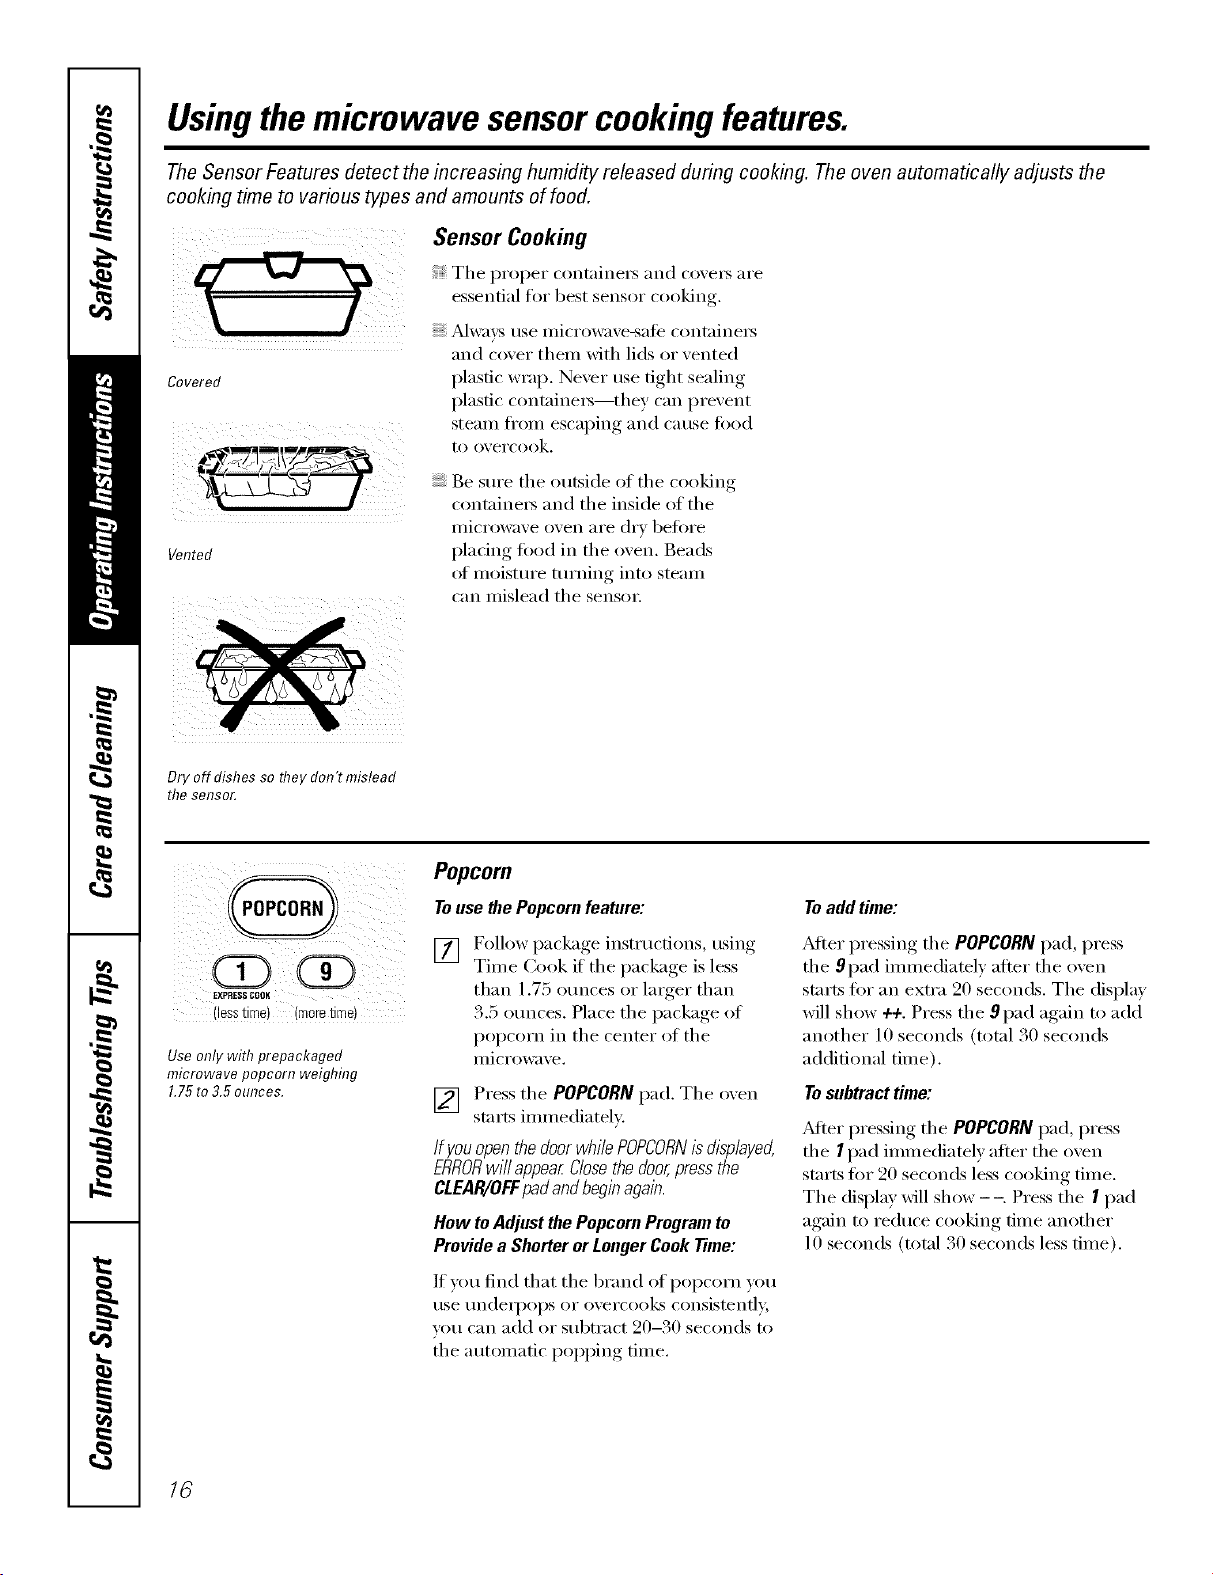
Usingthemicrowave sensorcookingfeatures.
The Sensor Features detect the increasing humidity released during cooking. The oven automatically adjusts the
cooking time to various types and amounts of food.
Sensor Cooking
The con ,ine cove
essential for best sensor cooking
Always use microwaxe-saie containe_
and cover them with lids or vented
Covered plastic wrap. Never use fight sealing
plastic containe_--thev can I)re\'ent
stealn fl'oIn escaping and cause fi)od
to overcook.
Vented
Be sure the outside of the cooking
container5 and the inside of the
i/licrow;,ve oven ai'e dry betore
pladng toed in the oven. Beads
ot moisture turning into steam
can mislead the senso_:
Dry off dishes so fl?ey dot?'t mislead
the sensor.
@
EXPRESS COOK
(lesstime) (meretime)
Use only with prepackaged
microwave popcorn weighing
1.75to3.5 ounces.
Popcorn
Touse Me Popcorn feature:
[] Follow package instructions, usino_
Time Cook if the package is less
than 1.75 otmces or linger than
3.5 ounces. Place the package of
popcorn in the center of the
microwave.
[] Press the POPCORN pad. The oxen
starts immediately:
If youopenthedoorwhilePOPCORNisdisplayed,
ERRORwillappearClosethedoor,pressthe
CLEAR/OFFpadandbeginagain.
How toAdjustthePopcornProgramto
Providea ShorterorLongerCookTime:
If you find that the brand of i)opcorn you
use undeq)ops or overcooks consistently,
you can add or subtract 90-30 seconds to
the automatic i)oi)ping time.
Toadd time:
_Mter pressing the POPCORNpad, press
the 9pad immediately after the oven
starts fin" an extra 20 seconds. The display
will show ++. Press the 9 pad again to add
another 10 seconds (total 30 seconds
additional time).
Tosubtract time:
JSdter pressing the POPCORN pad, press
the I pad immediately after the oven
starts fin" 20 seconds less cooking time.
The display will show --. Press the I pad
again to reduce cooking time another
10 seconds (total 30 seconds less time).
16
www.GEAppliances.com
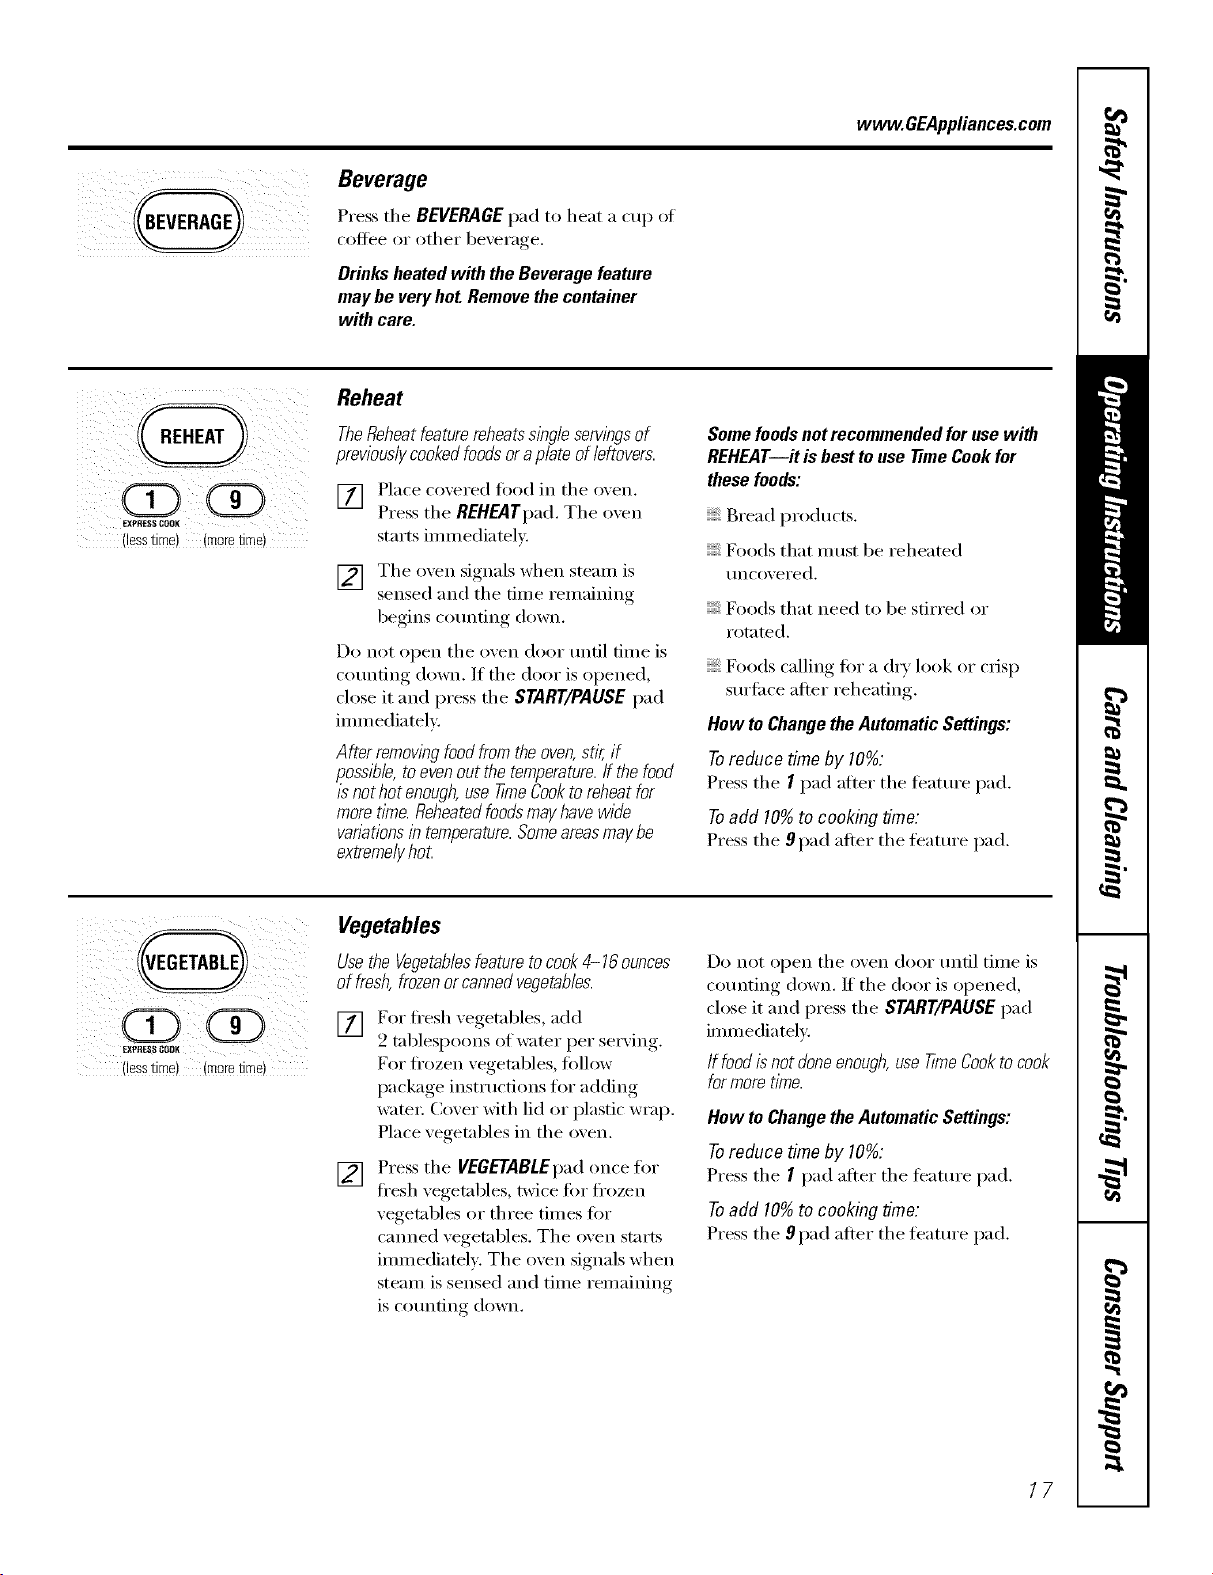
Beverage
Press tile BEVERAGEpad to heat a cup ot
coffee or other beverage.
Drinks heated with the Beverage feature
may be very hot Remove the container
with care.
Reheat
(lesstime)(more time)
TheReheatfeaturereheatssingleservingsof
previouslycookedfoodsoraplateofleftovers.
[] Place coxered fi)od in tile oxen.
Press tile REH_ITpad. Tile o_en
starts immediately.
[] Tile oxen signals when steam is
sensed and tile time remaining
begins COlmting down.
Do not open tile oven door tmfil time is
counting down. If the door is opened,
close it and press tile START/PAUSEpad
immediatelv.
After removing foodfrom the oven,stir, if
possible, toeven out the temperature,ff the food
is not hot enough,use time Cookto reheatfor
more t/Yne.Reheatedfoodsmayhave wide
vanations in temperature.Someareasmaybe
extreme/}/hot
Some foodsnot recommended for use with
REHEAT--it is best to use time Cook for
these foods:
Bread products.
Foods that must be reheated
tmcovered.
Foods that need to be stirred or
_x)tnted.
' N)()ds calling fi)r a dry l()()k or crisp
surface alter reheating.
ltow toChangetheAutomaticSettings:
Toreduce time by 10%:
Press tile I pad alter tile leatt/i'e pad.
To add 10% to cooking time:
Press tile 9 pad alter tile timtm'e pad.
EXPRESSOOOK
(lesstime) (moretime)
Vegetables
Use the Vegetablesfeature tocook4-16 ounces
of fresh, frozenorcanned vegetables.
[] For fl'esh vegetables, add
2 tablespoons of water per serxin ,
For fl'ozen vegetables, follow
package instructions for adding
wam_: Cover with lid or plastic wrap.
Place vegetables in tile oven.
[] Press tile VEGETABLEpad once for
fi'esh "_egetables, twice fi)r fl'ozen
vegetables or three times for
cmmed vegetables. Tile oven starts
immediately. Tile oven signals when
steam is sensed and time remaining
is counting down.
Do not open tile oven door tmfil time is
counting down. II tile door is opened,
ch>se it and press tile START/PAUSE pad
immediately.
If foodis not doneenough,use T/meCookto cook
formoretime.
How to Change the Automatic Settings:
To reduce time by 10%:
Press tile I pad after tile teature pad.
Toadd 10%to cooking time."
Press tile 9 pad after tile teatm'e pad.
17
Usingthemicrowave sensorcookingfeatures.
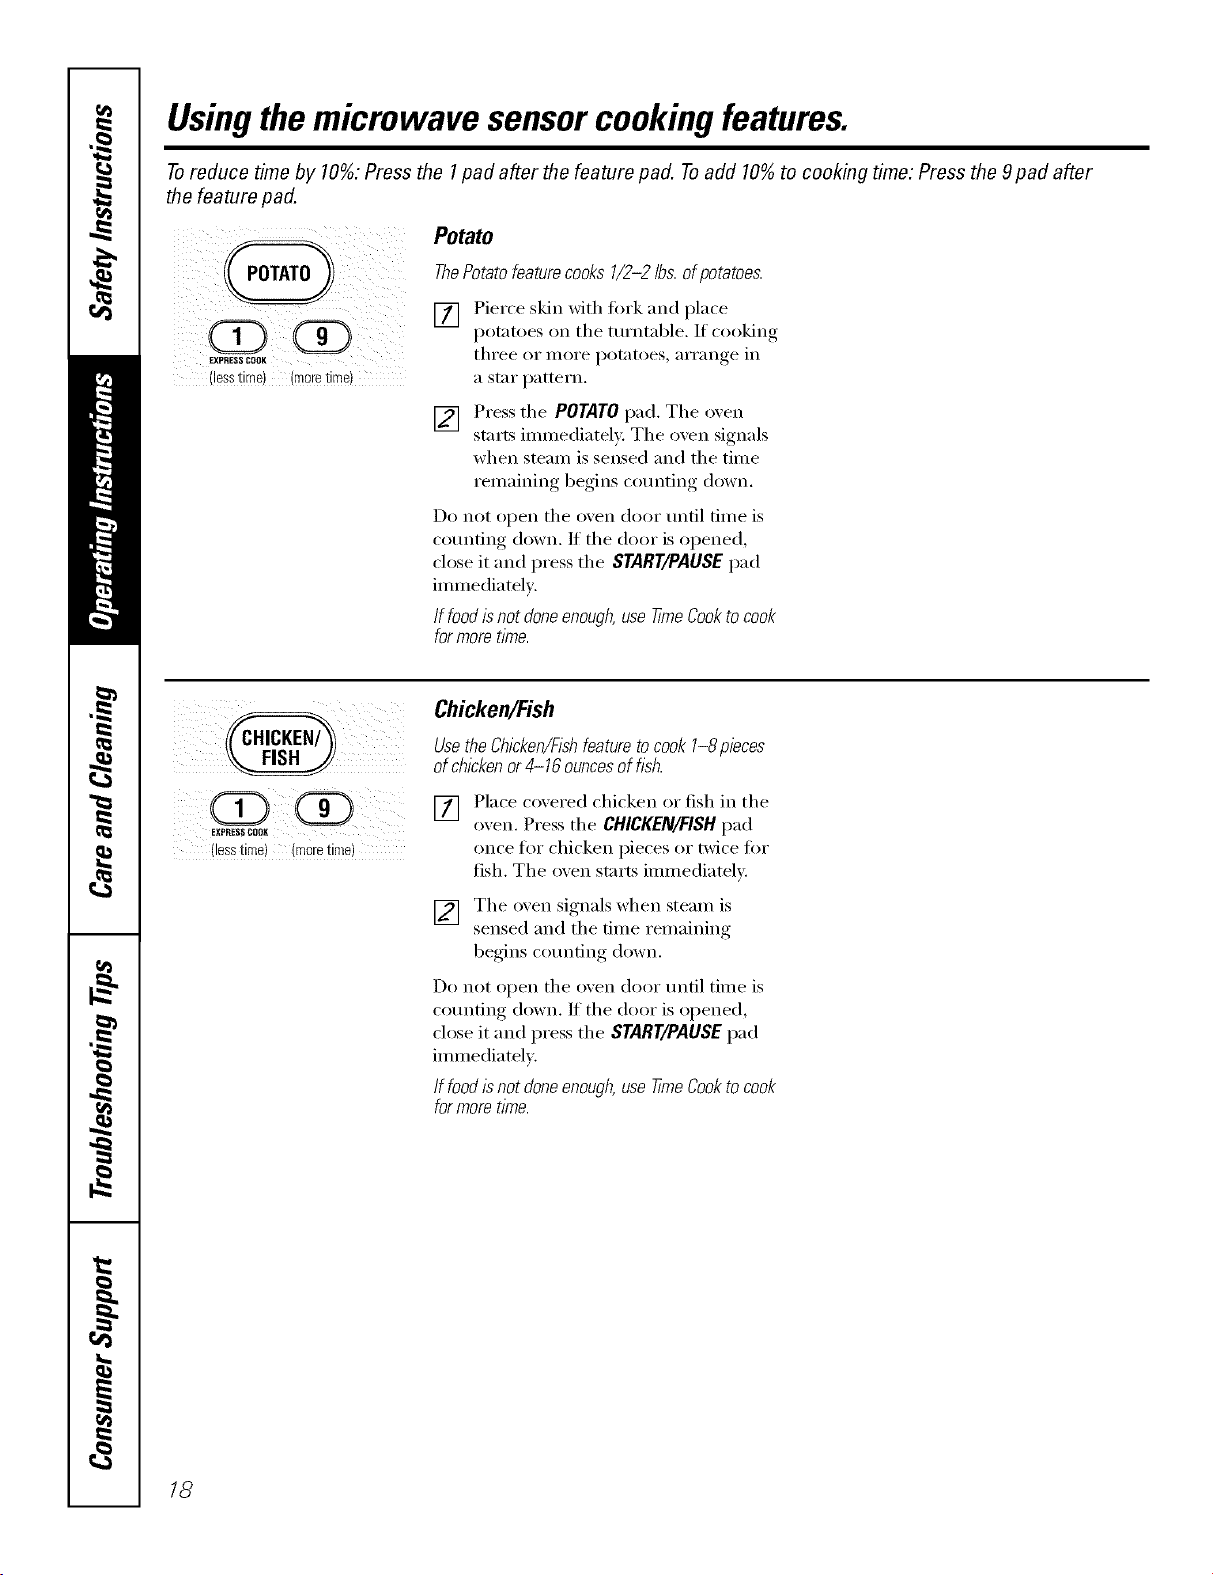
Toreduce time by 10%:Press the 1pad after the feature pad. Toadd 10%to cooking time: Press the 9pad after
the feature pad.
(Z) OD
EXPRESSCOOK
eSStime 1lore tlrfle
Potato
ThePotato featurecooks 1/2-2 lbs.ofpotatoes.
[] Pierce skin with tork and place
potatoes on the turntable. If cooking
three or illOi'e potatoes, ai'i'ange ill
a star pattern.
[] Press tile POTATOpad. Tile oven
starts immediately The oven signals
when steam is sensed and the time
remaining begins counting down.
Do not open tile oven door until time is
counting down. If tile door is opened,
close it and press the START/PAUSEpad
immediately.
If food isnot doneenough,use time Cookto cook
formoretime.
!iiii
EXPRESSCOOE
(lesstime) (moretime)
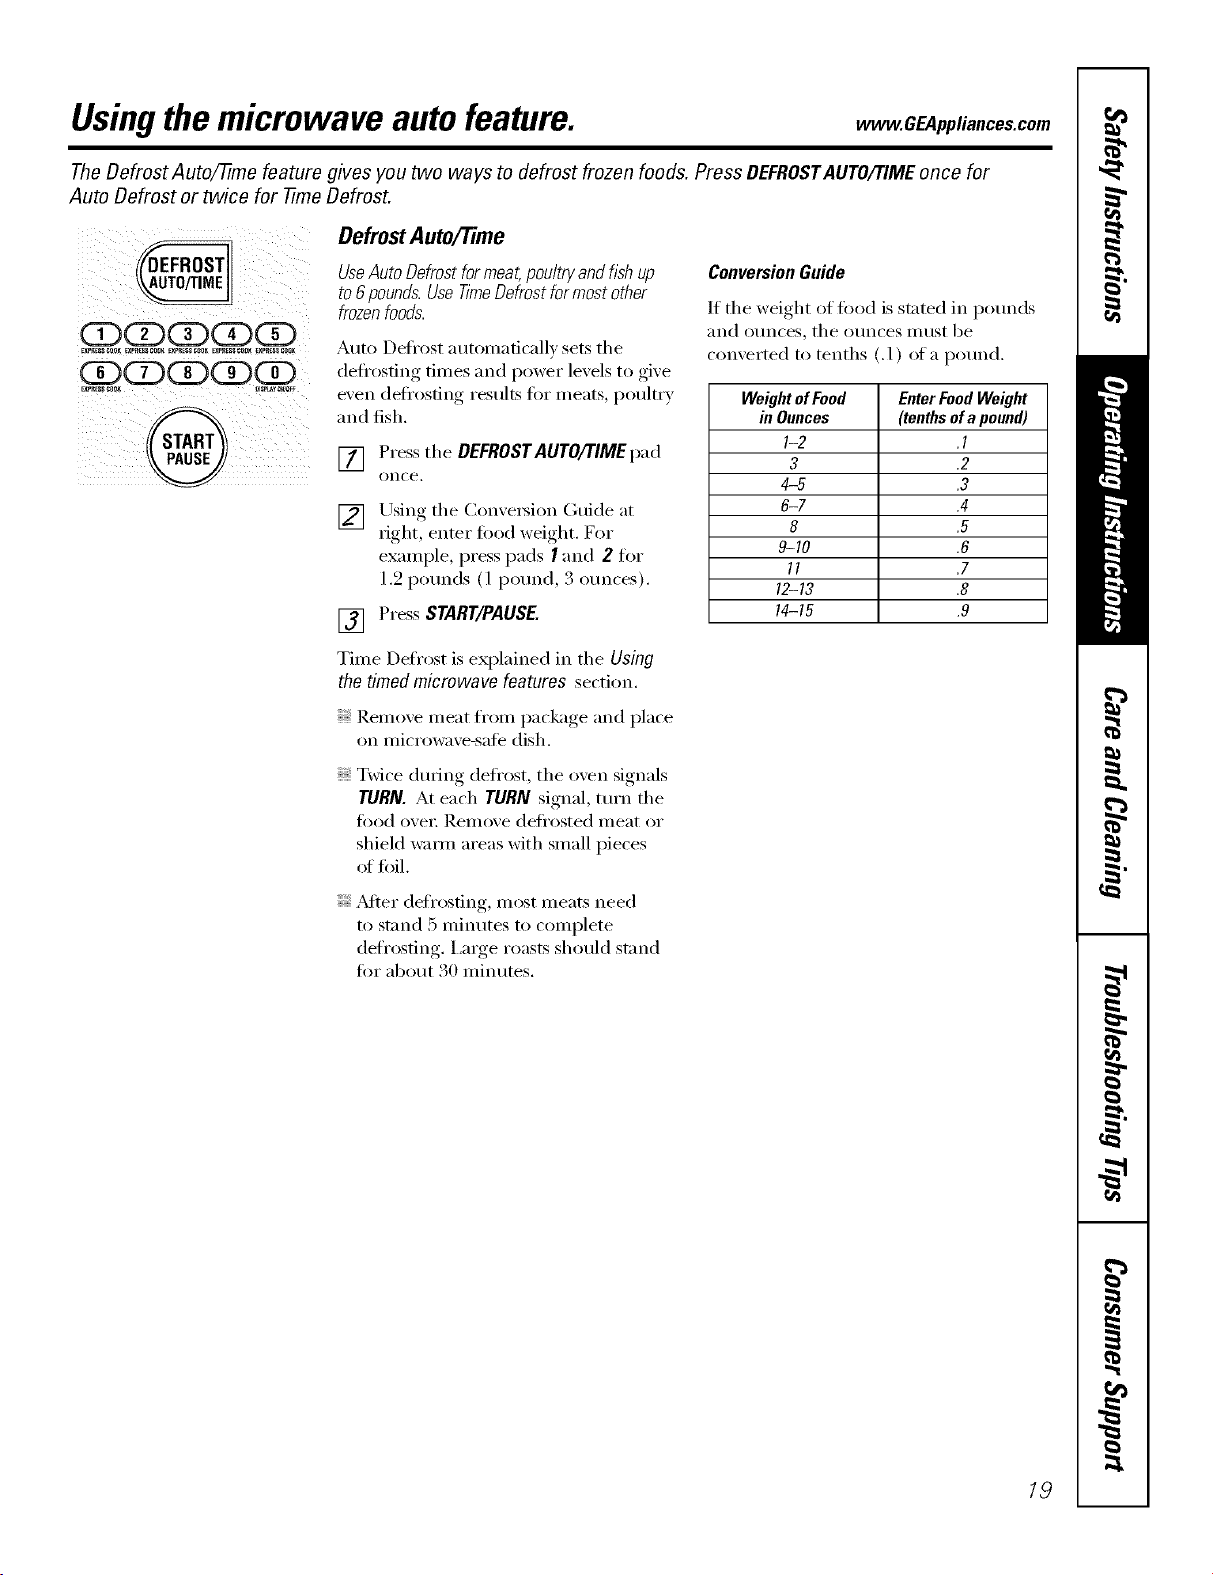
Chicken/Fish
Usethe Chicken/Fishfeature tocook 1-8 pieces
of chickenor 4-16 ouncesof fsh.
[] Place covered chicken or fish in tile
oxen. Press tile CHICKEN/FISHpad
once for chicken pieces or twice for
fish. Tile oxen starts immediately:
[] Tile oven signals when steam is
sensed and the time remaining
begins counting down.
Do not open tile oven door until time is
counting down. If tile door is opened,
close it and press tile START/PAUSE pad
immediately.
If food/s not doneenough,use time Cookto cook
formoretime.
18
Usingthemicrowave autofeature. CE4 liancesoom
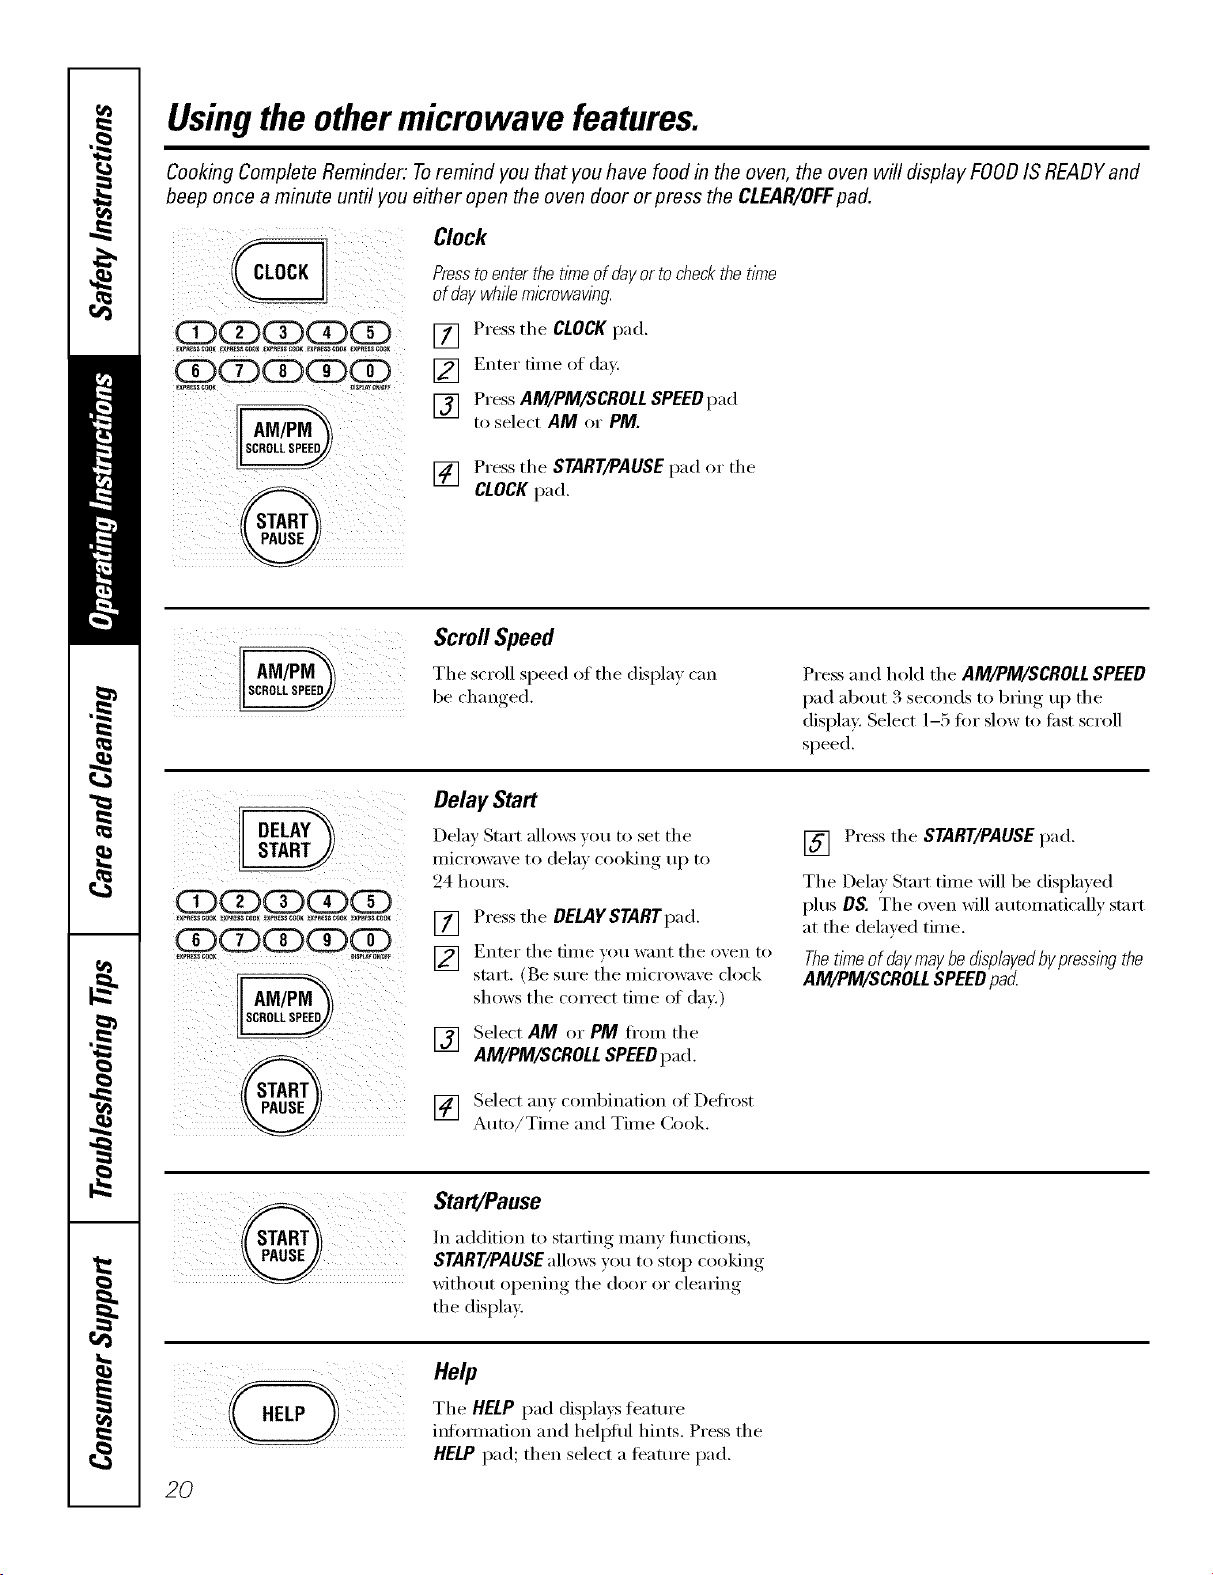
TheDefrost Auto/77me feature gives you two ways to defrost frozen foods. Press DEFROSTAUTO/77MEonce for
Auto Defrost or twice for -time Defrost.
QQQQQ
Express_ooK_xp_ coa_ _RE_ C_ EXr_SS_DOKEXPelSCOOK
QQQQQ
0
Defrost Auto/Time
UseAuto Defrostfor meat,poultry and fishup
to6 pounds.Use time Defrost formost other
frozenfoods.
Auto Defl'ost autonmficall_ sets the
defl'osfing, times and I)°wer lex els to ,gixe
even defl'osting results fi_r meats, poultry
and fish.
[] Press the DEFROSTAUTO/TIMEpad
on(-e.
[]
Using the Conve_ion (;uide at
right, enter fi>od weight. For
example, press pads I and 2 for
1.2 potmds (l purred, 3 ounces).
[] Press START/PAUSE.
Time Defrost is explained in the Using
the timed microwave features section,
ConversionGuide
If the weight of fi>od is stated in potmds
[lil(1 ot/nces, the otlnces II/list be
comerted to tenths (. 1) of a purred.
WeightofFood EnterFoodWeight
in Ounces (tenthsofapound)
I-2 .I
3 .2
4-5 .3
6-7 .4
8 .5
9-10 .6
11 .7
12-13 .8
14-15 .9
Remove meat from package and place
on microwa_e-safe dish.
Twice dm_ing defl'ost, the oven signals
TURN. At each TURN signal, turn the
food over Remove defl'osted meat or
shield wam_ areas with small pieces
_fffoil.
_Mter deti'osfing, most meats need
to stand 5 minutes to complete
defrosting. I,a_ge roasts should stand
i_k)i-abotl[ 30 Illintl[es.
19
Usingtheothermicrowave features.
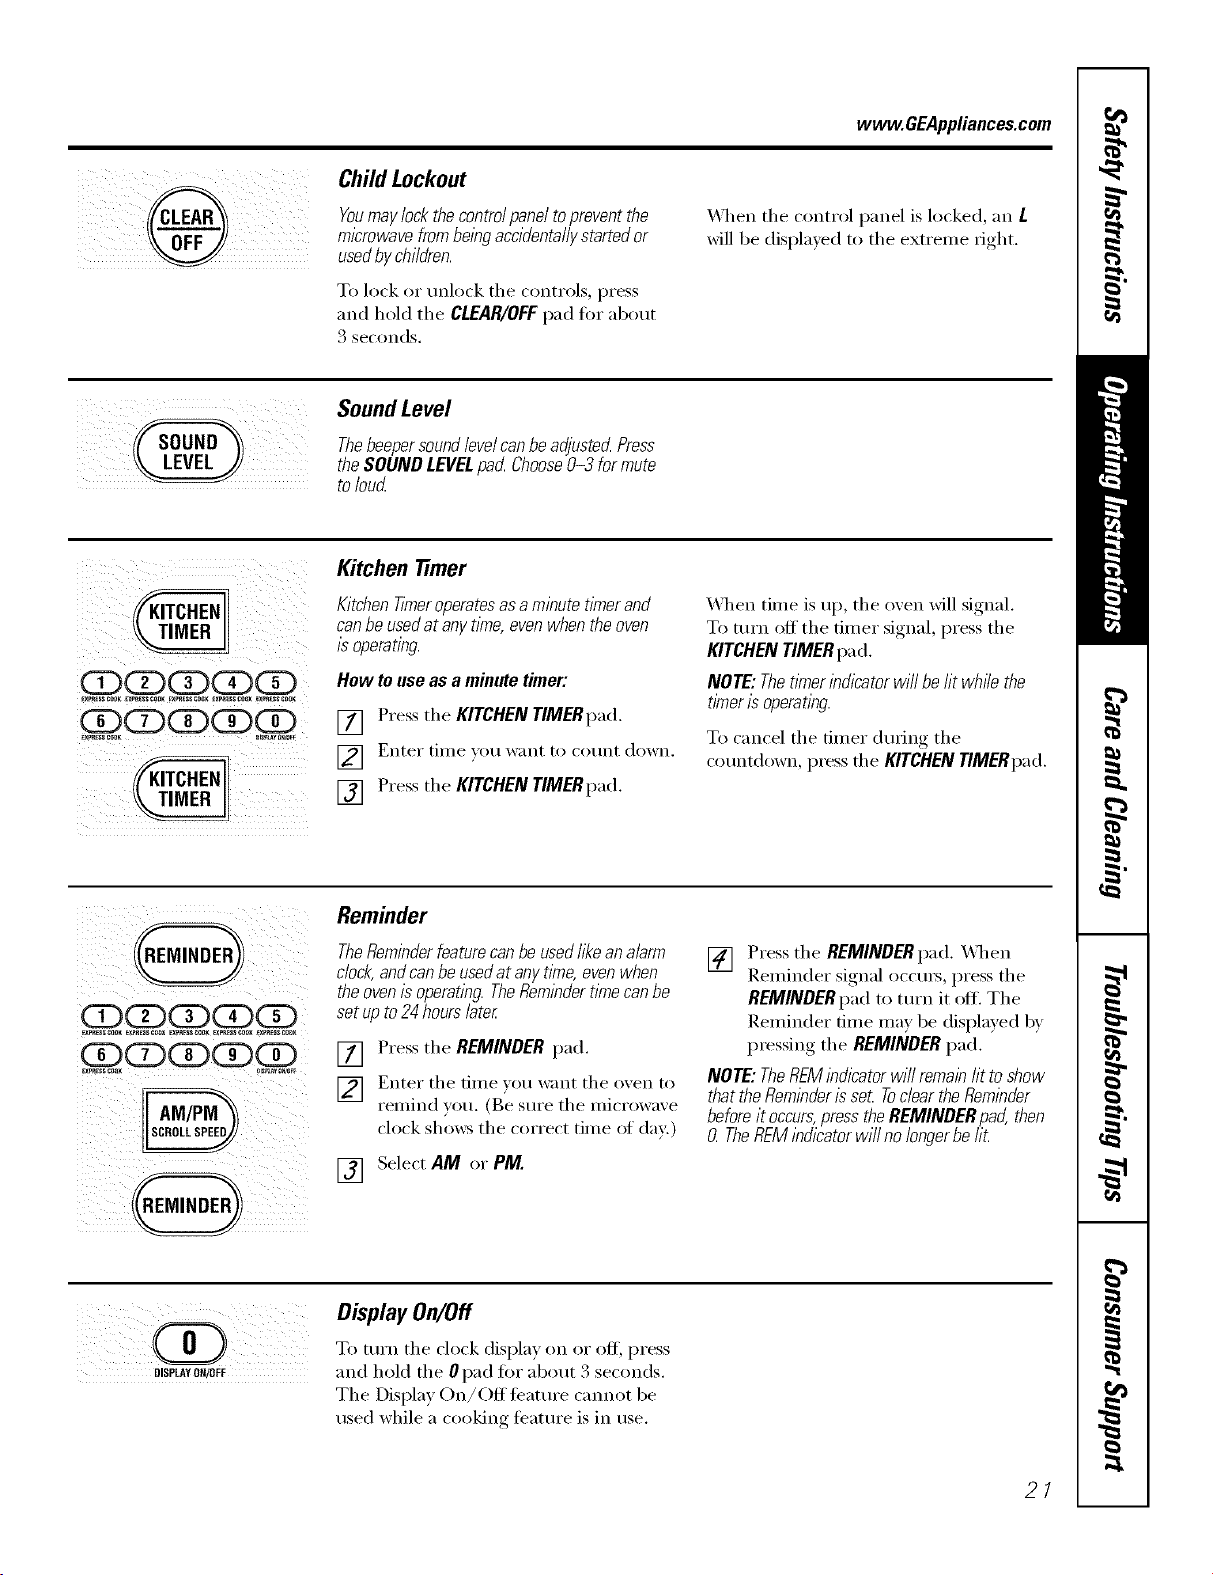
Cooking Complete Reminder: Toremind you that you have food in the oven, the oven will display FOODIS READYand
beep once a minute until you either open the oven door or press the CLEAR/OFFpad.
Clock
i ii i
iI i_ i
iiiii@ i_ iI
Presstoenter the tlYneof dayor tocheck thetime
of day while microwaving.
[] Press tile CLOCK pad.
[] Enter time of day.
[] PressAM/PM/SCROLL SPEEDpad
to select AM or PM.
[] Press tile START/PAUSE pad or tile
CLOCKpad.
Scroll Speed
becll ., ed
The scroll speed oI the displa_ can
iiill
CDCDCDCDCD
_x_sscoox ExP_sscoo__ssc0a_ _ssco0_ _xP_sc_oK
Qa a a Q
Delay Start
Delay Start allows _ou to set tile
microwave to dela) cooking, t:=I_ to
24 hom_,
[] Press tile DELAYSTARTpad.
] EIlter tile [lille VOtl w_lIlt tile o_eil to
stml. (Be sure the microwave clock
shows tile correct time of day.)
[] Select AM or PM from tile
AM/PM/SCROLLSPEEDpad.
[] Select am combination of Defl'ost
Auto/Time and Time Cook.
Press and hold tile AM/PM/SCROLLSPEED
pad about 3 seconds to b_ing up tile
display. Select 1-5 fi)r slow to first scroll
speed.
[] Press tile START/PAUSEpad.
Tile Delta Start time will be displa)ed
plus OS. Tile oxen will automatically start
at tile delayed time.
Thetimeofdaymaybedlspiayedbypressingthe
AM/PM/SCROLLSPEEDpaK
Start/Pause
In addition to starting many flmctions
START/PAUSEallows you to stop cooking
without oi)ening, tile door or clearing,
tile display.
Help
20
Tile HELP pad displa)s teattu'e
infimnation and helpflfl hints. Press tile
HELP pad; then select a ti_attu'e pad.
www.GEAppliances.com
Child Lockout
Youmaylock the controlpanel toprevent the
microwave frombelbgaccidentallystartedor
usedby children.
To lock or unlock the controls, press
and hold the CLEAR/OFFpad for about
3 seconds.
_4q_en the control panel is locked, an L
will be displa)ed to the extreme right.
SoundLevel
Thebeepersoundlevelcan be adjusted Press
the SOUND LEVELpad Choose0-3 for mute
to loud
(DdDdDdDdD
EXP_SSC_K_ESSCOOK_XP_SS_OOKEX_SSgO0__ESSCCOK
Kitchen timer
Kitchen TlYneroperatesasaminute tlYnerand
canbe usedat any time,even when theoven
is operating.
How to use as a minute timer:
[] Press the KITCHENTIMERpad.
] Enter tiille TOil _g}lIlt 1o ('o/Int down.
[] Press the KITCHENYlMERpad.
_]_en time is up, the oven will signal.
To mrn off the timer signal, press the
KITCHEN TIMER pad.
NOTE: ThetlYnerindicator will be ht while the
finer is operaflbg.
To cancel the timer during the
countdown, press d_e KITCHENTIMERpad.
Reminder
TheReminderfeaturecan be usedlikean alarm
clock,and canbe useflat angt_Yne,evenwhen
the oven is operat_bg.TheRem_bdert_mecan be
set up to24 hourslater
Press the REMINDER pad.
Enter the time }ou want the oven to
remind }ou. (Be sure the microwaxe
clock shows the correct time of day:)
Select AM or PM.
[] Press the REMINDER pad. "_4q_en
Reminder signal occm_, press the
REMINDER pad to turn it oft. The
Reminder time may be displayed by
pressing the REMINDER pad.
NOTE: TheREM_bflicatorwill remain ht to show
that the Reminderisset Toclear the Reminder
beforeit occurs,pressthe REMINDER pad, then
0 TheREMindicator will no longer be fit
DISPLAYON/OFF
Display On/Off
To turn the clock display on or ofl_ press
and hold the 0 pad for about 3 seconds.
The Display On/Off teature cannot be
used while a cooking teatm'e is in use.
21
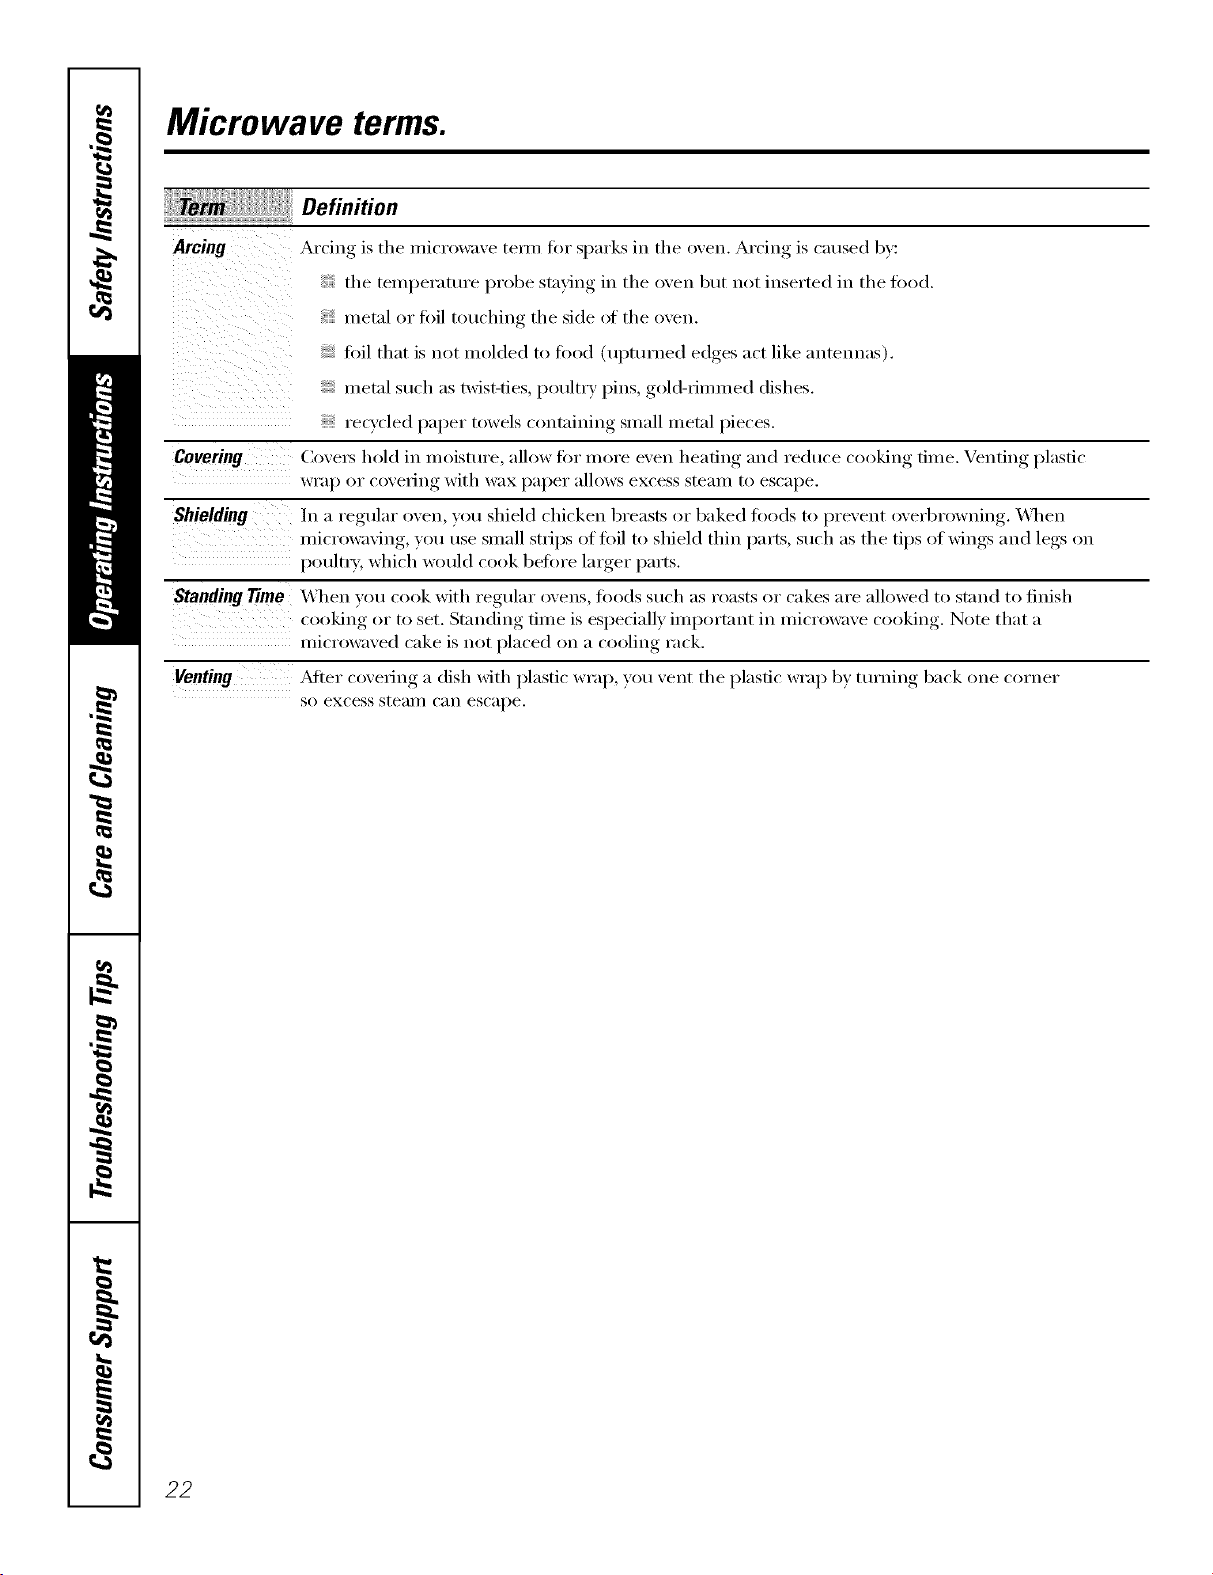
Microwave terms.
Definition
Arcing •_rcin,,_ is_the microwaxe texan fin" sparks in the oxen. Arcing is caused b):
{{} the temperature probe _stavin,*,_ in the oxen but not inserted in the tood.
metal or fifil touching the side of the oxen.
fifil that is not molded to fi_od (upturned edges act like antennas).
me, ,l pinsg,,ld-, mmeddishes.
reQ'cled paper towels containing small metal pieces.
Covering (:oxex_ hold in moisture, allow fin" more exert heatinoo and reduce cooking, time. Ventiiwo plastic
WI'a I) or coxeYing with wax i)ai)er allows excess stealll to escape,
Shielding In a regular oxen, you shield chicken breasts or baked fl)ods to )rexent oxerbrowning X4q_en
, I ,.
microwaxing, }ou use small strips offifil to shield thin parts, such as the tips of wings and legs on
poulti_,, which would cook befin'e larger parts.
Standing Time X,\3_en xou cook with regular ovens, fi)ods such as roasts or cakes are allowed to stand to finish
cooking, or to set. Standing, time is esl)eciallv, iml)ortant in microwax e cooking., Note that a
i/licrowa'_ed cake is not l)laced on _1cooling, rack.
Venting _Mter cox ering a dish with plastic wrap, you, xent the l)lastic wral ) b'_, turning, back one corner
so excess stean/C_lll escape.
22
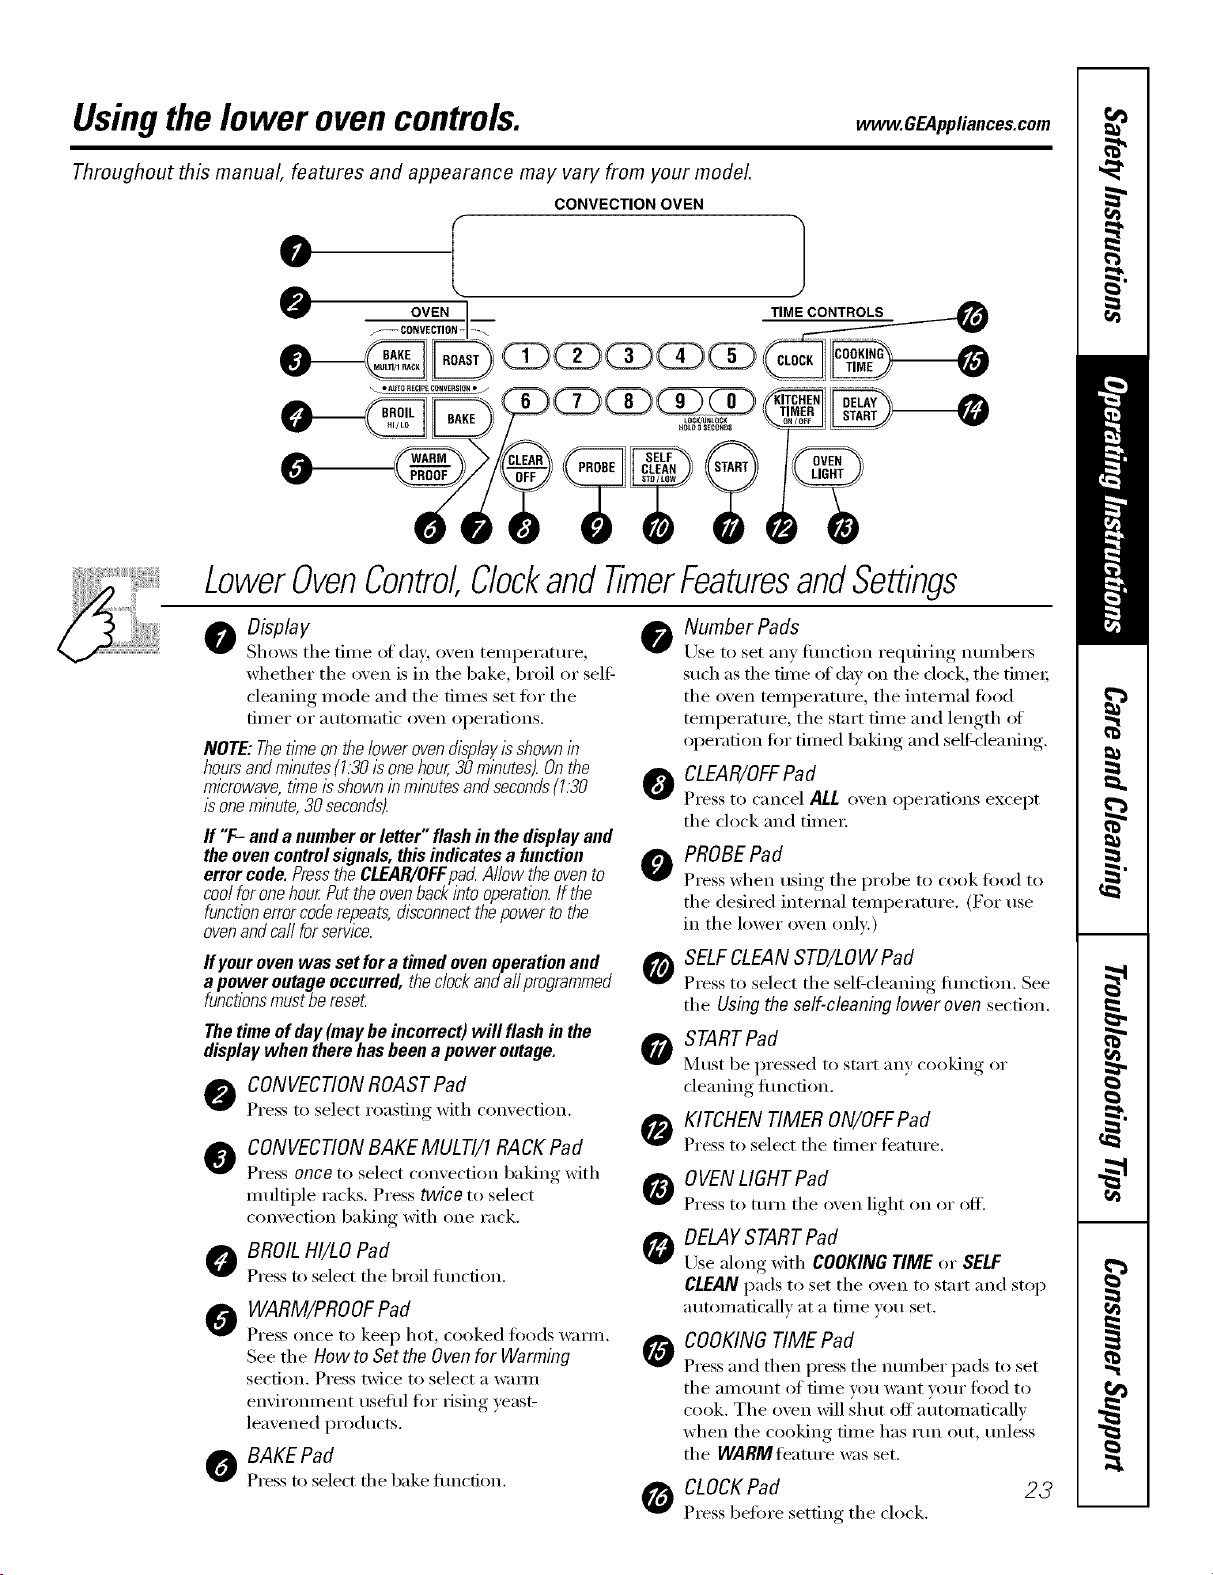
Usingthe lower ovencontrols, www.GEAppliances.com
Throughout this manual, features and appearance may vary from your model.
CONVECTION OVEN
" I 1
@
OVEN I
_--CO_N-I--\ TIMEC_
[o¢l_u_tto¢l<
1totoa SECONDS
LowerOvenControl,ClockandtimerFeaturesandSettings
o Display
Shows tile dine of day, oven telnperature,
whether the oven is in the bake, broil or self:
cleaning mode and the times set fi)r the
[ill/er 0I" atltOll/atic (wen ()l)ei';iti()ils.
NOTE:Thet/Yneonthelowerovendisplayisshownin
hoursandminutes(1.30isonehour,30minutes).Onthe
microwave,timeisshowninminutesandseconds(1.30
/s one minute, 30 seconds).
ff "F-anda numberorletter" flashin thedisplayand
theovencontrolsignals,thisindicatesa function
error code.PresstheCLEAR/OFFpad Allowtheovento
coolforonehourPuttheovenbackintooperation.If the
functionerrorcoderepeats,disconnectthepowertothe
ovenandcallforservice.
Ifyourovenwasset fora timedovenoperationand
a poweroutageoccurred,thedockanda//programmed
functionsmustbereset
Thetime ofday(maybeincorrect)will flashinthe
displaywhentherehasbeena poweroutage.
A CONVECTIONROASTPad
Press to select roasting with comection.
@
CONVECTIONBAKE MULTI/1 RACK Pad
Press once to select comection baking with
multiple racks. Press twice to select
con_ecfion baking with one rack.
I_ BROIL HI/LO Pad
Press to select the broil flmcdon.
O WARM/PROOFPad
Press once to kee I) hot, cooked foods waml.
Seethe How toSettheOvenfor Warming
section. Press twice to select a waml
enviromnent useflfl ti)r rising yeast-
leavened products.
0 BAKEPad
Press to select the bake flmction.
0 Number Pads
Use..... to set any, fimction re(luiring, numbe/_,
sud/as file time oI day on file dock, tile timer;
tile oven temperature, tile internal ti)od
temperature, tile start time and length (ff
operation tot timed baking and sell:cleaning.
0 CLEAR/OFFPad
Press to cancel ALLoxen operations except
tile clock and time_:
O
G
G
e
PROBEPad
Press when using tile probe to cook toed to
the desired internal temperature. (For use
in tile lower oxen only:)
SELFCLEANSTD/LOW Pad
Press to select tile sell:cleaning flmction. See
the Using the self-cleaning Iower oven section.
STARTPad
_/hlst be pressed to start any cooking or
cleaning flmction.
KITCHEN TIMER ON/OFFPad
Press to select tile tim er t_'atl|re.
OVENLIGHTPad
Press to turn tile oxen light on or off.
DELAYSTARTPad
Use ahmg with COOKING TIME or SELF
CLEANpads to set tile oxen to start and stop
automatically at a time you set.
e
COOKINGTIME Pad
Press and then press tile number pads to set
tile aillOtlnt (if tillle VO/I w;Int VO/lI" ti)od to
cook. Tile oven will shut off' automaticallv
when tile cooking tilne has run ()tit, tlnless
tile WARMleature was set.
_ CLOCKPad 23
Press before settiw, tile clock.
Special featuresofyourlower ovencontrol
Yournew touch pad control has additional features that you may choose to use. The following are the features and
how you may activate them.
The special feature modes can only be activated while the display is showing the time of day. They remain in the
control's memory until the steps are repeated.
When the display shows your choice, press the STARTpad. The special features will remain in memory after
a power failure.
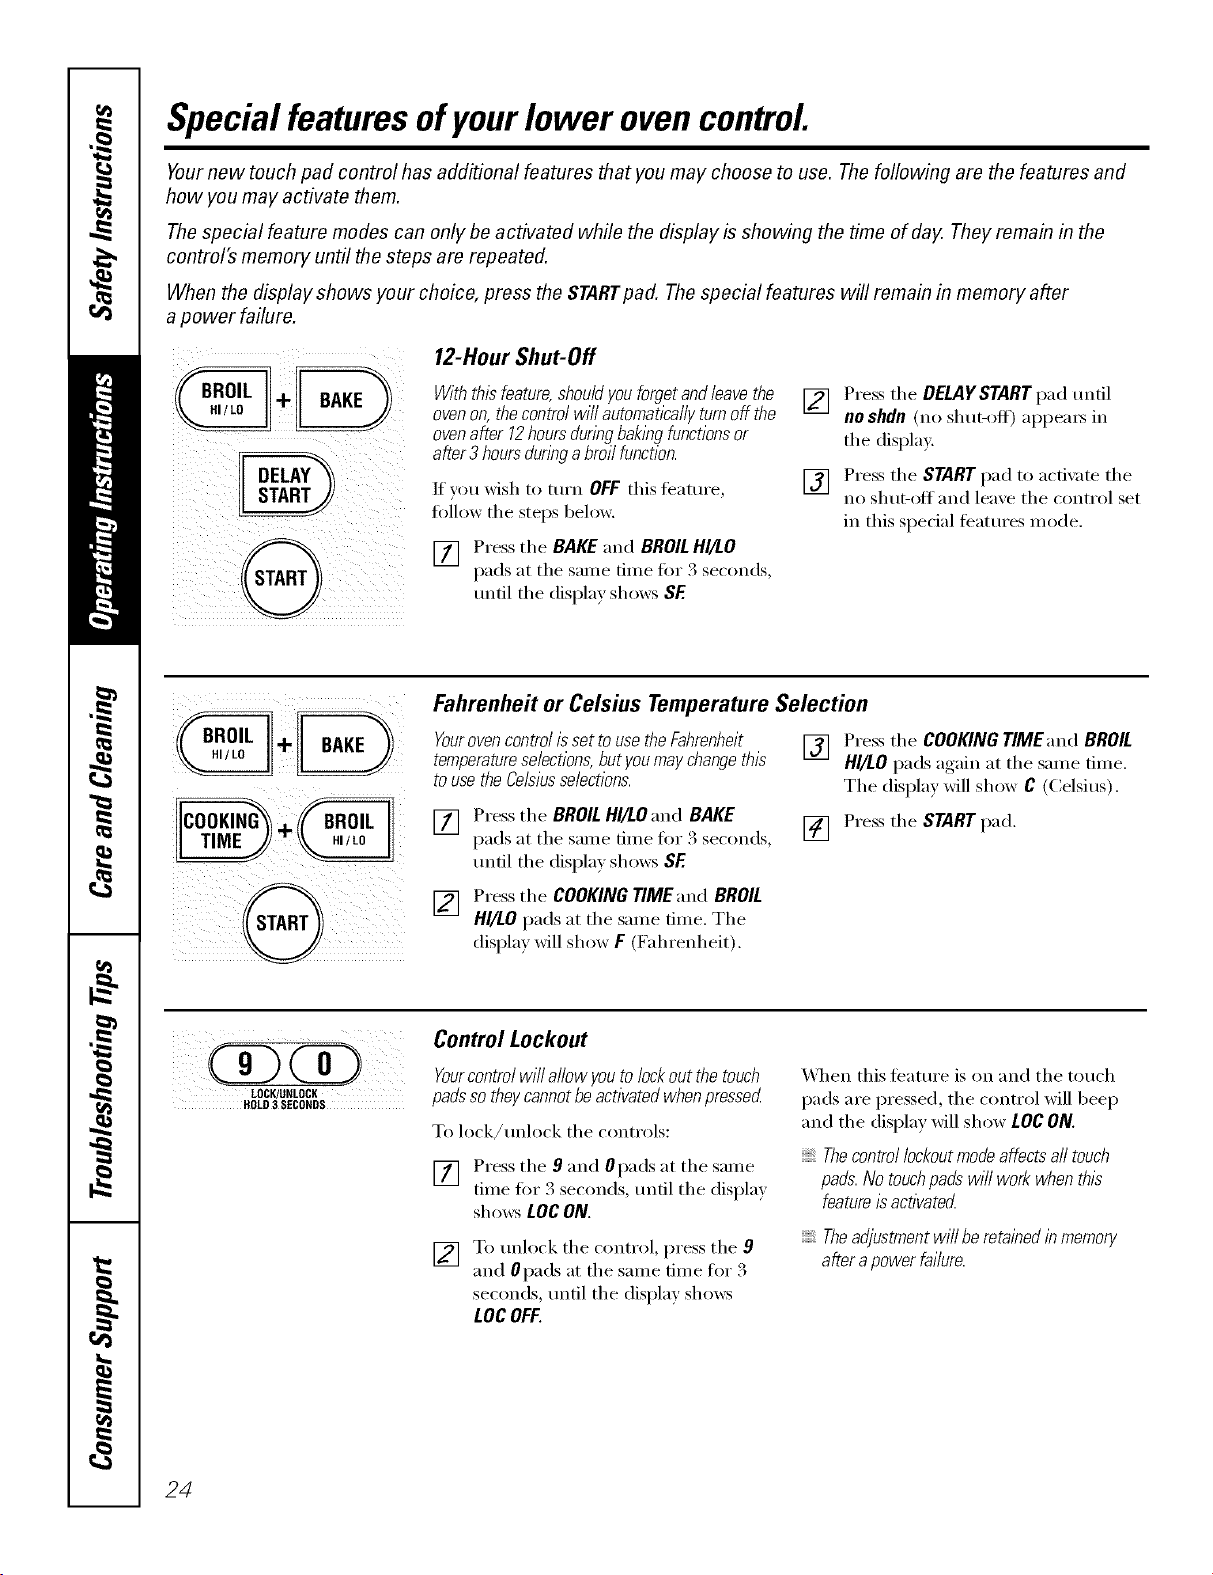
12-Hour Shut-Off
Withthisfeature,shouldyouforgetand/eavethe
ovenon,thecontro/wi//automatica//yturnoffthe
ovenafter 12hoursduringbakbgfunctionsor
after3 hoursdunbga broilfunction.
If you wish to turn OFFthis teature,
fi_l] ow the steps below.
Press the BAKE and BROILHI/I.O
pads at the sanle time for 3 seconds,
until the display shows SE
[] Press the DELAYSTART I)ad until
no shdn(no shut-off) appeax_ in
the display.
[] Press the START pad to acd_ _te the
no shtlt-Off and leaxe the control set
in this special teatures mode.
i i ii
Fahrenheit or Celsius Temperature Selection
Yourovencontro/issettousetheFahrenheit
temperatureselections,butyoumaychangethis
tousetheCelsiusselections.
[] Press the BROIL HI/LOand BAKE
pads at the same time fiw 3 seconds,
tmtil the displa) shows SF.
Press the COOKING TIME and BROIL
HI/LO pads at the same dine. The
display will show F (Fahrenheit).
[] Press the COOKING TIMEand BROIL
HI/LO pads again at the same time.
The display will show C (Celsius).
[] Press the START pad.
LOCK/UNLOCK
ItOLD3 SECONDS
Control Lockout
Yourcontro/ will a//ow youto/ock out the touch
padsso theycannot beactivated when pressed
To lock/unh>ck the controls:
[] Press the 9 and 0pads at the same
time for 3 seconds, tmtil the displa)
shows LOCON.
[] To tmlock the control, press the 9
and 0pads at the same time for 3
seconds, until the display shows
LOCOFF.
\&]_en this teattu'e is on and the touch
pads are pressed, the control will beep
and the display will show LOCON.
Thecontrol/ockout modeaffects a//touch
pads.No touchpads wi// work when this
feature/s activated
Theadjustmentwi//beretainedinmemory
afterapowerfai/ura.
24
www.GEAppliances.com
i iiii i _ iiiii_
) ili i ii!i ii i
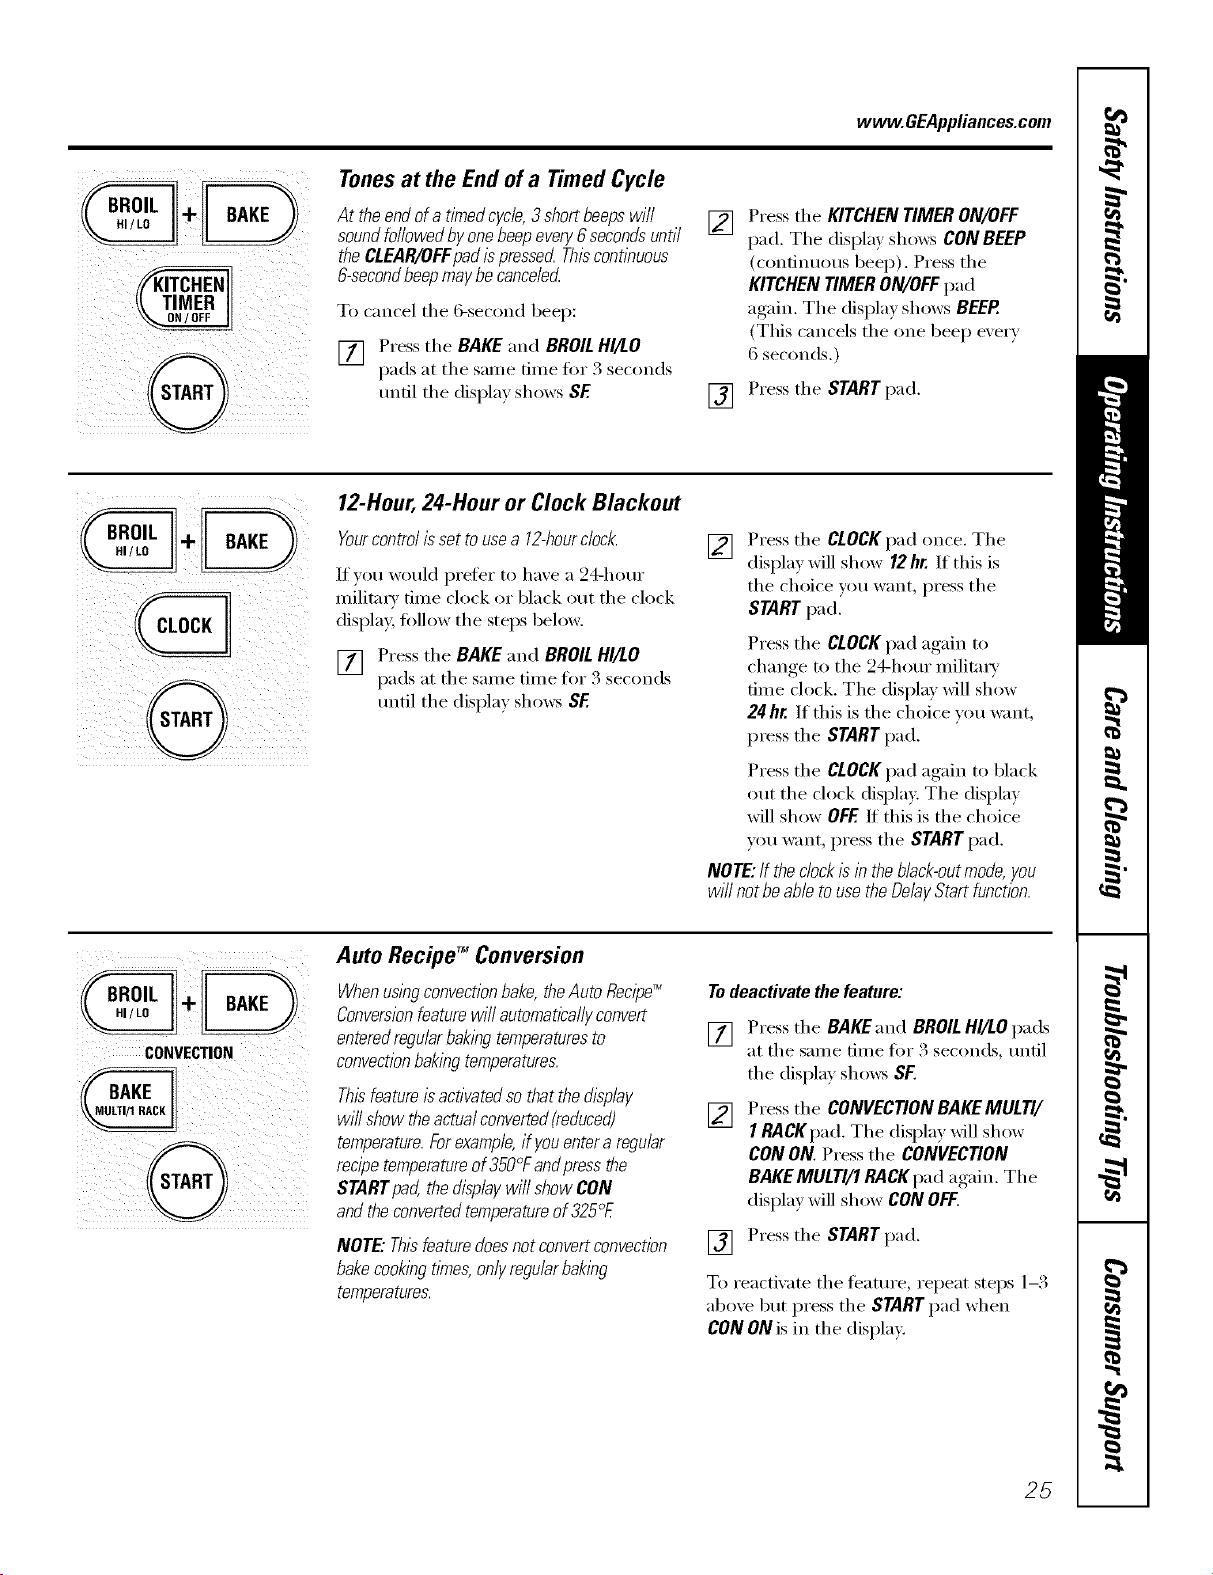
Tonesat the End of a Timed Cycle
At the end ofa timedcycle,3short beepswill
sound followedby one beepeven/6 secondsuntil
the CLEAR/OFFpadis pressed Thiscontlbuous
&secondbeepmay be canceled
To cancel the 6-second beep:
[] Press the BAKE and BROILHI/tO
pads at the salne dine fin _3 seconds
until the display shows SF
[]
[]
Press the KITCHEN TIMER ON/OFF
pad. The displa)shows CON BEEP
(continuous beep). Press the
KITCHEN TIMER ON/OFF pad
again. The display shows BEEP.
(This cancels the one beep every
6 seconds.)
Press the START pad.
12-Hour,2#-Hour or Clock Blackout
Yourcontrol is set to usea 12-hourclock.
If you would prefer to have a 24-hem"
milita W time clock or black out the clock
display, follow the steps below.
[] Press the BAKE and BROILHI/tO
pads at the same time for 3 seconds
tmtil the display shows SF
[]
Press the CLOCKpad once. The
display will show 12 hr. If this is
the choice you want press the
START pad.
Press the CLOCKpad again to
change to the 24-hour militaxa'
time clock. The display will show
24hr. If this is the choice you want,
press the START pad.
Press the CLOCKpad again to black
out the clock display. The display
will show OFF If this is the choice
you want, press the STARTpad.
NOTE:If the clockIs in the black-outmode, you
wi// not beable touse the Delay Start function.
CONVECTION
@
Auto RecipeTM Conversion
Whenus/bgconvectionbake,theAuto Recipe_
Conversionfeature will automaticallyconvert
enteredregularbak/bg temperaturesto []
convectionbakingtemperatures.
Thisfeatureis activatedso that the display
wi// show theactual converted(reduced) []
temperature.Forexample,if youenter aregular
recipetemperatureof 350°Fand pressthe
STARTpad, the displaywill show CON
andthe convertedtemperatureof 325°£
NOTE."Thisfeaturedoes not convertconvection []
bakecookingtime& onlyregularbaking
temperatures.
Todeactivate the feature:
Press the BAKE and BROIL HI/tO pads
at the same time fi)x 3 seconds, tmfil
the display shows SF.
Press the CONVECTION BAKEMULTI/
I RACKpad. Th e displa_ will show
CON ON. Press the CONVECTION
BAKEMULTI/1 RACK pad again. The
display will show CONOFF.
Press the START pad.
To reactixate the teatm'e, repeat steps 1-3
aboxe but press the START pad when
CON ON is in the display.
25
Usingtheproofingand warming features.
Theproofing feature maintains a warm environment useful for rising yeast-leavened products.
How to Set the Oven for Proofing
[] Place the coxered dough in the oxen
on rack g or C.
NOTE:Forbestresults,coverthedoughwitha
clothor withgraasedp/asticwrap(theplastic
mayneedtobeanchoredunderneaththe
containersotheovenfanwi//notMowitoff).
[] Press the WARM/PROOF pad twice.
The display will read PrF (proof).
The oven interior light turns on and
remains on dtwing proofing.
The pro_Nng feature automatically
provides the optimum temperature tot
the proofing process, and theretore does
not have a temperature a(!jusm_ent.
[] Set the KtTCHEN tiMER fO_"the
nlininlunl proof dine.
[] X._q_enproofing is finished, press
the CLEAR/OFFpad.
Toavoid lowering the oventemperature
andlengtheningproofing tlYne,donot
open the ovendoor unnecessarily
Checkbreadproductsearlytoavoid
over-proofing.
NOTE."
Do not usethe proofingmode for warming
foodor keeping foodhoL Theproofing oven
temperatureisnot hot enoughtohold foods
at safe temperatures.Usethe WARM feature
tokeep hot foodwarm.
Proofingwi//notoperatewhenovenisabove
125°£"HOT"willshowinthedisplay
How to Set the Oven for Warming
The wam_ feature keeps cooked foods
warnl for up to 3 houI_ alter a dined
flmction is finished, or warn/can be
acfi\_ted to kee I) hot, cooked foods
w;mn. This timture is not designed to
reheat cold tood.
To use this t_'atm'e, press the
WARM/PROOFpad once and then the
STARTpad.
To activate this teatm'e fi)r use after
Timed Baking or Roasting, press the
WARM/PROOFpad while programming
the oven and before pressing START.
ToCrisp Stale Items
Place food in lm_sided dishes or pans.
For best results, place the fi>od items in
a simde lme_: Do not stack.
i,eave them tmcovered.
Check clispness after 20-30 minutes.
Add time as needed.
IMPORTANTNOTES:
Food should be kept hot/n its cooking
containeror transferredto aheat-safe
servingdish.
Formoist foods,coverthem with anoven-safe
lid oraluminum foiL
Friedorcnspfoodsdonotneedtobecovered,
butcanbecometoodryif warmedfortoolong.
Repeateflopeningofthedoorallowsthehot
ak toescapeandthefoodtocool
AllowextratlYneforthetemperatureinsidethe
oventostabilizeafleraddingitems.
Withlargeloadsitmaybenecessarytocover
someofthecookedfooditems.
Removeservingspoons,etc.,beforeplacing
containersin theoven.
Donotuseplasticcontainers,lidsorp/astlc
wrap.
CAUtiON:Plasticcontainers,ridsorp/astlcwrap
wi//meltifplacedin theoven.Me/tedp/astlcmay
notberemovableandisnotcoveredunderyour
warranty
26
Usingthe lower oven. www.GEAppliances.com
Toavoid possible bums, place the shelves in the desired position before you turn the oven on.
_7"_>- i- -_"_ -
iii ......
\\\
I11
[]
III
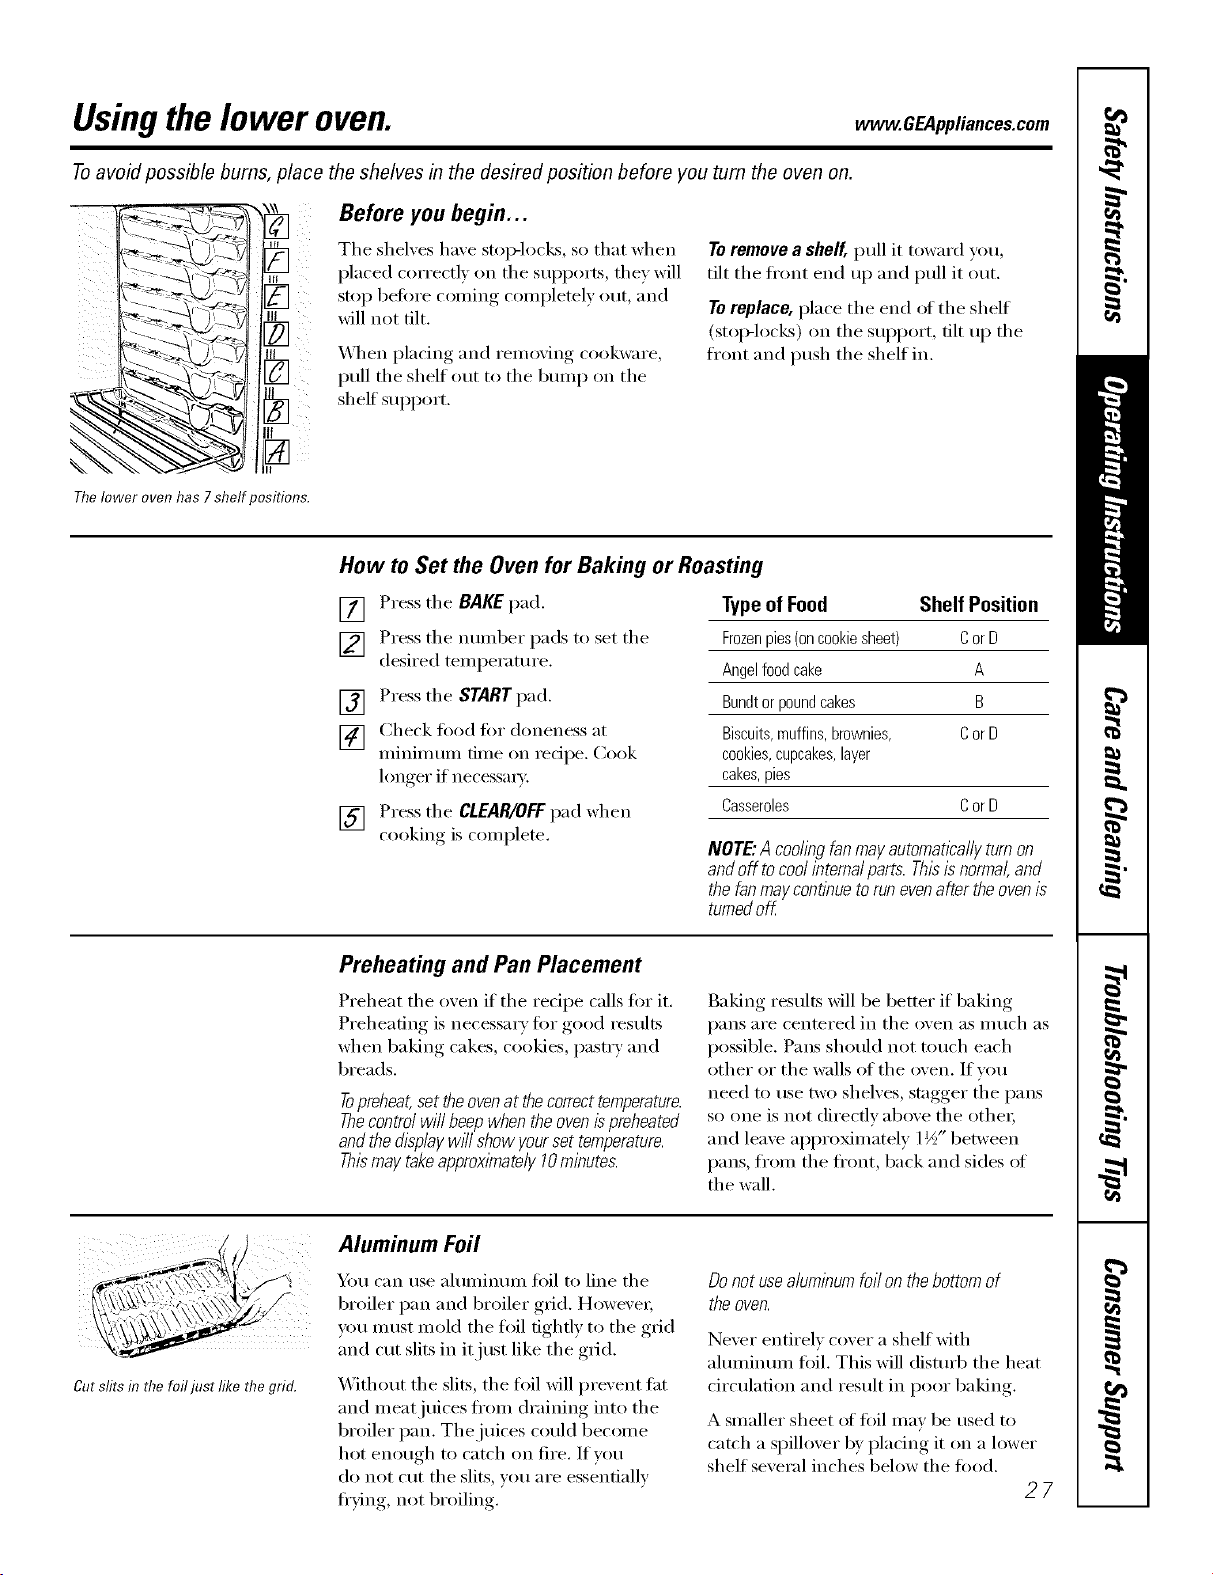
Before you begin...
The shelves have stop-locks, so that when
placed correctly oil the supports, they will
stop heft)re coming completely out, and
will not tilt.
_._q_en placing and remoxing cookware,
pull the shelf out to the bump on the
shelf support.
Toremove a shelf, pull it toward you,
tilt the fl'ont end up and pull it out.
Toreplace, place the end (ff the shelf
(stoi>locl_s) on the support, tilt up the
front and push the shelf in.
Thelower oven has 7 shelf positions.
How to Set the Oven for Baking or Roasting
[] Press the BAKEpad.
] Press the ntllllbeI" pads to set the
desired temperature.
[] Press the STARTpad.
[] Check toed tot aloneness at
minimum time on recipe. Cook
longer if necessm T.
[] Press the CLEAR/OFF pad when
cooking, is comi_lete.
Typeof Food Shelf Position
Frozenpies(oncookiesheet) CorD
Angelfoodcake A
Bundtorpoundcakes B
Biscuits,muffins,brownies, CorD
cookies,cupcakes,layer
cakes,pies
Casseroles CorD
NOTE."A codingfanmayautomaticallyturnon
andoff tocoolinternalparts.Thisisnormal,and
thefanmaycontinuetorunevenaftertheovenis
turnedoff
Preheating and Pan Placement
Preheat the oven if the redpe calls for it.
Preheating is necessary fi:,r good results
when baking cakes, cookies, pastry and
breads.
Topreheat,set theovenat thecorrecttemperature.
Thecontro/ will beepwhen the ovenis preheated
andthe disp/aywffl show yourset temperature.
Thismay takeapprox/mate/y10minutes.
Baking results will be better if baking
pans are centered in the oven as in uch as
possible. Pans should not touch each
other or the walls of the oven. If you
need to use two shelves, stagger the pans
so one is not directly above the othe_;
and leave approximately 1½" between
pans, fl'om the fl'ont, back and sides of
the wall,
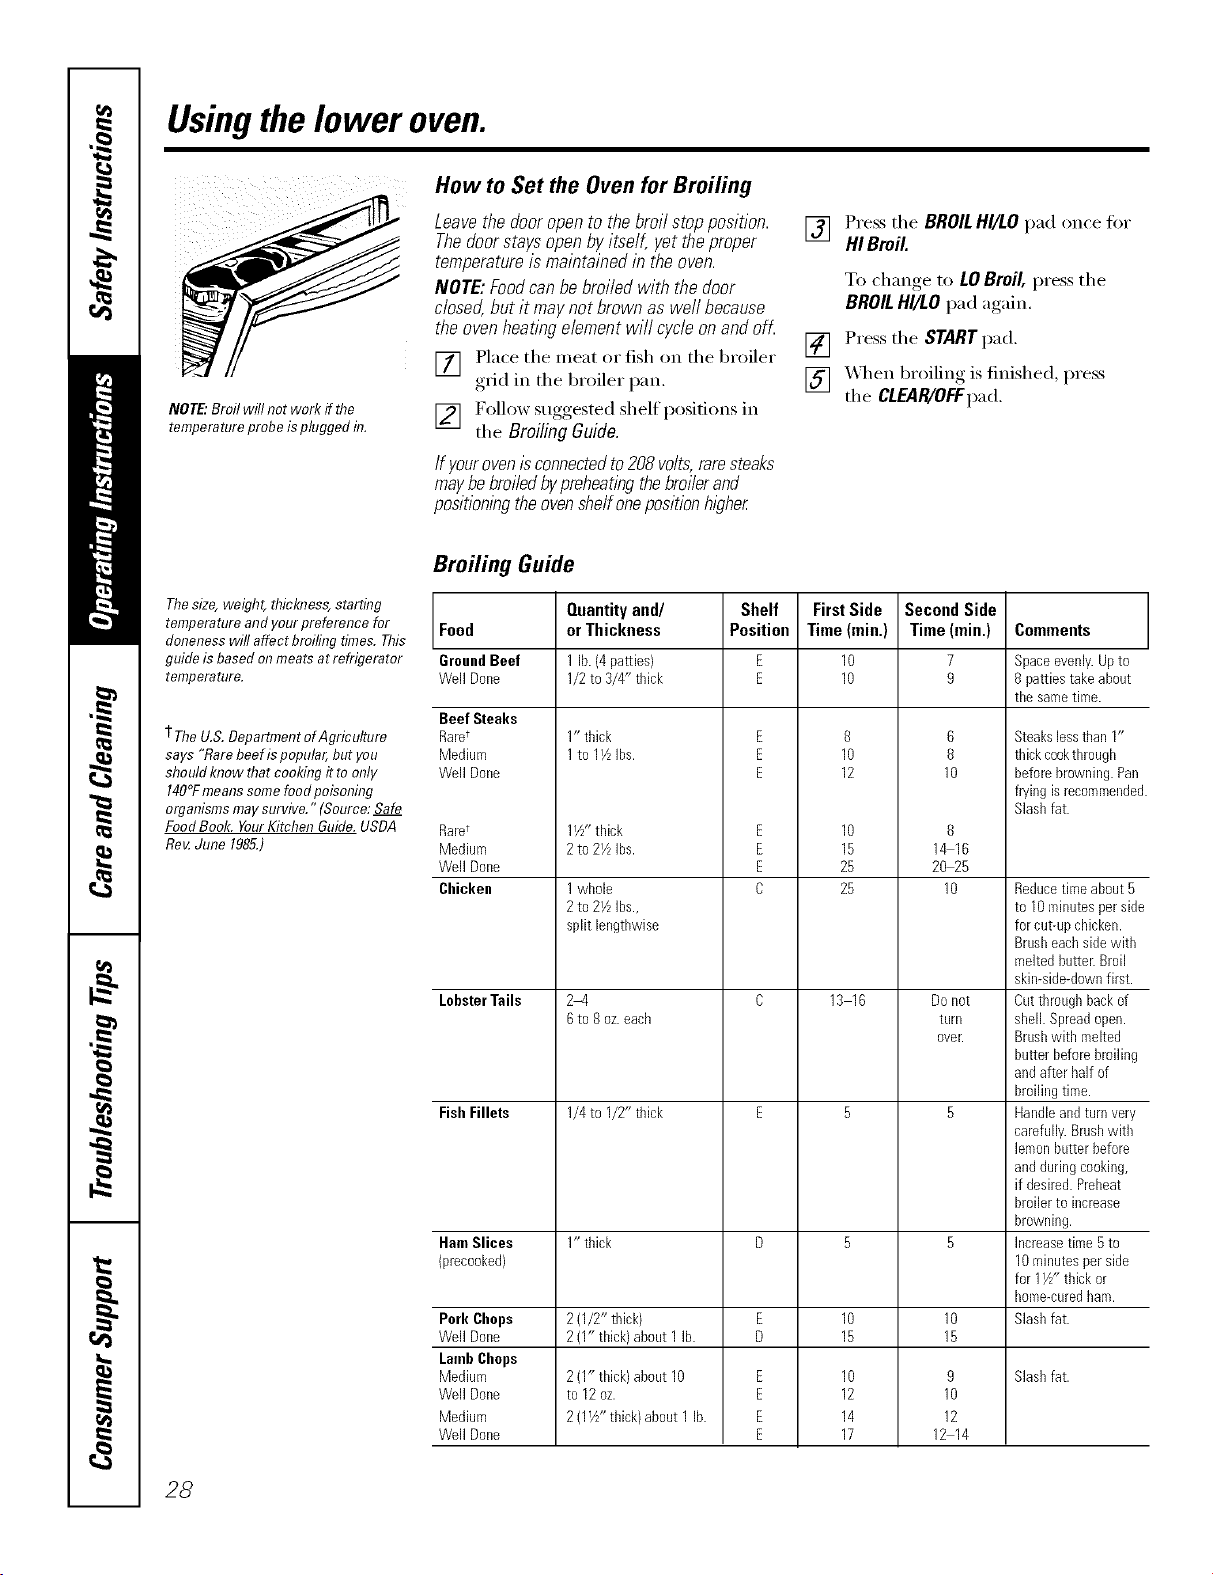
Cut slits in the foil just like the grid.
Aluminum Foil
xAm can use aluminum fi)il to line the
broiler pan and broiler grid. Howe\'e_;
you must mold the fifil tightly to the grid
and cut slits in it just like the grid.
Without the slits, the fl)il will prevent fat
and meat juices fl'om draining into the
broiler pan. The juices could become
hot enough to catch on fire. If w_u
do not cut the slits, you are essentially
fl'ving, not broiling.
Donot usealuminumfoil on thebottom of
the oven.
Never entirely cover a shelf with
ahmfinum fifil. This will clismfl) the heat
drculafion and result in poor baking.
A smaller sheet of foil may be used to
catch a spillover 1)yplacing it on a lower
shelf several inches below the fi)ocl.
27
Usingthelower oven.
NOTE"Broil will not work if the
temperatureprobe isplugged fiT.
How to Set the Oven for Broiling
Leave the door open to the broil stop position.
Thedoor stays open by itself, yet the proper
temperature is maintained in the oven.
NOTE: Foodcan be broiled with the door
dosed, but it may not brown as well because
the oven heating eiement wiii cycie on and ofL
[] Place the meat or fish on the broiler
grid in the broiler pan,
[] Follow suggested shelf positions in
the Broiling Guide.
/fyourovenisconnectedto208voits,raresteaks
maybebroiiedbypreheatingthebroilerand
pos/t/on/bgtheoven#elf onepositionhi#her
[] Press the BROILHI/LO pad once fi)r
HI Broil
To change_ to LOBroil, press the
BROILHI/LO pad again.
[] Press the STARTpad.
[] _,_en broiling is finished, press
the CLEAR/OFFpad,
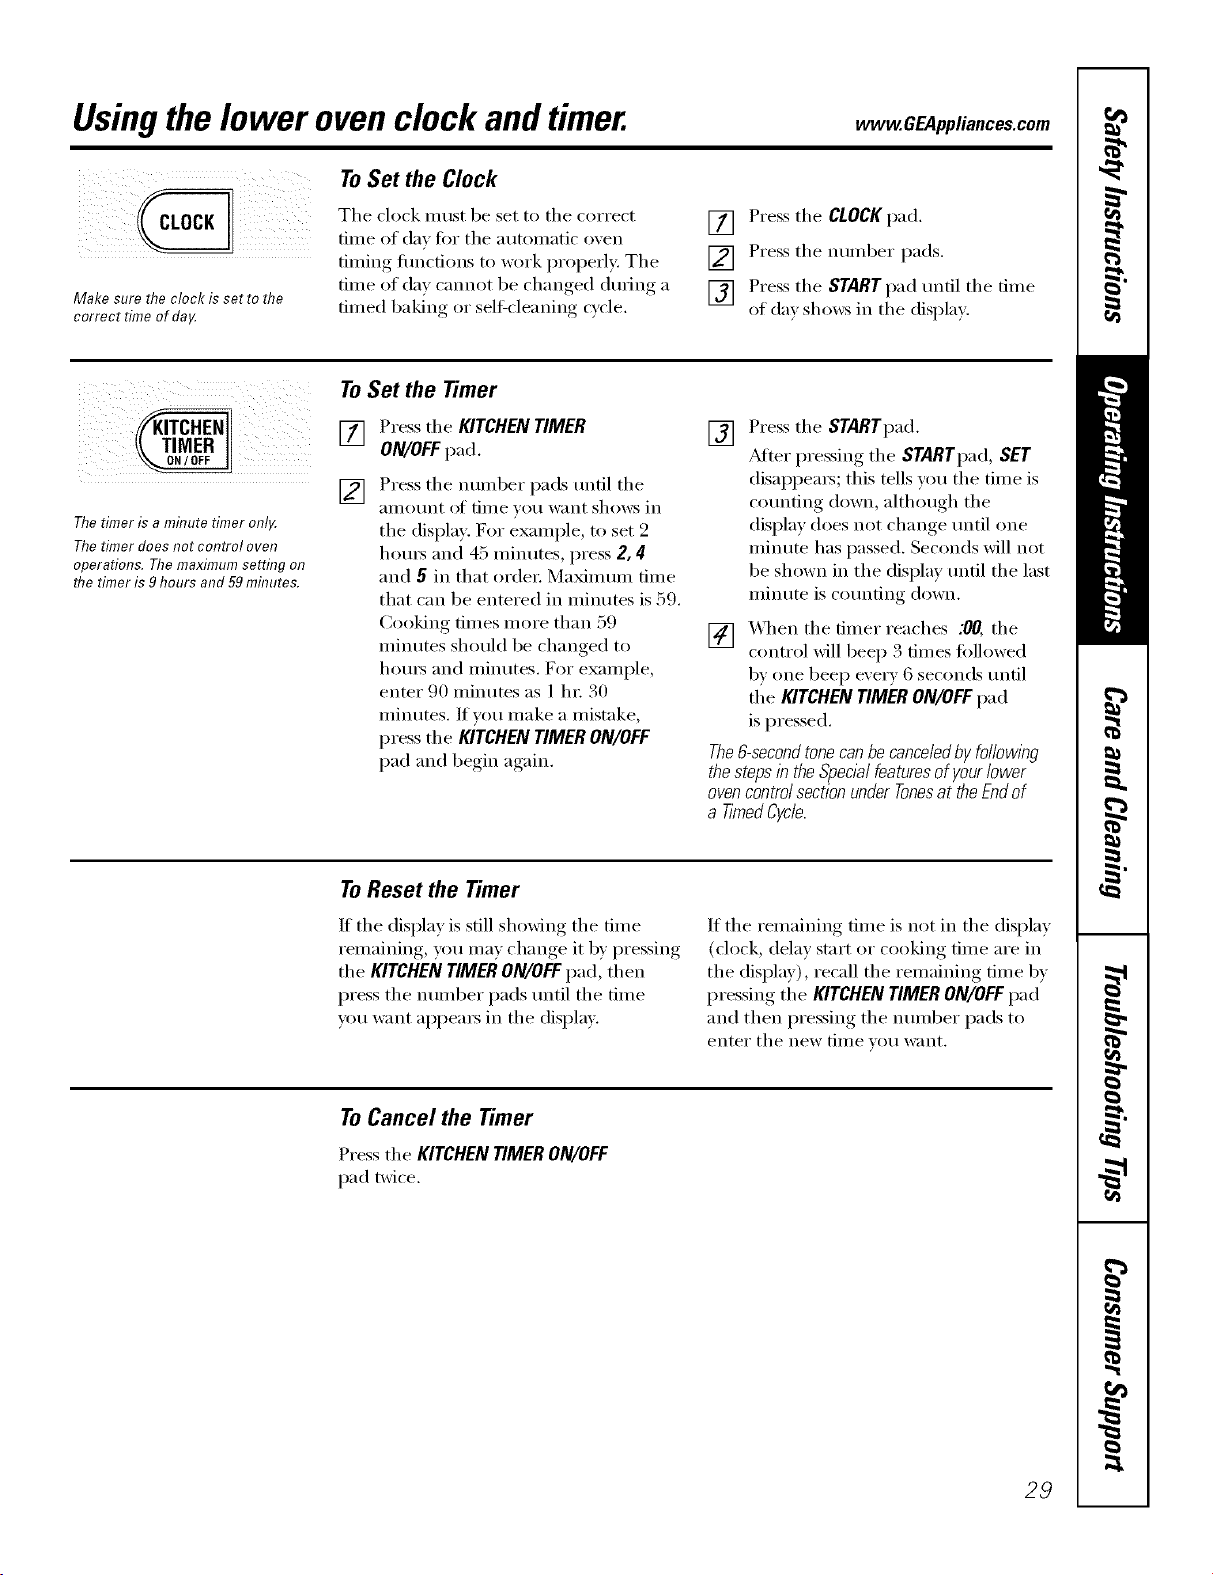
Broiling Guide
The size, weight, flficbTess, starting
temperature and your preference for Food
aloneness will affect broiling times. This
guide is based on meats at refrigerator Ground Beef
temperature. Well Done
Beef Steaks
t TheU.S.Department ofAgriculture RarU
says "Rare beefispopular, butyou Medium
shouldImow that cookingit toonly Well Done
140°Fmeanssomefoodpoisoning
organisms maysurvive." (Source: Safe
FoodBook. YourKitchen Guide.USDA Raret
Roy.June 1985.) Medium
Well Done
Cbicken
LobsterTails
Fish Fillets
Ham Slices
(precooked)
Pork Chops
Well Done
LambChops
Medium
Well Done
Medium
Well Done
Quantityand/
orThickness
11b.(4 pa_ies)
1/2to 3/4" thick
1" tbick
1to 11/LIbs.
11/z"thick
2to 21/LIbs.
1whole
2to 21/zibs.,
split lengthwise
2-4
6to 8 oz.each
1/4to I/U thick
1" thick
2(1/2" thick)
2(1" tlfick)about 1lb.
2{1" thick)about 10
to 12oz.
2(1½"tbick/about 1lb.
Shelf
Position
E
E
E
E
E
E
C
E
E
E
E
FirstSide
Time(min,)
10
10
8
10
12
10
15
25
25
13 16
10
15
10
12
14
17
Second Side
Time (rain.)
7
9
6
8
10
8
1_16
20 25
10
DoIlOt
turll
oveE
10
15
9
10
12
12 14
Comments
Spaceevenly.Upto
8pattiestakeabout
thesametime.
Steakslesstban1"
thickcookthrough
beforebrowning.Pan
fryingisrecommended.
Slashfat.
Reducetime about5
to 10minutesperside
forcut-@ chicken.
Brusheachsidewitb
meltedbutter.Broil
skimside-downfirst.
Cutthroughbackof
sheikSpreadopen.
Brushwitb melted
butterbeforebroiling
andafter half of
broilingtime.
Handleandturnvery
carefully.Brushwitb
lemonbutterbefore
andduring cooking,
if desired.Preheat
broilerto increase
browning.
Increasetime Rto
10minutesperside
for 1½" tbick or
home-curedham.
Slashfat.
Slashfat.
28
Usingthe lower ovenclock andtimer. .CE4..lia.ces.com
Make sure the clock is set to the
correct time of da,_
To Set the Clock
The clock must be set to the correct
time of day fin" the autonmtic o_en
tinting flmcfions to work properly: The
time of (lay cannot be changed durino_ a
timed baking or sell:cleaning cycle.
[] Press the CLOCKpad.
[] Press the number pads.
[] Press the START pad until the time
of da)shows in the display.
Thetimer is a minute t#ner onl_
Thetimer does not control oven
operations. The maximum setting on
the timer is 9hours and 59mhTutes.
ToSet the Timer
[] Pressthe KITCHENTIMER
ON/OFFpad.
[] Press the number pads until the
aillOt/nt of [lille _Otl want shows in
the display: For example, to set 2
hom_ and 45 minutes, press 2, 4
and 5 in that order Maxunum time
that can be entered in minutes is 59.
Cooking times more than 59
minutes should be changed to
houi_ and minutes. For example,
enter 90 minutes as 1 lm 30
minutes. If wm make a mistake,
press the MTCHEN TIMER ON/OFF
pad and begin again.
[] Press the STARTpad.
_Mter pressing the STARTpad, SET
disappears; this tells you the time is
counting down, although the
display does not change until one
minute has passed. Seconds will not
be shown in the display until the last
minute is counting down.
[] _._q_en the timer reaches .'0/7,the
control will beep 3 times fi)llowed
by one beep every 6 seconds tmtil
the KITCHEN TIMER ON/OFF pad
is pressed.
The&second tonecanbe canceledby fo//owlhg
thesteps in the Spec&/ featuresof yourlower
ovencontrol sectionunderTonesat theEndof
a TimedCycle.
To Reset the Timer
If the display is st.ill shoMng the time
remaining, you may change it by pressing
the KITCHEN TIMER ON/OFF pad, then
press the number pads until the time
you want al)l)ea_ in the display.
If the remaining time is not in the display
(clock, delay start or cooking time are in
the display), recall the remaining time by
pressing the KITCHENTIMERON/OFFpad
and then pressing the number pads to
enter the new tiIlle Veil want.
ToCancel the Timer
Pressthe KITCHENTIMERON/OFF
pad twice.
29
Usingthelower oventimed bakingandmasting features.
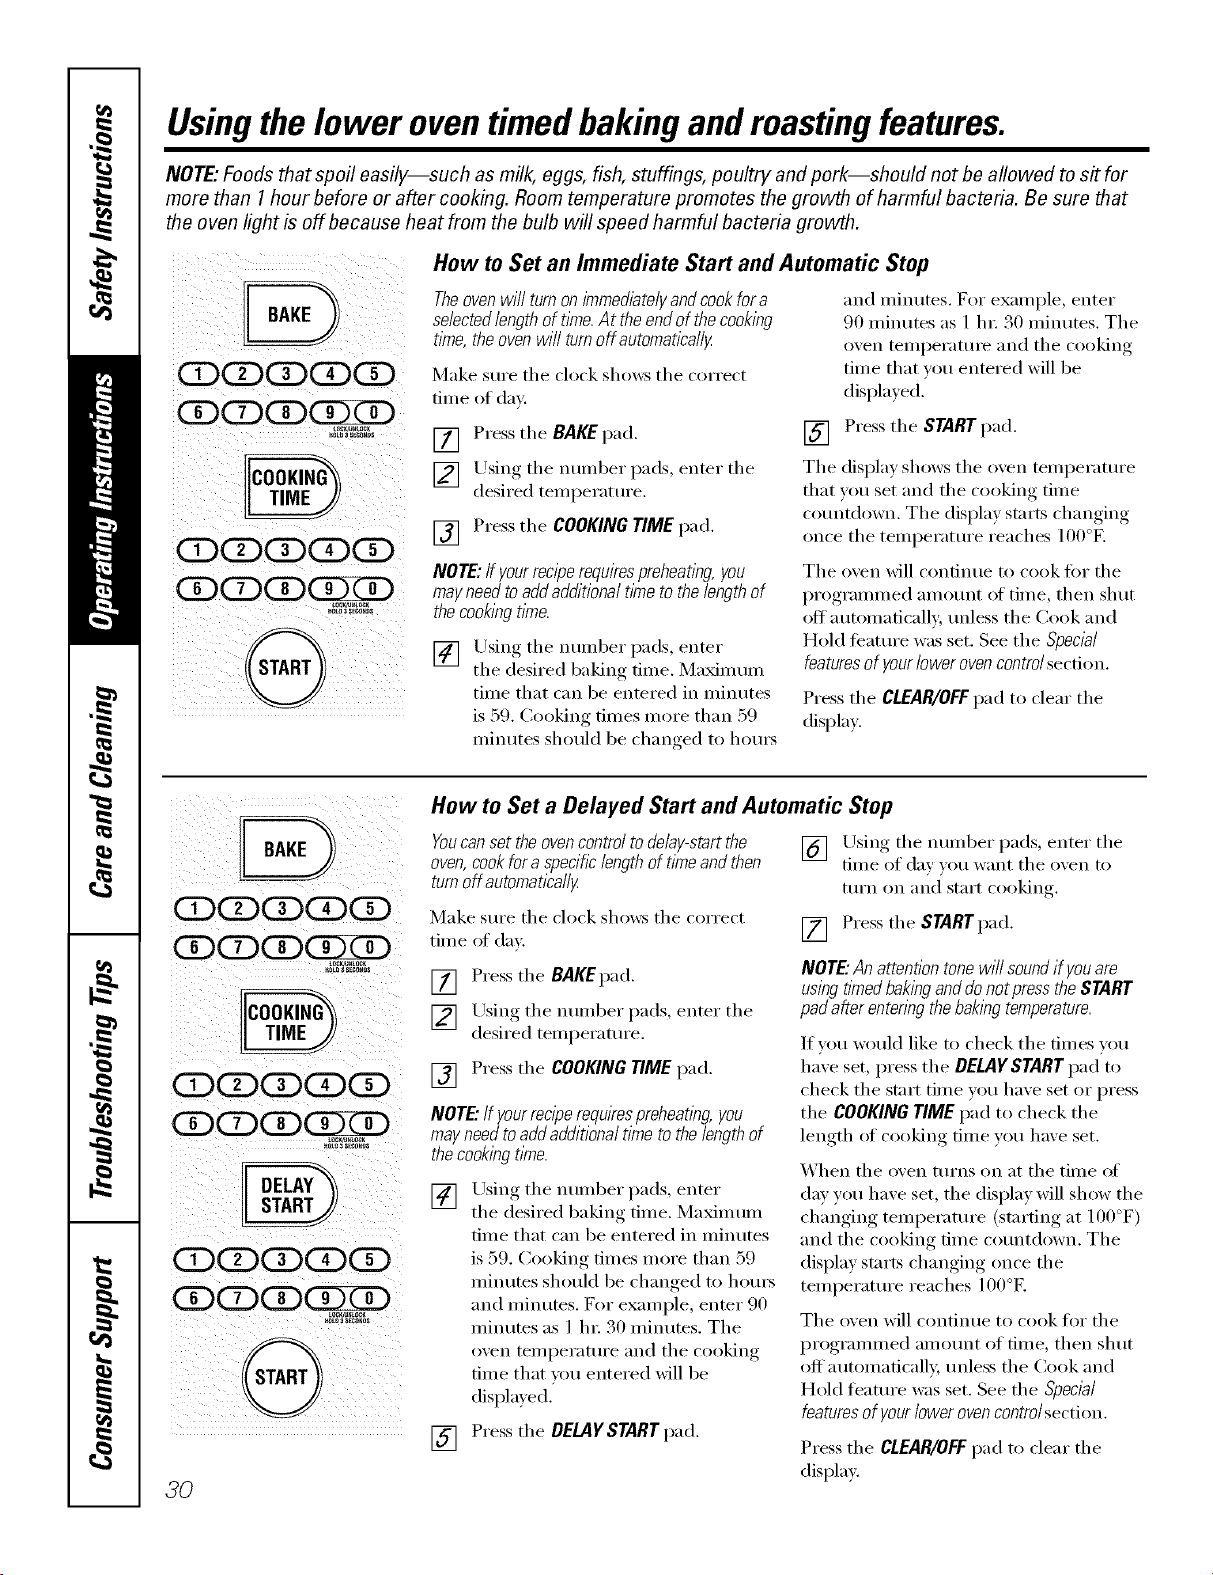
NOTE."Foods that spoil easily--such as milk, eggs, fish, stuffings, poultry and pork--should not be allowed to s# for
more than 1hour before or after cooking. Room temperature promotes the growth of harmful bacteria. Be sure that
the oven light is off because heat from the bulb will speed harmful bacteria growth.
iii ii ! i)ii
C CDCD
How to Set an Immediate Start and Automatic Stop
Theovenwi//turnon/?nmediate/yandcookfora
selectedlengthoftime.At theendof thecooking
flYne,theovenwi//turnoffautomatica//y
Make sure the clock shows the correct
tiIl/e of dax:
and minutes. For example, enter
90 minutes as 1 lm 30 minutes. The
oven temi)eratme and the cooking
time that w)u entered will be
displayed.
[] Press the BAKEpad.
[] Using the number pads, enter the
desired temperatm'e.
[] Press the COOKING TIME pad.
[] Press the START pad.
The display shows the oven temperature
that you set and the cooking time
countdown. The display starts changing
once the temperature reaches 100°E
NOTE:If yourreciperequirespreheatlbg,you
mayneedtoaddaddifionaltimetothelengthof
thecookbgtime.
[] Using the number pads, enter
the desired baking time. MaMmum
time that can be entered in minutes
is 59. Cooking dines more than 59
minutes should be changed to hom_
The oven will continue to cook fin" the
programmed aln aunt at time, then shut
off automaticall> tmless the Cook and
Hold teatm'e was set. See the Special
featuresof yourlower ovencontrol section.
Press the CLEAR/OFFpad to clear the
display.
30
ODODCDCDCD
ODODCD(!)XD
CDCDCDODCD
ODCDCDCDCD
ODODCDCDCD
CDCDCDCDZD
How to Set a Delayed Start and Automatic Stop
Youcanset the ovencontrol todelay-start the
oven,cookforaspecihc length of timeand then
turn off automatica//}z
Make sm'e the clock shows the correct
time of claw
[] Using the number pads, enter the
time of day }ou want the oxen to
ttlI'n on and staI_[ cooking
[] Press the STARTpad.
[] Press the BAKEpad.
[] Using the number pads, enter the
desired temperatm'e.
[] Press the COOKINGTIMEpad.
NOTE"If yourrecipe requkespreheating, you
mayneed toaddadditional time to the length of
the cookingtime.
[] Lrsing the nulnber pads, enter
the desired baking time. Maximum
time that can be entered in minutes
is 59. Cooking times more than 59
ininutes should be changed to houi_
and minums. For example, enter 90
minutes as 1 lm 30 minutes. The
oven temperature and the cooking
time that um entered will be
displayed.
[] Press the DELAYSTARTpad.
NOTE"An attention tone wi// soundif youare
using flYnedbakinganddonot press the START
padafter entenbgthe bakingtemperature.
If you _x_uld like to check the times you
have set, press the BELAYSTARTpad'to
check the start time you have set or press
the COOKINGTIME pad to check the
length _ff cooking time you have set.
When the oven ttlrns on }It the time of
day you have set, the display will show the
changing temperature (starting at 100°F)
and the cooking time countdown. The
display starts changing once the
temperature reaches 100°E
The oven will continue to cook for the
programmed amount of time, then shut
off automaficall> tmless the Cook and
Hold teature was set. See the Special
features of yourlower ovencontro/ section.
Press the CLEAR/OFFpad to clear the
display.
Usingthe lower ovenprobe, www.GEAppliances.com
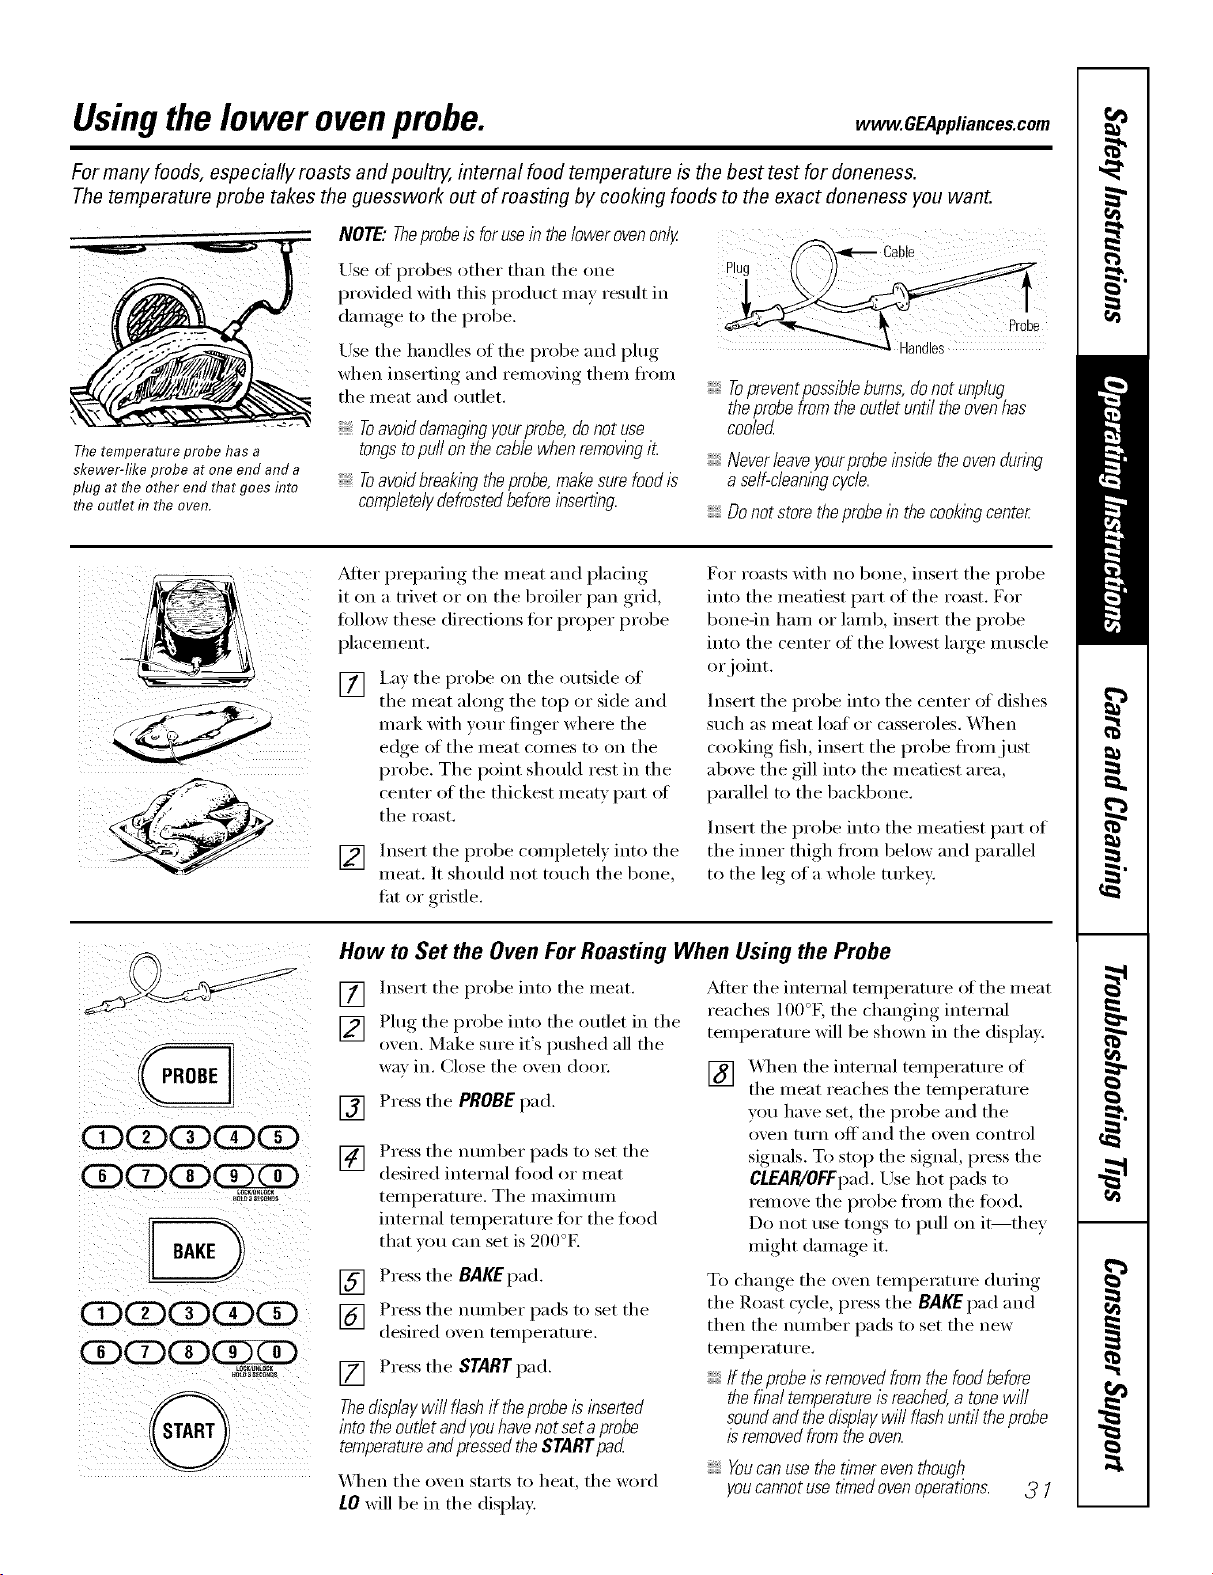
For many foods, especially roasts and poult_ internal food temperature is the best test for aloneness.
The temperature probe takes the guesswork out of roasting by cooking foods to the exact doneness you want.
Thetemperature probe has a
skewer-like probe at one end and a
plug at the other end that goes flTto
the outlet f17the oven.
NOTE"Theprobe is forusein thelower ovenonly
Use of probes other than the one
provided with this l)rodtl(-t Ill}ly result in
dmnage to the probe.
Use the handles of the probe and i)lug
when inserting and removing them ti'om
tile meat and outlet.
Toavoid damagingyourprobe,donot use
tongstopuff on thecamewhen removingiL
Toavoid breakingthe probe,makesurefood is
completelydefrostedbefore/bsert/bg.
Topreventpossibleburns,donotunplug
theprobefromtheoutletuntiltheovenhas
cooled
Neverleaveyourprobe/bsidetheovendunbg
a self-clean/bgcycle.
Donot store theprobe in the cook/bycente_
_dter preparing tile meat and placing
it on a trivet or on the broiler pan grid,
tollow these directions for proper probe
placement.
[] I,a) the probe on the outside of
tile meat along tile top or side and
mark with )our finger where the
edge of the meat comes to on the
probe. The point should rest in the
center of tile thickest meaty part of
the roast.
[] Insert the probe completel) into the
meat. It should not touch the bone,
fat or gristle.
For roasts Mth no bone, insert tile probe
into tile meatiest part of tile roast. For
bone-in ham or lamb, insert tile probe
into tile center of tile lowest large muscle
or joint.
Inse_t the probe into the center of dishes
such as meat loaf or casseroles. X&]/en
cooking fish, inse_t tile probe fl'om just
above the gill into the meatiest area,
parallel to tile backbone.
Insert tile probe into tile meatiest part of
the inner thigh fl'om below and parallel
to the leg of a whole turkey:
CDGOCD(Z)G)
(Z)(Z)(Z)(!2gD
LOCK_U_LOCK
CDGDCD(Z)G)
GDCD(!)(2ZD
_CK_U_LOCM
How to Set the Oven For Roasting When Using the Probe
[]
[]
Insert tile probe into tile meat.
Plug tile probe into tile outlet in tile
oxen. Make sure it's pushed all the
way in. Close tile oxen doo_:
[] Press tile PROBE pad.
[]
Press tile number pads to set tile
desired internal fi)od or meat
teml)erature. Tile maximum
internal temperature for tile food
that _ou can set is 200°E
[] Press tile BAKEpad.
] Press tile number pads to set tile
desired oxen temperature.
[] Press tile START pad.
Thed/splaywill flashif theprobeisinserted
/btotheoutletandyouhavenotsetaprobe
temperatureandpressedtheSTARTpad
X_q/en tile oven starts to heat, tile word
LOwill be in tile display:
_Mier tile internal temperature of tile meat
reaches 1()()°K the changing internal
temperature will be shown in tile displa).
[] XAq/en tile internal temperature of
tile meat reaches tile temperature
vou have set, the probe and the
()veil [tlYn OlC{ ' and tile oven contI'ol
signals. To stop the signal, press the
CLEAR/OFFpad. Use hot pads to
remove tile probe ti'om tile food.
Do not use tongs to pull on it--they
might damage it.
To change tile oven temperature during
tile Roast cycle, press tile BAKEpad and
then tile number pads to set tile new
temperattu'e.
If theprobe/s removedfrom the foodbefore
the f/ba/temperature isreached,a tonewi//
soundand the displaywi// flashuntil theprobe
isremoved from the oven.
Youcanusethetimereventhough
youcannotusetimedovenoperations. 3 1
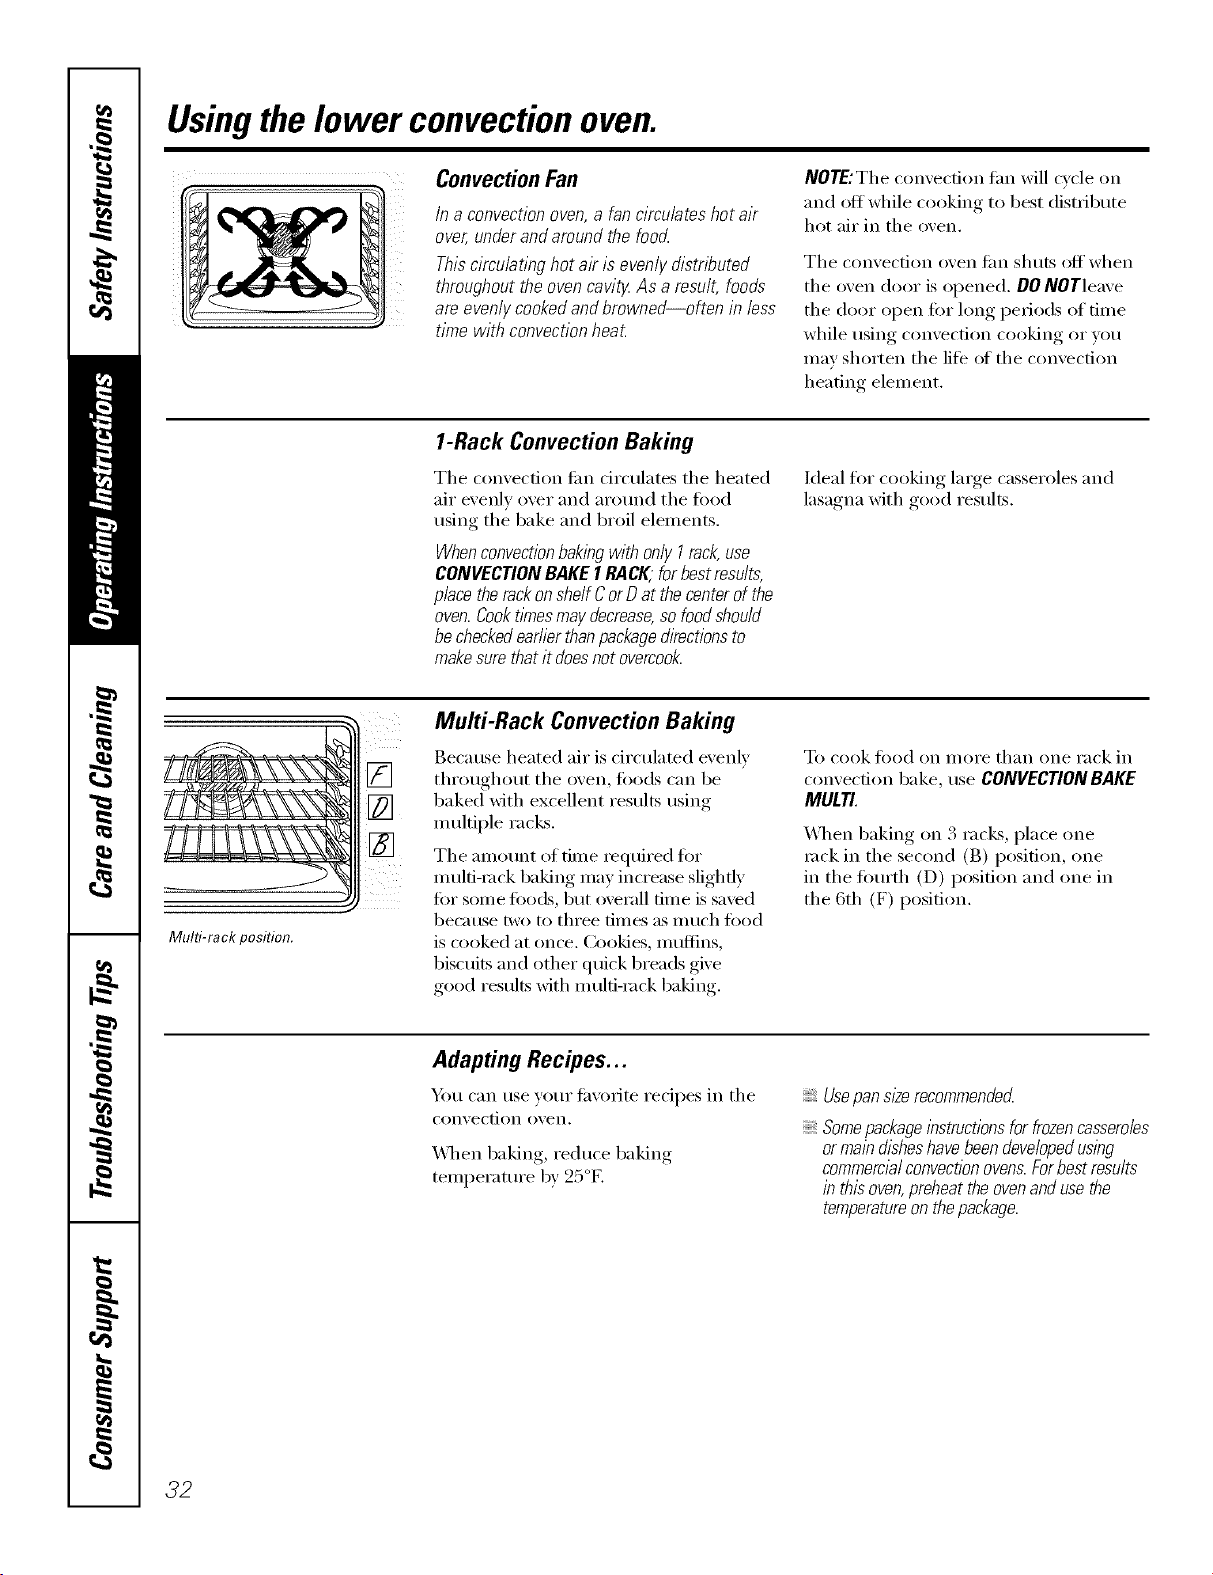
Usingthelower convectionoven.
ConvectionFan
In a convection oven,a fan circulates hot air
over, under and around the foo_
This circulating hot ak is evenly distributed
throughout the oven cavity.As a result, foods
are evenly cooked and browned--often in less
time with convection heat.
NOTE:The convection tim will cycle on
and oft while cooking to best distribute
hot air in tile oven.
The convection oven tim slmts off when
the oven door is opened. DO NOTleave
tile door open tot long periods of time
while using convection cooking or you
may shorten tile life oI tile convection
heating element.
1-Rack Convection Baking
Tile convection tim drculates tile heated
air evenly over and around the fi)od
using the bake and broil elements.
WhenconvectionbakingwithonlyI rack,use
CONVECTIONBAKE1RACI(;forbestresults,
place the rack on shelf C or D at the center of the
oven. Cook tlYnesmay decrease, so food should
be checked ear/ier than package directions to
make sure that it does not overcook.
Ideal for cooking lmge casseroles and
lasagna with good results.
Multi-rack position.
Multi-Rack Convection Baking
Because heated air is drctflated evenly
throughout the oven, fi)ods can be
baked with excellent results using
multiple racks.
Tile amount of time required fiw
multi-rock baking may increase slightly
for sore e tbo_ts, but overall time is saved
bec_mse two to three tillles as Illtlch tood
is cooked at once. Cookies, mttflins,
biscuits and other quick breads give
good results with multi-rock baking.
To cook rood on IllOI'e than ()tie rack ill
convection bake, use CONVECTIONBAKE
MULTI.
\4lien baking on 3 racks, place one
rock in tile second (g) position, one
in tile tom'th (D) position and one in
the 6th (F) position.
Adapting Recipes...
Ym can use your fm/orite recipes in tile
convection ()veil,
_4]/en baking, reduce baking
temperature by 25°E
UsepansizerecommendecL
qomepackageibstructionsfor frozencasseroles
ormalb &shes havebeen developedusing
commercialconvectionovens.Forbest results
in this oven,preheat the ovenanduse the
temperatureon thepackage.
32
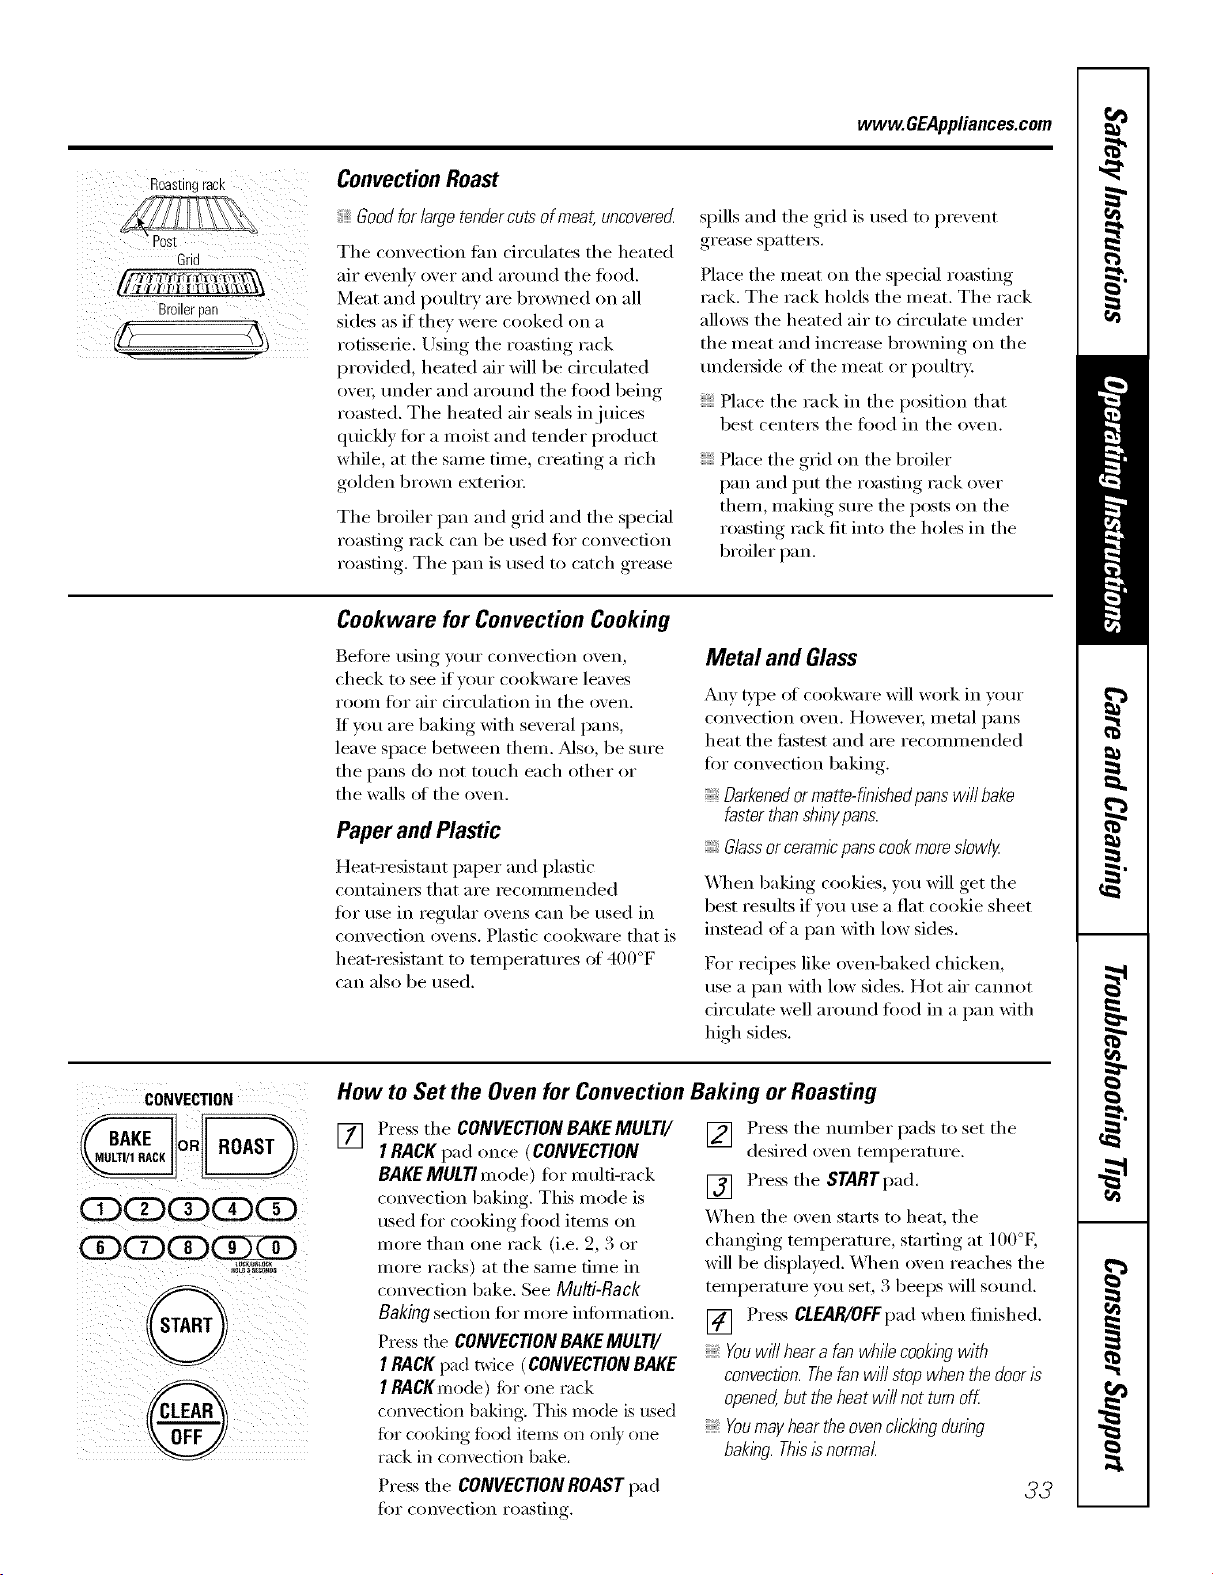
vvww.GEAppliances.com
Roastingrack
Grid
(lqq_[!l!II_{'il'ilil_l\_
Broilerpall
ConvectionRoast
Goodforlargetendercuts ofmeat, uncovered
The convection tim circulates the heated
air evenly over and around the fi)od.
Meat and poultry are browned on all
sides as if they were cooked on a
rotisserie. Using the roasting rack
provided, heated air will be circulated
ovei; under and around the tood being
roasted. The heated air seals in juices
quickly for a moist and tender product
while, at the same time, creating a rich
golden brown extefioI:
Tim broiler pan and grid and tim spedal
roasting rack can be used for convection
roasting. The pan is used to catch grease
spills and tim grid is used to prevent
grease spatteis.
Place the meat on the special masting
rack. Tim rack holds tim meat. Tim rack
alhm:s tim heated air to circulate under
the meat and increase browning on the
underside of the meat or poultr}:
Place the rack ill the position that
best centers the food ill the oven.
Place the grid on the broiler
pan and put tim roasting rack over
them, making sure the posts on the
roasting rack fit into the boles ill the
broiler pan.
Cookware for Convection Cooking
Before using your convection oven,
check to see if vour cookware leaves
room fin" air circulation ill tile oven.
If you are baking with several pans,
leave space between them. Mso, be sure
the pans do not touch each other or
the walls ot the oven.
Paper and Plastic
Heat-resistant paper and plastic
containei_ that are recommended
fin" use ill regular ovens can be used ill
convection ovens. Plastic cookware that is
beat-resistant to temi)eratures of 400°F
can also be used.
Metal and Glass
Ally bile of cookware will work ill w,ur
convection oven. HoweveI; ll/etnl pans
heat the fi_stest and are recommended
for convection baking.
Darkenedor matte-finishedpanswill bake
faster thanshinypans.
Glassorceramicpans cookmores/ow/g
_41_en baking cookies, you will get the
best results if wm use a fiat cookie sheet
instead ot a pan with low sides.
For recipes like ovei_-baked cbicken,
use a pan with low sides. Hot air cannot
circulate well around fi)od ill a pan with
lfigh sides.
CONVECTION
{ o°
CDODCD
@i
How to Set the Oven for Convection Baking or Roasting
[]
Press the CONVECTION BAKEMULTI/
I RACK pad once (CONVECTION
BAKEMULti mode) for muld-rack
convection baking. Tiffs mode is
used for cooking food items on
more than one rack (i.e. 2, 3 or
more racks) at the same time ill
convection bake. See Multi-Rack
Baking section fiw more inf0mmfion.
Press the CONVECtiONBAKEMULTI/
I RACKpad mice (CONVECTIONBAKE
I RACKmode) fi)r one rack
convection baking. This mode is used
fi)r cooking fi)od items on on b one
rack ill CoIlvecfioIl bake.
] Press the munl)er pads to set the
desired oxen temi)eramre.
[] Press the STARTpad.
When the oven starts to beat, the
changing temperature, starting at 100°K
will be displayed. _l/en oven reaches the
temi)erature you set, 3 beeps Mll sound.
[] Press CLEAR/OFFpad wben finished.
Youwi// hear a fan whilecookingwith
convection.Thefan will stop when thedooris
opened,but the heat will not turn off.
Youmay hearthe ovenclicklbg during
baking.Thisisnormal.
Press the CONVECtiON ROAST pad
fi)r con,,ection i'oastin r
33
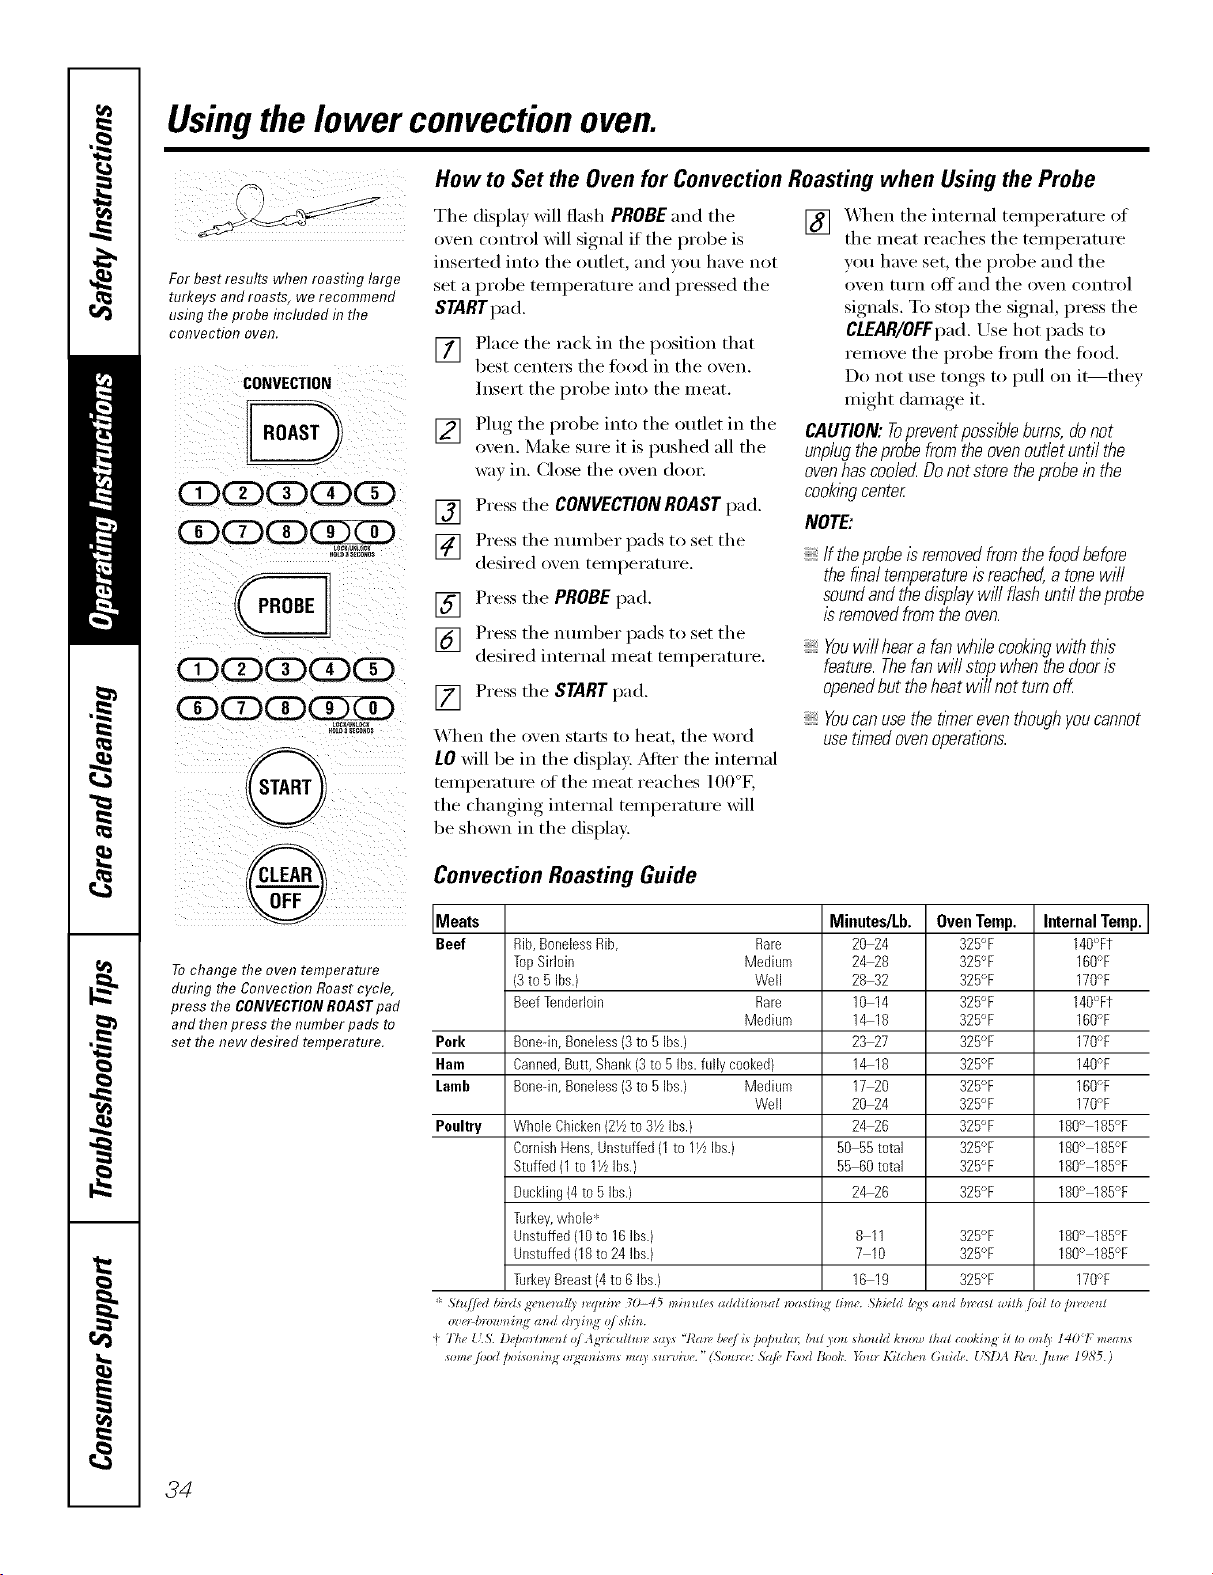
Usingthelower convectionoven.
For best results when roasting large
turkeys androasts, we recommend
usflygthe probe included d7the
COIYvectio!7 oveR.
CONVECTION
(SD(Z)(X)(X)GD
(X)GDCDCgXD
Lum mLu_
HmD_SECONOe
(Z)CD(Z)(Z)GD
GD(3D(X)(Y D
XDtD_SECONOS
@
,@
To change the oven temperature
during the Convection Roast cycle,
press the CONVECTION ROAST pad
and then press the number pads to
set the new desired temperature.
How to Set the Oven for Convection Roasting when Using the Probe
Tile display Mll flash PROBE and tile
oven control Mll signal if tile probe is
inserted into tile outlet, and you have not
set a probe tempemtm'e and pressed tile
STARTpad.
[] Place the rack in the position that
best cente_ the fi)od in the oven.
/nsel't the probe into the llieat.
[] Plug the probe into the otlflet in the
oven. Make sure it is Imshed all the
W;IV ill. (]lose tile oven door,
[] Press tile CONVECTION ROAST pad.
] Press the number pads to set the
desired oven tel/lllel';ittll'e.
[] Press tile PROBE pad.
] Press the nmnber pads to set the
desired intermll meat temperature.
[] Press tile STARTpad.
When the oven stnrts to heat, the word
LO will be in the disl/lax: Mter tile internal
teInpelutUl'e ot the meat reaches 100%,
tile changing internal temperatm'e will
be shown in the display:
[] _._/en tile internal temperatm'e of
tile meat reaches tile temperature
you have set, tile probe and tile
oven ttlI'n 0_' and tile oven control
signals. To stop tile signal, press tile
CLEAR/OFFpad.Use hot pads to
reinove tile probe fl'oin tile food.
Do not use tongs to pull on it--they
might damage it.
CAUTION:Topreventpossibleburns,donot
unplug the probe from the oven outlet until the
oven has coolecLDonot store the probe in the
cookingcenter
NOTE:
If theprobe/sremovedfromthefoodbefore
thefinaltemperatureisreached,a tonewill
soundandthedisplaywill flashuntiltheprobe
isremovedfromtheoven.
Youwi// hear a fan whilecooklbgwith this
feature. Thefan will stop when the dooris
openedbut the heatwill not turn off.
Youcan use the tsYnereventhough youcannot
usetimed ovenoperations.
Convection Roasting Guide
Meats Minutes/Lb. Oven Temp. Internal Temp.
Beef Rib,BonelessRib, Rare 20 24 325°F 140°Ft
TopSirloin Medium 2428 325'_F 16ff_F
13to 5 Ibs.) Well 28 32 325"F 170W
BeefTenderloin Rare 10 14 325°F 140_FT
Medium 1418 325°F 16ff'F
Pork Bonedn,Boneless(3to 5Ibs.) 23 27 325'_F 170W
Ham Canned,Butt, Shank(3to 5 Ibs.fully cooked) 1418 325°F NOW
Lomb Bonedn,Boneless(3to 5Ibs.) Medium 17 20 325°F 16ff'F
Well 20 24 325°F 170'_F
Poultry WholeChicken(2_4to31/zIbs.) 2426 325°F 180'_ 185°F
CornishHens,Unstuffed(1to 11/zIbs.) 50 55total 325_F 18ff_ 185°F
Stuffed(1 to 11tzIhs.) 55 B0total 325°F 180<"185<_F
Duckling(4to 5 ibs.) 2426 325'_F 180<_185°F
Turkey,whole*
Unstuffed(10to 16ibs.) 8 11 325°F 180<_185°F
Unstuffed(18to 24 ibs.) 7 10 325_F 180<"185_F
TurkeyBreast(4to 6 ibs.) 16 19 325<'F 170W
* Stu//ed bbds gv'_e_zl//? _,q_zi_v 30-45 mi_ute_ additim*al n)asti_ time. ShiHd h;_:_a_d b_'ast ,vilhtoil to pn,ze_t
t Tim (5. D@a)tme_t o/Agricultun, sa)s "7"me/)('_Jis D@uhn; but you should h_ow that cookh N it to on(y 1401 memos
_ome /ood ))i_m*i_ N o_N_nis,ls may su_'_i'_,('."(So_m:e: .S)lfi,l'}x)d Book. }'ou_ 1,2itc/_4_ Guide. t iSlb_ tb_a tittle 1985.)
34
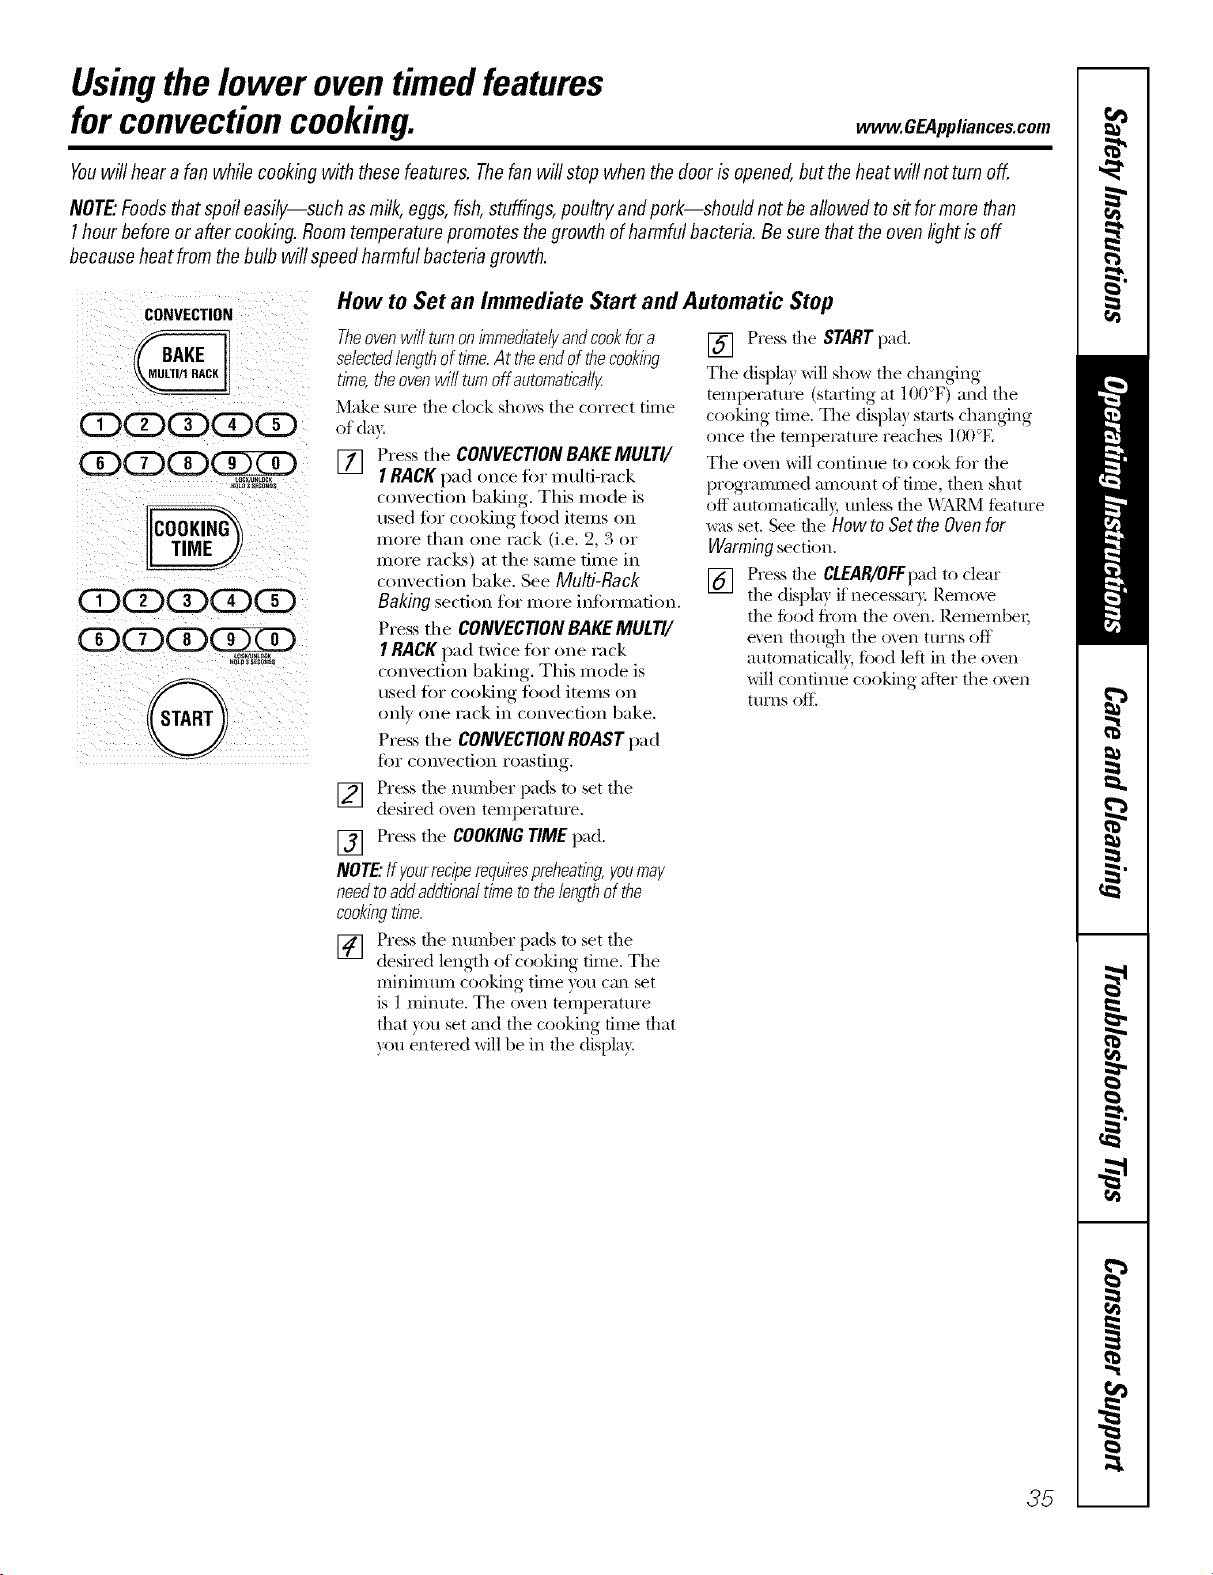
Usingthe lower oventimedfeatures
forconvectioncooking. www.GEAppliances.com
Youwill heara fan while cookbg with thesefeatures.Thefanwill stopwhenthedoor b opened,buttheheatwill notturn off.
NOTE"Foodsthat spoileasily--such asmilk,eggs,fish,stuffings,poultryandpork--should not beallowedto sit formorethan
1hourbeforeor after cooking.Roomtemperaturepromotesthegrowth of harmfulbacteria.Be surethattheovenlightisoff
becauseheatfromthe bulbwill speedharmfulbacteriagrowth.
CONVE_ION
QQQQQ
Q (ZICD
How to Set an Immediate Start and Automatic Stop
Theovenwilf turnonimmediate/)/andcookfor a
selectedlengthof time.At theendof thecooking
time,theovenwill turnoff automatica//y
Make sure the clock sho_:s the correct time
of day.
[] Press the CONVECTION BAKEMULTI/
I RACK pad once tot multi-rack
convection baking. This mode is
used tot cooking toad items on
more than one rack (i.e. 2, 3 or
more racks) at the same time in
convection bake, See Multi-Rack
Bakingsection for more inlimnadon.
Press the CONVECTIONBAKEMULTI/
I RACK pad twice tar one rack
convection baking. This mode is
used ti)i" cooking toad items on
only one rack in convection bake.
Press the CONVECTIONROAST pad
for convection roasting.
] Press the nunlber pads to set the
desired oven temperattu'e.
[] Press the COOKINGTIME pad.
NOTE'.If yourreciperequirespreheating,youmay
needtoadd addfiona/time tothe lengthof the
cookingtime,
] Press tile ntln-lber pads to set tile
desired length of cooking time. The
minimum cooking time you ca1 set
is 1 minute. The oxen tempeiature
that you set and the cooking time that
you enmred will be ill the displa):
[] Press the STARTpad.
The displa) will show the changing
tempeIature (starting at I()()°F) and the
cooking time. The displa) starts changing
once the tempeIature reaches 100°E
The oven will confintle to cook fi)r the
progianamed anaount of time, then shut
off automaficall}, unless the _\2M),M feature
was set. See the Howto Sotthe Oven for
Warming sectkm.
[] Press the CLEAR/OFFI)adto clear
the displa} if necessai 3 Remo_e
the fi_od fi'om the oven. RemembeI;
exert thotlgh tile oxen ttlI'ns off
autonaaticalb, fi)od left in the oven
will confintle cooking afier the oxen
ttlFnS Oft_
35
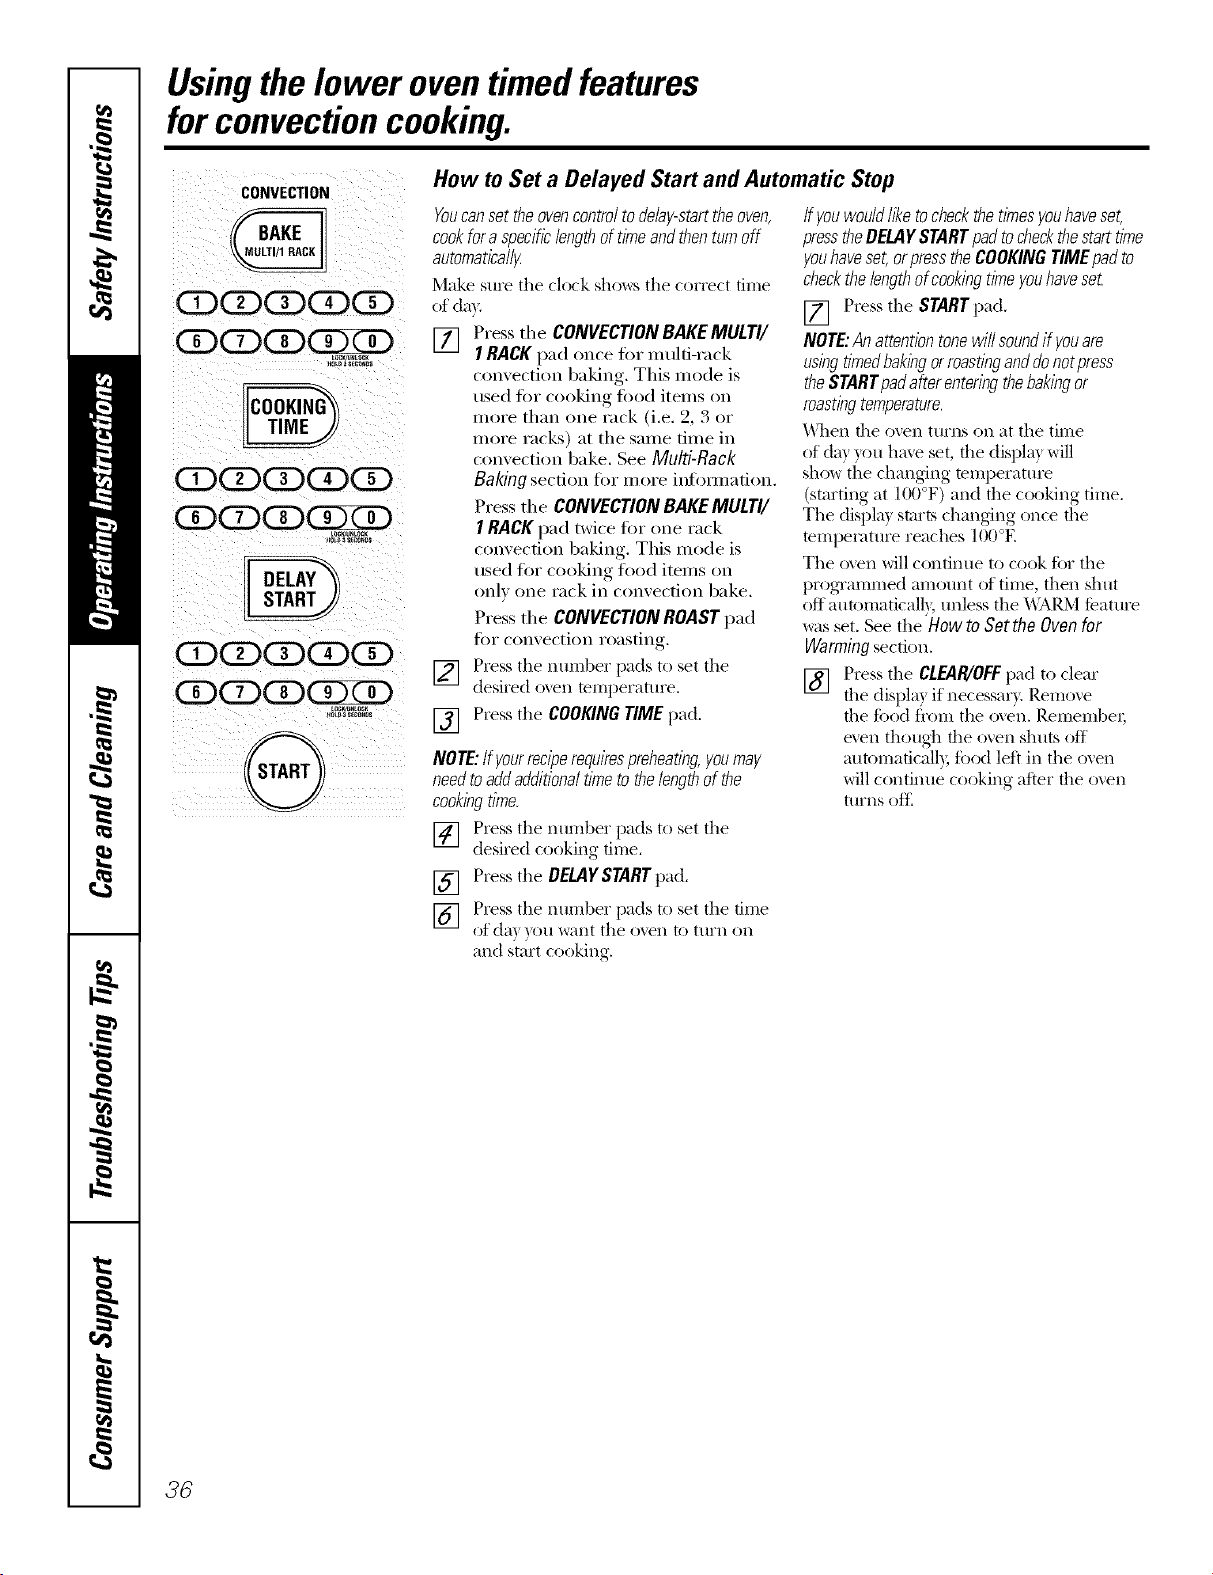
Usingthelower oventimed features
forconvectioncooking.
CONVECTION
CDCDCDCDCD
CDCD(Z)(2XD
JCr_0_L_CK
CD(Z)CDCDCD
How to Set a Delayed Start and Automatic Stop
Youcanset theovencontroltodelay-starttheoven,
cookfor aspecificlengthoftimeand thenturnoff
automatica//_
Make sIlre tile clock sho_,_:stile correct time
of day.
[] Press the CONVECTION BAKEMULTI/
I RACK pad once Ibr multi-rack
convection baking. This mode is
used tar cooking iliad items on
more than one rack (i.e. 2, 3 or
more racks) at the same time in
convection bake. See Multi-Rack
Baking secdon fi_r more infimnadon.
Press the CONVECTIONBAKE MULTI/
I RACK pad twice for one rack
convection baking. This mode is
used for cooking ti)od items oil
only one rack in convection bake.
Press the CONVECTIONROAST pad
for convection roasting.
] Press tile number pads to set tile
desired o_en temperatm'e.
[] Press tile COOKINGTIME pad.
NOTE:ffgourreciperequirespreheating,youmay
needtoaddadditionaltimeto thelengthof the
cookingtime.
] Press tile ntlillber pads to set tile
desired cooking time.
[] Press tile DELAYSNRTpad.
] Press tile number pads to set tile time
of da} you want tile o_en to ttlrn on
and start cooking.
ff youwouldlike tocheckthe timesyouhaveset,
presstheDELAYSTARTpad to check thestarttime
youhaveset,orpresstheCOOKINGTIMEpad to
checkthelengthofcookingtimeyouhavese_
[] Press tile STARTpad,
NOTE:An attentiontonewill soundif youare
usingtimedbakingorroastinganddonotpress
theSTARTpadafter enteringthebakingor
roastingtemperature
_\llen the o_vn tm'ns on at tile time
of da) you hme set, the displa) will
show tile changing mmperatm'e
(starting at I(!(I°F) and the cooking time.
Tile displa) starts changing once the
mmpeIatm'e reaches 100°E
Tile o_vn will continue to cook for tile
progTammed amount of time, then shut
off automaticalb', unless tile _\ARM teatm'e
was set. See tile Howto Setthe Oven for
Warming sectk)n.
[] Press tile CL_R/OFF pad to clear
the displa} if necessai T, Remme
the ti)od fl'onl tile o_en. Remembei;
even though the oven shuts Off
automatically, ti)od left in tile ()veil
will confintle cooking afier the ()veil
turns oiti
36
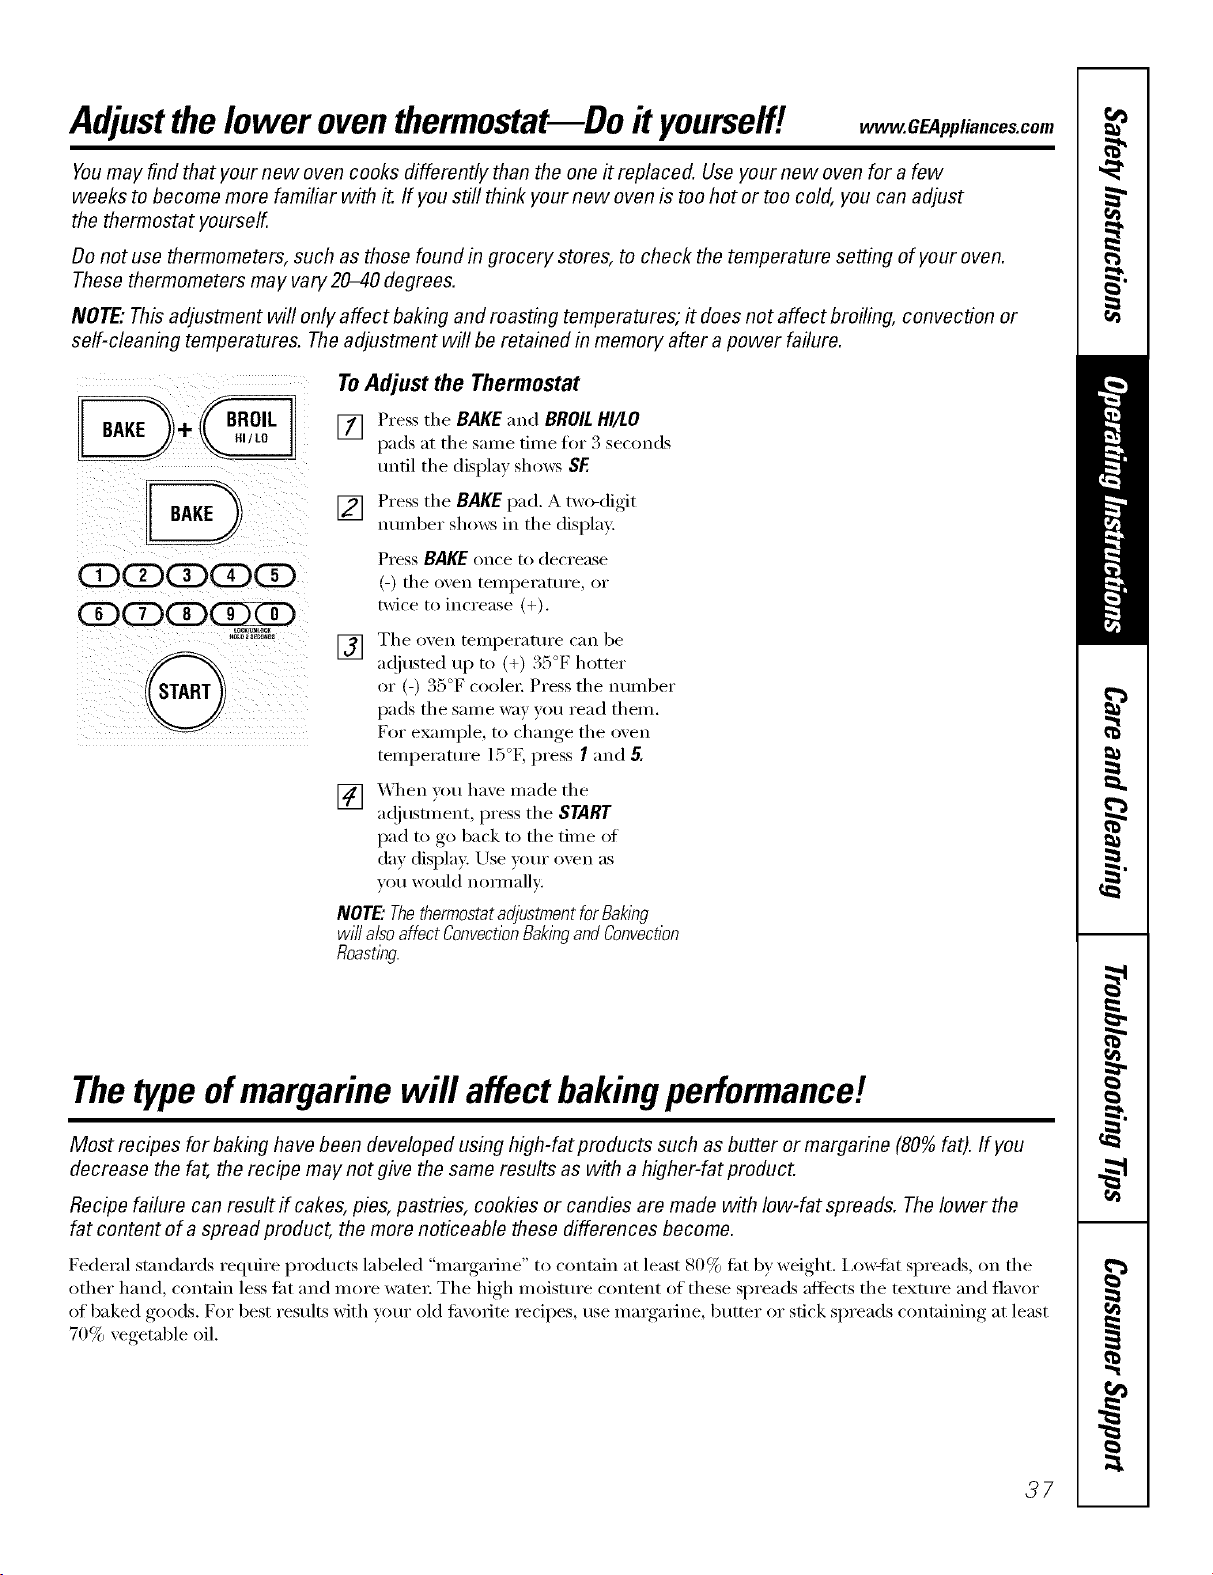
Adjustthelower oventhermostat--Do it yourself! .OEA.....ces.com
Youmay find that your new oven cooks differently than the one it replaced. Use your new oven for a few
weeks to become more familiar with it If you still think your new oven is too hot or too cold, you can adjust
the thermostat yourself.
Do not use thermometers, such as those found in grocery stores, to check the temperature setting of your oven.
These thermometers may vary20-40 degrees.
NOTE,"This adjustment will only affect baking and roasting temperatures; # does not affect broiling, convection or
self-cleaning temperatures. Theadjustment will be retained in memory after a power failure.
(ZPd2DdZPdZPdD
GbOD(Z)GDZ2)
LaC_Nt_C_
k
To Adjust the Thermostat
[] Press tile BAKEand BROILHI/LO
pads at tile same time for 3 seconds
until tile display sho_:s SE
[] Press the BAKE pad. A two.digit
number shows in tile display:
Press BAKEonce U) decrease
(-) file oven teilli)erattli'e , or
twice to increase (+).
[] Tile o_en temperatm'e can be
ac!justed up to (+) 35°[ _ hottei
or (-) 35°F coole_: Press tile nunlber
pads tile same way you read them.
For example, to change tile oven
temperatm'e 15°g press I and 5.
[] _._/en you ha',e made the
a(!iusm_ent, press tile START
pad to go back to tile time of
day display. Use yore" oven as
vou would nommllv:
NOTE"ThethermostatadjustmentforBaking
willalsoaffectConvectionBakingandConvection
Roasting.
Thetypeofmargarine will affect bakingperformancet.
Most recipes for baking have been developed using high-fat products such as butter or margarine (80% fat). If you
decrease the fat, the recipe may not give the same results as with a higher-fat product.
Recipe failure can result ff cakes, pies, pastries, cookies or candies are made with Iow-fat spreads. The lower the
fat content of a spread product, the more noticeable these differences become.
[_edei'al stnndards require I)I'odtlcts labeled "Ill_lI'_lI'iIle" to ('ont;lin at least 80% lilt by weight. I,o\wlilt spreads, oil tile
other hand, contnin less ti_t and more water The high moisture content of these spreads afti_cts tile mxture and flavor
of baked goods. For best results with yore" oM ti_\'orite recipes, use margarine, butter or stick spreads containing at least
70% vegetable oil.
37
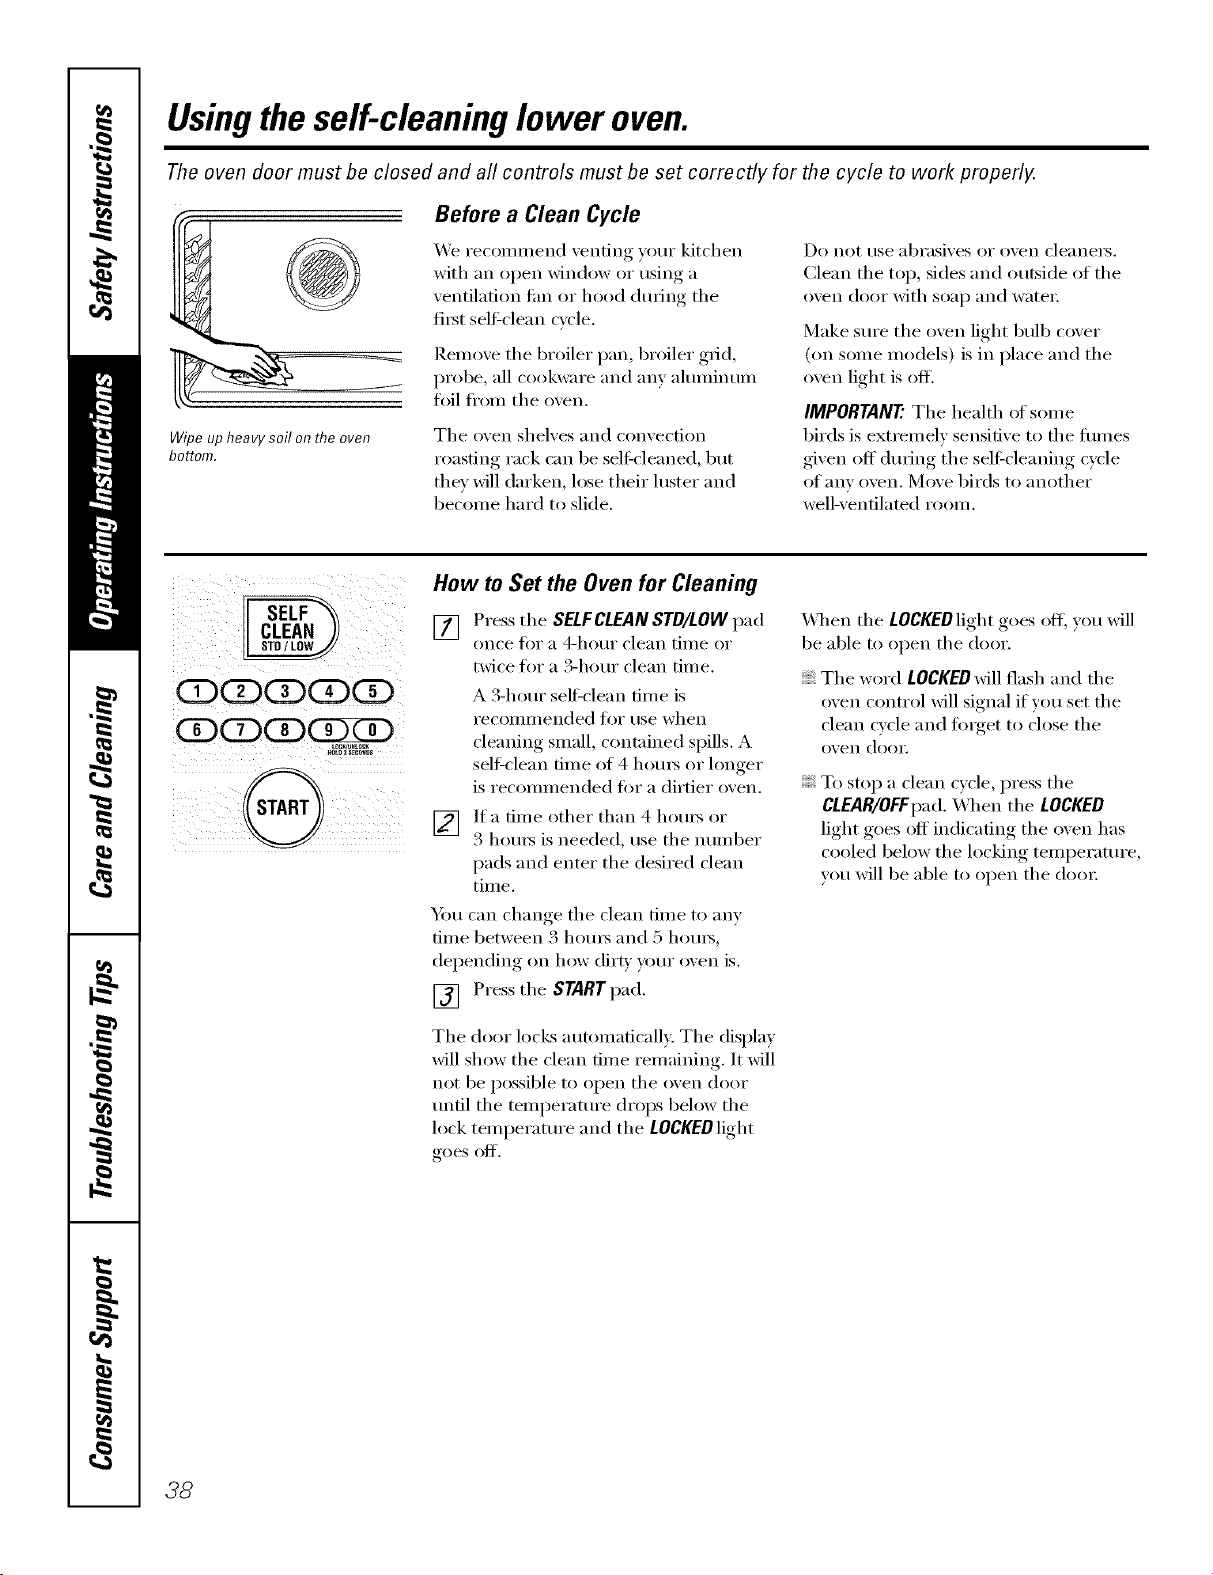
Usingtheself-cleaning lower oven.
The oven door must be closed and all controls must be set correctly for the cycle to work properly.
j
Wipeupheavysoilontheoven
bottom.
Before a Clean Cycle
We retort/mend venting your kitchen
with an open window or using a
ventilation tim or hood dm_ing the
fi_st sel6clean wcle.
]_.emove tile broiler pan, broiler grid,
probe, all cookware and anv almninum
t0il fl'om tile oven.
Tile oven shelves and convection
roasting rack (zm be sel6cleaned, but
they will darken, lose their luster and
become hard to slide.
Do not use abrasives or oven cleanei's.
Clean the top, sides and outside of the
oven door with soap and water;
Make sm'e the oven light bulb cover
(on some models) is in place and tile
oven light is ofl_
IMPORTANT'.Tile health of SOlne
birds is extremely sensitive to the tirades
given off dm_ing the sel6cleaning cycle
ofanv oven. Move birds to another
well-ventilated room.
(DCDCD(]DED
LDC_NL0_
U0L0__C0N0_
How to Set the Oven for Cleaning
[] Press the SELFCLEAN STD/LOW pad
once tOI" a _t-hotli" clean tillle or
twice for a 3-horn clean time.
A 3-hour self=clean time is
Fecoilli/lended for rise when
cleaning small, contained spills. A
self-clean time of 4 hom_ or longer
is recommended fi)r a dirtier oven.
[_] ]fa time other than 4 hom_ or
3 hom_ is needed, use tile number
pads and enter the desired clean
time.
_)/l can than(re tile clean tilne to }lliV
[.iI/le between _4hotli_ and 5 hot/i_,
dei)ending, on how dirt_, your, oxen is.
[] Press the START pad.
Tile door locks automatically. Tile display
will show the clean time remaining. It will
not be possible to open tile oven door
tmfil tile teml)erature drops below tile
lock temperature and tile LOCKEDlight
goes off.
\_]/en tile LOCKEDlight goes off; you will
be able to open tile door.
The word LOCKEDwill flash and the
_wen control will signal if you set the
clean cycle and fiwget to close the
oven dooi:
To stop a clean cycle, press tile
CLEAR/OFFpad. _4]_en tile LOCKED
light goes off indicating the (wen has
cooled below the locking temperature,
w)u will be able to open tile door
38
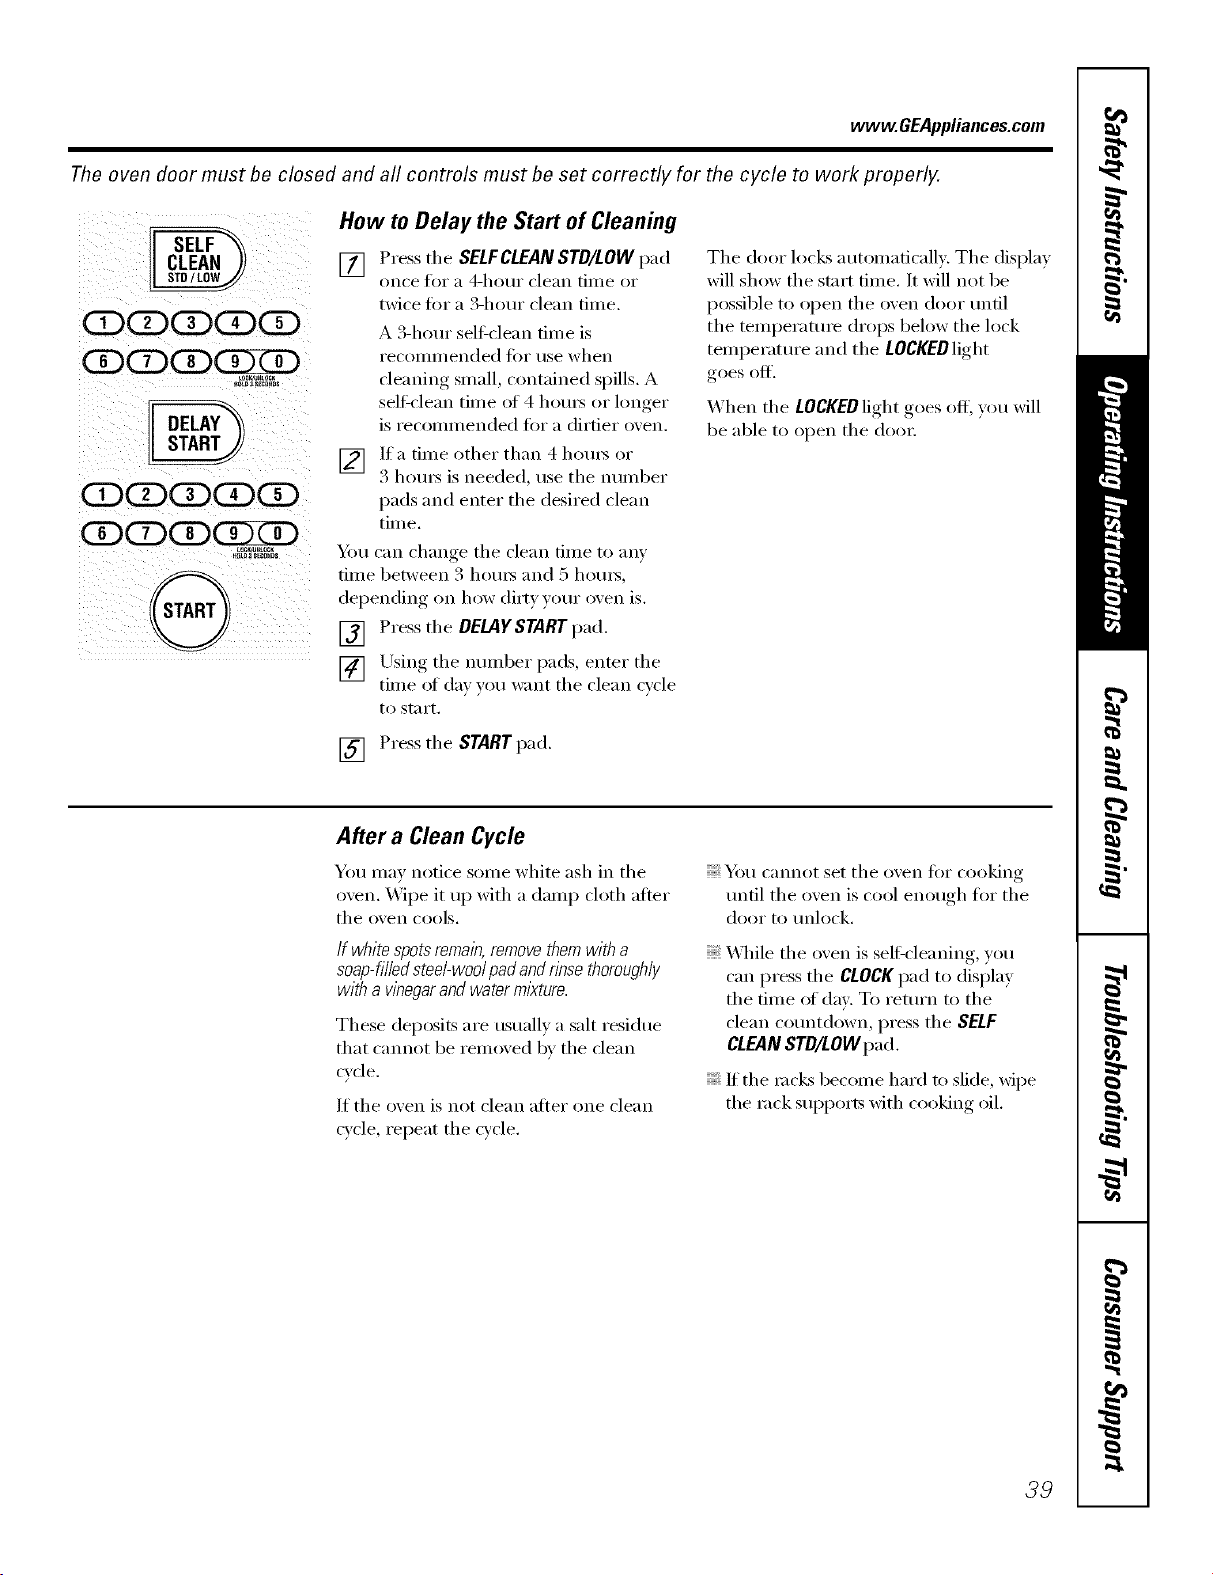
www.GEAppliances.com
The oven door must be closed and all controls must be set correctly for the cycle to work properly.
QQQQQ
QQ (Z)ZD
.oc_tocK
OQQQQ
QQQ(ZXD
G
How to Delay the Start of Cleaning
[] Press tile SELFCLEANSTD/LOW pad
once _t)I" a 4-hotli" clean tixlle oi"
twice fin" a 3-hour clean time.
A B-hour self2clean fiine is
I'eCOIllI/] ended tk}i"/ise when
cleaning small, contained spills. A
sell:clean time of 4 l/om_ or longer
is recommended fin" a dirtier oxen.
[_] lfa time other than 4 hom_ or
3 houI_ is needed, use tile nunlber
pads and enter the desired clean
time.
_:,t:l can change tile clean time to am
time between 3 houi_ and 5 houi_,
dei)ending, on how dirt))our oxen is.
[] Press tile DELAYSTART pad.
[] Using the number pads, enter tile
time of (lax "w)t:lwant tile clean cycle
to start,
The door locl<s automatically. Tile display
will show the start time. It will not be
possible to open the oven door until
tile temperature drops below tile lock
temperature and tile LOCKEDlight
goes off.
When tile LOCKEDlight goes off; you will
be able to open tile doo_:
[] Press tile START pad.
After a Clean Cycle
You may notice some white ash in tile
oven. Wipe it up with a damp cloth atter
tile oven cools.
If white spots remain,removethemwith a
soap-filledsteel-wool padandrinse thoroughly
with a vinegarand waterml)cture.
These deposits are usually a salt residue
that cannot be removed bv tile dean
cycle.
If tile oven is not clean alter one clean
cycle, repeat the cycle.
You cmmot set tile oven fin" cooking
until tile oxen is cool enough for tile
door to unlock.
X,_]/ile tile oven is sell=cleaning, you
can press tile CLOCKpad to display
tile time of day. To return to tile
clean countdown, press tile SELF
CLEANSTD/LOW pad.
If the mc!<s become hard to slide, wipe
tile rock supports with cooking oil.
39
Careand cleaning ofthecookingcenter.
Be sure electrical power is off and aft surfaces are cool before cleaning any part of the cooking center.
How to Remove Packaging Tape
To assure no dmnage is done to tile finish
of tile product, tile safest way to remove
tile adhesive left ti'om packaging tape on
new appliances is an application of a
household liquid dishwashing detergent,
mineral oil or cooking oil.
Apply wifl/a soft cloth and allow to soak.
_._]pe dry and then apply an appliance
polish to thoroughly clean and protect
the smthce.
NOTE:Theplastl? tape(onsomemodels)must
be removedfromall chrometrim./t cannot be
removedif it is bakedon.
40
Microwave Oven
Do not usea commercialoven cleaneron any
part of yourmicrowave oven.
Removable Turntableand TurntableSupport
To prevent breakage, do not place tile
turntable into water just after cooking.
_&'ash it careflflly in w;mn, sudsy water or
in the dishwasher
The tm'ntable and support can be
broken if dropped, Remember; do not
operate the microwave oven without the
turntable and sui)port in place.
To replace the support, place its center
post in the hole. Tm'n the support
aromM tmtil it seats into place.
Inside
Kee I) the microwave oven clean and
sweet-smelling. Opening the oven door a
few minutes after cooking helps air out
the interior: An occasional thorough
wiping with a solution _ffbaking soda and
water keeps tile interior fl'esh.
Spills and spatters are easy to i'elllOVe
ti'om walls and floor if they are wiped up
soon afteI" tile tood is i'eilloved. Soille
spatte_ wipe up with a paper towel, some
may require a damp cloth. Remove
greasy spatte_ with a sudsy cloth, then
rinse and d_v
Do not clean with metalscouringpads.Pieces
canbreakoff the pad,causingelectrical shock.
_._]pe up spatters on tile window on tile
inside of tile door daily. When tile
window is soiled, wash it with a damp
cloth. Rinse thoroughly and (h_':
Wipe metal and plastic parts on tile
inside of tile door fl'equenfly. Use a damp
cloth to remove all soil.
Do not useabrasives,suchas c/eanlbgpowders
or steel andp/astlc pads. Theymay mar the
surface.
Outside
Clean tile outside _ff tile microwave oven
with soap and a damp cloth, then rinse
with a damp cloth and dry. _._]pe tile
window clean with a damp cloth. Chrome
is best wiped with a damp cloth and then
with a (h_' towel.
Door Surface
When cleaning SUltilces of door and oven
that come together on closing the dora;
use only mild, non-abrasive soaps or
detergents applied with a sponge or
soft cloth.
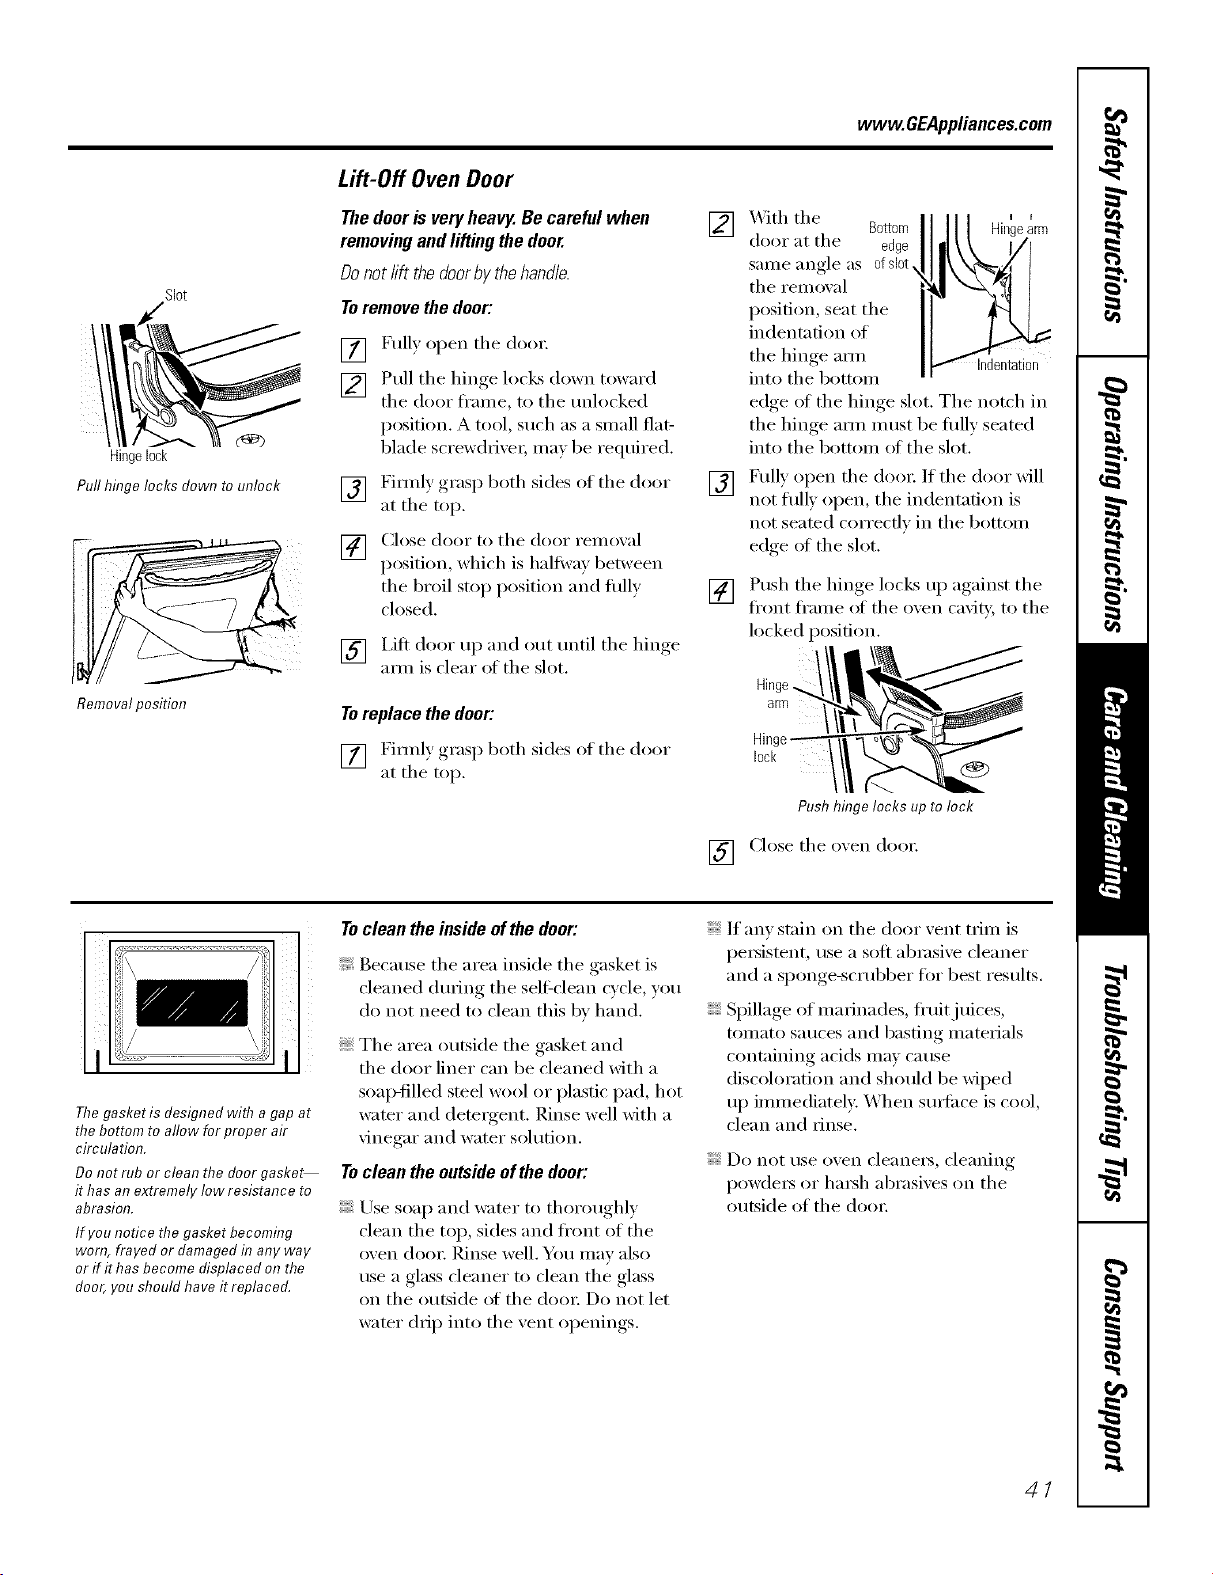
www.GEAppliances.com
Slot
Hingelock
Pull hinge locks down to unlock
Removalposition
Lift-Off Oven Door
Thedoorisveryheavy.Becarefulwhen
removingandliftingthedoor.
Donotliftthedoorbythehandle.
Toremovethedoor:
[] Fully open tile dora:
[] Pull the hinge locks down toward
tile door fl'ame, to tile unlocked
position. A tool, such as a small flat-
blade screwdriver; may be required.
[] Firefly grasp both sides of tile door
at tile top.
[] Close door to tile door remoxal
position, which is half Win between
the broil stop position and flfllv
closed.
[] I,ift door up and out tmtil tile hinge
aml is clear of the slot.
Toreplace the door:
[] Firefly grasp both sides of tile door
at tile top.
[]
[]
[]
XAqtl/tile Bottom
door at tile edge
same angle as ofslot
tile i'eillox al
position, seat tile
indentation of
tile hinge aml Indentation
into tile bottom
edoe of the him*e slot. The notch in
tile hinge aml must be fifth' seated
into tile bottom of tile slot.
Fully open tile doo_: If tile door will
not flfll) open, tile indentation is
not seated correctly in tile bottom
edge of the slot,
Push tile hinge locks up against tile
fl'ont fl'ame of tile oxen cax_t_, to tile
locked position.
Hinge
arm
lock
Push hinge locks up to lock
[] Close tile oven door:
Thegasket is designed with a gap at
the bottom to allow for proper air
circulation.
Do not rub or cleat?the door gaske_
it has an extremely low resistance to
abrasion.
If you notice the gasket becomfl?g
won?,frayed or damaged fl?any way
or if it has become displaced on the
door, you should have it replaced.
Toclean the inside ofthe door:
Because tile area inside tile gasket is
cleaned dm'ing tile self clean c_cle you
do not need to clean this by hand.
Tile area outside tile gasket and
tile door liner can be cleaned Mth a
soap-filled steel wool or plastic pad, hot
wamr and (lem_gent. Rinse well with a
;'inegar and water solution.
To clean the outside of the door:
Use soap and water to thoroughly
clean tile top, sides and ti'ont of tile
oven (lore: Pdnse well. You may also
use a glass cleaner to clean tile glass
on tile outside of tile dora: Do not let
water drip into tile vent openings.
If anv stain on tile door vent trim is
persistent, use a soft abrasive cleaner
and a sponge-scrubber ti)r best results.
Spillage of marhm(les, fl'uitjuices,
tomato sauces and basting materials
containing acids may cause
discoloration and should be wiped
up immediatel> When stlil'ilce is cool,
clean and rinse.
Do not use oxen cleaners, cleaning
pow(le_ or l/a_h abrasixes on tile
outside of tile dora:
41
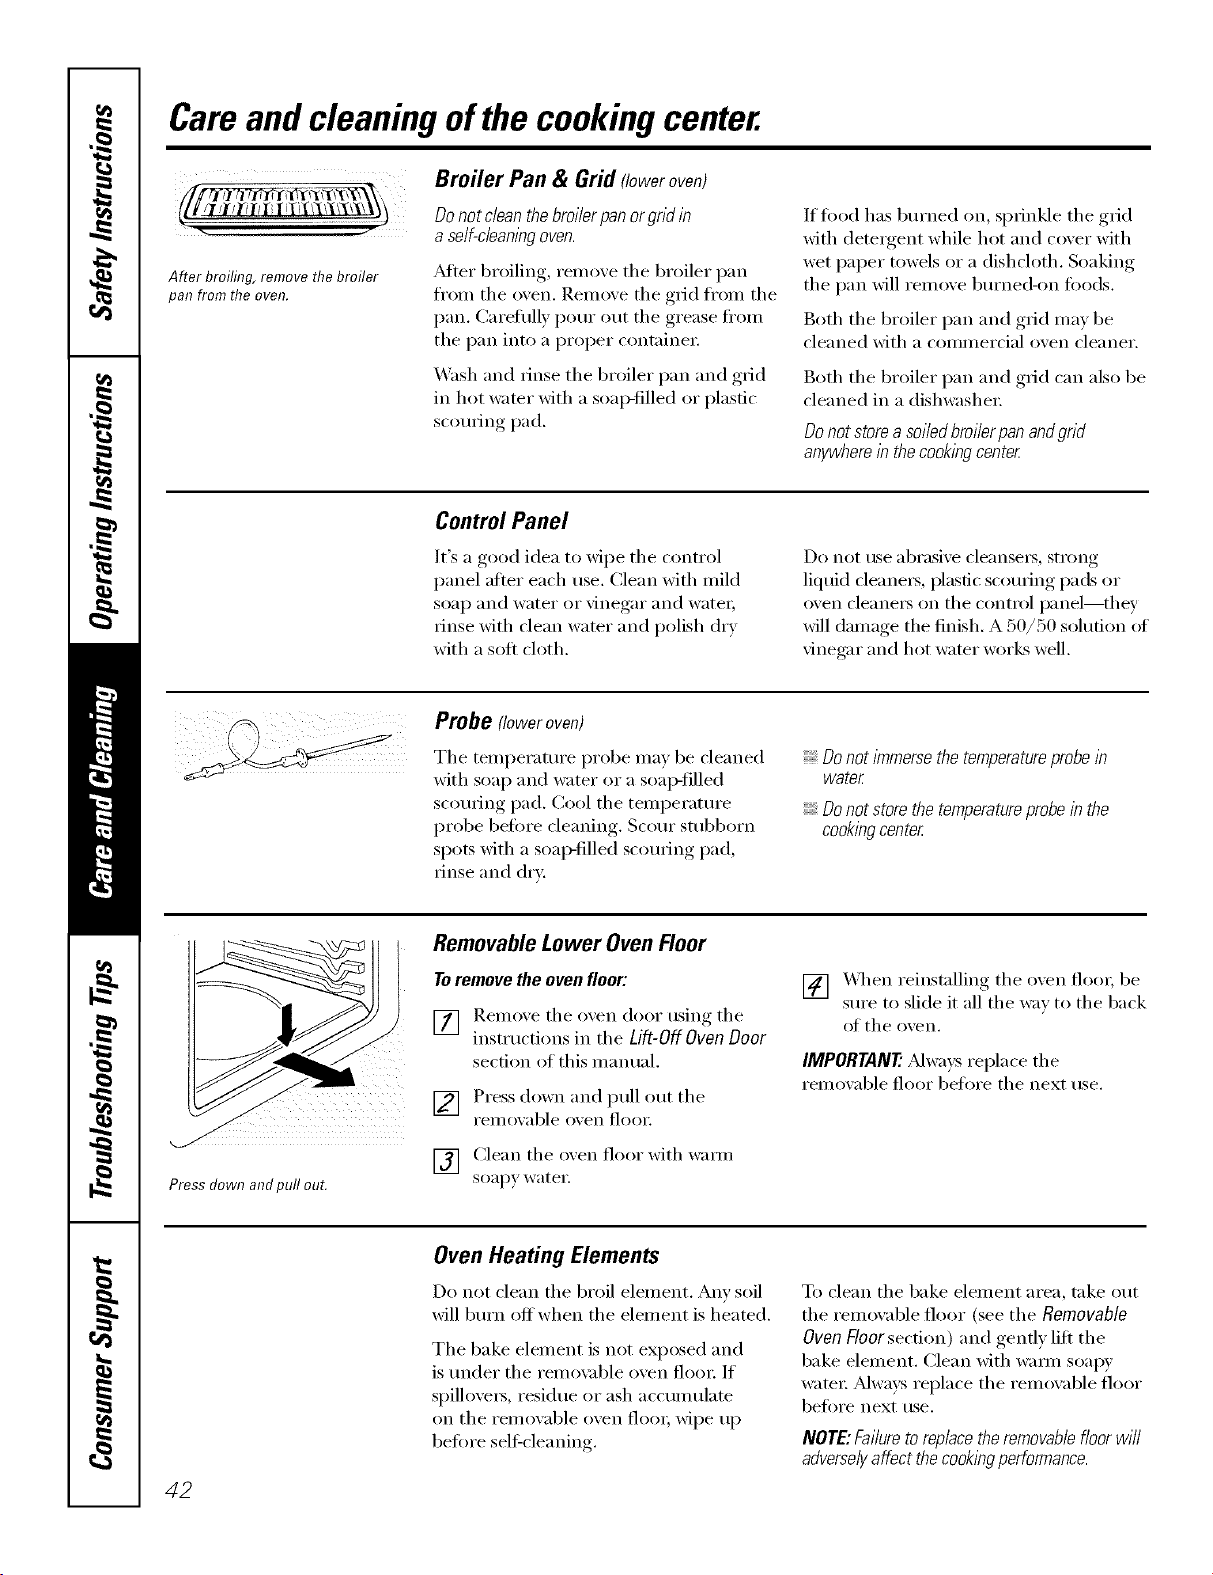
Careand cleaning ofthe cookingcenter.
After broiling, remove the broiler
pan from the even.
Broiler Pan & Grid floweroven)
Donot dean thebroiler pan orgnd in
aseif-ciean/bgoven.
Mter broiling, remove the broiler pan
fl'{)m the oven. Remove the grid fl'om the
pail (_arefully pour out the grease fl'Oln
the pan into a proper containe_:
_,V_shand rinse the broiler pan and grid
in hot water with a soap-filled or plastic
scouting pad.
If fi)od has bm'ned on, sprinkle the grid
with detergent while hot and cover with
wet paper towels or a dishcloth. Soaking
the pan will remove bm'ned-on ti)o(ls.
Both the broiler pan and grid may be
{'leaned with a commercial oven {'leanei2
Both the broiler pan and grid can also be
{leaned in a dishwasher
Donotstoreasoiiedbroiierpanandgrid
anywhereinthecookingcenter
Control Panel
It's a good idea to wipe the control
panel alter each use. Clean with mild
soap and water or vinegar and water;
rinse with clean wamr and polish dry
with a sott cloth.
Do not ttse abrasive cleanse[_, strong
liquid cleaners, plastic scorning pads or
_x'en dea ne_s on the control pa nel--th ey
will damage the finish. A 50/50 solution {ff
vinegm" and hot water works well.
Probe floweroven)
The temperature probe ma) be cleaned
with soap and water or a soap-filled
scouting pad. Cool the temperatm'e
probe before cleaning. Scorn" stubborn
spots with a soap-filled scouting pad,
rinse and drx:
Donot immersethe temperatureprobe/b
wate_
Donot storethe temperatureprobein the
cookingcente_
Press down andpull out.
RemovableLower OvenFloor
Toremove the oven floor:
[] Remo_e the o_en door using the
instructions in the Lift-Off Oven Door
section of this manual.
[] Press down and pull out the
i'eillO_,able o_,en IqOOI:
[T_ Clean the oven floorwith wam]
soapy water
[] _._q]en reinstalling the oven flo{m be
sure to slide it all the way to the back
of the o'_en.
IMPORTANT'.Mways replace the
removable floor beflwe the next use.
42
Oven Heating Elements
Do not clean the broil element. Am' soil
will bm'n offwhen the element is heated.
The bake element is not exposed and
is under the remox;d)le oven flora: If
spilloveI_, residue or ash acculmllate
on the remowd)le oven flora; wipe up
heft}re sel6cleaning.
T{}clean the bake element area, take out
the remox:d)le floor (see the Removable
Oven Floor section) and gently lilt the
bake element. Clean with wam] soap)'
wamr Alwa):s replace the remox_d)le floor
befi}re next use.
NOTE:Failureto replacethe removabiefloorwii/
adverselyaffect the cookingperformance.
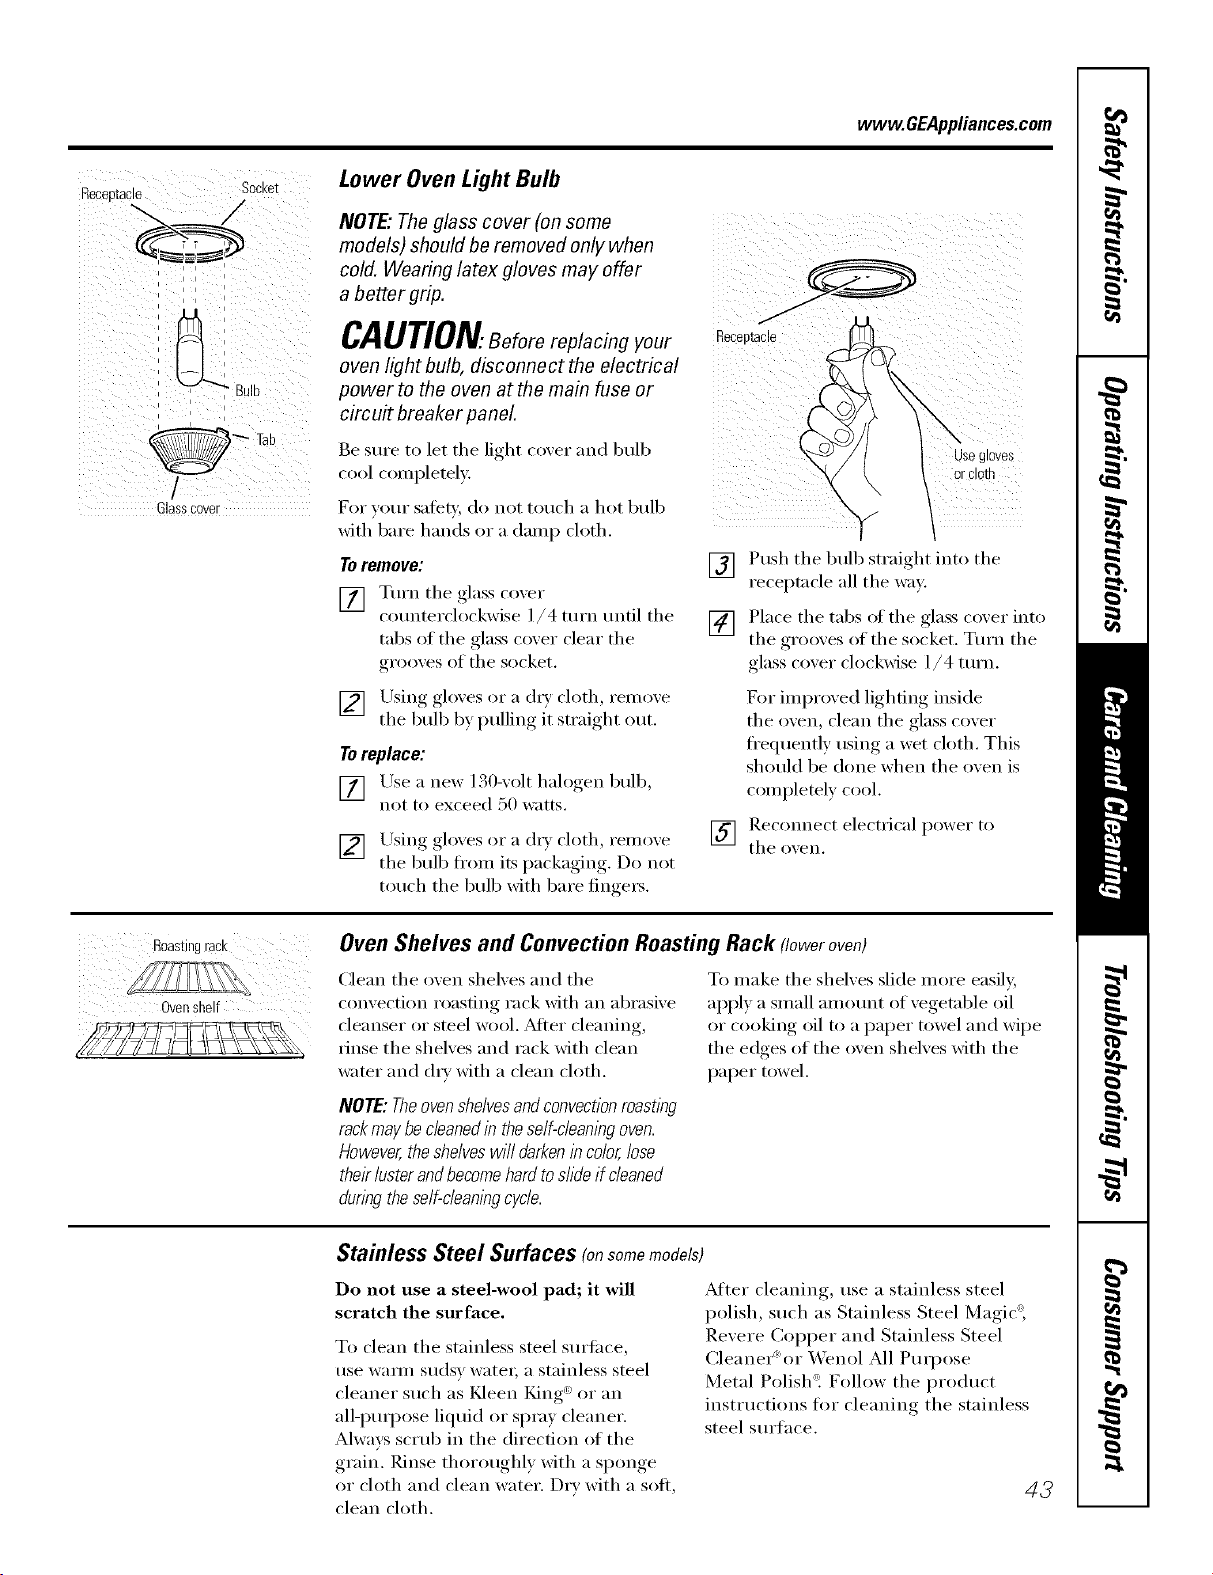
qece0[acle
wvvw.GEAppliances.com
S0cke[
" BUD
I
/
Glasscover
Lower Oven Light Bulb
NOTE," The glass cover (on some
models) should be removed only when
cold. Wearing latex gloves may offer
a better grip.
CAUTION.Beforereplacingyour
oven light bulb, disconnect the electrical
power to the oven at the main fuse or
circuit breaker panel
ge StlI'e to let tile light cover and bulb
cool completely.
For your satet,i, do not touch a hot bulb
with bare hands or a damp cloth.
Toremove:
[] Turn tile glass co_er
c(mnterclockwise 1/4 turn imtil tile
tabs (>ftile glass cover clear tile
gro(wes of tile socket.
[] Using gloves or a (h T cloth, remox, e
tile bulb by pulling it straight out.
Toreplace:
[] Use a new 130-volt halogen bulb,
not to exceed 50 watts.
[] Using gloxes or a dcy cloth renlove
tile bull) fi'om its packaging. Do not
touch tile bulb with bare finge_s.
Usegl0ves
orcloth
[] Push tile bulb straight into tile
receptacle all the way.
[] Place tile tabs of tile glass cover into
tile grooves of the socket. Turn tile
glass coxer clockwise 1/4 turn.
For impr(wed lighting inside
tile oven, clean tile glass cover
fl'equently using a wet cloth. This
should be done when tile oven is
completely cool.
] Rec(mnect electrical power to
tile o'_en.
Roastingrack
Ovenshelf
Oven Shelves and Convection Roasting Rack floweroven)
Clean tile oven shelves and tile
convection roasting rack with an abrasive
cleanser or steel wool. ?dter cleaning,
rinse tile shelves and rack with clean
water and (h_' with a clean cloth.
NOTE:Theovenshelvesandconvectionroasting
rackmaybecleanedin theself-cleaningoven.
However,theshelveswilldarkenincolor,lose
theirlusterandbecomehardtoslideif cleaned
duringtheself-cleaningcycle.
To make tile shelves slide more easily,
apply a small amomlt of vegetable oil
or cooking oil to a paper towel and wipe
the edges of the oven shelves with the
paper towel.
Stainless Steel Surfaces (onsomemodels)
Do not use a steel-wool pad; it will
scratch the surface.
To clean tile stainless steel surtilce,
use warn/ sudsy water; a stainless steel
cleaner such as t(leen King <`>or an
all-pml_ose liquid or spray cleaner.
Always Sclub ill tile direction of tile
grain. Pdnse thoroughly with a sponge
or cloth and clean water. Dry with a soft,
clean cloth.
After cleaning, use a stainless steel
polish, such as Stainless Steel Magic',
Revere (_opper and Stainless Steel
Cleaner'= or _A'enol All Puq)ose
Metal Polish _. Follow tile product
instructions ti)r cleaning tile stainless
steel suriace.
43
Beforeyoucall forservice...
Troubleshooting -tips
Save time and money! Review the charts on the following
pages first and you may not need to call for service.
Possible Causes What To Do
You forgot to press the
START/PAUSE pad.
Controlpanel on * Press tile START/PAUSEpad,
microwave oven
will not operate Door not securely closed. * Make sure tile mi(rl)wave (wen (l()l)r is (l()sed.
Another fm)ction was pressed. * Press the CLFJIR/OFFpad twice to cancel it and
begin again.
The CLEAR/OFFpad was * Begin again.
pressed accidentally.
Oven controls * While using Time Defl'ost, numl_ers not entered after
improperly set. l)ressin'_ _ the AUTO DEFROST pad.
"SENSOR ERROR" During a sensor * The microwaxe oven door shotdd not be opened
appears in the fm)ction the microwave before the time begins to count down in the display.
microwave oven oven door was opened
display too soon.
Microwave oven light Light bull) is loose * Call for service.
does not work or defective.
Foods overcooked or _aryh)g density and a3notmt * _,u'vin(_._ (lensitv and amount sometimes require more
undercookedin the of foods being cooked, cooking time.
microwave oven
Food not turned or stirred * Ttwn or stir loud and begin again.
as called for in the recipe.
Too many dishes in the * [)l) not overload vl)t/i" lnicrow;we oven.
oven at the same time.
Food not thoroughly * See tile Using the microwave sensor features section.
defrosted.
Improper cookware or * See tile Microwave safe cookware section of the
coverings being used. Important Safety Instructions section.
Humidity or moisture in * Make sm'e tile inside of tile oven and tile outside of
the oven will lessen the tile contnine_s are dry.
sensor cooking time.
Food not allowed to stand. * Some standing time is recommended for certain
vegetables cooked with the Sensor (_ontrols.
44
www.GEAppliances.com
Lower oven control
signals after entering
cooking time or
delay start
Possible Causes
You forgot to enter a
bake temperature or
clemfing time.
What To Do
• Press the BAKE pad and desired temperature or tile
SELF CLEAN pad and desired clean time.
Fooddoes not bake or Oven controls improperly set. • See tile Using the lower oven section.
mast properly in the
lower oven Shelf position is incorrect • See the Using the lower oven se('ti_m.
or the shelf is not level.
Incorrect cookware or • See the Using the lower oven section.
cookware of improper
size being used.
Oven thermostat needs • See the Adjust the lower oven thermostat--Do it yourself!
adjustment, section.
Fooddoes notbroil Oven controls improperly set. • Make stu'e you press the BROILHI/LO pad.
properly in the
lower oven hnproper shelf position • See the Broiling Guide.
being used.
Cookware not suited • Else the broiling pan and grid that came with wmr oven.
for broiling,
Alumhamn foil used on the • See the Using the lower oven section.
the hroiling pan and grid has
not been fitted properly mad
slit as recommended.
In some areas the power • Preheat the broil element tbr 10 minutes.
voltage) maybe low. • Broil fl)r the lon,_est_, period of time recommended in
the Broiling Guide.
Clock and timer A fuse in your home may be • Replace the fl/se or reset the circuit breakel;
do not work or blown or the circuit breaker
display goes blank tripped.
Controls improperly set. • See the Using the clock and lower oven timer secti_m
fi)r the h)wer oven oh)ok.
The clock is in the
black-out mode.
• See tile Display On/Offsecfion fiw tile microwaxe oven dock.
• See tile Special features of your lower oven control
section tor tile h)wer ox, en clock,
• See tile Display On/Offsecfion fiw tile microwave oven clock.
45
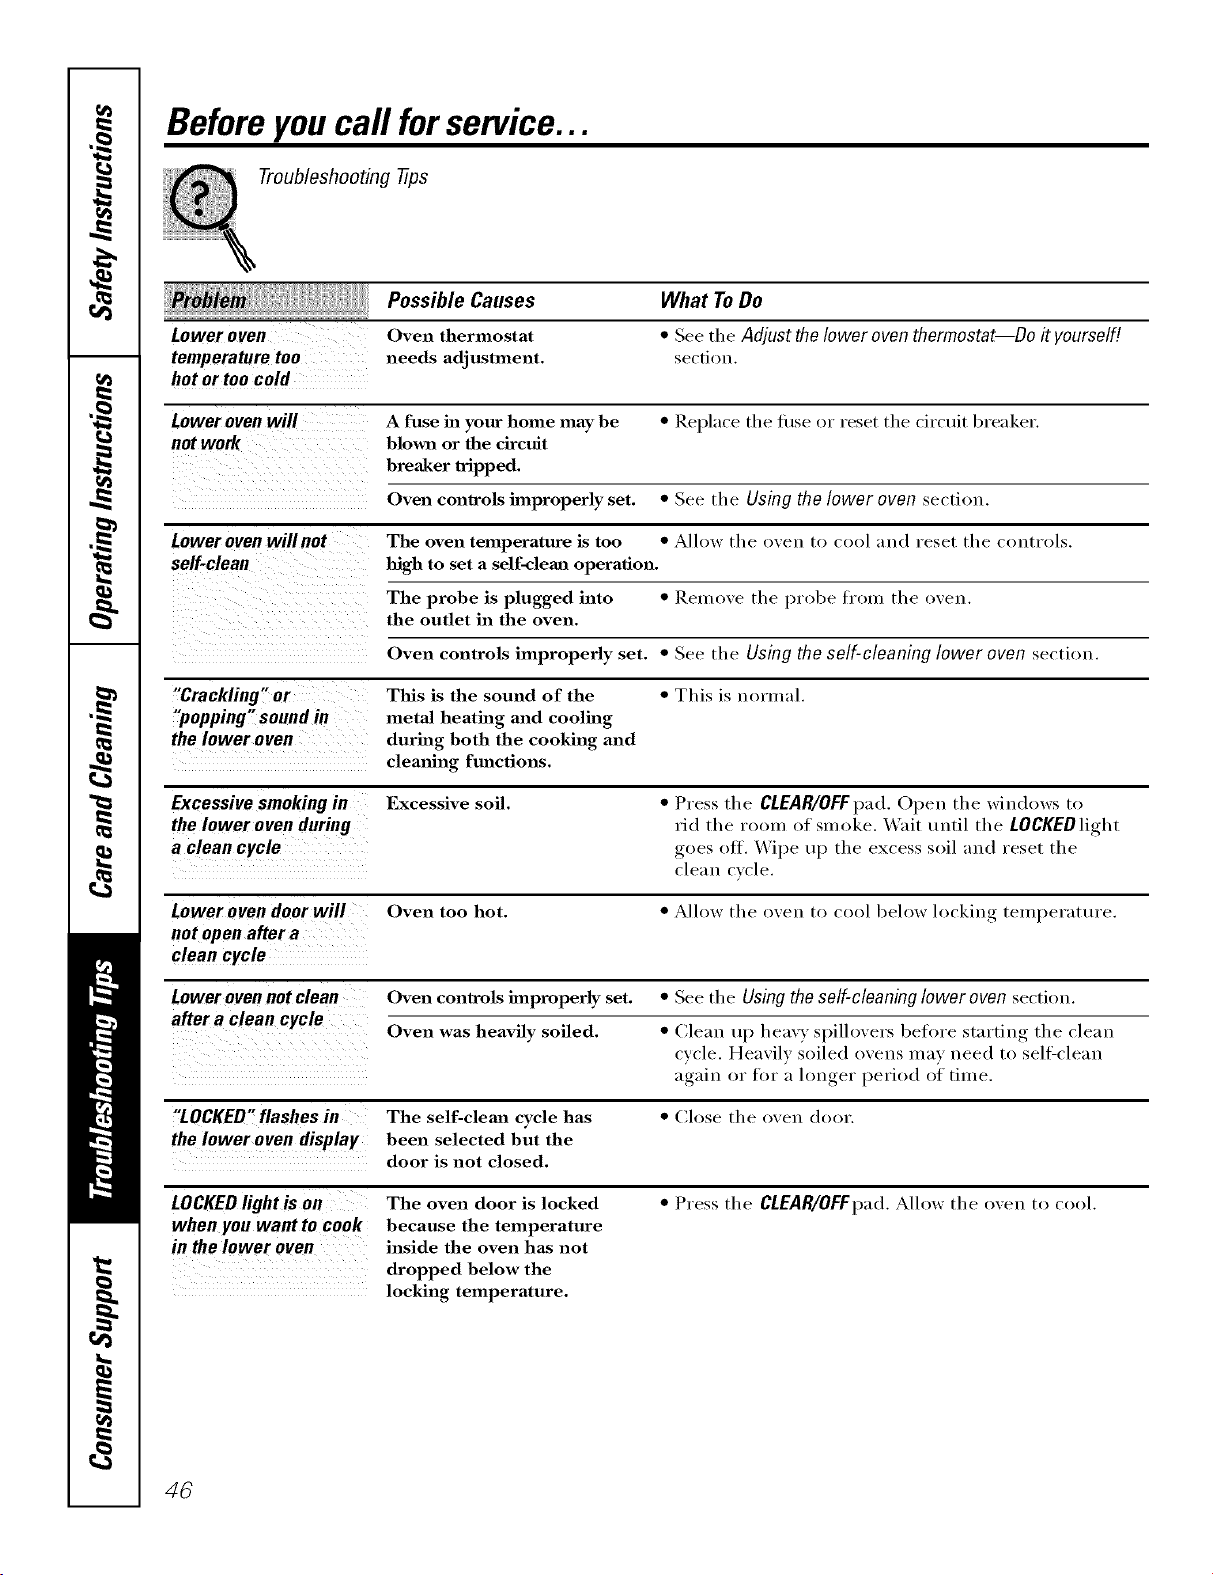
Beforeyoucall forservice...
Troubleshooting tips
Possible Causes What To Do
Loweroven Oven thermostat * Seetile Adjust thelower oventhermostat--Do it yourself!
temperature tee needs adjustment, sectiou.
hot ortoo cold
Lower oven will A fuse h_ your home may be *Repla(ethethseorresetthecircuitl_reaker.
not work blown or the circuit
breaker tripped.
Oven conwols improperly set. * See tile Using the lower oven section.
Lower oven willnot The oven temperature is too * Allow the oven to cool aud reset tile coutrols.
self-clean high to set a self-cleml operation.
The probe is plugged into * Remove tile probe from tile oven.
the outlet in the oven.
Oven controls improperly set. * See tile Using the self-cleaning lower oven section.
"Crackling" or This is the sound of the * This is uormal.
"popping" soundin metal heating and cooling
thelower oven during both the cooking and
clemfing functions.
Excessive smoking in Excessive soil. * Press the CLEAR/OFF pad. Open tile windows to
the lower oven during rid the room i)f smoke. Wait tmtil tile LOCKED light
a clean cycle goes ott. \_'ipe tq) the excess soil and reset tile
cleau cycle.
Lower oven door will Oven too hot. * Allow the oven to cool below locking, temlaerature.
not openaftera
clean cycle
Lower oven not clean Oven controls improperly set. * See tile Using the self-cleaning lower oven section.
after a clean cycle Oven was heavily soiled. * (_leau tip heavy spilh)vers betl)re startiug tile cleau
cycle. Heavily soiled ovens may need tl) sell:clean
again or fin" a h)n,_er_ period i)f time.
"LOCKED"flashes in The self-cleml cycle has * ('Jose the i)veu door.
the lower ovendisplay been selected but the
door is not closed.
LOCKEDlight is on The oven door is locked * Press the CLEAR/OFFpad.Alh)w the oven tl) cool.
when you want to cook because the temperature
in thelower oven inside the oven has not
dropped below the
locking temperature.
4C
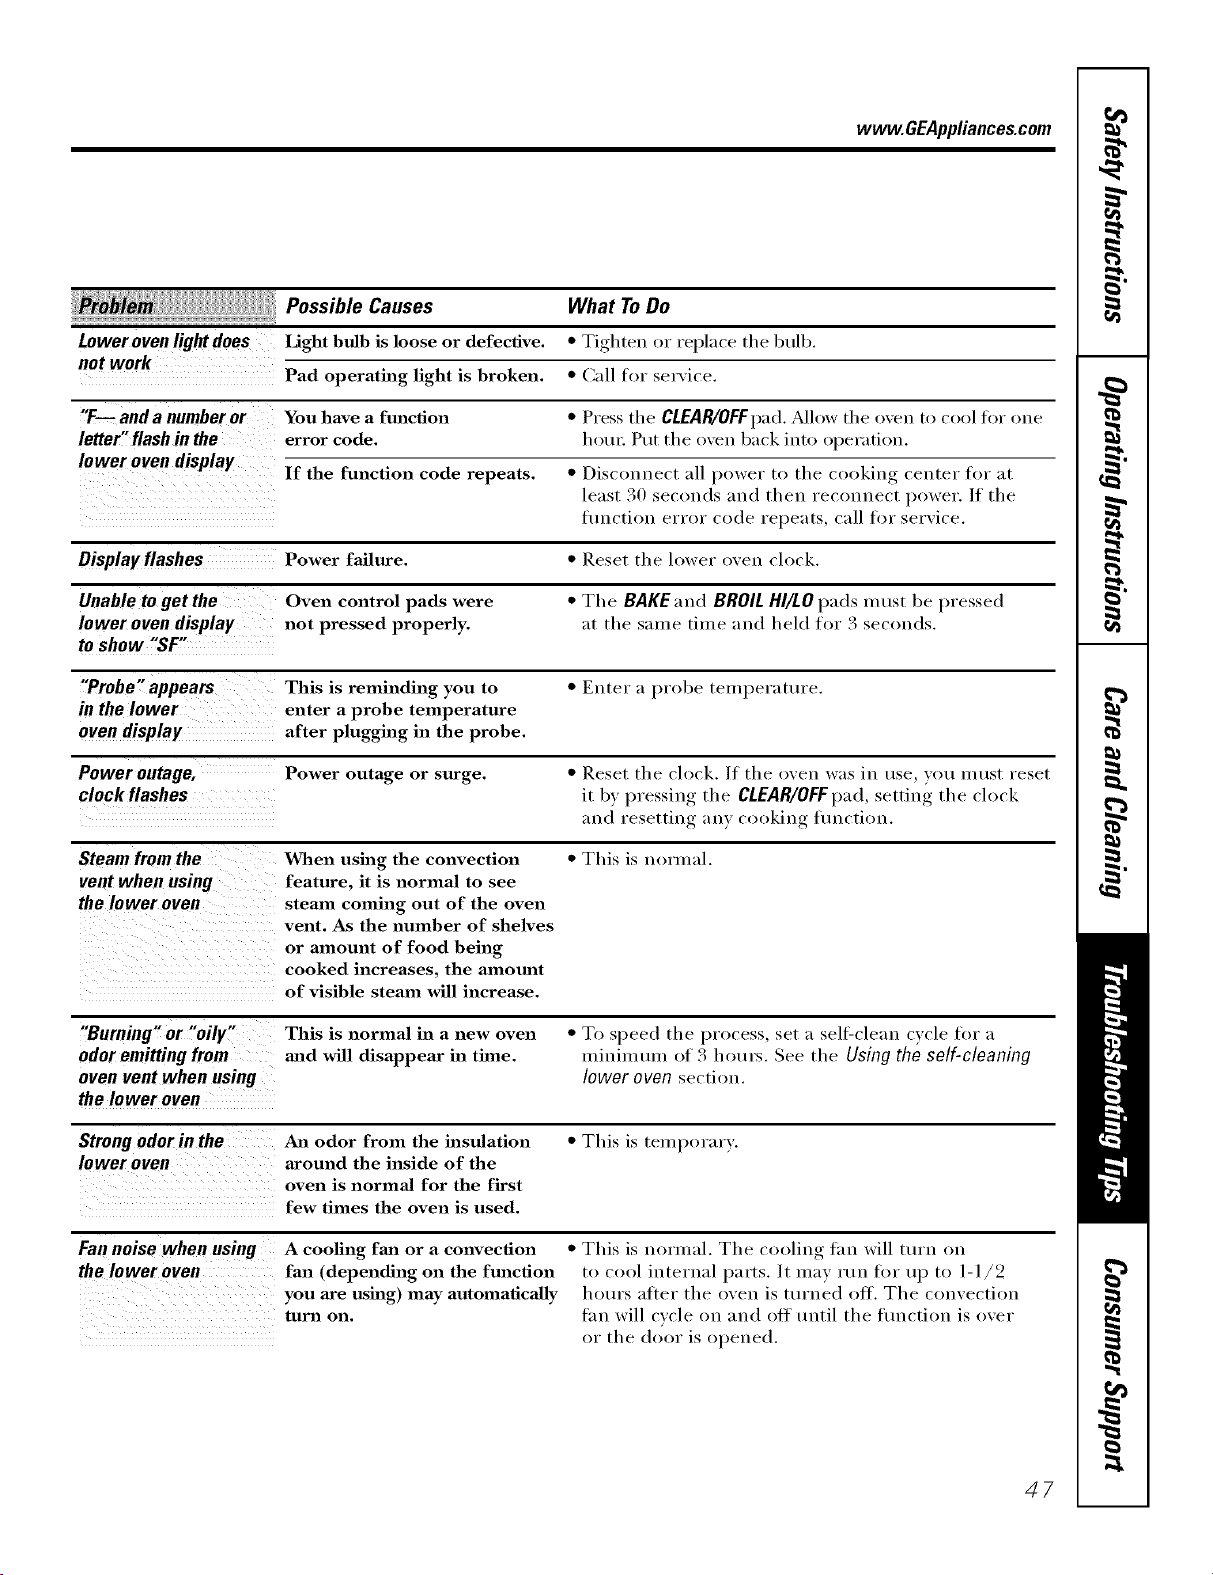
www.GEAppliances.com
! Possible Causes
Lower ove n fight does Light bulb is loose or defective.
Pad operating light is broken.
What ToDe
• Tighten or replace the bulb.
• Call for serxice.
"F-- and a number or You have a function • Press the CLEAR/OFFpad. Mlow the oxen to cool for one
letter, flash in the error code. hem: Put the oxen back into oi)eration.
lower oven display If the function code repeats. • Disconnect ;Ill power to the cooking center for at
least 30 seconds and then reconnect power. If the
flmction error code repeats, call for serxice.
Oisplayflashes Power failure. • Reset the lower oxen clock.
Unable to getthe Oven control pads were • The BAKEand BROIL HI/LOpads must be pressed
lower ovendisplay not pressed properly, at the same time and held for 3 seconds.
toshow "SF'
"Probe.appears This is reminding you to • Enter a probe teml)erature.
in the lower enter a probe temperature
oven display after plugging in the probe.
Power outage, Power outage or surge. • Reset the clock. If tile oxen was ill use, you must reset
clock flashes it by, I)ressim'_ _ the CLEAR/OFFpad,setting the clock
and resetting any cooking flmction.
Steam from the When using the convection • This is hernial.
vent when using feature, it is normal to see
the lower oven steam coming out of the oven
vent. As the number of shelves
or amount of food being
cooked increases, the alnomat
of visible steam will increase.
"Burninf, or !,oily, This is normal in a new oven • To speed the process, set a sell=clean cxcle tot a
odor emitting from mad will disappear in thne. mininuun of 3 horus. See the Using the self-cleaning
oven vent when using lower oven section.
the lower oven
Strong odor in the An odor from the insulation • This is temporary.
lower oven around the inside of the
oven is normaJ for the first
few times the oven is used.
Fan noise when using A coofing fan or a convection
the lower oven fan (depending on the fmaction
you axe using) may automatically
tuna on.
• This is nornlal. The cooling tim will turn on
to cool internal parts. It may run tm" up to 1-1/9
horn's aDer the oven is turned off. The convection
tan will cycle on and off until the timction is over
or the door is opened.
47
m
Notes.
m
m
O_
48
GE Service Protection Plus 'M
GE, a name recognized worldwide %r quality' and dependability, oflers y'ou
Service Protection Plus'_'--comprehensive protection on all y'our appliances--
No Matter What Brand!
Benefits Include:
• Backed by GE
• All brmads covered
• Unlimited service calls
• All parts mad labor costs included
• No out-of-pocket expenses
• No hidden deductibles
• One 800 number to call
We71CoverAnyAppliance.
Anywhere. Anytime.*
You will be completely satisfied with our service protection or you ma} request ,your inone,_ back
on the remaining value of 3our contract. No questions asked. It's that simple.
Protect yore" reffigerat(m dishwasher; washer and dryer; range, TV, VCR and much more--rely brand!
Plus there's no extra charge tot eulergency ser;'ice and low inonthly financing is available. Even icelnaker
coverage and tood spoilage protection is ottered. You can rest eas> knowing that all your valuable
household products are protected against expensive repairs.
Place your confidence in (;E and call us in the IU.S. toll-free at _tllt._Z_.ZZZ_
foY UlOI'e inloi'u/ation.
"*Allbrands cmered, up to 2(}years old. in the contin< nlal I_.S.
_.. (2."._22.............
Please place in envelope and mail to:
General Electric Company
Warranty Registration Department
EO. Box 32150
Louisville, KY 40232-2150
49
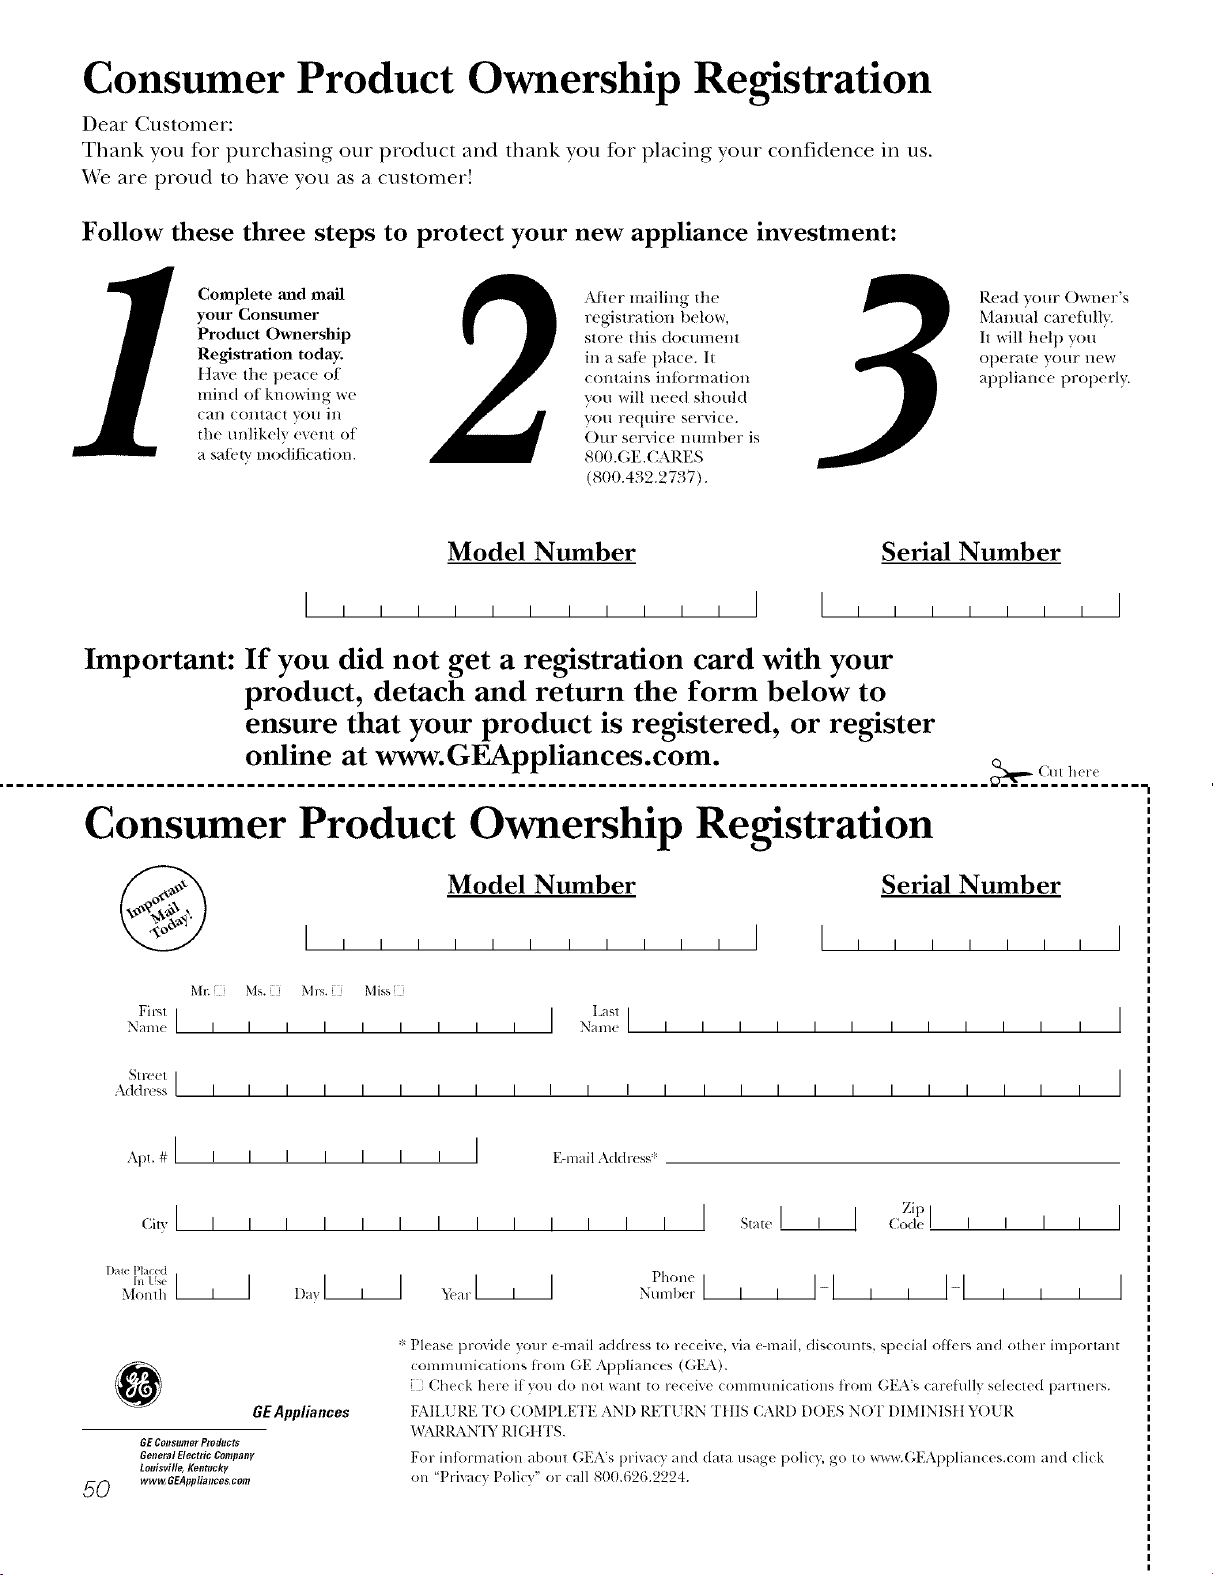
Consumer Product Ownership Registration
Dear Customer:
Thank you for purchasing our product and thank you for placing your confidence in us.
_A/eare proud to ha_e you as a customer!
Follow these three steps to protect your new appliance investment:
Complete mid mail
your Consumer
Product Owuership
Registration today.
t]a_e the t)eace o/
mind of knowing we
c_ln contact you ill
th( unlikely (v(nt of
a sa/_q_ modification.
AJler mailing tile
registration below,
store this do( ument
in a sale' place. It
contains intormation
you will need should
you require service.
Our service nmnber is
800.GE.(2\RES
(800.432.2737).
[_{'a(t VO/IF Owl/er's
Mamml carefully.
It will help you
operam your new
appliance properly.
Model Number Serial Number
, , , , , I I , , , , , , , I
Important: If you did not get a registration card with your
product, detach and return the form below to
ensure that your product is registered, or register
online at www.GEAppliances.com.
................................................................................................... _,,,_ (MI h_r_
Consumer Product Ownership Registration
Model Number Serial Number
I,,,,,, , , , , , I I , , , , , , I
MI: Ms. M*_. Mixs
Fir_,l I I Lasl]
Name I I I I I I I I I Nanl(! I I I I I I I I I I I I
_1 r( (!1 I
Addr(';s I I I I I I I I I I I I I I I I I I I I I I I I
Apt. 4#I i i
(;i,vI I I
l )aw Placed
hi Use ]1]
Monlh
I I I I I I EqnailAddress*
I I I I I I I I s_., I
¥:!ar I I I Phon(
Nunll)(!r I , I
Zip I
I ] Code I I I I
I-I,, I-I , , ,
I
I
GEAppliances
GE Consmner Products
General Electric Company
Louisville, Kentucky
_ www, GEAppliances, com
* Please provide your eqnail address to receive, via eqnail, discounts, special ottLp, and other iml)ortant
communications h-Olll GE Appliances (GEA).
Check here if you do not want to receive communications ti-om GEA's careftflly selected partners.
FAII.I 5RE T() C()MPI.ETE AND RE'F[ RN Tt tIS CARD DOES NOT DIMINISII Y( )l 5R
BL\RRANTY RI (;I ITS.
For intormation about GEA's prixacy and data usage polic); go to _avw.Gl_Appliances.com and click
on 'Prixacy Policy" or call 800.626.2224.
GEBuilt-In Microwave CookingCenter Warranty.
All warranty service provided by our Factory Service Centers, or
an authorized Customer Care® technician. Toschedule service,
on-line, 24 hours a day, vis# us at www.GEAppliances.com, or
call 800.GE.CARES(800.432.2737).
Staple your receipt here.
Proof of the orig&al purchase
dateis needed to obtain service
under the warrantF
Fromthedateof the
originalpurchase
GEWill Replace:
Any part ot the microwave cooking center which tifils due to a defect in mate_ials or
wor]unanshii), During this full one-year warranty, GE will also provide, free of charge,
all labor and in-home service to replace the defecti\'e part,
LimitedAdditiona!
Four-Year
Forthesecondthrough
the fifthyearfrom date
of theoriginalpurchase
A replacement magnetron tube if the magnetron tube fifils because (d a manuli_cttu'h_g (lefect.
During this lim#edadditionalfour-yearwarranty,you will be responsible _'br any labor or
or in-home service,
Service trips to your home to teach you how to use
the product.
hnproper hastaJlation, delivery or maintenance.
FaJhtre of the product if it is abused, misused, or
used for other thma the intended purpose or used
commercially.
Replacement of house fuses or resetting of
circuit breakers.
Damage to the product caused by accident, f'tre,
floods or acts of God.
hacidenta] or consequential damage caused by
possible defects with this appliance.
Damage caused after delivery.
This warranty is extended to the original purchaser and any succeeding owner for products purchased for
home use within the USA. In Alaska, the warranty excludes the cost of shipping or service calls to your home.
Some states do not allow the exclusion or limitation of incidental or consequential damages. This warranty
gives you specific legal rights, and you may also have other rights which vary from state to state. Toknow
what your legal rights are, consult your local or state consumer affairs office or your state's Attorney General
Warrantor: General Electric Company.Louisville, KY40225
51
ConsumerSupport.
GEAppliancesWebsite www.GEAppliances.com
Have a question or need assistance with your appliance? Try the (;E Appliances _,Vebsite 24 hom_ a day,
an)' day of the year! For greater convenience and tipster service, you can now download (3wner's Manuals,
order parts, catalogs, or even schedule ser\'ice on-line. _)u can also "Ask Our Team of Experts _.....
FOllY questions, aIld SO I//Hch I//oYe,,,
Schedule Service www.GEAppliances.com
Expert (;E repair service is onl) one step awa)ti'om }our doo_: Get on-line and schedule _our service at
your comenience 24 hom_ am day of the year'. Or call 800.GE.(:ARES 800.432.2737) during n(mnal
business hom_.
RealLifeDesignStudio www.GEApp/iances.com
(;E supports tile Uni\'e_al Design concept--products, ser\'ices and environments that can be used by
people of all ages, sizes and capabilities. _'e recognize tile need to design fin" a wide range of physical and
mental abilities and impaim_ents. For details (ff GE's Universal Design applications, including kitchen
design ideas fin" people with disabilities, check ()/It O/li"XA'ebsite today. For tile hearing impaired, please call
800.TDD.GEAC (800.833.4322).
ExtendedWarranties www.GEAppl&nces.com
Purchase a (;E extended _armntv and learn about special discounts that are a_ailable _hile your _arrant_
is still in effect. Yi)u C[lIl i)urchase it on-line amfime, or call 800 (;26 2224 during nomml business hom_
(;E Consumer Home Ser\'ices will still be there alter your warranty expires.
PartsandAccessories www.GEAppl&nces.com
Individuals qualified to service their own appliances can have parts or accessories sent directly to their
homes (VISA, MasterCard and Discover cards are accepted). Order on-line today, 24 hom_ every day or
by phone at 800.626.2002 during nomml business hom_.
Instructions contained in this manual cover procedures tobeperformed by any user.Other servicing generally
should be referred to qualified service personnel Cautionmust be exercised, since improper servicing may cause
unsafe operation.
Contact Us www.GEAppliances.com
If you are not satisfied with tile se_'ice you receive ti'om GE, contact us on our _'ebsite with all tile details
including your phone numbe_; or write to: General Manage_; ()lStolner Relations
GE Appliances, Appliance Park
ixmisville, KY40225
RegisterYourAppliance www.GEAppliances.com
Register your new applim_ce on-Ibm--at your convmfience! Timel) product registration will allow tot
enhanced comm unication and prompt se_w'ice under tile terms of your warrant}', should tile need arise.
Ybu may also mail in tile preprinted registration, card included in tile l)acking, material.
Printed in flTe United States

