Loading ...
Loading ...
Loading ...
21
OPERATIONS MANUAL
WORKTOPS/UNDERCOUNTERS & SANDWICH UNITS
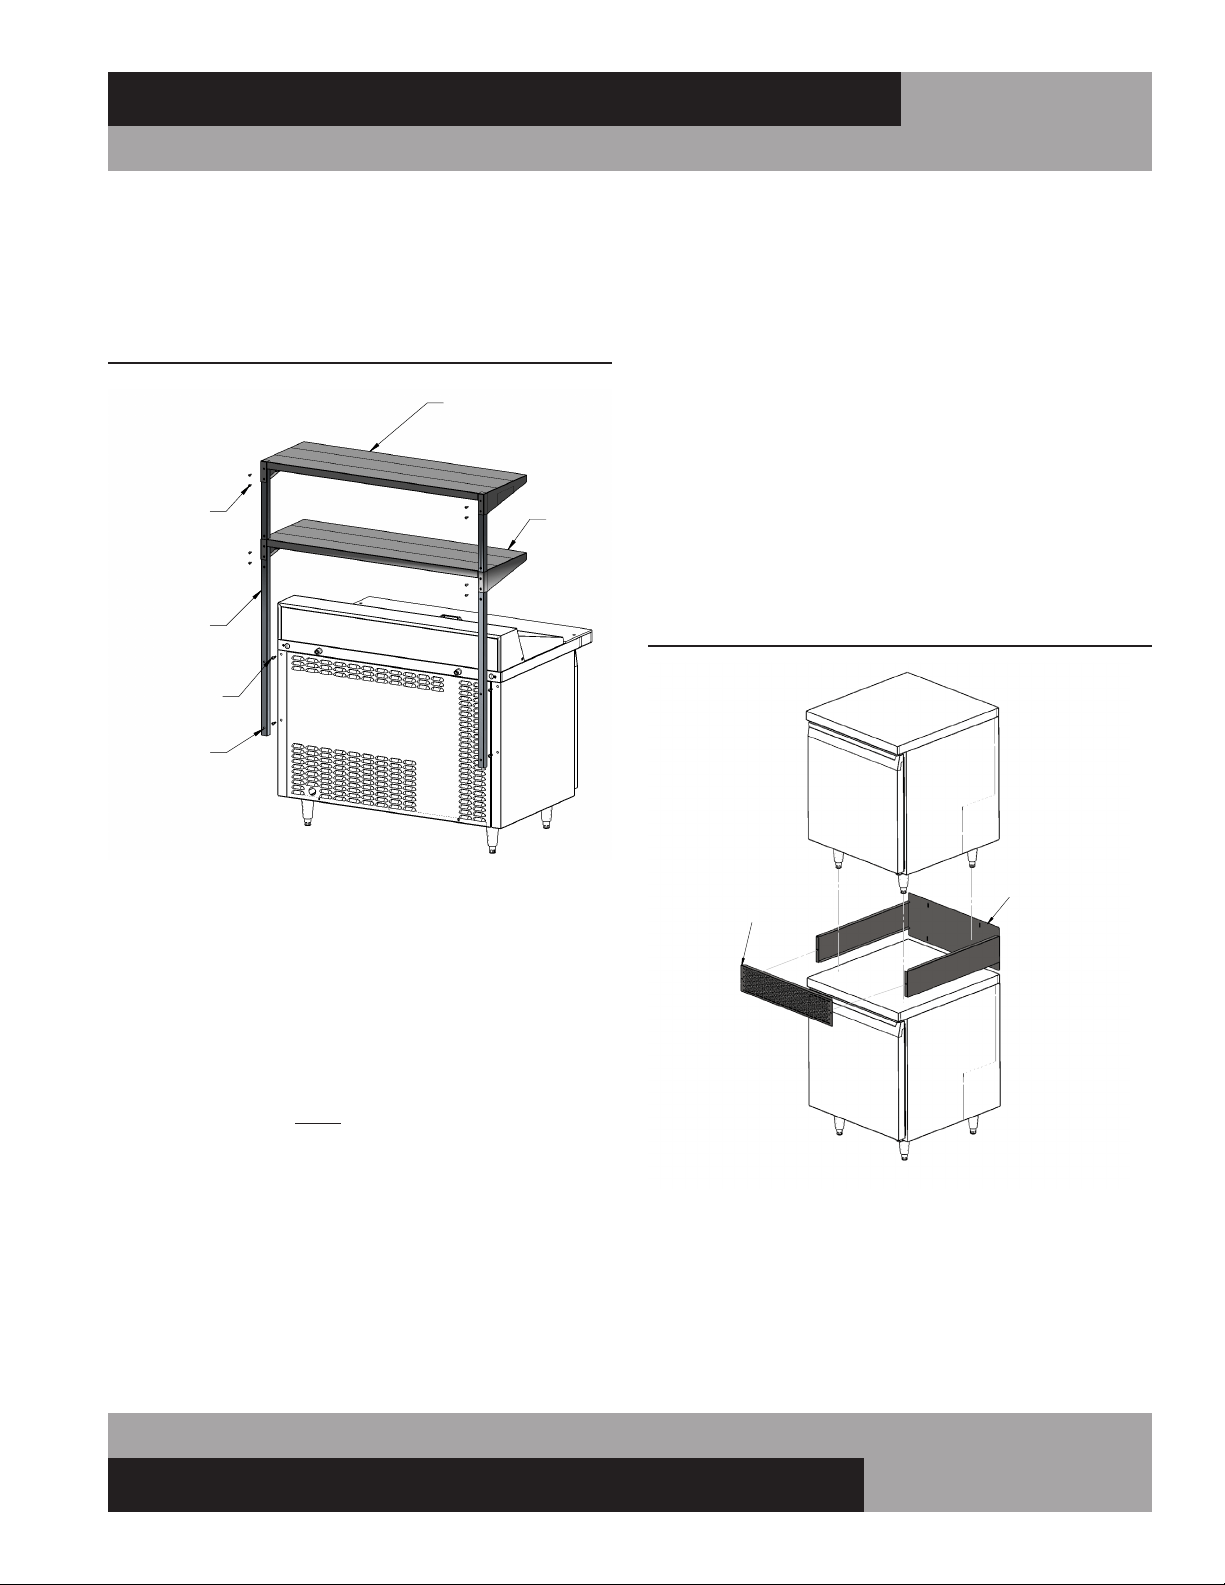
4. Install stacking collar as shown in Figure 16, making sure
all rear screw hole slots line up on both top and bottom
models where screws were removed from in Step 2. If
screw hole slots do not line up (left to right) with screw
holes then the stacking collar has been mounted upside
down. Remove and re-install correctly.
5. Adjust the height and level of the “top” cabinet by reaching
in through the front opening of the stacking collar and turn-
ing the bullet feet on the legs in (CW) until the bottom of
the cabinet is snug against the stacking collar. Once snug,
install the rear screws that were removed in Step 2 and
peel off the adhesive tape backing strip around the side
flanges of the stacking collar so that both units are bonded
together.
6. Align the front grill holes with the stacking collar holes and
secure both thumbscrews.
Secure the shelf, using two 10-32 screws on each end, driving
them snugly but not tightly. Check the alignment of the shelves
and tighten all the screws. Double check that the shelves and
uprights are secured rigidly.
INSTALLING STACKING COLLAR ADAPTER KIT
All models that are 48” wide or less and have a solid, flat top
can be stacked one on top of the other with the use of a heavy
duty, stainless steel stacking collar as shown in Figure 16. When
stacking a refrigerator and freezer, it is always best to place the
freezer model on the bottom for maximum efficiency. The front
grill which is attached to the stacking collar body is attached
with easily removable thumbscrews and should be removed
periodically for cleaning. The front grill should always be clean
and clear of debris and never blocked.
To stack your models, the following instructions should be fol-
lowed:
1. Decide which unit is to be on “top” & “bottom”.
2. On “top” unit, remove screws at the bottom of the back
cover. In “bottom” unit, remove screws, joggle clips and
bumpers aloing the top back of the cabinet.
3. Install the legs on the “top” unit and adjust all four bullet
feet out (CCW) three full turns. Carefully lift the cabinet and
set it on top of the “bottom” unit.
FIGURE 16: Stacking Collar
STACKING
COLLAR
GRILL
10-32 SCREWS
UPRIGHT
1/4-20 SCREWS
KEYHOLES
OPPOSITE
THESE HOLES
TOP SHELF
BOTTOM
SHELF
(NO NOTCHES IN BACK CORNERS)
FIGURE 15: Overshelf Installation
Loading ...
Loading ...
Loading ...