
Instructions for the Use and Care and Installation of
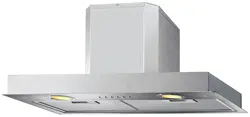
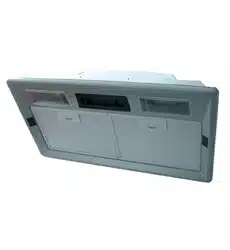
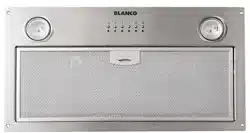
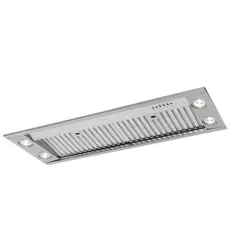
RUL70X
RUL90X
Rangehood

Dear Customer,
Thank you for buying a BLANCO rangehood.
Before we continue telling you about this rangehood, we cordially invite you to become
part of the Blanco family by subscribing online.
Please visit our website where you can easily subscribe and request such things as‘
invitations to future cooking classes’ and gourmet recipes.
Go to www.blanco-australia.com and fill in the subscription details.
You will find that the clean lines and modern look of your Blanco rangehood blends in
perfectly with your kitchen décor. It is easy to use and performs to a high standard.
Blanco also makes a range of products that will enhance your kitchen such as cooktops,
ovens, dishwashers and microwaves, sinks and taps. There are models to complement
your new Blanco rangehood.
Of course, we make every effort to ensure that our products meet all your requirements,
and our Customer Relations department is at your disposal, to answer all your questions
and to listen to all your suggestions.
Please complete the warranty card and keep your receipt as proof of purchase. Retain all
documents relating to the purchase of this product.
Blanco is committed to providing increasingly efficient products that are easy to use, and
are not just beautiful, smart.
BLANCO
- 2 -
- 3 -
- 4 -
- 5 -

GENERAL
These warnings are provided in the interest of safety. Carefully read the following important information regarding
installation safety and maintenance. You MUST read them carefully before installing or using the appliance. It
is most important that this instruction book be retained with the appliance for future reference. Should the
appliance be sold or transferred , always ensure that the book is left with the appliance in order that the new
owner can get to know the function of the appliance and the relevant warnings.
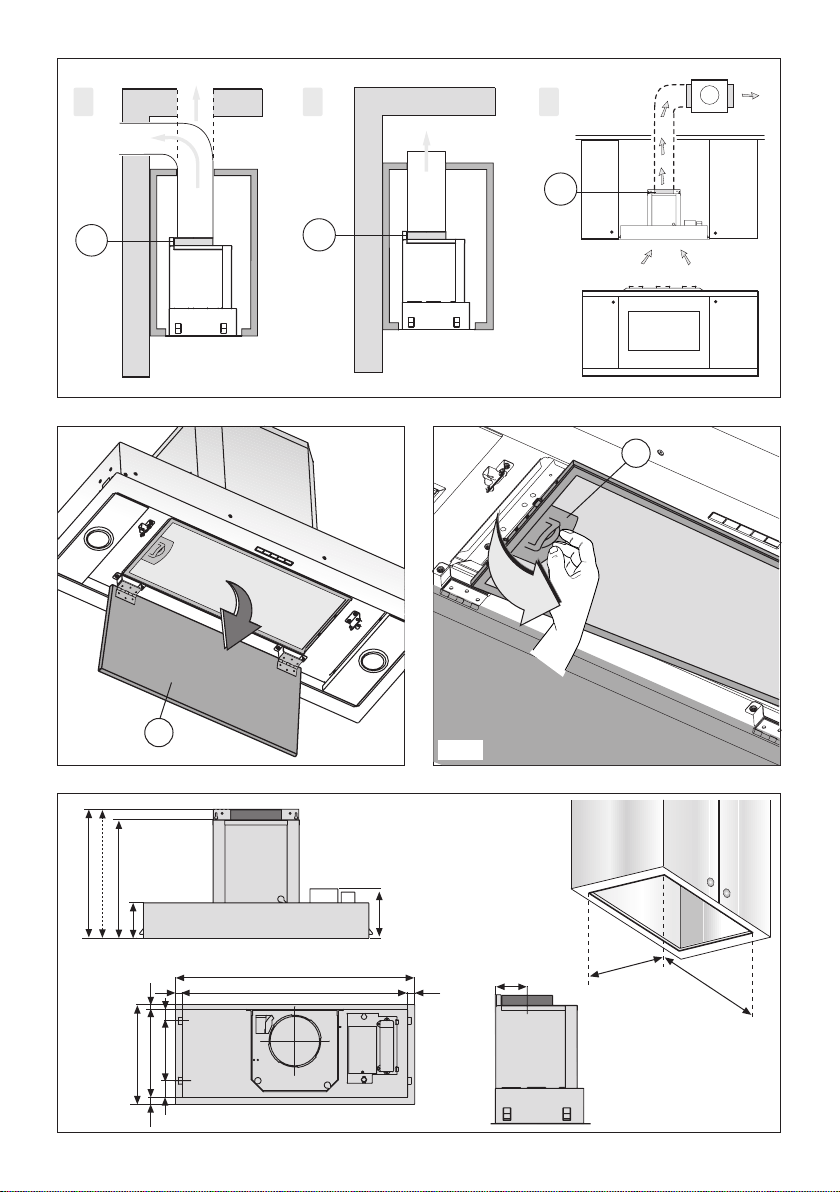
The appliance has been designed for use in the ducting version (air exhaust to the outside – Fig.1B), ltering
version (air circulation on the inside – Fig.1A) or with external motor (Fig.1C).
SAFETY PRECAUTION
1. Take care when the rangehood is operating in the same room as an open replace or burner that requires
air in the environment and uses an energy source other than electrical energy – this is because the rangehood
removes air from the environment which a burner or replace may need for combustion. The negative pressure
in the environment must not exceed 4Pa (4x10⁻⁵ bar).
2. Provide adequate ventilation in the environment for a safe operation of the rangehood.
3. Follow the local laws applicable for external air evacuation.
4. If the supply cord is damaged, it must be replaced by the manufacturer or its service agent or a similarly
qualied person in order to avoid a hazard.
WARNING!
In certain circumstances electrical appliances may be a danger hazard.
A) The appliance is not intended for use by persons (including children) with reduced physical, sensory or men-
tal capabilities, or lack of experience and knowledge, unless they have been given supervised or instruction
concerning use of the appliance by a responsible person for their safely.
B) Young children should be supervised to ensure they do not play with the appliance.
C) Do not check or remove the lters when the rangehood is operating.
D) Flambè cooking is prohibited underneath the rangehood.
E) Constantly check food that is frying as any overheated oil may become a re hazard.
F) Disconnect the electrical plug prior to any maintenance.
G) Do not touch lighting or adjacent areas when lighting is on - and for a period of time after using the light.
H) Avoid leaving the cooktop on (gas and electric) without the saucepan covering the burner or cooking zone.
This is because heat transferring upwards to the rangehood will be damaging to the lters and a re hazard.
I) Ensure adequate ventilation of the room where the rangehood is used at the same time as appliances burning
gas or other fuels. Exercise care when a rangehood is installed in an area where a gas burner is operating.
Depending on the size of the room, the rangehood may draw from the room air that is necessary for proper
combustion of the burner.
J) Ensure the rangehood is cleaned frequently, as directed on page 9.
L) There is a risk of re if cleaning is not carried out in accordance with the instructions.
M) For any repairs always contact an authorised Technical Customer Service Centre and ask for original spare
parts. Repairs by untrained people may lead to damage and void warranty.
N) Caution: Accessible parts may become hot when used with a cooking appliance.
Warnings for Installation:
a) The exhaust air must not be discharged into a ue which is used for exhausting fumes from appliances
burning gas or other fuels.
b) The minimum distance between the supporting surface for the cooktop vessels on the hob and the lowest
part of the rangehood:
* When the rangehood is located above a gas appliance, this distance shall be 65cm.
* If the instructions for installation for the gas hob specify a greater distance, this must be taken into account.
(The distance of 65cm can be reduced for non combustible parts of rangehoods and parts operating at safety
extra low voltage provided these parts do not give access to live parts if deformed).
*Distance may be reduced to 60cm to align with the AGA code.
c) The regulations concerning the discharge of exhaust air have to be fullled.
d) All Blanco rangehoods are used for indoor application/installation only.
Other Information:
This appliance conforms to the European Directive EC/2002/96, Waste Electrical and Electronic Equipment (WEEE).
By making sure that this appliance is disposed of in a suitable manner, the user is helping to prevent potential
damage to the environment or to public health.
- 6 -

The symbol on the product or on the packaging label on the carton indicates that the appliance should not
be treated as domestic waste, but should be delivered to a suitable electric and electronic appliance recycling
collection point. Follow local guidelines when disposing of waste. For more information on the treatment,
re-use and recycling of this product, please contact your local authority or domestic waste collection service.
INSTALLATION INSTRUCTIONS
Any electrical work must be undertaken by a qualied electrician. It is dangerous to alter specications in any way.
Ensure that all packaging, both inside and outside the rangehood, has been removed before it is used.
After installation, please dispose of the packaging with due regard to safety and the environment.
Note: Ensure you have read the warnings for installation on page 6.
•ElectricConnection
The appliance has been manufactured as a class II, therefore no earth cable is necessary.
The plug must be easily accessible after the installation of the appliance.
If the appliance is equipped with power cord without plug, a suitably dimensioned omnipolar switch with 3
mm minimum opening between contacts must be tted between the appliance and the electricity supply in
compliance with the load and current regulations.
The connection to the mains is carried out as follows:
BROWN = L line
BLUE = N neutral
• If a connection tube composed of two parts is used, the upper part must be placed outside the lower part.
Do not connect the rangehood exhaust to the same conductor used to circulate hot air or for evacuating fumes
from other appliances generated by other than an electrical source. Before proceeding with the assembly
operations, remove the anti-grease lter(s) (Fig.2-3) so that the unit is easier to handle.
- In the case of assembly of the appliance in the ducted version prepare the hole for evacuation of the air.
• We recommend the use of an air exhaust tube which has the same diameter as the air exhaust outlet hole.
If a pipe with a smaller diameter is used, the eciency of the product may be reduced and its operation may
become noisier.
Warning: Failure to install the screws or xing device in accordance with these instructions
may result in electrical hazards (see technical data if supplied).
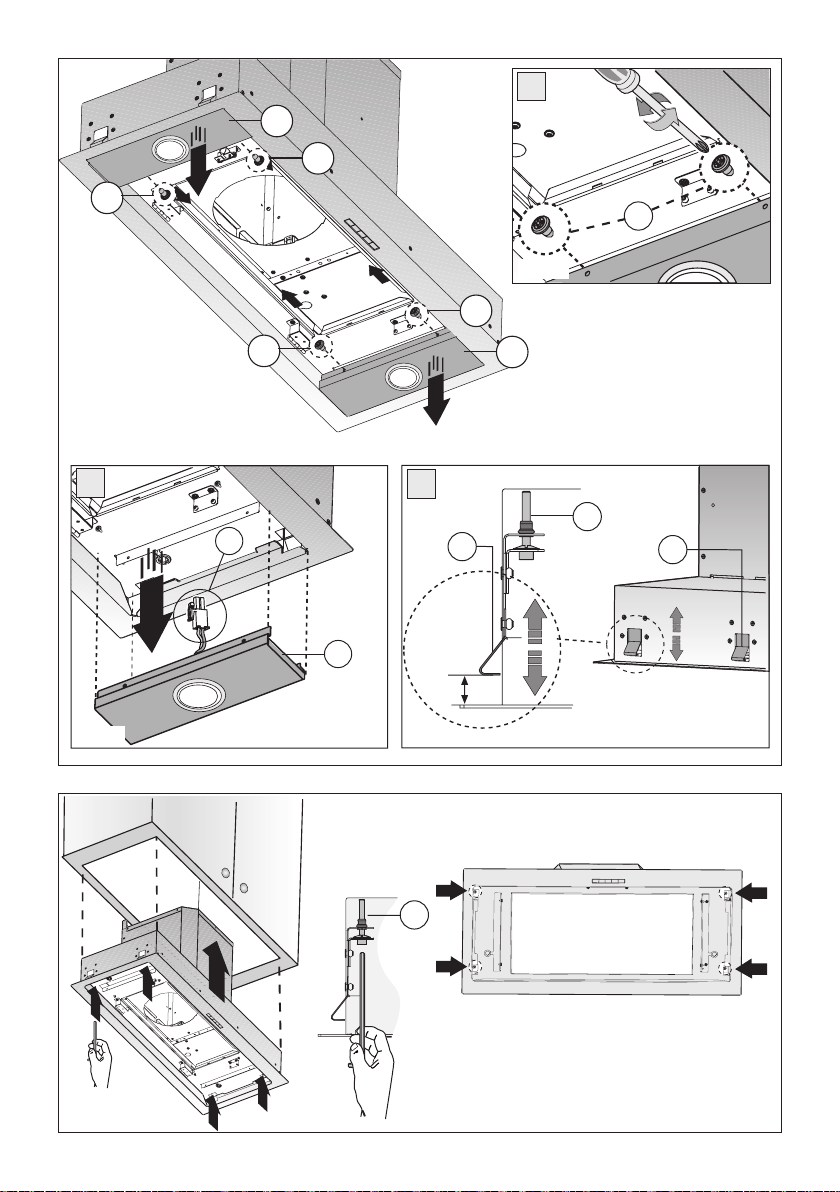
•Installation
The following instruction should be followed to carry out the correct installation of the rangehood.
1. Mounting of the rangehood on the lower side of the cupboard.
2. Selection of the version (extraction or ltration).
3. Before starting to x the rangehood, disconnect the anti-grease lter for easier appliance handling:
- Open panel B as shown in Fig.2.
- Pull handle C as shown in Fig.3.
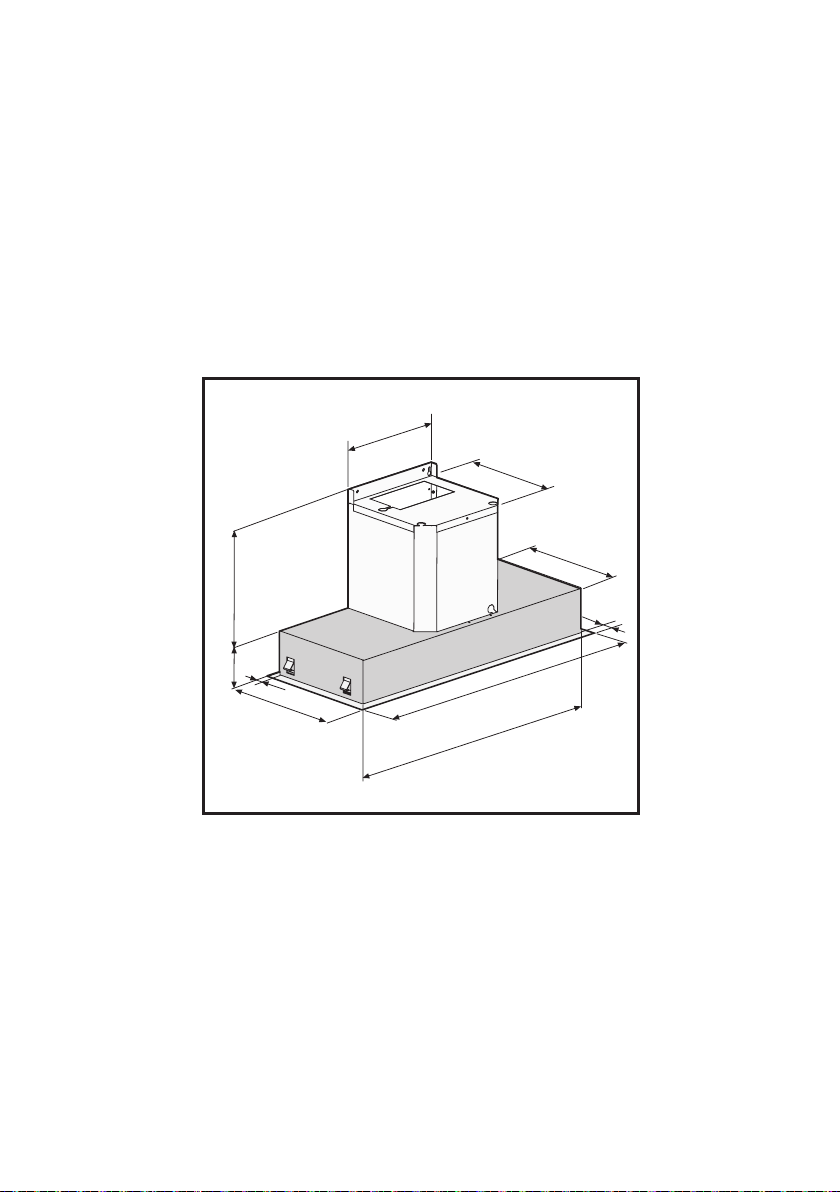
• Fitting the rangehood into the lower part of the wall cabinet
For all measurements relating to the rangehood, please refer to Fig.4.
Before xing the rangehood to the lower part of the cabinet, the following steps should be performed:
1. Remove the 4 screws E xing the two rangehood lamps H (RHS and LHS) in place as indicated in Fig.5A.
2. Remove the lamps H and disconnect the connectors W of the lamps to make installation easier, as indicated
in Fig.5B.
3. Make sure the thickness of the cabinet falls within the range of values listed in Fig.5C. Fit the rangehood in
the cabinet (Fig.6) and make sure the 4 springs are xed in place well. Fix the rangehood to the cabinet securely
by using a screwdriver to tighten the screws M until the appliance is ush with the cabinet (Fig.6).
4. Connect the connectors W of the lamps again and reinstall the lamps H xing them with the 4 screws E that
were previously removed.
•DuctedInstallation
When installed in this way the appliance expels fumes outside, either through a perimeter wall or through
existing ducting. It is therefore necessary to purchase a non-ammable air exhaust tube (not supplied) which
complies with all current legislation and connect it to ange N (Fig.1B).
- 7 -
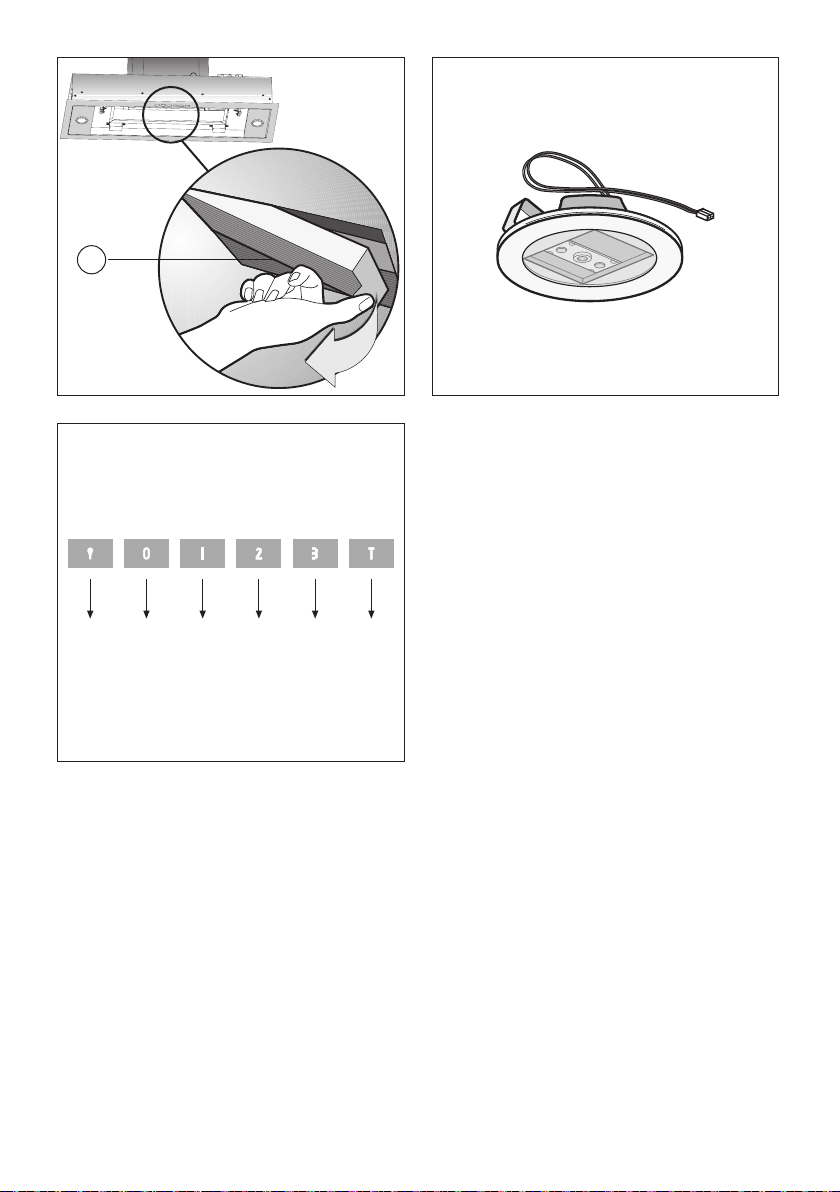
•RecirculatingInstallation
Please note:
When the rangehood is recirculated, carbon lters must be ordered as an accessory.
- To replace the carbon filters X, pull lever outwards as shown in Fig.7.
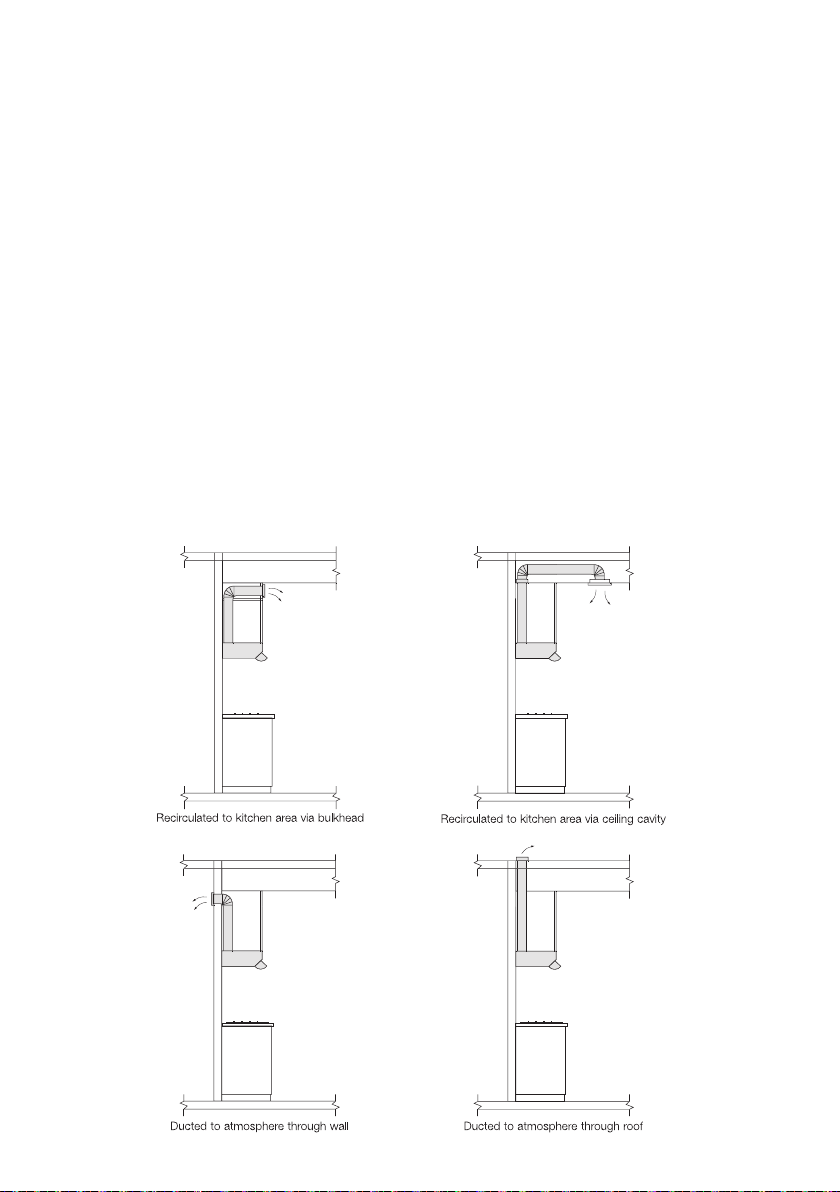
Additional Installation Notes.
Rangehoods may be ducted in two ways:
1. Ducted to the atmosphere (outside).
2. Recirculating.
We recommend ducting to the atmosphere to ensure optimum performance. Recirculating the air back into
the room should only be used when outside extraction is not possible. To ensure maximum performance when
ducting it is important the ducting that carries the fumes away, be as short and as straight as possible.
When incorporating a rangehood in the design of a kitchen the following points need to be considered to
achieve the most benet from the rangehood.
1. Ducting from a rangehood carrying the exhaust air, should not exceed a length of three (3) metres.
2. For ducted installation we recommend using galvanised or similar metal type ue pipe. PVC pipe is not
recommended.
3. Ducting containing a 90° degree bend will encounter a loss in eciency of approximately 35%. Additional
90° degree bends can cause losses of up to 15% per bend.
4. Ducting size should always comply with the manufacturers specication.
5. We recommend carbon lters be used when re-circulating the air into the room. There will be some loss of
air movement when carbon lters are tted.
The following diagrams are examples of installations:
- 8 -

USEANDMAINTENANCE
•Itisrecommendedtooperatetheappliancepriortocooking.Itisrecommendedtoleavetheappliancein
operation for 15 minutes after cooking is terminated in order to help eliminate cooking vapors and odors. The
proper function of the rangehood is conditioned by the regularity of the maintenance operations, in particular,
the active carbon lter.
•Theanti-greaselterscapturethegreaseparticlessuspendedintheair,andarethereforesubjecttoclogging
according to the frequency of the use of the appliance. In order to prevent re hazard, it is recommended to
clean the lter at a maximum of 2 months by carrying out the following instructions:
- Remove the anti-grease lters from the rangehood and wash them in a solution of water and neutral liquid
detergent, leaving to soak.
- Rinse thoroughly with warm water and leave to dry.
- The anti-grease lters may also be washed in the dishwasher. The aluminum panels may alter in colour after
several washes. This is not cause for customer complaint nor replacement of panels.
•Theactivecarbonltershelptopurifytheairthatisreplacedintheenvironment.Theltersarenotwashable
nor reusable and must be replaced at maximum every four months. The saturation of the active carbon lter
depends on the frequency of use of the appliance, by the type of cooking and the regularity of cleaning the
anti-grease lters.
•Cleanthefanandothersurfacesoftherangehoodregularlyusingaclothmoistenedwithdenaturedalcohol
or non abrasive liquid detergent.
•Thelightfunction isdesignedforuseduringcooking and notforprolongedgeneralilluminationofthe
environment. Prolonged use will notably reduce the duration of the bulb.
•ReplacingLEDlamps(Fig.8):
Replacement of the LED lamps needs to be carried out by an authorised technician. Please contact an authorised
service centre when this needs to be arranged.
• Commands (Fig.9) luminous the key symbols are explained below:
A = LIGHT
B = OFF
C = SPEED I
D= SPEED II
E = SPEED III
F = AUTOMATIC STOP TIMER - 15 minutes
• To operate the INTENSIVE speed function, press key E for two seconds and it will be activated for 10 minutes
after which it will return to the previously set speed. When the function is active the LED ashes. To interrupt it
before the 10 minutes have expired press key E again.
• By pressing key F for two seconds (with the rangehood switched o) the "clean air" function is activated.
This function switches the appliance on for ten minutes every hour at speed level 1. As soon as this function is
activated the motor starts up at speed level 1 for ten minutes, During this time key F and key C will ash at the
same time.
After ten minutes the motor switches o and the LED of key F remains switched on with a xed light until the
motor starts up again at speed level 1 after fty minutes. Keys F and C start to ash again for ten minutes and so on.
By pressing any key (excluding the rangehood light key A) the "clean air" function will be deactivated and the
rangehood will return to normal operation (e.g. if key D is pressed the "clean air" function is deactivated and
the motor moves to the 2nd speed straight away. By pressing key B the function is deactivated).
(*) The "AUTOMATIC STOP TIMER" delays stopping of the rangehood, which will continue functioning for 15
minutes at the operating speed set at the time this function is activated.
•Activecarbon/greaseltersaturation:
- When button A ashes at a frequency of 2 seconds, the grease lters must be cleaned.
- When button A ashes at a frequency of 0.5 seconds, the carbon lters must be replaced.
After the lter has been replaced, the electronic memory must be reset by pressing button A for approximately
5 seconds, until the light on the button stops ashing.
THEMANUFACTURERDECLINESALLRESPONSIBILITYFOREVENTUALDAMAGESCAUSEDBYBREACHING
THE WARNINGS SET OUT IN THIS MANUAL.
- 9 -
RUL70X
RUL90X
- 10 -

We appreciate your feedback.
Please review our products on
www. blanco-australia.com
- 11 -

3LIK1402
Printed on recycled paper