ge.com
©
©
©
Safety Information ......... 9-6
Operating Instructions
Best Cooking Methods ....... 19
Combination I Feaulres ...... 16
Combination 9 Features ...... 17
Convection Features ......... 15
Convenience Features ........ 14
Cookware Tips .............. 90
Grill Feature ............... 18
Microwave Terms ............ 93
Other Features ........... 91,92
Oven Features ............. 7, 8
Power Levels ................ 9
Timed Features .......... 10-13
Care and Cleaning ......... 24
Troubleshooting Tips ....... 95
Things That Are Normal ...... 25
Consumer Support
Consumer Support . . .Back Cover
Product Registration ...... 99, 30
V_'arranty .................. 31
Write the model and serial
numbers here:
Model #
Serial #
You can find them on a label
inside the oven.
JES1290
3513813700 49-40499 07-06UP7
IMPORTANTSAFETYINSTRUCTIONS.
READALLINSTRUCTIONSBEFOREUSING.
^.. WARNING- Foryoursafety,theinformationinthismanualmustbefollowedtominimizetherisk
of fire or explosion, electric shock, or to prevent property damage, personal injury, or loss of life.
PRECAUTIONSTOAVOIDPOSSIBLEEXPOSURE
TOEXCESSIVEMICROWAVEENERGY
(a) Do NotAttempt to operate this oven with the door
open since alien<leer operation can result in ham/fill
eN)osui'e m nlicrowave energy', It is iinl)ortant not to
deteat or tamper with the satiety interlocks.
(h) DoNotPlace any object between the oven fl'ont ti_ce
and the door or allow soil or cleaner residue to
accunlulate on sealing suiqfilces.
(c) Do Not Operate the oven if it is dan/aged. It is
i)articularly in/i)ortant that the oven door close
i)roi)erly and that there is no dan/age to the:
(l) door (bent),
(2) hinges and latches (broken or h)osened),
(3) door seals and sealing sui_fi_ces.
(d) The Oven Should Not be a(!iusted or rei)aired by
anyone except l)rol)erly qualified service l)ei_onnel.
IMPORTANTSAFETYINSTRUCTIONS.
When using electrical appfiances basic safety precautions should be followed, including the following.
Use this appfiance only for its intended purpose as described in this Owner's Manual.
• Read and h)lh)w the specific l)re(atltions in the • Do not store this apl)liance ot/tdoois. Do not t/se this
Precautions to Avoid Possible Exposure to Excessive
Microwave Energy section above.
• This al)pliance inust be grotlnded. (:onnect only
to a i)roi)erly grounded outlet. See the Grounding
Instructions section on page 5.
• hlstall or h)cate this api)liance only in accordance
with the provided installation instructions.
• This ()veil n/ust be h)cated at least 3 ft. above floor level.
• Be cert;fin to place the fl'ont surtilce of the door
3" or nlore back fl'onl the counterto l) edge to avoid
accidental ill)ping of the al)pliance in nornlal usage.
• Do not n/aunt this ai)pliance over a sink.
• Do not I//Otlnt the i//ici'ol_;ive ()veil over or near }lliV
poilion of a heating or cooking al)pliance.
• Do not store anything directly oil top of the nlicrowave
oven surti_ce when the n/icrowave oven is in oi)eration.
• Do not operate this ai)pliance if it has a damaged
power cord or phIg, if it is not working l)rol)erly or
if it has been danlaged or drol)ped. If the power caM
is damaged, it n/list be replaced by General Electric
SeIMce or an authorized seiMce agent using a power
cord a\_filable fl'onl General Electric.
• Do not cover or block any oi)enings on the apl)liance.
• Lrse this al)pliance only fin" its intended use as described
in this Ill_lIltl_ll. Do not rise coFi'osive cheI/licals or wlpoi's
in this ai)pliance. This nlicrowave oven is specifically
designed to heat, dry or cook flied, and is not inmnded
fi)r lal)oratorv or industrial rise.
• This n/icrowave oven is not apl)roved or tested tor
I/l}lIJne rise.
i)roduct near watei_t0r exainl)le, in a wet basenlent,
near a swinnning pool, near a sink or in sinlilar locations.
• Kee I) power cord away fl'onl heated surlilces.
• Do not iininei_e power coId or plug in wateI:
• Do not let power cord hang over edge at table or
Co/In[elL
• To reduce the risk of fire in the oven cavity:
-- Do not overcook fi)od. (:areflillv attend ai)pliance when
papei; plastic or other combustible n/aterials are placed
inside the oven while cooking.
-- Ren/ove wire twist-ties and metal handles fl'oin paper or
plastic containei_ befi)re placing then/in the oven.
-- Do not rise the oven fi)r storage pui])oses. Do not leave
paper products, cooking utensils or ti)od in the ()veil
when not in use.
-- If n/aterials inside the oven ignite, kee I) the oven door
ch)sed, turn the oven off and disconnect the power
cord, or shut off power at the flIse or circuit breaker
panel. If the door is opened, the fire nlay spread.
• See door surfi_ce cleaning instructions in the
Care and cleaning of the microwave oven section
of this nlanual.
• This al)pliance illtlst only be seiMced by qualified service
i)eisonnel. Contact nearest authorized seiMce ti_cilitv fin,
examination, repair or a(!iusnnent.
• _&swith any ai)pliance, ch)se supeiMsion is necessai T
when used bv children.
SAVETHESEINSTRUCTIONS
2
g_com
WARNING!
ARCING
If you see arcing, press CLEAR/OFF and correct the problem.
Arcing is the inicrowa;'e tei-/n fl)r sparks in the oven.
Arcing is caused by:
• The metal shelf installed incorrectly so it touches
the microwave wall.
• Metal or fi)il touching the side of the oven.
• Foil not molded to fi)od (upturned edges act
like antemms),
• Met;fl, such as twist-ties, poultI w pins or gold-
rimmed dishes, in tile microwave.
• Recycled paper towels containing small metal
pieces being used in tile microwave.
FOODS
• \,*_l/enmicrowaving, place all fi)ods and
containers on the glass microwave turntable.
• SUPERHEATEDWATER
Liquids,such aswater,coffee or teaare ableto
be overheatedbeyondtheboilingpoint without
appearingto beboiling. Visiblebubblingor boiling
whenthecontainer isremovedfrom themicrowave
ovenisnot alwayspresent.THISCOULDRESULT
IN VERYHOTLIQUIDSSUDDENLYBOILING0 VER
WHENTHECONTAINERISDISTURBEDORA
SPOONOROTHERUTENSILISINSERTEDINTO
THELIQUID.
To reduce tile risk ot iqj m7 to i)eisons:
-- Do not overheat tile liquid.
-- Stir tile liquid both before and halfway through
heating it.
-- Do not use straight-sided containei_ with
I1_1ITOW Ilec]qs.
--AJter heating, allow tile container to stand in
tile microwave oven fiw a short time before
removing tile containei:
-- Use extreme care when inserting a spoon or
other utensil into tile container.
Do not pop popcorn in your microwave oven
unless in a special microwave popcorn accessory
or unless you use popcorn labeled for use in
microwave ()veils.
• Some products such as whole eggs and sealed
containei_fi)r example, closedjais--are able
to exphxle and should not be heated in this
microwave oven. Such use of tile microwave
oven could result in iqjm y.
• Do not boil eggs in a microwave oven. Pressure
will build up inside egg yolk and will cause it
to bmst, possibly resulting in iqjmT:
Operating tile microwave with no fl)od inside fi)r
ii/oi'e than a IlliIltlte oI" tWO Illay cause damage to
tile oven and could start a fire. It increases tile
heat around tile magnetron and can shorten tile
life at the oven.
• Foods with unbroken outer "skin" such as
potatoes, hot dogs, sausages, tomatoes, apples,
chicken liveis and other giblets, and egg p)ll<s
should be pierced to allow steam to escape
during cooking.
• Avoid heating baby food in glass jars, even
with the lid oil Make sure all infimt toed is
thoroughly cooked. Stir toed to distribum the
heat evenly: Be careflll to prevent scalding when
wamfing flimmla. Tile container may libel cooler
than tile titan ula really is. Mwavs test tile titan ula
betore teeding the baby:
• Don't defrost fl'ozen beverages in mmxm_necked
bottles (espedally carbonated beverages). Even if
the container is opened, pressure can build up.
This can cause the container to burst, possibly
resulting in iqjmy:
• Hot foods and steam can cause burns. Be ('areflll
when opening any containeis of hot fl)od,
including popcorn bags, cooking pouches and
boxes. To prevent possible iqjury, direct steam
away fi'om hands and face.
• Do not overcook potatoes. Thev could dehydrate
and catch fire, causing damage to your oven.
• Cook II/eat aild poultI y thoroughl)_meat to at
least an INTERNAl, temperature at 160°F and
poultr)' to at least an INTERNAl, mmperamre
of 180°E Cooking to these mmperatures usually
promcts against fi)odborne illness.
• Foods cooked in liquids (such as pasta) may
tend to boil more rapidly than foods cent;fining
less moisture. Should this occm; refer m the
Care and cleaning of the microwave oven section
for instructions on how to clean tile inside
of tile oxen. 3
IMPORTANTSAFETYINSTRUCTIONS.
READALLINSTRUCTIONSBEFOREUSING.
A WARNING!
4
MICROWAVE-SAFECOOKWARE
Make sure to use suitable cookware during
iilicrowave cooking. Most glass casseroles, cooking
dishes, measuring cups, custard cups, potmry or
china dim_erware which does not have metallic trim
or glaze with a metallic sheen can be used. Some
cookware is labeled "suitable tot microwaving."
• Place food or microwavable container directly
on the glass turntable to cook w)m" food.
• Use of the black metal tray during microwave
cooking will result in inferior cooking
perlimnance.
• If you are not sm'e it a dish is microwave-sate,
use this test: Place in the oven both the dish you
are testing and a glass measming cup filled with
1 cup of water--set the measuring cup either in
or next to the dish. Microwave 30-45 seconds
at high. If the dish heats, it should not be used
tot microwaving.
If the dish remains cool and only the water in
the cup heats, then the dish is microwave-sate.
• Ove_Mzed fi)od or oversized metal cookware
should not be used in a microwave/convection
oven because they increase the risk of electric
shock and could catlse a fire.
• Sometimes the oven floor; turntable and walls
can becollle too hot to touch. Be careflll
touching the flora; tm'ntable and walls during
and alter cooking.
• Ifw)u use a meat them]ometer while cooking,
make sure it is sale for use in microwave ovens.
• Do not use rec)'cled paper products. Recycled
paper towels, napkins and waxed paper can
contain metal flecks which may cause arcing
or ignim. Paper products containing nylon
or nylon filaments should be avoided, as they
may also ignim.
• Some sP,,roloam trays (like those that meat
is packaged on) have a thin strip of metal
embedded in the bottom. _4]]en microwaved,
the metal can burn the floor of the oven or
ignite a paper towel,
• Do not use the microwave to (h7 newspape_.
• Not all plastic wrap is suitable tbr use in
microwave ovens. Check the package for
[)i'o[)ei"/Ise.
• Do not use paper products when the
microwave/convection oven is operamd in the
convection or COll/bination illode.
• Paper towels, waxed paper and plastic wrap
can be used to cover dishes in order to retain
moisture and prevent spattering. Be sm'e to
vent plastic wrap so steam can escape.
• Cookware may become hot because of heat
transferred fl'om the heamd food. Pot holde_
may be needed U) handle the cookware.
"Boilable" cooking pouches and tightly closed
plastic bags shouM be slit, pierced or vented as
directed by package. If they are not, plastic couM
bm_t dm'ing or immediately after cooking,
possibly resulting in injui T. A]so, plastic storage
containers should be at least partially uncovered
because they titan a fight seal. _]]en cooking
with containe_ tightly covered with plastic wrap,
remove covering careflflly and direct steam away
fi'om hands and e_ce.
Use toil only as directed in this guide. TV dinne_
may be microwaved in tbil trays less than 3/4"
high; remove the top toil cover and return the
troy to the box. \4lien using foil in the microwave
oven, kee I) the foil at least 1" away from the sides
of the oven.
• Plastic cookware---Plasfic cookware designed tor
microwave cooking is ve_y usefifl, but should be
used careflfllv. Even microwave-sate plasfc may
not be as tolerant ot overcooking condifons as
are glass or ceramic materials, and may solten or
char if subjected to short periods of overcooking.
In hmger exposures to overcooking, the food
and cookware could ignim.
• Use of the shelf accessory:
-- Remove the shelf flx)m the oven when not in use.
-- Use pot holde_ when handling the shelf and
cookware. They Illav be hot.
-- Be sm'e that the shelf is positioned properly
inside the oven to prevent product damage.
-- Do not {'over the shell or any i)ml ot the oven
with metal fi)il. This will cause ovefl]eating ot the
II]i{TO_;Ive/{'onve{'[ion ()veil,
Follow these guidelines:
UUse microwave-sati _ plastics only and use
them in strict compliance xdth the cookware
IIla n ti[il Ct t ii'ei"s I'e COlIllI/e n da tions.
_'_ Do not IlliCl'OWa_,e ell/l)g ,' containei's.
_Do not pemfit children to use plastic
cookware without complete super\ision.
ge.com
GRILLING,CONVECTION& COMBINATIONSAFETY
• Use tile black nletal tray when orilling • Use of tile rack:
con;ection or coi/lbination cooking, Use tile trav
in tile SaIlle wa} yotl would use a shallow baking
pan or baking tray. Place fi)od, o',en-saie
cookware or the rack directly on the black metal
tI'aV when cooking,
Use of tile glass turntable when ,grillin°,-,
comection or coinbination cooking will result
in inferior cooking perflmnance.
Do not co_er tile black nletal tray with nletal fi>il
in conibination nlode. This will cause arcing in
tile o_, en.
• Any non-nletal, oven-sate dish can be used when
ctinlbination cooking in the oven. Any oven-sate
dish can be used when grilling or convection
cooking.
• The oven and door will get hot when grilling,
convection or coillbination Cooking,
• Cookware will beconie hot when gi_illing,
convection or ciinlbinafion cooking. Pot holdei_
or oven initts will be needed to handle the
cookware.
-- For comection two level baking only;
-- Place dish diI'ecfl_ on tile rack.
-- Reino_e tile rack fl'oin tile o_en when not in use.
-- Use piit holdei_ or ()veil initts when handling
tile rack. It ina_ be hot.
-- Be sure that tile rack is positioned properly
inside tile ()veil to prevent product danlage.
-- Do not cover tile rack or any part of tile ()veil
with nletal fi)il. This will cause overheating oI
tile ()veil,
• During and after use, do not touch, or let
clothing, pot holdei_ or other flanmiable
inaterials contact tile top heating elenient or
guard. These surti_ces Inav be hot enough
to burn even though they are dark in coloi:
_Mlow sufficient tiIne fi)r cooling fiIst.
• Renlove cookwai'e conlpletely fl'oin tile oven
befl)I'e turning fi)od.
• Do not use paper towels or coverings, containei_
or cooking/roasting bags nlade of fl)il or other
reflective inaterial, plastic, wax or paper when
grilling, convection or conlbination cooking.
• Do not place fl)od directly against the top or
bottonl heating elenients.
GROUNDINGINSTRUCTIONS
WARNING:I ro eruseof the grounding plug can result in a risk of electric shock.
This appliance inust be gix)unded, hi tile event of
an electrical short circuit, grounding reduces tile
risk ot electric shock by providing an escape wire
fi)r tile electric current.
This appliance is equipped with a power cord
having a grounding wire with a grounding phig.
Tile phIg Inust be phIgged into an outlet that is
properly installed and grounded.
(_IInsult a qualified electrician or seIMce technician
if tile grounding instructions are not coinpletely
undeistood, or if doubt exists as to whether tile
appliance is propeity grounded.
If tile outlet is a standard 2-prong wall outlet,
it is your peisonal responsibili_' and obligation
to have it replaced with a properly grounded
3-prong wall outlet.
Do not tlndeI" }lIIV ciI'C/lI/ISt_lnces c/I[ oi" I'eIllOVe
tile third (ground) prong fl'onl tile power cord.
_'e do not reconmlend using an extension cord
with this appliance. If tile power cord is to() short,
have a qualified electiician or service mchnician
install an outlet near tile appliance.
(See EXTENSIONCORDSsection.)
For best operation, phig this appliance into its
own electrical outlet to prexent flickering of lights,
bhIwing of flIse or ti_ipping of circuit breaker.
IMPORTANTSAFETYINSTRUCTIONS.
READALLINSTRUCTIONSBEFOREUSING.
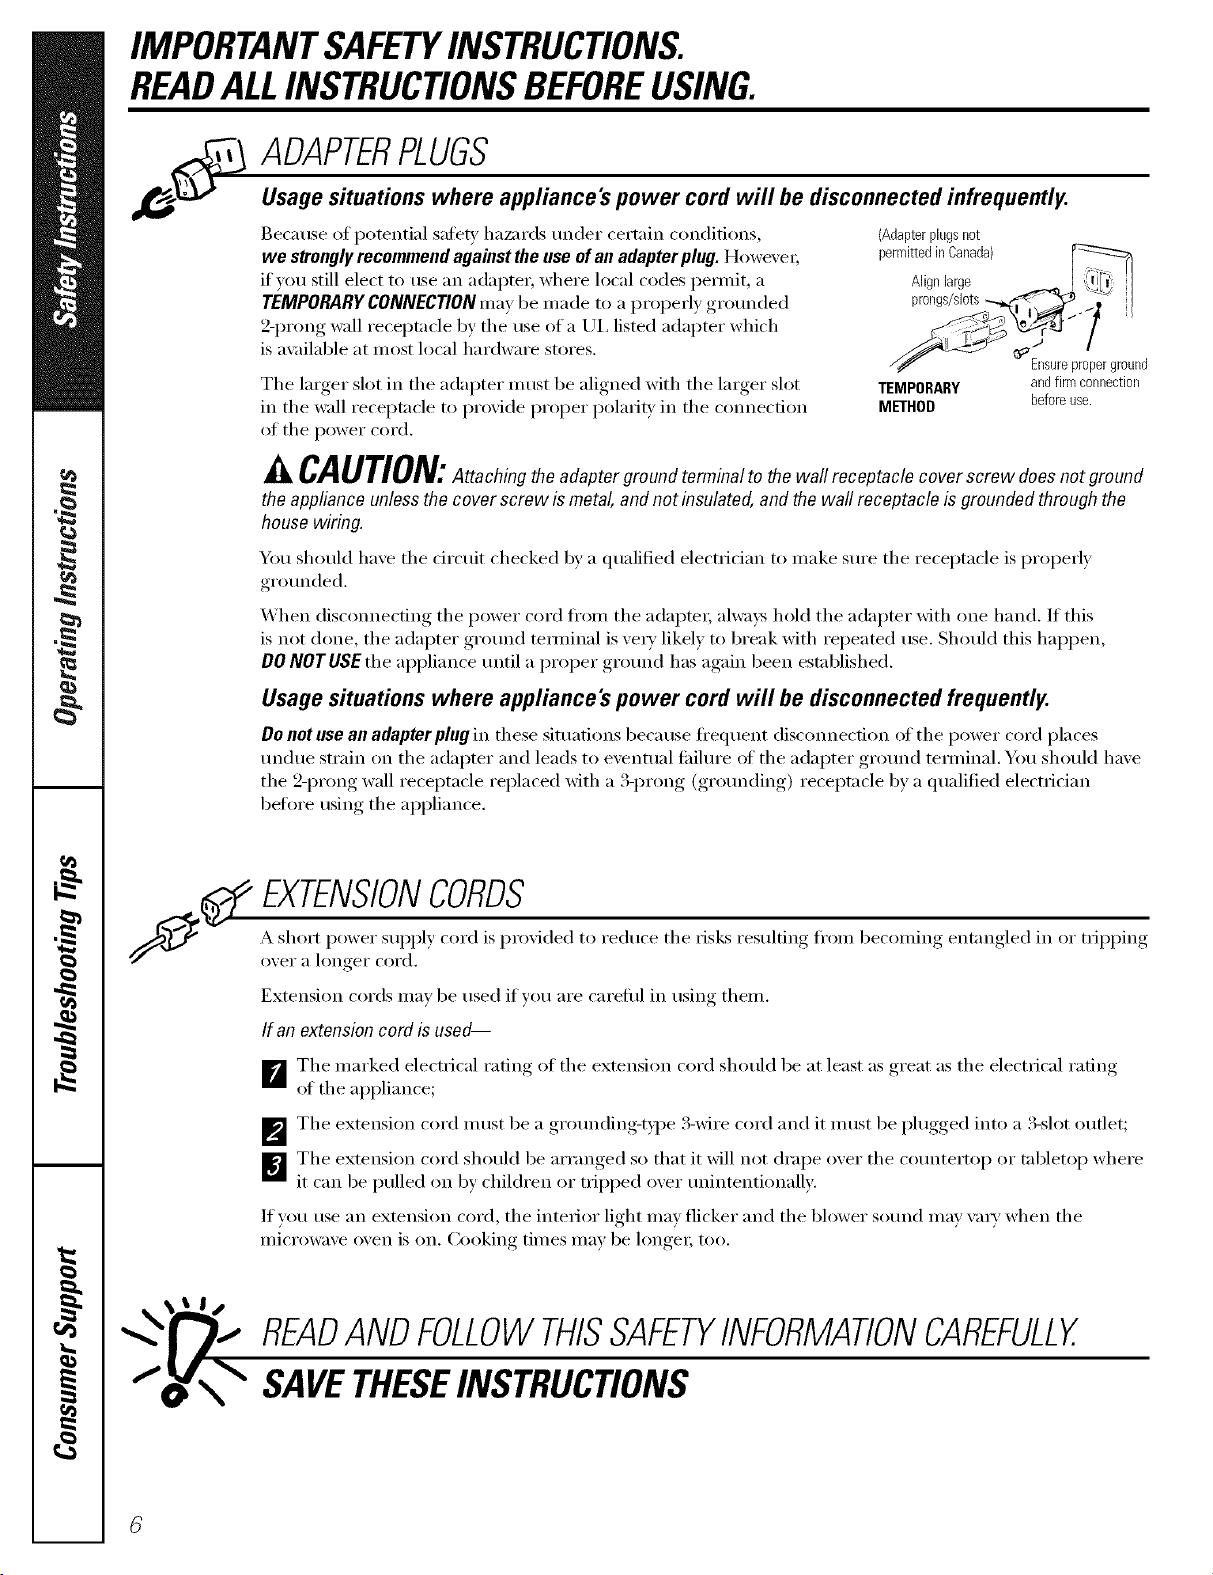
,i__ADAPTERPLUGS
Usage situations where appliance's power cord will be disconnected infrequently.
Because of potential sati_w ha/m'ds under certain conditions,
we stronglyrecommend against the use ofan adapter plug. Howevex;
if you still elect to use an adapter, where local codes permit, a
TEMPORARY CONNECTIONmay be inade to a propedy grounded
2-prong wall receptacle by the tlse of a UI, listed adapter which
is a\;filable at most local hardware stores.
The larger slot in the adapter must be aligned with the larger slot
in the wall receptacle to pro_ide proper polari b in the connection
of the power cord.
{Adapter plugs not
permittedinCanada)
Alignlarge I I i' I
__pron_,ots-1_I
/fT" Ensureproperground
TEMPORARY andfirmconnection
METHOD beforeuse.
^_CAUTION:A_achingtheadaptergroundterminaltothewallreceptaclecoverscrewdoesnotground
the appliance unless the cover screw is metal, and not insulated, and the wall receptacle is grounded through the
house wiring.
You should have the drcuit checked by a qualified electrician to make sure the receptacle is properly
grounded.
When disconnecting the power cord ti'om the adaptor; alwa):s hold the adapter with one hand. If this
is not done, the adapter ground terminal is ve_, ' likely to break with repeated use. Should this hal_pen,
DO NOT USEthe appliance until a proper ground has again been established.
Usage situations where appliance's power cord will be disconnected frequently.
Do not usean adapter plug in these situations because ti'equent disconnection of the power cord places
m_due strain on the adapter and leads to eventual fifilm'e of the adapter ground temfinal. You should have
the 2-prong wall receptacle replaced with a 3-prong (grounding) receptacle by a qualified electrician
befin'e using the appliance.
EXTENSIONCORDS
A short power SUl)plv, cord is provided to reduce the risks resulting< ti'om becoming< ent;mgled< in or trill) )ing<
over a longer cord.
Extension cords may be used if w)u are carelifl in using them.
If an extension cord is used--
Ir_The marked electrical rating of the e×tension cord shotfld be at least asgreat as the electrical radng
of the appliance;
l ,,
_'_ The extension cord must be a grounding-t)]_e 3-wire cord and it must be _lugged into a 3-slot outlet;
_The extension cord should be arranged so that it will not drape oxer the countertop or tabletop where
it can be pulled on by children or tripped oxer tmintentionallv.
]f you use an extension cord, the interior light may flicker and the bh_wer sound nlav wiry when the
microwave oven is on. Cooking times may be longe_; too.
READANDFOLLOWTHISSAFETYINFORMATIONCAREFULLY.
SAVETHESEINSTRUCTIONS
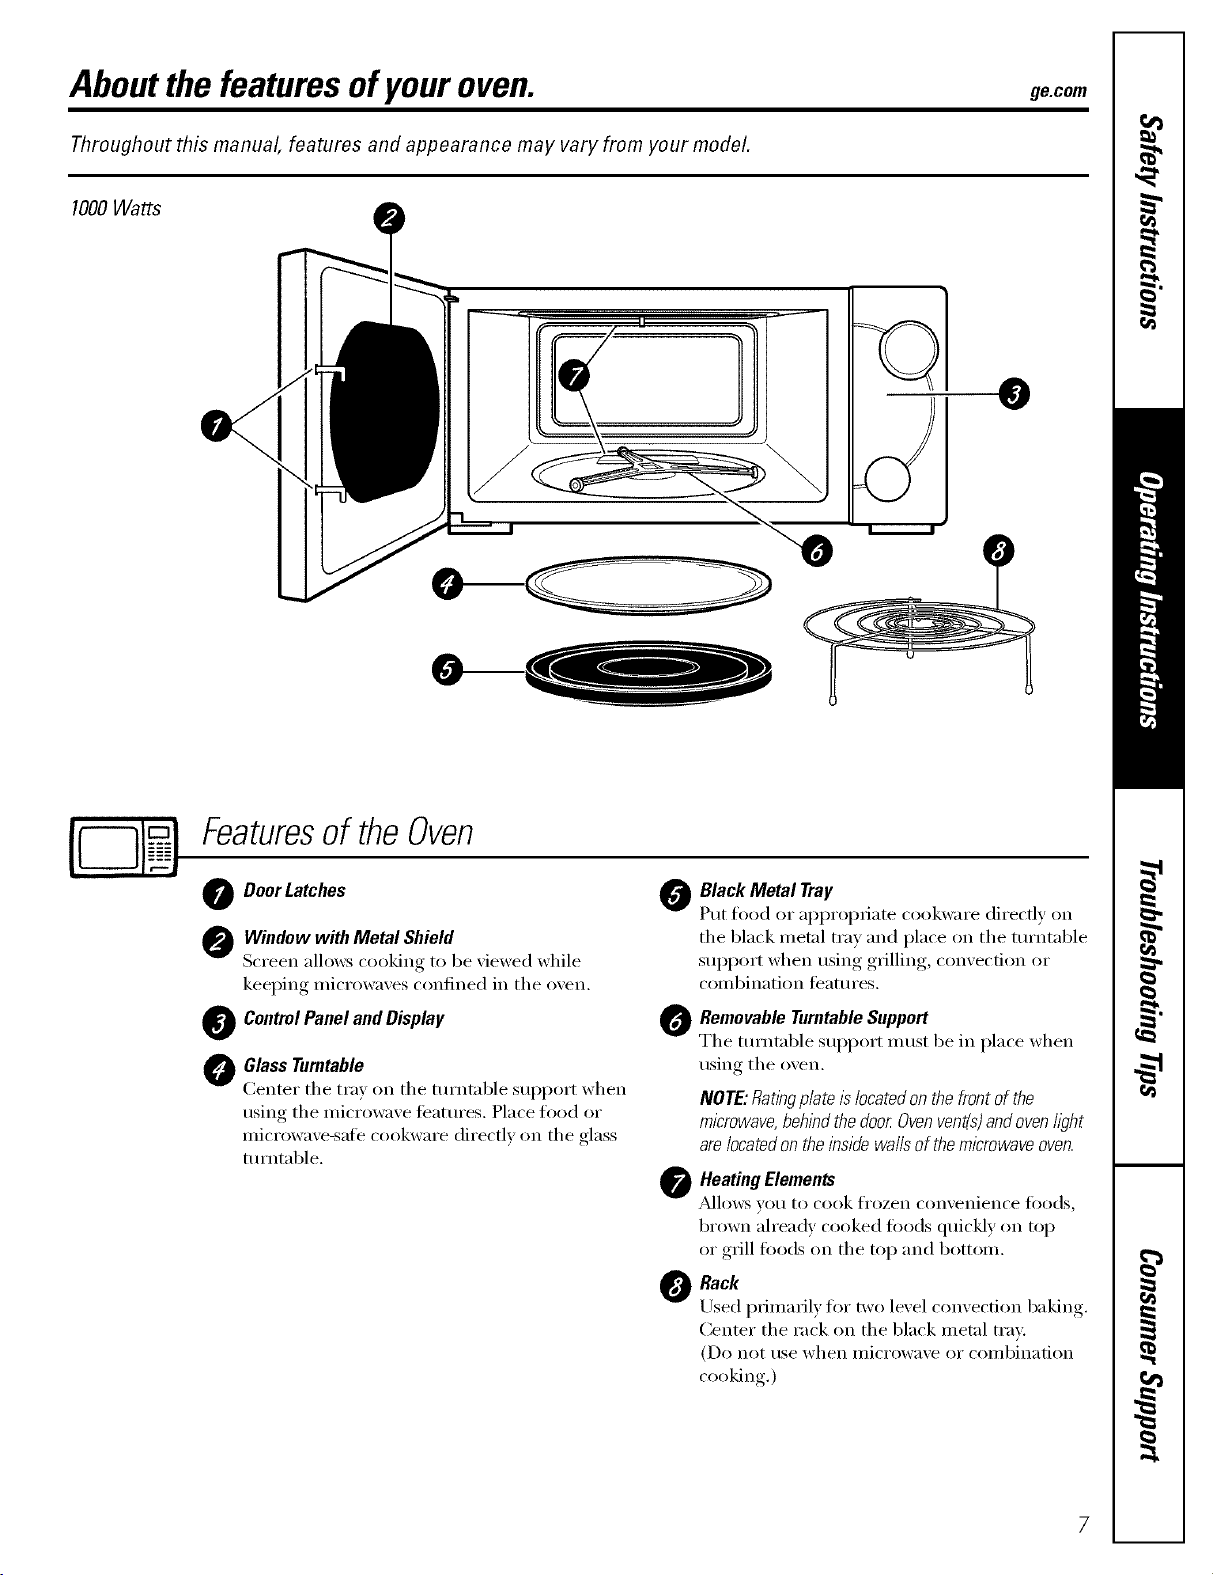
Aboutthe featuresofyouroven. gecom
Throughout this manual, features and appearance may vary from your model.
1000Watts
\
0
Featuresof theOven
Door Latches 0
Window with Metal Shield
Screen alh)ws cooking to be ;iewed while
keeping microwaves confined in the oven.
@ Control Panel and Display @
Glass Turntable
Center the tray on the turntable stq)port when
using the microwave ti_atm'es. Place food or
microwave-sate cookware directly on the glass
turntable.
BlackMetal Tray
Put food or ai)propfiate cookware direct.Iv on
the black metal tray and place on the turntable
support when usin,*._,grilling,, comecfion or
combination teatm'es.
RemovableTurntableSupport
The turntable support must be in place when
using the oven.
NOTE:RatingplateIslocatedonthefrontofthe
microwave,behindthedoorOvenvent(s)andovenhght
are/ocatedontheinsidewaftsofthemicrowaveoven.
Heating Elements
_kdlows VOtl to cook fi'ozen ('on'_enien('e i()o(ls,
brown alrea(k cooked foods quickly on top
or grill fi)o(ls on the top and bottom.
Rack
Used pfimaril,_ tot two level conxection baking.
Center the rack on the black metal tra>
(Do not use when microwave or combination
cooking.)
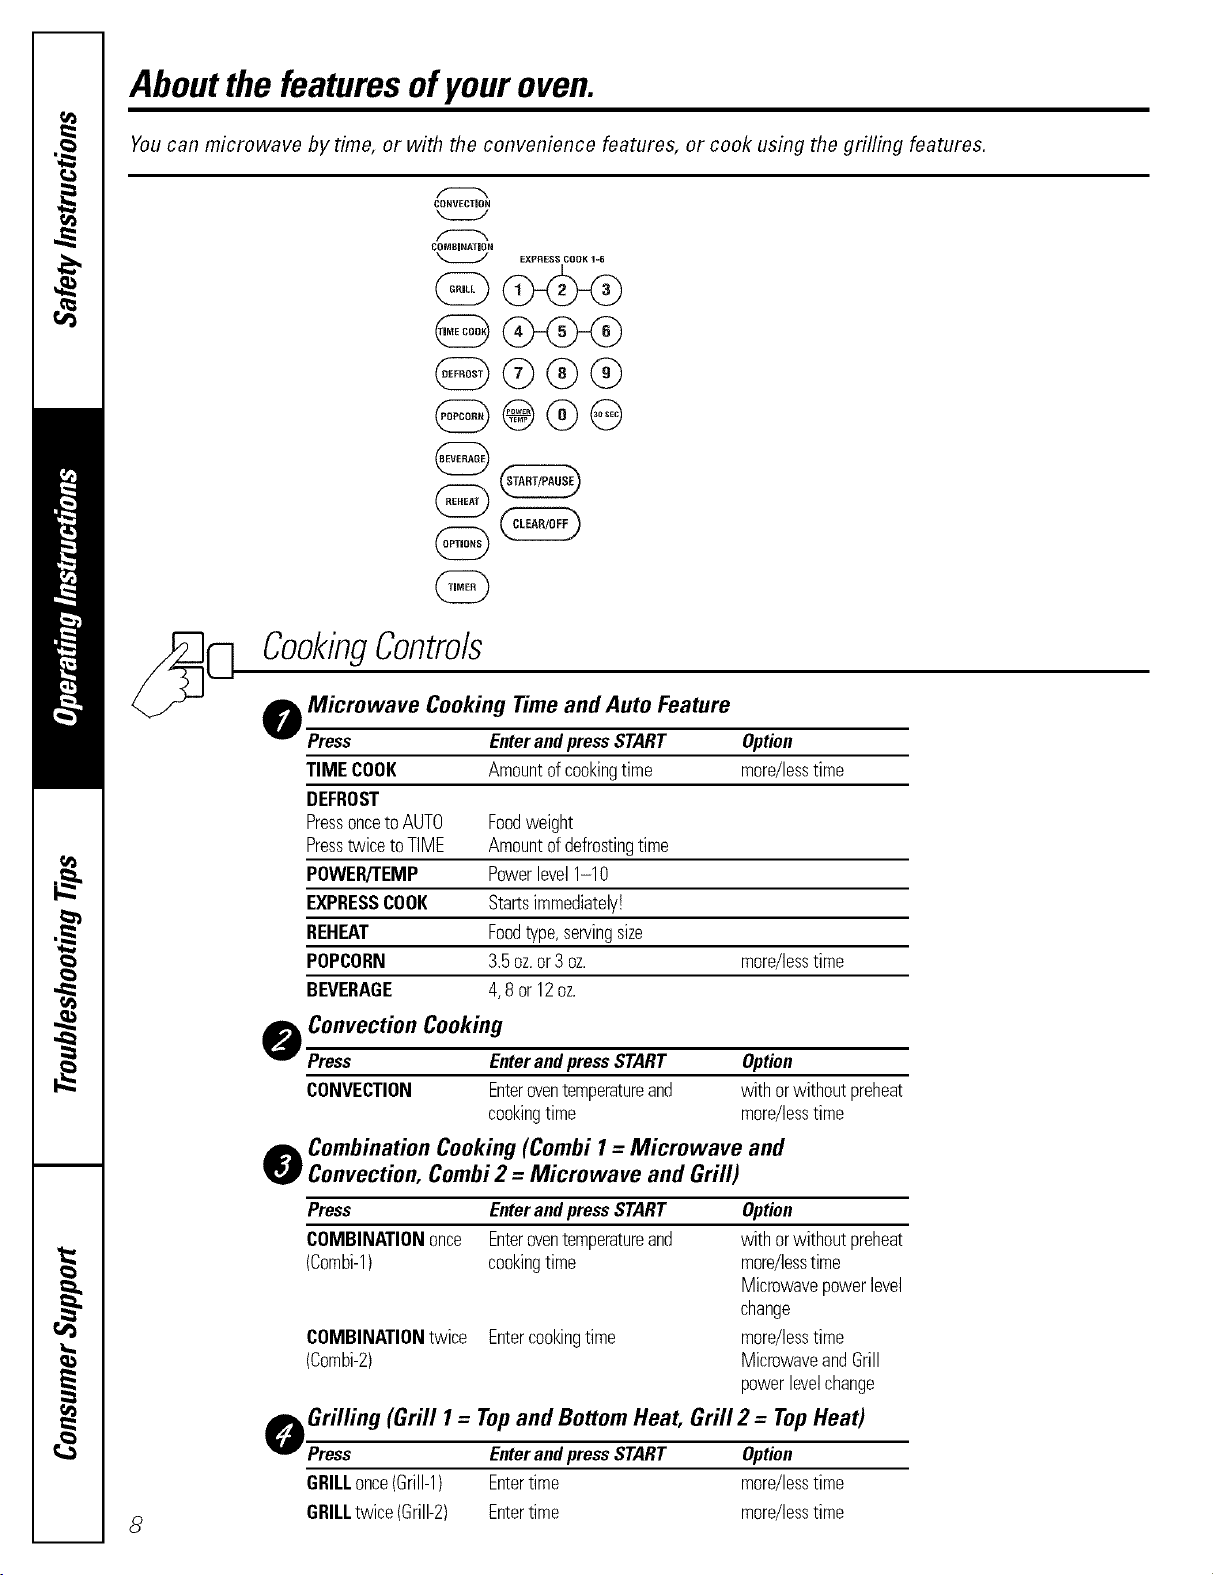
Aboutthe featuresofyouroven.
You can microwave by time, or with the convenience features, or cook using the grilling features.
CONVECTION
COMBiNATiON
EXFRESS COOK 1-6
@GG®
@@®@
@
@
CookingControls
o Micrewave Cooking Timeand Auto Feature
Press Enterandpress START Option
TIMECOOK Amountofcookingtime more/lesstime
DEFROST
PressoncetoAUTO Foodweight
PresstwicetoTIME Amountofdefrostingtime
POWER/TEMP Powerlevel1-10
EXPRESSCOOK Startsimmediately!
REHEAT Foodtype,servingsize
POPCORN 3.5oz.or3oz. more/lesstime
BEVERAGE 4,8or12oz.
o Convection Cooking
Press EnterandpressSTART Option
CONVECTION Enteroventemperatureand withorwithoutpreheat
cookingtime more/lesstime
LCombination Cooking (Combi 1= Microwave and
eW Convection, Combi2 = Microwave and Grill)
Press EnterandpressSTART Option
COMBINATIONonce Enteroventemperatureand withorwithoutpreheat
(Combi-1) cookingtime more/lesstime
Microwavepowerlevel
change
COMBINATIONtwice Entercookingtime more/lesstime
(Combi-2) MicrowaveandGrill
powerlevelchange
o Grilling (Grill 1= Topand Bottom Heat, Grill 2 = TopHeat)
Press EnterandpressSTART Option
GRILLonce(Grill-1) Entertime more/lesstime
GRILLtwice(Grill-2) Entertime more/lesstime
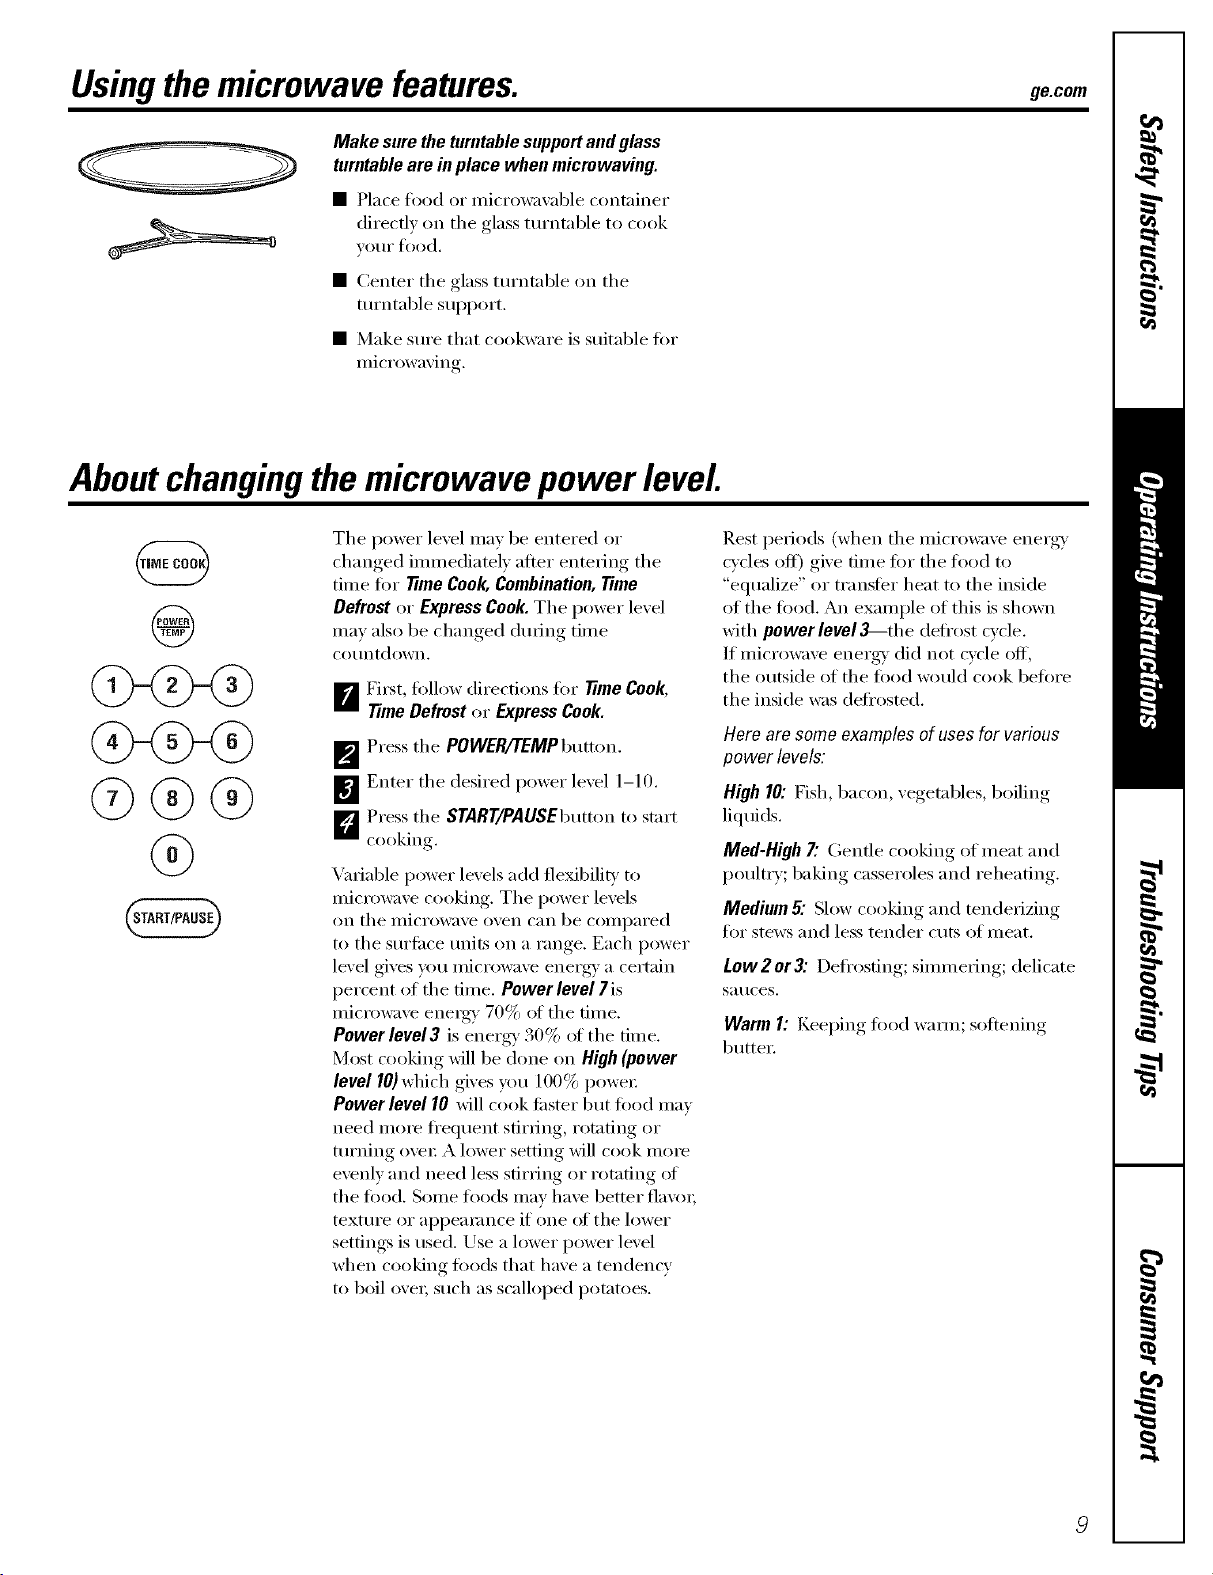
Usingthemicrowave features, gecem
Make sure the turntable support and glass
turntable are in place when micrewaving.
• Place food or microwavable container
directly oil the glass turntable to cook
VO/II" f0od,
• Center tile glass turntable on tile
turntable support.
• Make sure that cookware is suitable fin.
microwaving,
Aboutchangingthemicrowave power level
@
G( (9
(9
Tile power level may be entered or
changed immediately after entering the
time fi)r Time Cook, Combination, Time
Defrost or Express Cook. Tile power level
may also be changed during time
COtlntdown,
B Fi_t, fi_llow directions fiw Time Cook,
Time Defrost or Express Cook.
F_ Press the POWER/'_MPbutton.
I_'] Enter the desired power level 1-10.
D Press tile START/PAUSEbutton to start
cooking.
Variable power levels add fleMbili D' to
micrm_m'e cooking. Tile power levels
on the IllicI'o%_lve oven C[lll be COllll)ared
to tile surfi_ce traits on a range. Each power
level gives you microgroove energy a certain
l)ercent of the time. Power level/is
microgroove energy 70% of tile time.
Power level3 is energy 30% ot tile time.
Most cooking will be done on High (power
level 10)which gives you 100% powex:
Power level 10 will cook fi_ster but fi_od may
need more fl'equent stirring, rotating or
tm'ning ove_: A lower setting will cook more
evenly and need less stirring or rotating ot
tile fi)o(l. Some fi)o(ls may have better fla\'oL
textm'e or appearance if one of tile h)wer
settings is used. Use a lower power level
when cooking tbods that have a tendency
to boil o\'e_; such as scalloped potatoes.
Rest periods (when tile microwave energr) '
cycles off) give time fin" the tood to
"equalize" or transter heat to the inside
of tile food. An example of this is shown
with power level,_-the defrost cycle.
If microwave ener_' did not cvcle off;
the outside of the food would cook befin'e
tile inside was defl'osted.
Hero am some examples of uses forvarious
power levels:
High 10: Fish, bacon, vegetables, boiling
liquids.
Med-High7."Gentle cooking of meat and
poultry; 1)a!dng casseroles and reheating.
Medium 5". Slow cooking and tenderizing
for stews and less tender cuts of meat.
Low2 or3: Defrosting; simmering; delicate
Sat/ces.
Warm I: Keel)ing, fl)od waml; softening,
butte_:
Aboutthe time andautomicrowave features.
03GG
@
Time Cook
Time CookI Time Cook II
J_dlows roll 1o microwaxe for _111_ tiille
up to 99 minutes.
Power level I0 (High) is autonmticall] set,
but you ma] change it fin" more flexibility:
[]Press the TIMECOOKbutton.
_'_ Enter cooking time.
m Change power lexel if)ou don't want
fifll powe_: (Press POWERITEMP. Select
a desired power level 1-10.)
_'_ Press the START/PAOSEbutton to start
(ookin_.
YLu may open the door during Time Cook
to check the Iced. Close the door and press
STaRT/PROSEt,, resuln e c()(Mng
I.ets you change power levels automatically
dining cooking. Here's how to do it:
D'_ Press the TIMECOOKbutton.
_ Enter cooking time.
m Chano-e the power lexel if you don't
want fifll powe_: (Press POWERLEVEL.
Select a desired power level 1-10.)
D Press the TIME COOKbutton again.
_'_ Enter the second cooking time.
_ ("ham*e the power lexel if} ou don't
want flfll powe_: (Press POWER/TEMP.
Select a desired power level 1-10.)
F'_ Press the START/PAUSEbutton to stm*
cooking.
M the end of Time CookI, Time Cook II
co/ints down.
Make sure the turntable support and glass turntable are in place when microwaving.
EXPRESS COOK 1-6
(?)<g>@
Express Cook
This is a quick way to set and start cooking in one minute blocks each time the EXPRESSbutton
is pressed.
The power level will automatically be set at 10 and the oven will start immediately.
The power lmel can be changed as time is counting down. (Press POWER/TEMP. Select a
desired power level 1-10.)
Make sure the turntable support and glass turntable are in place when microwaving.
0
Add30Seconds
::Ji::Each time the 30 SECbutton is pressed, it will add 30 seconds to any cooking time
cotmfing down, tmti] the maximtm cooking time is reached.
Make sure the turntable support and glass turntable are in place when microwaving.
10
ge.com
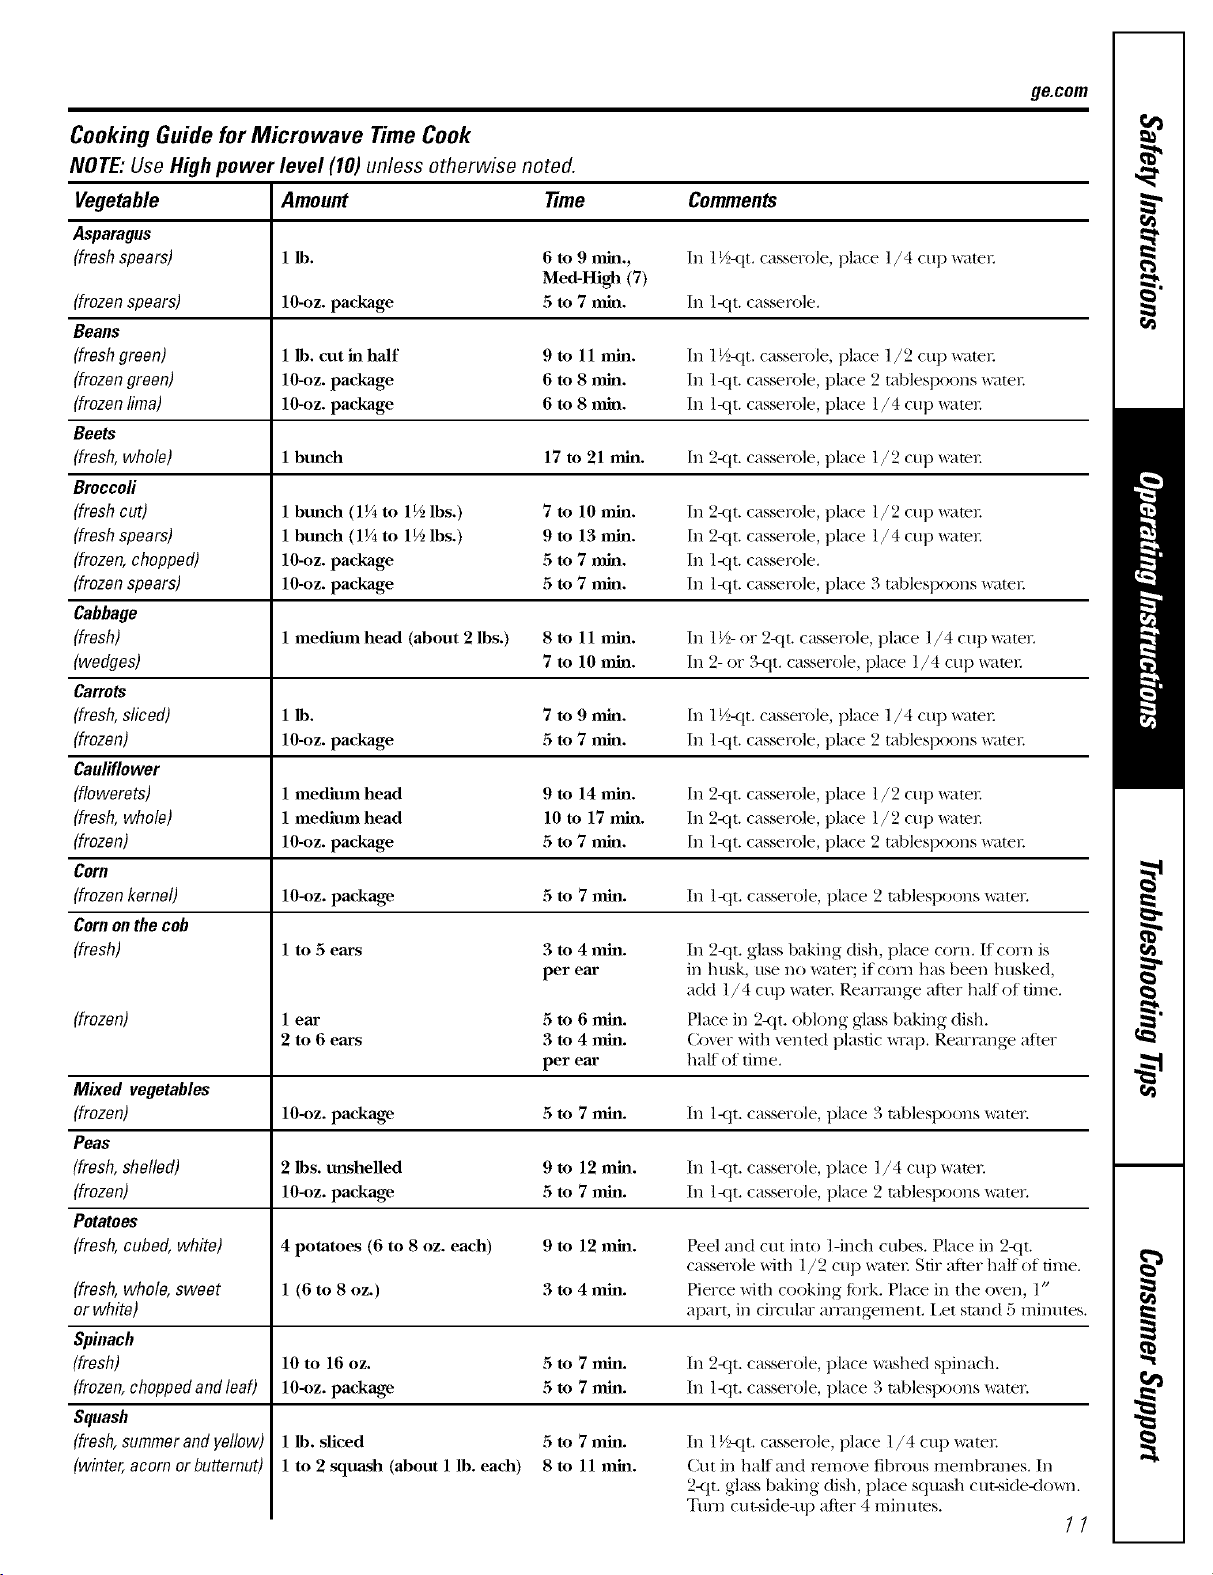
Cooking Guide for Microwave Time Cook
NOTE: Use High power level (10) unless otherwise noted.
Vegetable Amount time Comments
Asparagus
(fresh spears) 1 lb. 6 to 9 rain., In 1½-<tt. casserole, place l/4 cup _ltel:
Med-High (7)
(frozen spears) lO-oz, package 5 to 7 nfin. In l<tt. casserole.
Beans
(freshgreen) 1 lb. cut in half 9 to 11 rain. In 1½-<tt. casserole, place l /2 cup _tel:
(frozengreen) 10-oz. package 6 to 8 rain. In l<tt. casserole, place 2 tablespoons _ater.
(frozen lima) 10-oz. package 6 to 8 rain. In l<tt. casserole, place l/4 cup _ater.
Beets
(fresh, whole) 1 bunch 17 to 21 rain. In 2-<it. casserole, place 1/2 cup _ltel:
Broccoli
(fresh cut) 1 bmlch (1¼ to 1½ lbs.) 7 to 10 nfin. In 2-<it. casserole, place 1/2 cup _ltel:
(freshspears) 1 bmlch (1¼ to 1½ lbs.) 9 to 13 rain. In 2-<it.casserole, place 1/4 cup _ltel:
(frozen, chopped) lO-oz, package 5 to 7 nml. In I-<tL casserole.
(frozenspears) 10-oz. package 5 to 7 rain. In l<tt. casserole, place 3 tablespoons _ater.
Cabbage
(fresh) 1 medium head (about 2 lbs.) 8 to 11 rain. In 1½- or 2<it. casserole, place l/4 cup _ltel:
(wedges) 7 to 10 rain. In 2- or ?_t t. casserole, place l/4 cup _ltel:
Carrots
(fresh,sliced) 1 lb. 7 to 9 rain. In 1½-<tt. casserole, place l/4 cup _ltel:
(frozen) 10-oz. package 5 to 7 nfin. In l<tt. casserole, place 2 tablespoons _atel:
Cauliflower
(flowerets) 1 medium head 9 to 14 rain. In 2-<it. casserole, place l/2 cup _tel:
(fresh,whole) 1 medium head 10 to 17 rain. In 2-<tLcasserole, place l/2 cup x_ltel:
(frozen) 10-oz. package 5 to 7 rain. In l<tt. casserole, place 2 tablespoons _atel:
Corn
(frozen kernel) 10-oz. package 5 to 7 rain. In 1-<tt. casserole, place 2 tablespoons ware1:
Cornon the cob
(fresh) 1 to .5ears
(frozen)
3 to 4 rain.
per ear
(fresh,whole,sweet
or white)
Spinach
(fresh)
(frozen,choppedandleaO
Squash
(fresh,summerandyellow)
(winter,acornor butternut)
lear 5 to 6 rain.
2 to 6 ears 3 to 4 rain.
per ear
In 2-<it. glass baking dish, place corn. II corn is
in husk, use no water; if corn has been husked,
add ]/4 c up ware1: Rearrmlge after half of time.
Place in 2<tt. oblong glass baking dish.
Cover with vented plastic _Tap. Rearrange after
half of time.
Mixed vegetables
(frozen) 10-_)z.package 5 to 7 rain. In l<tt. casserole, place 3 tablespoons water:
Peas
(fresh, shelled) 2 lbs. unshelled 9 to 12 rain. In l-<tt, casserole, place 1/4 cup water:
(frozen) 10-_)z.package 5 to 7 rain. In ]<tt. casserole, place 2 tablespoons water.
Potatoes
(fresh, cubed, white) 4 potatoes (6 to 8 oz. each) 9 to 12 rain. Peel and cut into l-inch cubes. Place in 2-<it.
casserole with l/2 cup _te_: Stir after half of time.
1 (6 to 8 oz.) 3 to 4 rain. Pierce with cooking fi)_k. Place in the oven, l"
apart, in circular arrangement, i,et stand 5 minutes.
10 to 16 oz. 5 to 7 rain. In 2<tt. casserole, place washed spinach.
104)z. package 5 to 7 rain. In l<tt. casserole, place 3 tablespoons water:
1 lb. sliced
1 to 2 squash (about 1 lb. each)
5 to 7 rain.
8to 11 rain.
In l V_tt. casserole, place 1/4 cup water:
Cut ill half and relnoxe fibrous inelnbrtmes. In
2-<it.glass baking dish, place squash cut-side<lo_l.
Ttml cut-side-up after 4 minutes.
11
Aboutthe time andautomicrowave features.
time Defrost
Use Time Defrost to defrost fin" a selected
length of time.
_r_ Press tile DEFROSTbutton twice,
_'_ Enter the defl'osting time,
_€'] Press the START/PAUSEbutton to start
defl'osfing.
D Turn tile todd oxer if tile oxen signals
TURN FOOD OVER.
Power level is automatically set at 3, but can
be changed. You can defl'ost small items
quickly by raising tile power level after
entering tile time. Power level 7 cuts tile
total defl'osfing time in about haiti power
level 10cuts tile total time to al)l)ro_mately
1/3. Howe;'e_; fi)od will need more
fl'equent attention than usual.
A dull thumping noise may be heard
dm_ing defrosting. This is nomml when
oven is not operating at High poweI;
Make sure the turntable support and glass
turntable are in place when microwaving.
Defrosting Tips
• Foods fl'ozen in paper or plastic can be
defl'osted in the package. Closed packages
should be slit, pierced or vented AFTER
fi)od has partially defl'osted. Plastic storage
containers shoukl be l)artially tmcovered.
• Family-size, prepackaged ti'ozen (limm_
can be deti'osted and microwaved. If tile
fl)od is in a fi)il containe_; transti_r it to a
microwave-sate dish.
• Foods that spoil easily should not be
alh)wed to sit ()tit fi)r x/loI'e than one l/()tlX"
after defl'osting. Room temperature
promotes tile gr(m_h of ham/tiff bacteria.
• For more even defl'osfing of linger toods,
such as roasts, use Auto Defrost. Be sure
lmge meats are completely defl'osted
befl n'e cooking.
• When defl'osted, fi)od should be cool
but softened in all areas. If still slightly icy,
return to tile microwave ve_T briefly, or
let it stand a tew minutes.
@
0)-(g>@
@
Auto Defrost
Use Auto Defrost fiw meat, poultt 3 and fish.
Use Time Defrost fiw most other frozen fi)ods.
Auto Defrost automatically sets tile
deti'osting times and power levels to give
even defl'osfing results fin" meats, poult_ y
and fish.
• Remove meat fl'om package and place
on microwaxe-satb dish.
_ Press tile DEFROSTbutton once.
_'_ Enter the food weight, usino the
Come,Men (;uide at rioht
For example, press 1.2 fin" 1.2 pomads
(I potmd, 3 oz.).
B Press tile START/PAUSEbutton to start
deli'osting.
D Turn tile fi)od oxer if tile oxen signals
TURN FOODOVER.
• Rein(we defl'osted meat or shield wama
areas with small pieces (ff fl)il.
• _Mter defl'osting, most meats need to
stand 5 minutes to complete deli'osting.
I,mge roasts should stand fin" about
30 minutes.
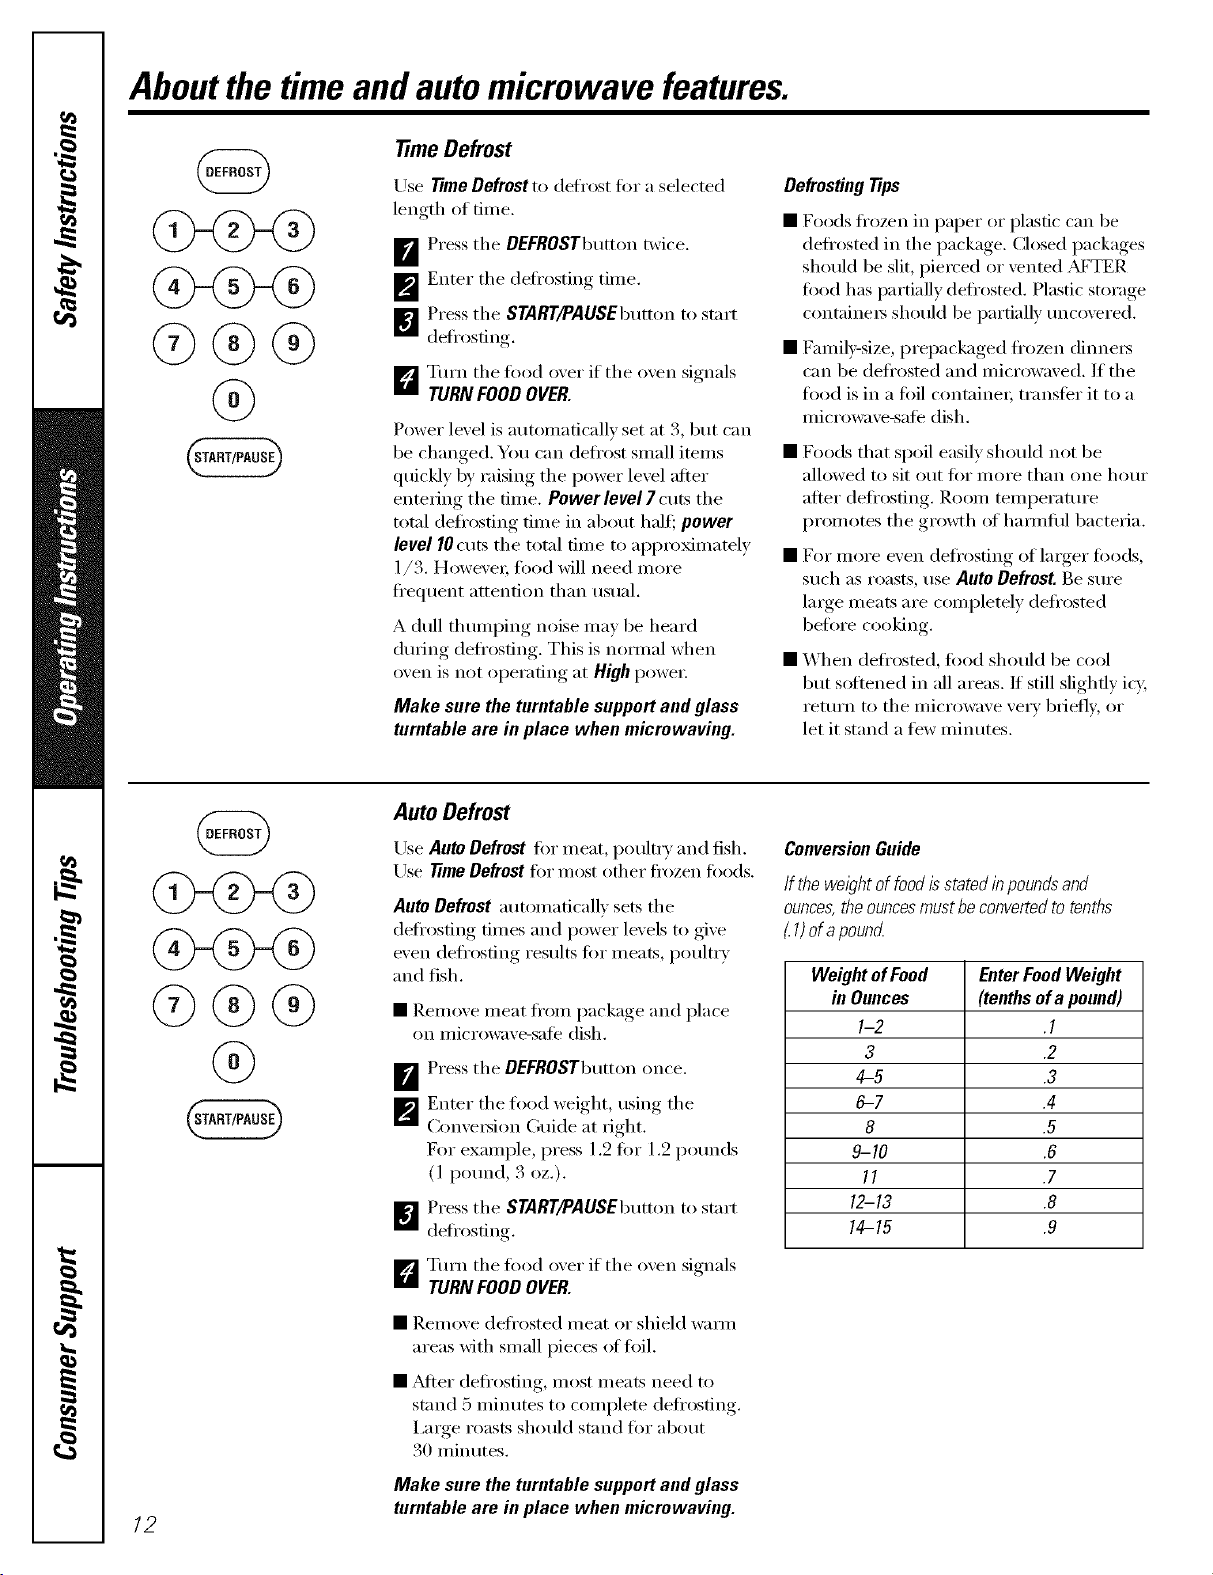
ConversionGuide
If thewel)htoffoodisstatedinpoundsand
ounces,theouncesmustbeconvertedtotenths
1)ofa pouncL
WeightofFood EnterFoodWeight
in Ounces (tenthsofa pound)
1-2 .1
3 .2
4-5 .3
6-7 .4
8 .5
9-10 .0
11 .7
12-13 .8
14-15 .9
Make sure the turntable support and glass
turntable are in place when micrewaving.
/2
ge.com
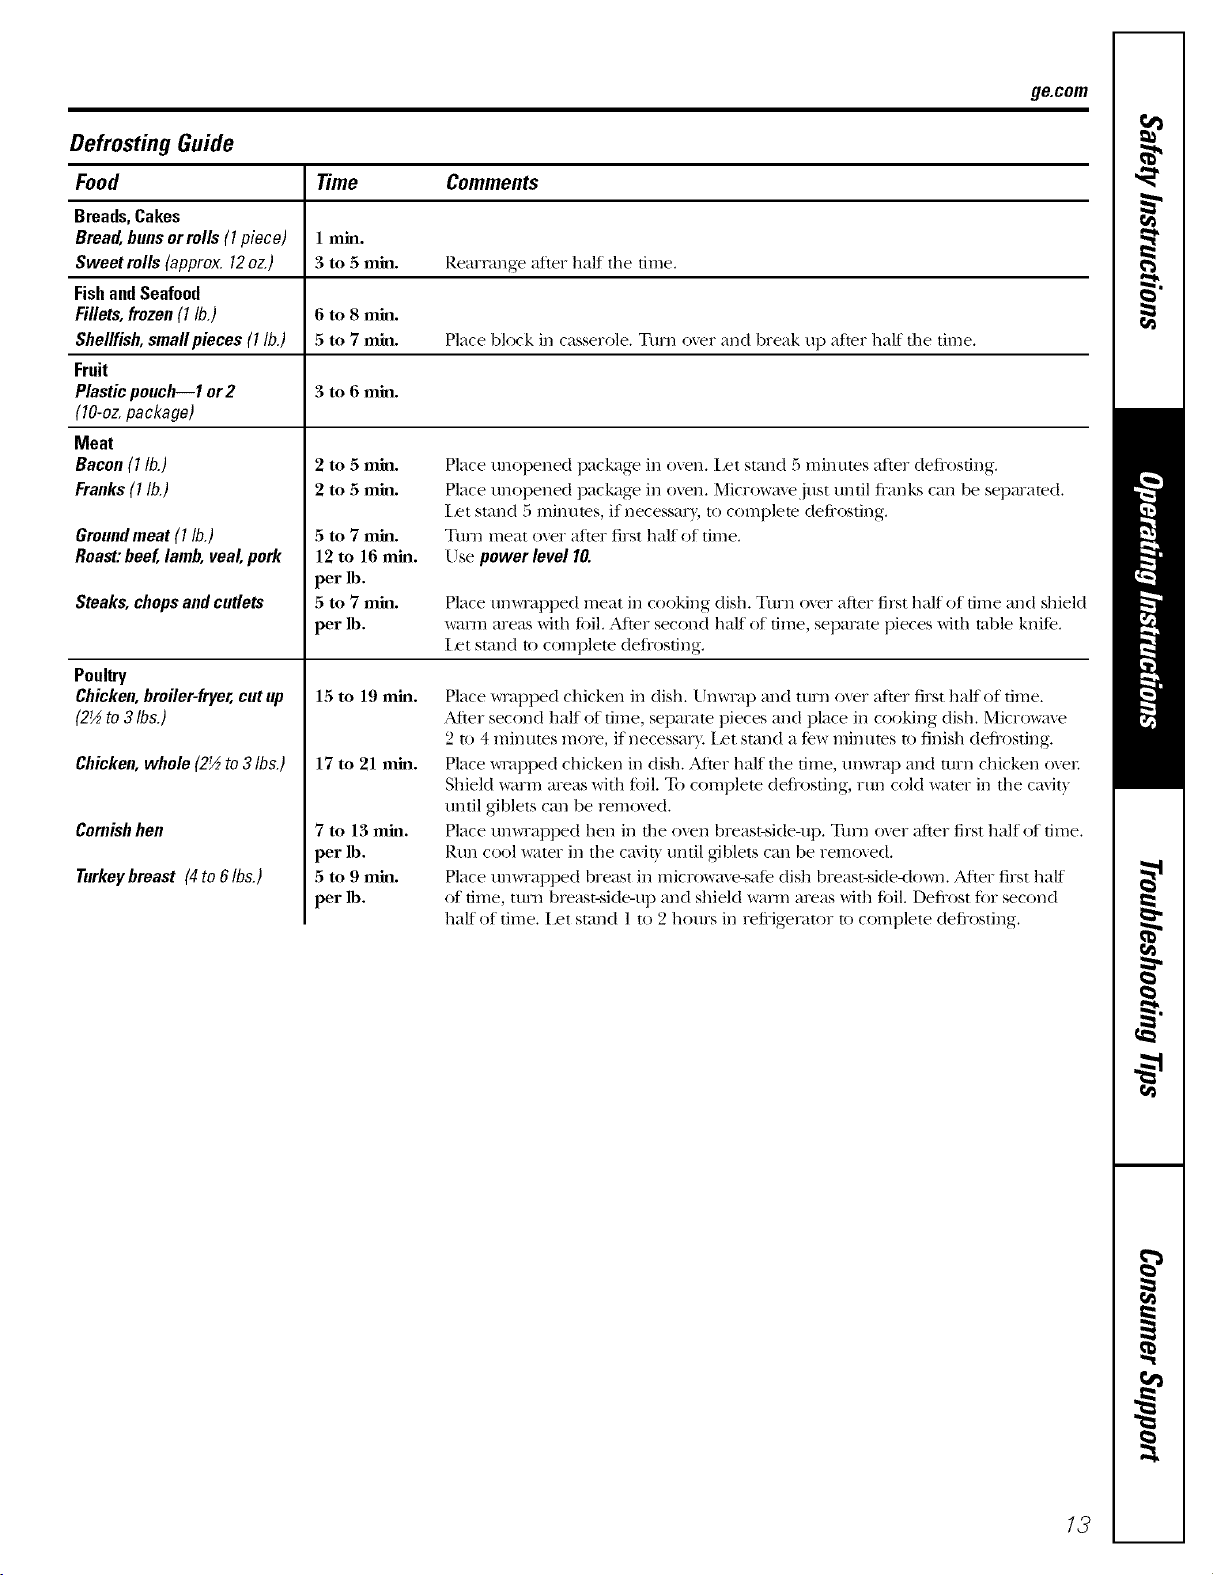
Defrosting Guide
Food Time Comments
Breads, Cakes
Bread, bans orrolls (I piece) ! rain.
Sweet rolls (approx. 12oz.) 3 to 5 rain. Rearrange after half the time.
Fish and Seafood
Fillets, frozen (I lb.) 6 to 8 rain.
Shellfish, smallpieces (I lb.) 5 to 7 rain. Place Mock in casserole. Turn o'_er and break up m'ter half the time.
Fruit
Plastic poach--1 or2 3 to 6 rain.
(10-oz. package)
Meat
Bacon(I lb.)
Franks(I lb.)
Groundmeat (I lb.)
Roast:beef, lamb,veal, pork
Steaks, chopsandcutlets
Poultry
Chicken,broiler-fryer,cat up
(2½to 3 Ibs.)
Chicken,whole(2½to3Ibs.)
Cornishhen
Turkeybreast (4to 6Ibs.)
5to7mm.
12tol6mm.
per_.
5to7mm.
per_.
15 to 19 rain.
17 to 21 rain.
7tol3mm.
per_.
5to9mm.
per_.
Place tmopened package ira oven, l_t stand 5 minutes m'ter defi'osdng.
Place tmopened package ira o_en. Microwm%just tmtil fi'anks can be separated.
I set stand 5 rain tires, if necessm3, to complete defi'osting.
Tuna meat over after first half of time.
Use power level I0.
Place Um_Tapped meat ira cooking dish, Turn over after first half of time and shield
warm areas with fi)il. _Mter second half of time, separate pieces with ruble knife,
Iset stand to complete deli'osfing.
Place _Tapped chicken ira dish. Unwrap mad turn over after first half of time.
After second half of time, separate pieces and place ira cooking dish. Microwave
2 to 4 minutes more, if necessar\, iset stand a few minutes to finish deli'osting.
Place _Tapped chicken ira dish. _Mter half the time, unvvTa l) and turn chicken o_el:
Shield warm areas with lifil. 33) complete deli'osting, run cold water ira the ca\it_
tmtil giblets can be removed.
Place um_Tapped hen ira the ()\era breast-side-up. Tm'n o_er after first half of time.
Rtm cool water ira the ca\it) tmtil giblets can be removed.
Place um_Tapped breast ira microwm'e-sale dish breast-side<lo_m. Alter first half
of time, mrn breast-side-up and shield warm areas with li)il. Deli'ost Ii)r second
half of time. ilet stand I to 2 hours ira refi'igerator to complete deJi'osting.
13
Aboutthe conveniencemicrowave features.
Useonlywith prepackaged
microwavepopcornweighing
3,0to3,5ounces,
Popcorn
Make sure the turntable supportand glass
turntable are in place when microwaving.
To use the Popcorn teature:
_r_ Follow )ackaoe instructi(ms, using
Time Cook if the package is less than 3.0
ounces or linger than 3.5 ounces. Place
the package of popcorn in the center
of the microwave.
[]
Press the POPCORNbutt(m once or
twice. The oxen starts immediately,
Press once tor a regular size (3.5 oz.)
bag of popcorn.
Press twice fin" a smaller size (3.0 oz.)
bag of popcorn.
If w)u open tile door while POPCORNis
displayed, PAUSEwill appea_: Close the
doo_, press START/PAUSEto resume
cooking ORpress CLEAR/OFFtocancel
the popcorn teattlre.
If food is undercooked after tile
countdown, use Time Cook fi)r
additional cooking time.
Toadd time:
Immediately after oven starts, press 9
to add 20 seconds.
Tosubtract time:
Immediately after oven starts, press 1
to subtract 20 seconds.
Beverage
Make sure the turntable supportand glass
turntable are in place when microwaving.
To use the Beverage teatm'e:
F_ Press BEVERAGE.
[]The serving, size is automatically set
at 4 ounce_ but can be changed b)
pressing BEVERAGEto select 8 or 12
ounces. Pressing twice selects 8 ounces
and pressing three times selects 12
Otlilt-'es. The oven starts immediately
Drinks heated with the Beverage feature may
be very hot Remove the container with care.
If bexerage is not hot enough after the
countdown, use Time Cook fin" additional
heating time.
Reheat
Make sure the turntable support and glass
turntable are in place when micrewaving.
Tile Reheatleatm'e reheats 1-6 servings
ot many previously cooked fi)o(ls.
F_ Press REHEAT
[] Select fi)od _'l)e 1-6. (See Reheat Guide
below).
_¢J Select ser\ing size 1-3.
L_ Press START
NOTE:Servingsizecannotbe changed
duringcooking.
Reheat Guide
Food Type
1.Meats
2. Pasta
3. Pizza slices
4. Plate of leftovers
5. Sauce
6. Vegetables
Comments
Co_er with lid or _ented plastic _Tap.
Co\er with lid or \ented plastic _Tap.
Do not cove1:
Co\er with lid or \ented plastic _Tap.
Co\er with lid or \ented plastic _vTap.
Co\er with lid or \ented plastic _vTap.
14
About the convection features, gecom
Convection cooking uses a heating element to raise tile temperature of tile air inside tile
oven. Any oven temperature fl'om 250°F to 450°F may be set, in increments ofB°E A tim
gently circulates this heated air throughout tile oven, over and around tile fi)od, producing
golden brown exte_io_ and _ich, moist inte_io_.
Because the heated air is kept constantly moving, not pemfitting a laver ot cooler air
to develop around tile tood, some toods cook fi_ster than in regular oven cooking.
See the Cookware Tips section for informationon suggested cookware.
For Best Results...
Use the rack only, when doiw,_ two lexel baking., Otherwise, place tood or oxen-sate dish
directly on metal tray.
CONVECTION
Convection Time Cook with Preheat
B Press tile CONVECTlONbutton.
_'_ Enter tile desired o_en temperature
between 250°F and 450°E Do not enter
con'_ection cook tiIlle noxv, (Tile cook
time will be entered late_, after tile o_en
is preheated.)
_ Press tile START/PAUSEbutton
to start preheating.
n
X'_hen tile oxen is preheated, it will
signal. If you do not open tile door
within 1 horn, tile oxen will turn off
automaticallv.
_'_ Open tile oxen door and, usin,*
caution, place the tood in the oxen.
_ Close the oxen doo_: Enter the cook
time and press START/PAUSEt,> stm*
cooklng,
F_ X_hen cookingiscomplete,tileoxen
will signal and turn off.
Make sure the turntable support and black metal tray are in place.
CONVECTION
\.____
Convection Time Cook without Preheating
B lf)our recipe does not require
I)reheating,, press tile CONVECTION
button.
_'_ Enter tile desired oxen temperature
between 250°F and 450°K
_ Enter tile cook time.
D Press tile START/PAUSEbummto start
tile o'_en,
Make sure the turntable support and black metal tray are in place.
15
Using the combination 1 (microwave and convection) features.
Combination I Cooking oftex_ the best features of microwave energy' and convection cooking.
Microwaves cook fi)od fl_st and convection circulation of heated air browns fl)ods
beautiflfllv. Any oven temperature fl'om 250°F to 450°F may be set, in increments of 5°E
CAUTION:Whenusingthe combinationfeatures,rememberthat the oven,
door and dishes will be very hod
• Cookware will become hot. Oven mitts • Be sure to select a size that will rotate
will be needed to handle the cookware, easily.
• Place fi)od or oven-sate cookware directly
on the black metal tray when cooking,
• Make sm'e tood is cooked all the way
through befi)re browning.
• Use the black metal tray in the same way
vou would use a shallow baking pan or
i)aking tray.
• In addition to the cookware provided,
VO/I C_III /ISe non-illetal casserole dishes,
pie plains and other heat-sate cookware.
Place them directly on the black metal
tI'ilV.
• Place tile black metal tray directly on tile
mrntable suI)port.
• Do not rise cookware or covelJngs i/lade
of paper; plastic or loft when using the
COlllbin_ltion [eattlres.
See the Cookware Tips section for information
on suggested cookware.
COMBINATION
GG®
Combination 1 Time Cooking with Preheat
B Press the COMBINATIONbutton.
[]
COMBI-I will be displayed.
_'_ Enter tile desired oven temperatm'e
between 250°F and 450°E Do not enter
combination cook time now. (Tile cook
time will be entered lateL after the o_en
is preheated.)
I_€_Press tile START/PAUSEbutton to start
preheating.
XAq/en die oven is preheated, it xdll signal.
]f_ou do not open tile door within 1 ho/u;
tile oxen will turn off automatically.
[]Open the oven door and, using
caution, place the fi)od in the oven.
1_'_ Close the oven doo_: Enter the cook
time. Enter whole minutes. Press the
START/PAUSEbutton to stmX cooking.
[] _4q_encooking is complete, tile o_en
will signal and turn off.
Make suretheturntablesupportand black metaltray are in place.
COMBINATION
GGG
G
Combination 1 Time Cooking without Preheat
B If your recipe does not require
preheating, press tile COMBINATION
button.
_'_ Enter tile desired oven temperatm'e
between 950°F and 450°E
_ Enter the cook time.
[]Press tile START/PAUSEbutton
to start tile o_,en.
NOTE:
• Some recipes call fin" preheating.
• Check the Cookwaro -tips section for
correct cookware when Combination
Cooking.
• Do not use metal cookware when
Combination Cooking.
• Place meat on a trivet in a glass dish to
collect juices and prevent spattering. For
fl)ods that are too tall to fit in tile oven,
vou can leave ()/it tile trivet.
• For best roasting and browning results,
whole roasts should be cooked in a glass
dish placed directly on the oxen shelf.
Make sure the turntable support and black metal tray are in place.
/6
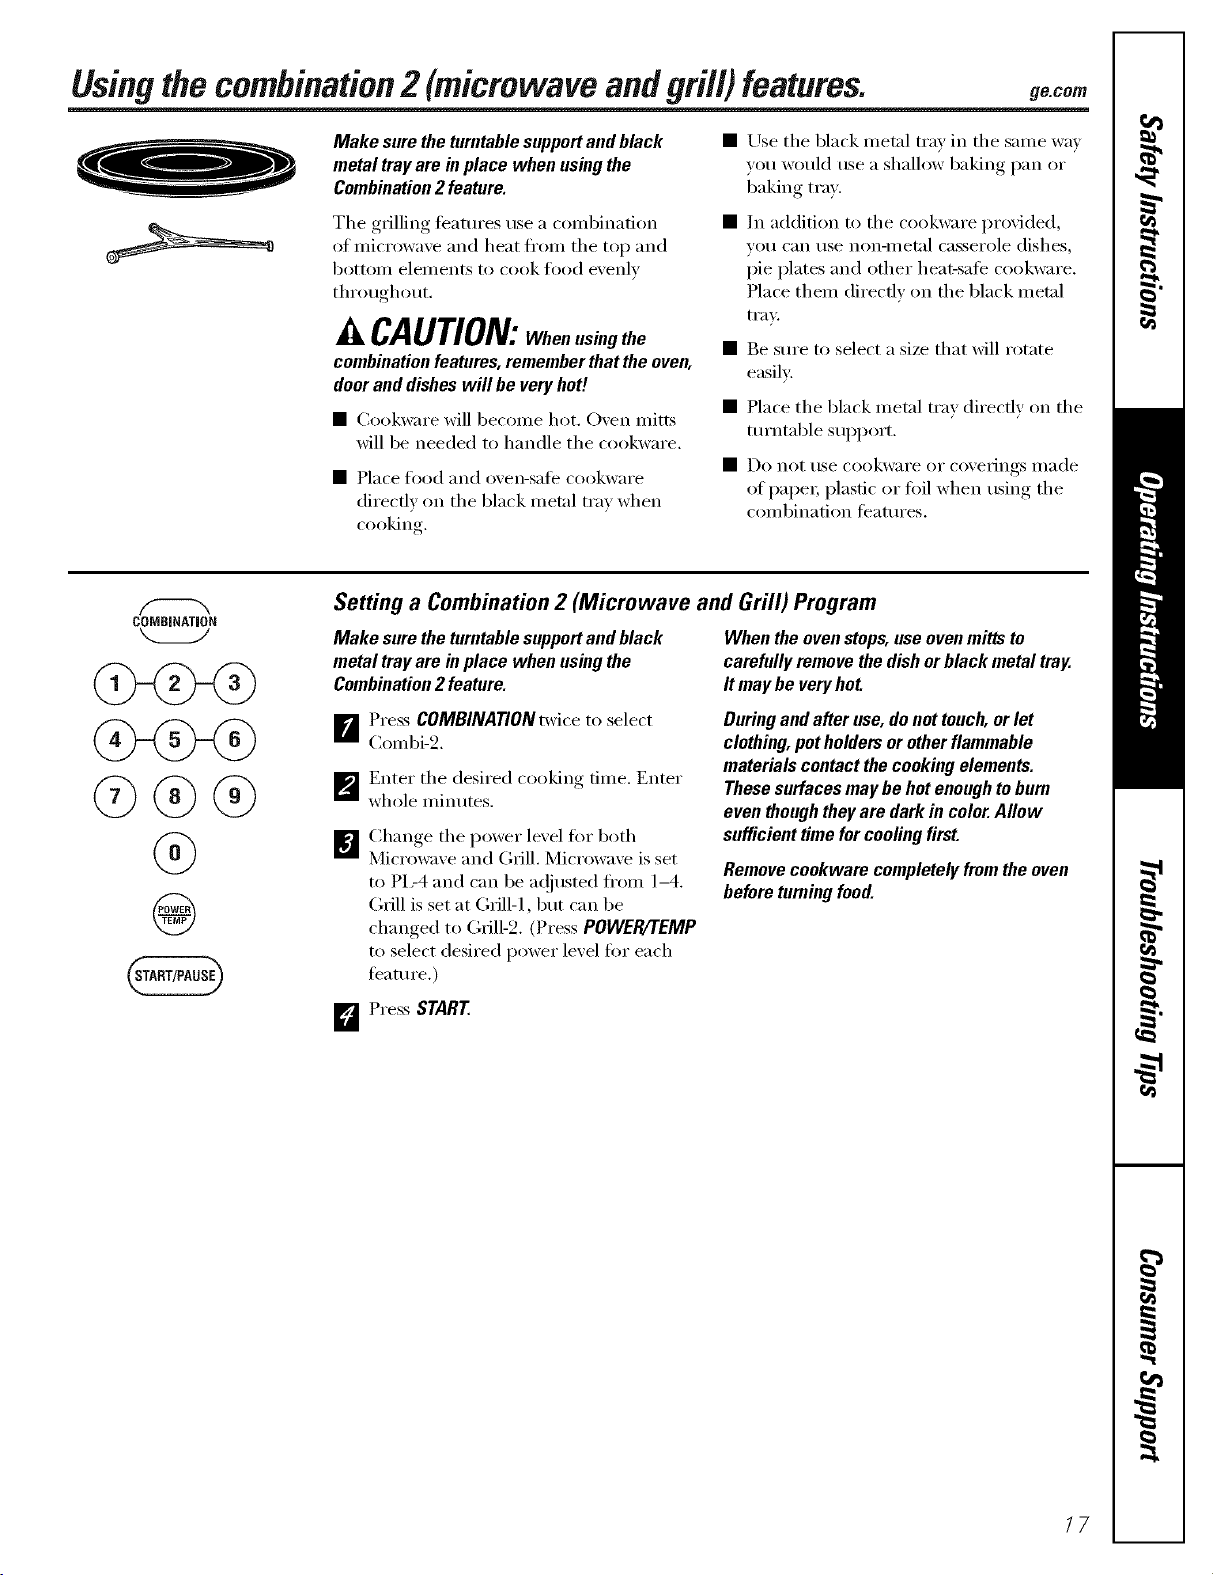
Usingthecombination2 (microwaveandgrill) features, ge.com
Make sure the turntable supportand black
metal tray are in place when using the
Combination2 feature.
The grilling features use a c()mbination
of microwave and heat fl'()m the top and
bottoI/l elei/lents to cook fi)od evenly
throughout.
A CAUTION:Whenusingthe
combination features, remember that the oven,
door and dishes will be very hot!
• (_ookware will become hot. Oven mitts
will be needed to handle the cookware.
• Place fl)od and oven-safe cookware
directly on the black metal tray when
cooking
• Use tile black metal tray in tile same way
you would use a shallow baking pan or
baking tray.
• In addition to the cookware provided,
VO/I C[III tlSe non-ll/etal casserole dishes,
pie plates and other heat-safe cookware.
Place them directly on tile black metal
tI'aV.
Be sure to select a size that will rotate
easily:
Place tile black metal tray directly on tile
turntable SUl)port.
Do not/lse cookware or coveYings illade
of paper; plastic or toil when using the
combination teattlI'es.
COMBINATION
@@@
@
@
Setting a Combination 2 (Microwave and Grill) Program
Make sure the turntable supportand black
metal tray are in place when using the
Combination2 feature.
When the ovenstops,use oven mitts to
carefully remove the dishor black metal tray.
It may be very hot
n
m
[]
Press COMBINATIONtwice to select
Combi-2.
Enter tile desired cooking time. Enter
whole minutes.
Chanoe,_ tile power lexel fi)r both
Microwaxe and (;rill. Microwave is set
to PL-4 and can be a(!iusted fl'om 1-4.
Grill is set at Grill-1, but can be
changed to Gfill-2. (Press POWER/TEMP
to select desired power level fi)r each
teatm'e.)
During and after use, donot touch, or let
clothing, pot holders or other flammable
materials contact the cooking elements.
These surfaces may be hot enoughto burn
even though theyare dark in color.Allow
sufficient time forcooling first.
Remove cookware completely from the oven
before turning food.
D Press START
17
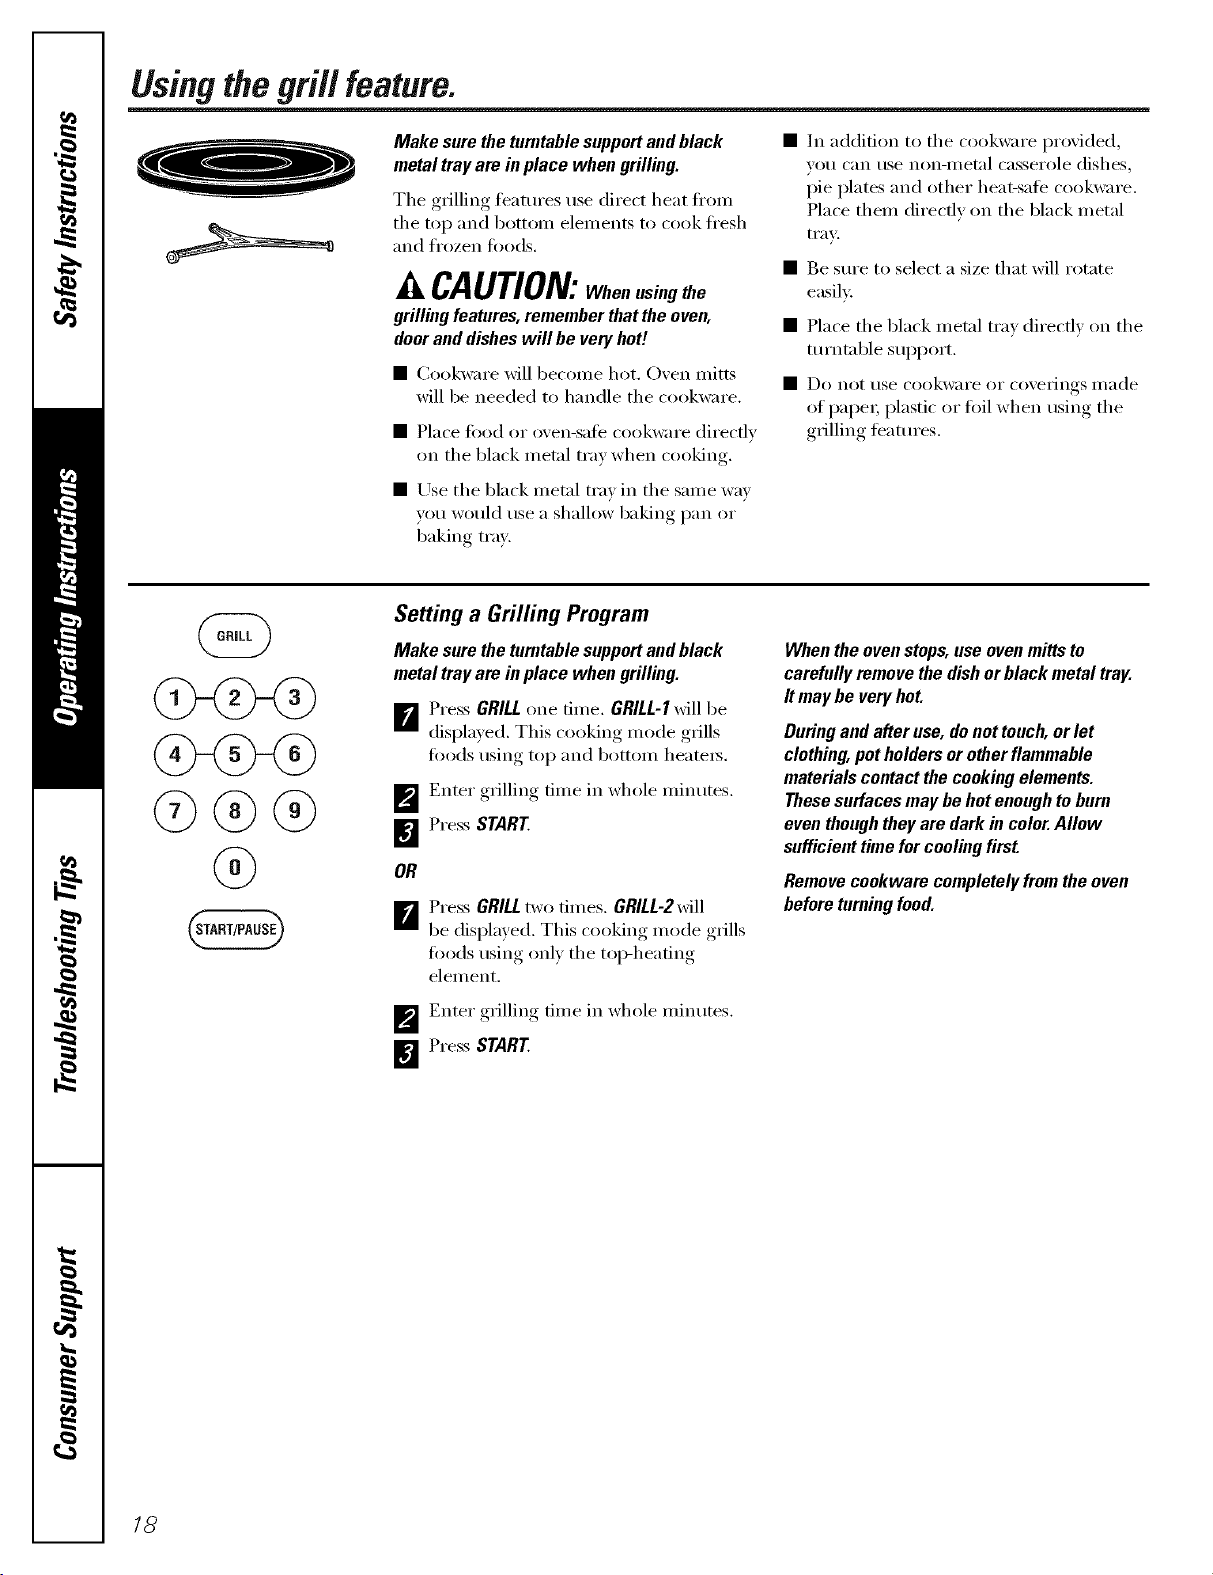
Usingthegrill feature.
Make sure the turntable supportand black
metal tray are in place when grilling.
The grilling features use direct heat fi'on_
tile top and botton_ elements to cook ti'esh
and frozen foods.
CAUtiON: When using the
grilling features, remember thatthe even,
door and dishes will be very hot/.
• Cookware will becoille hot. (-);'en n/itts
will be needed to handle the cookware.
• Place tood or oven-sate cookware directly
on the black metal tray when cooking.
• Use the black metal tray in the same way
vou would use a shallow baking pan or
i)aking tray.
In addition to tile cookware p_xwided,
V()/I C_lIl tlSe non-ii/etnl casserole dishes,
pie plates and other heat-sate cookware.
Place them directly on the black metal
tI'_lVk
Be sure to select a size that will rotate
easily:
• Place tile black metal tray directly on tile
turntable support.
• [)o not rise cookware or coveiJngs II/ade
of paper; plastic or foil when using tile
grilling teatures.
@
(><g>@
Setting a Grilling Program
Make sure the turntable supportand black
metal tray are in place when grilling.
_ Press GRILLone time. GRILL-lwill be
displa)ed. This cooking mode grills
foods using top and bottom heaters.
_'_ Enter g_illing time in whole minutes.
_¢j Press START
OR
D'_ Press GRILLtwo tilnes. GRILL-2will
be displayed. This cooking mode grills
foods using onl) tile toi>heating
element.
_'_ Enter grilling time in whole minutes.
_ Press START
When the ovenstops, use ovenmitts to
carefully remove the dishor black metal tray.
It may be very hot.
During and after use, de net touch, or let
clothing, pot holders or other flammable
materials contact the cooking elements.
These surfaces may be hot enough to burn
even though theyare dark in color.Allow
sufficient time for cooling first
Remove ceokware cempletely frem the oven
before turning food.
18
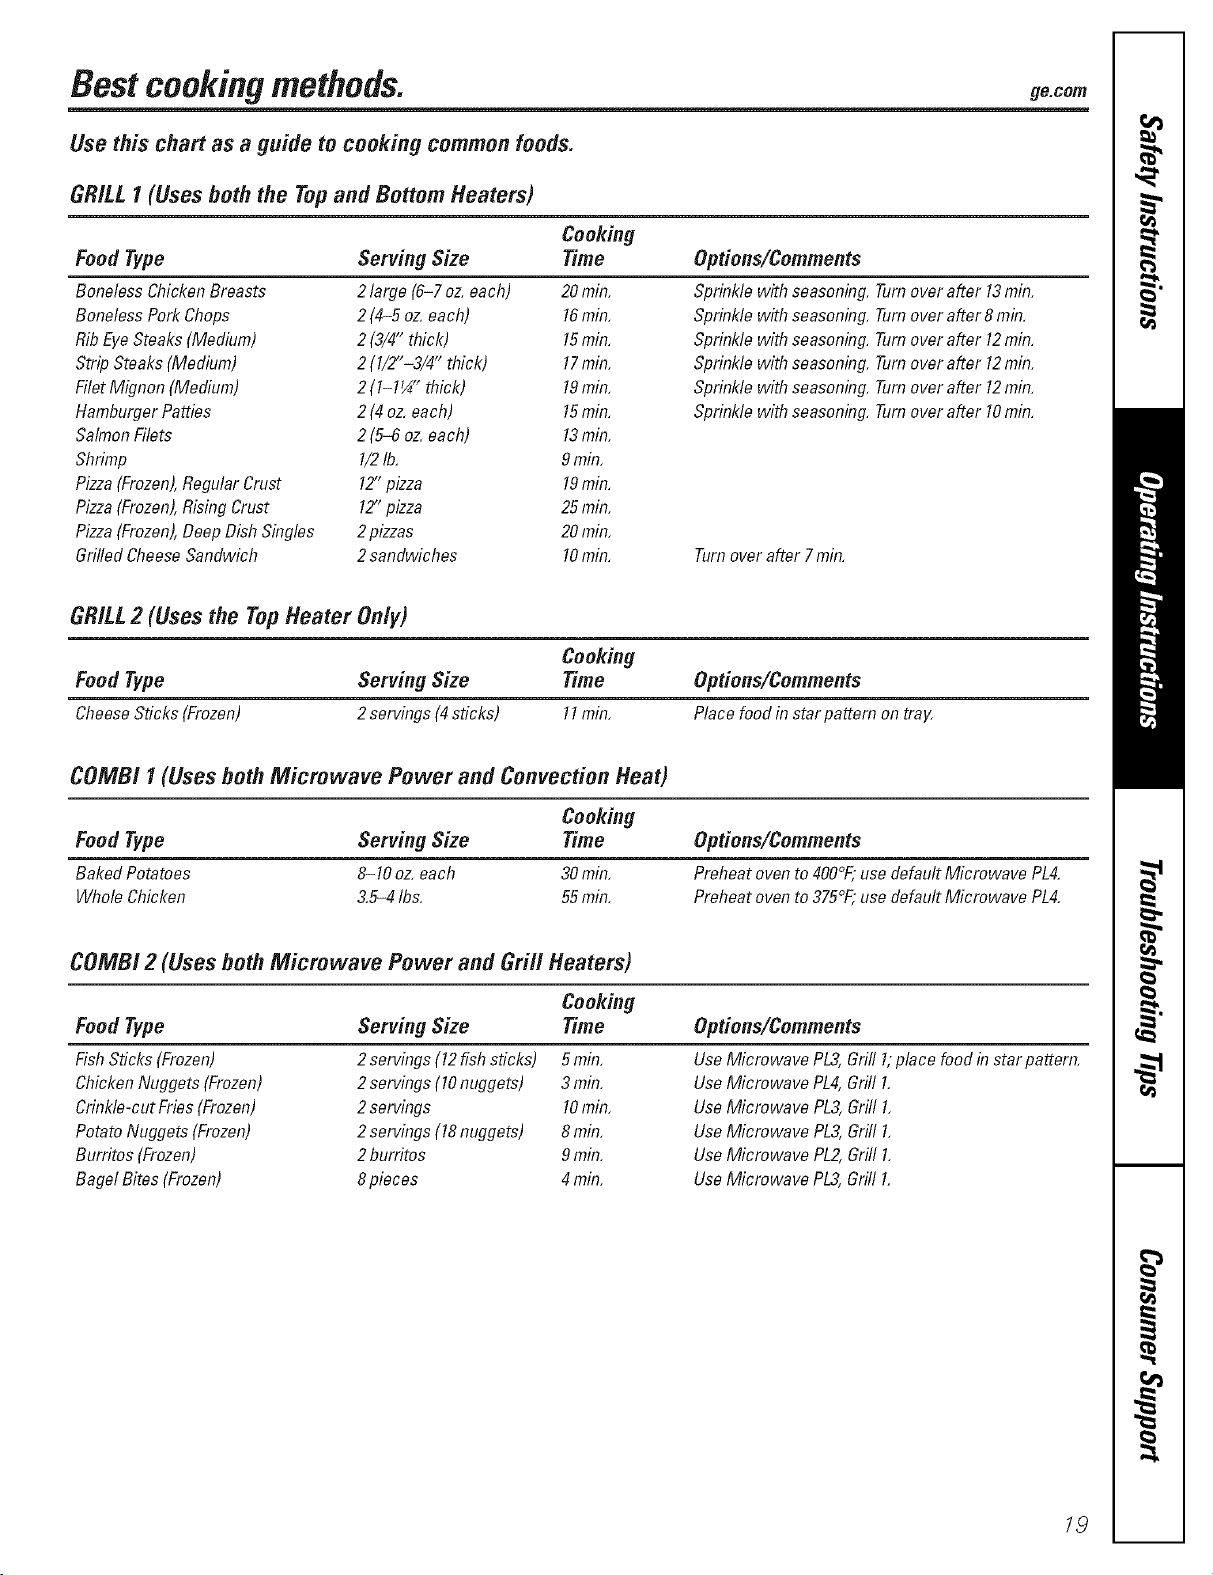
Bestcookingmethods. 9eoo,,
Use this chart as a guide to cooking cerumen feeds.
GR/LL1 (Uses beth the Topand Bottom Heaters)
FoodType
Boneless ChickenBreasts
Boneless Pork Chops
Rib EyeSteaks (Medium)
Strip Steaks (Medium)
Cooking
Serving Size Time
2large (6-7oz. each) 20min,
2(4-5 oz.each) 16min,
2(3/4" thick) 15min,
2(1/2"-3/4" thiclO 17min,
Options/Comments
Sprinkle with seasoning, Turnover after 13min,
Sprinkle with seasoning, Turnover after 8 min,
Sprinkle with seasoning, Turnover after 12min,
Sprinkle with seasoning, Turnover after 12min,
Filet Mignon (Medium)
Hamburger Patties
Salmon Filets
Shrimp
Pizza(Frozen),Regular Crust
Pizza(Frozen),Rising Crust
Pizza(Frozen),Deep Dish Singles
Grilled CheeseSandwich
2(1=1'_"thick)
2(4oz.each)
2(54 oz.each)
1/21b,
12"pizza
12"pizza
2pizzas
2sandwiches
19min,
15min,
13min,
9min,
19min,
25rain,
20rain,
10min,
Sprinkle with seasoning, Turnover after 12min,
Sprinkle with seasoning, Turnover after 10min,
Turnover after 7 min,
GR/LL2 (Usesthe TopHeaterOnly)
Cooking
Food Type Serving Size Time Options/Comments
CheeseSticks (Frozen) 2servings (4 sticks) 11min, Place food in star pattern on tray,
COMB/f (Uses both Microwave Power and Convection Heat)
Cooking
Food Type Serving Size Time Options/Comments
Baked Potatoes 8-10 oz.each 30min, Preheat oven to 4gO°F;use default Microwave PL4.
Whole Chicken 3.5-4 Ibs, 55min, Preheat oven to 375°F;use default Microwave PL4,
COMB/2 (Uses both Microwave Power and Grill Heaters)
Food Type
Fish Sticks (Frozen)
Chicken Nuggets (Frozen)
Crinkle-cut Fries(Frozen)
Potato Nuggets (Frozen)
Burritos (Frozen)
Bagel Bites (Frozen)
Cooking
Serving Size Time
2servings (12fish sticks) 5min,
2servings (10nuggets) 3min,
2servings 10rain,
2servings (18nuggets) 8rain,
2burritos 9min,
8pieces 4min,
Opdons/Comments
Use Microwave PL3,Grill 1;place food in star pattern.
Use Microwave PL4,Grill 1,
Use Microwave PL3,Grill 1,
Use Microwave PL3,Grill 1,
Use Microwave PL2,Grill 1,
Use Microwave PL3,Grill 1,
19
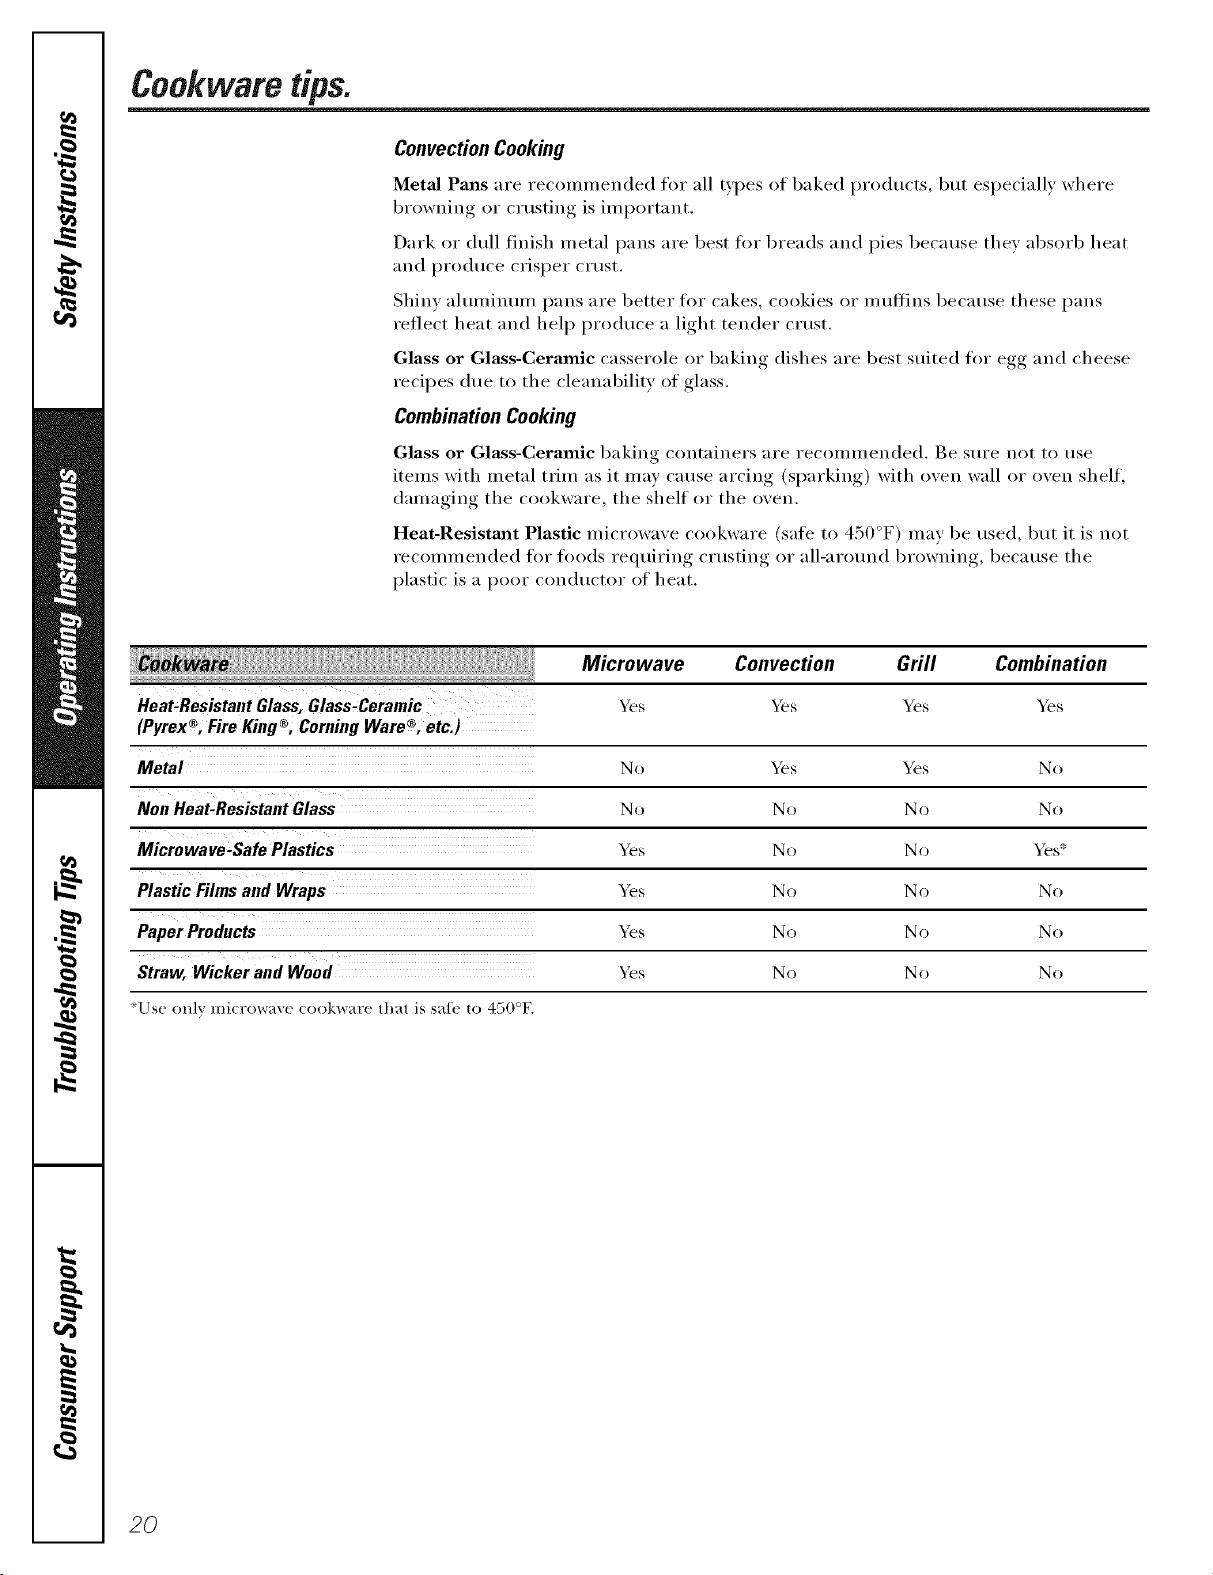
Cookwaretips.
ConvectionCooking
Metal Pans are re('mmnended for all types ot baked products, but especially where
browning or c_ usting is important.
Dark or dull finish metal pans are best t0r breads and pies because they absorb heat
and produce crisper c_ust.
Shiny almnimm/ pans are better fl)r cakes, cookies or muffins because these pans
reflect heat and help produce a light tender crust.
Glass or Glass-Ceramic casserole or baking dishes are best suited fi)r egg and cheese
recipes due to the cleanability of glass.
CombinationCooking
Glass or Glass-Ceramic baking containers are recommended. Be sure not to use
items with metal trim as it may cause arcing (sparking) with oven wall or oven shelf,
damaging the cookware, the shelf or the oven.
Heat-Resistm_t Plastic microwave cookware (safe to 450°F) may be used, but it is not
recommended for ti)ocls requiring cresting or all-arotmd browning, because the
plastic is a poor conductor of heat.
Microwave Convection Grill Combination
Heat,Resistant Glass, Glass-Ceramic _s _s Yes _s
® ® ®
(Pyrex , Fire King ,Corning Ware , etc.)
Metal No _s Yes No
Nell Heat,Resistant Glass N() N() N o No
_s No No _s':'
Plastic Films and Wraps _s No No No
_s No No No
Straw, Wicker and Wood _s No No No
'[IS(! only llli(rowa'_e ( ook_r_.Fe that is safe tO 4:7( ]P.
2O
Aboutthe otherfeatures. 9eco,,
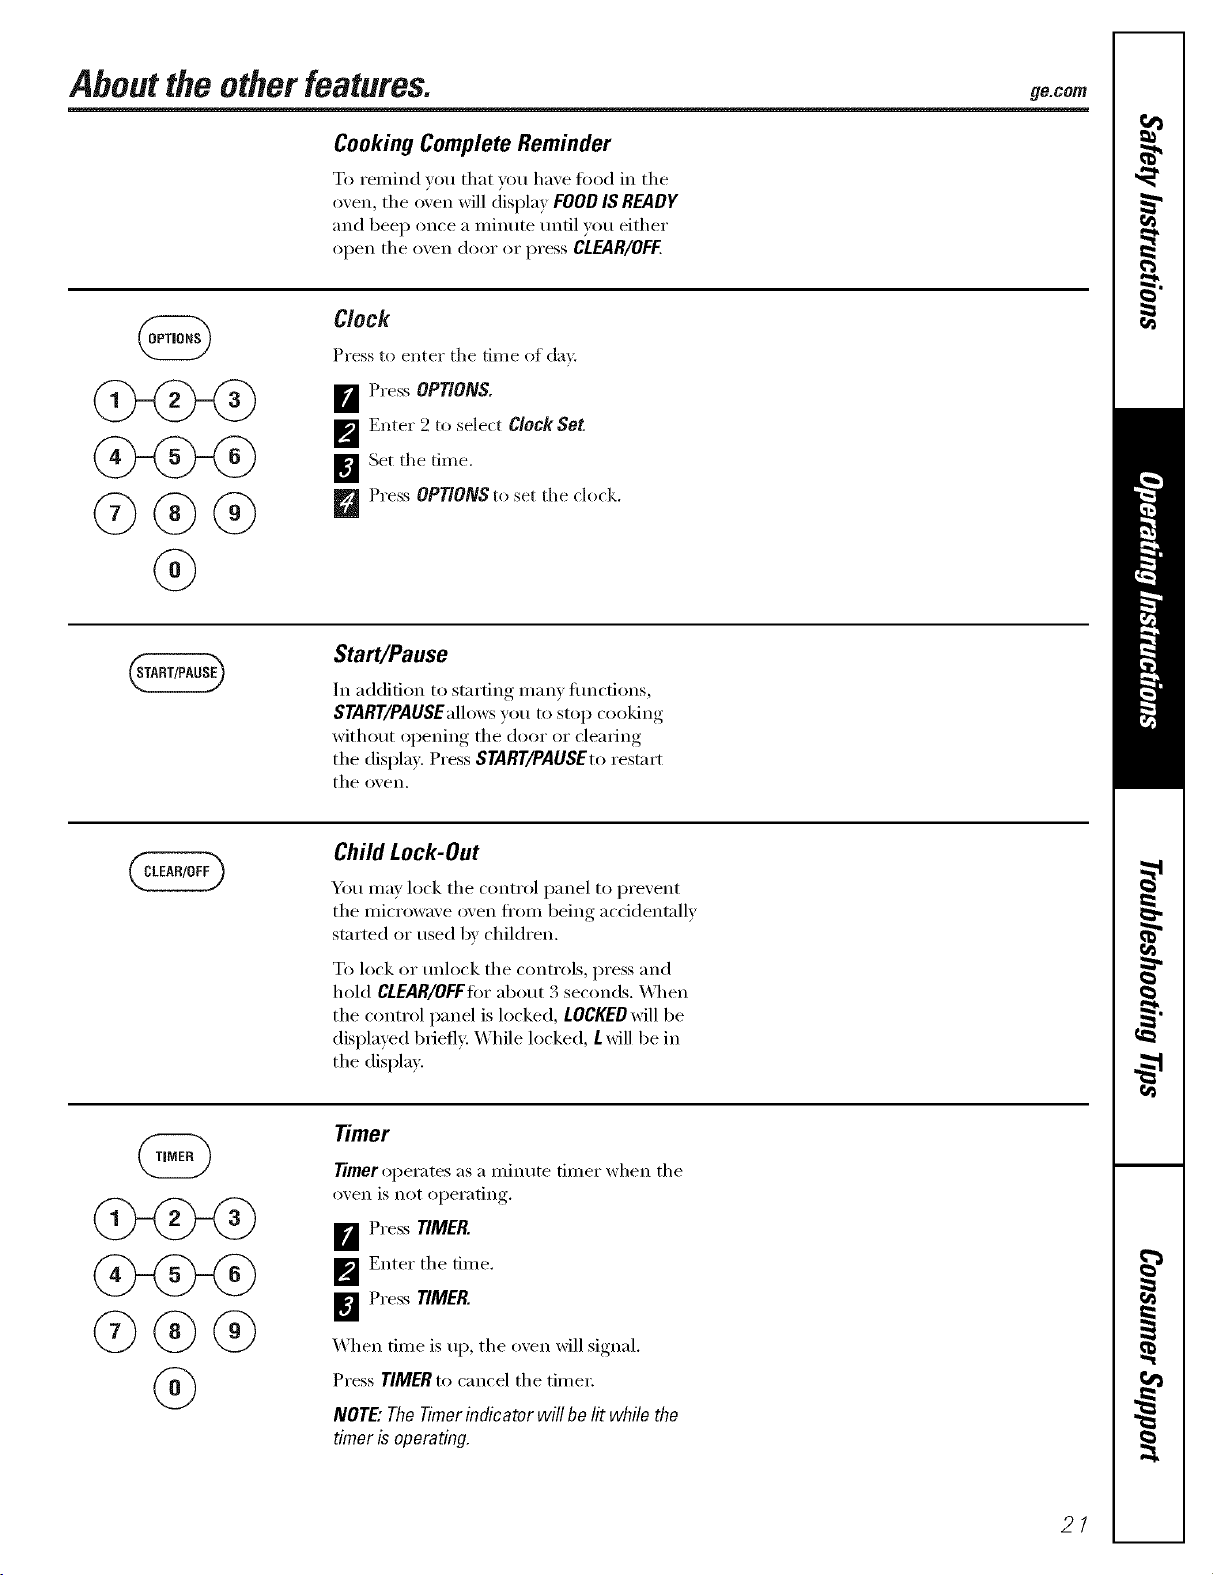
Cooking Complete Reminder
To remind you that )_m have fl)od in the
oven, tile oven will display FOODISREADY
and beep once a mixmte until you either
open tile oxen door or press CLEAR/OFF.
@<g>@
@@@
@
Clock
Press to enter tile time of day.
ira Press OPTIONS.
_'_ Enter 2 to select C/ockSet.
_lSet tile time.
_ Press OPTIONS to set tile clock.
Start/Pause
In addition to starting many flmcfions,
START/PAUSEalh>wsy(>u to stop cooking
without opening tile door or clearing
tile display. Press START/PAUSEto restart
the oven,
Child Lock-Out
You may lock the control panel to pre_ent
the microwaxe o_en fi'om being accidentall_
started or used b_ children.
To lock or mflock tile controls, press and
hold CLEAR/OFFfi)r about 3 seconds. \4lien
the control panel is locked, LOCKEDwill be
displayed briefly. While locked, Lwill be in
the display.
@
@@@
@@@
@
Timer
Timeroperates as a minute timer when tile
oxen is not ol)ei'ating,.
D'_ Press TIMER.
_'_ Enter tile time.
_€] Press TIMER.
X_q/en time is up, tile oxen will signal.
Press TIMERto cancel tile timex:
NOTE"TheTimerindicatorwill be lit while the
timerisoperating.
21
Aboutthe otherfeatures.
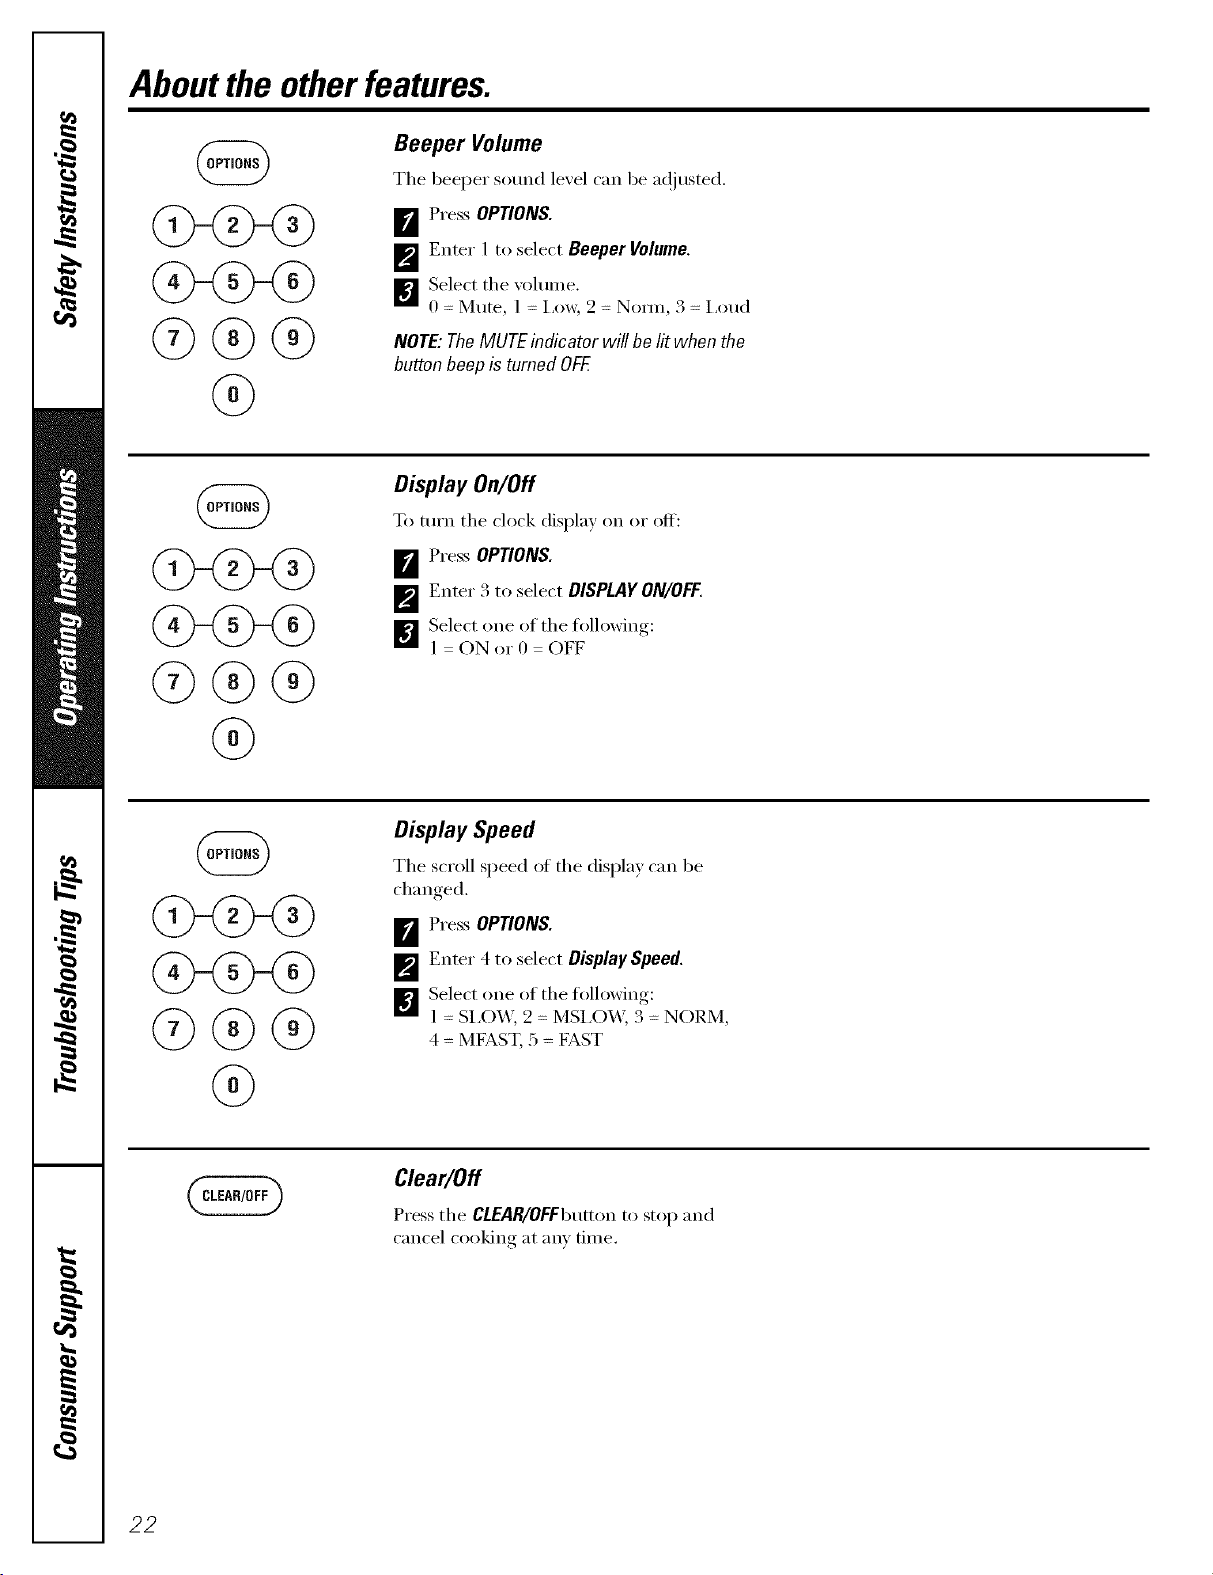
Beeper Volume
The beeper som_d level can be a(!iusted.
_r_ Press OPTIONS.
_'J Enter 1to select Beeper Volume.
_€_ Select the _olume.
0 = Mute, 1 = I,ow, 2 = Nom_, 3 = I,oud
NOTE: The MUrE indicator will be litwhen the
button beep is turned OFF.
Display On/Off
To turn the clock display on or off:
B Press OPTIONS.
_'_ Enter 3 to select DISPLAYON/OFF.
[]Select one of the h_llowing:
1 = ON or 0 = OFF
G
Display Speed
The scroll speed ot the displa,_ can be
than{red
B Press OPTIONS.
_'_ Enter 4 to select Display Speed.
I_'] Select one of the following:
1 = SI,O_, 2 = MSI,O_', 3 = NORM,
4 = ME__ST, 5 = E__ST
Clear/Off
Press the CLEAR/OFFbumm t(>stop and
cancel cooking at am' time.
22

Microwave terms, ge.oom
Covering
Shielding
StandingTime
Venting
Definition
Ardng is the microwm'e tem_ tbr sparks in the oven. Arcing is caused by:
[] the metal shelf being installed incorrectly and touching the microwm'e walls.
[] metal or toil touching the side of the oven.
[] fifil that is not molded to tbod (upturned edges act like antennas).
[] metal such as twist-ties, poultry pins, gold-rimmed dishes.
[] recycled paper towels containing small metal pieces.
Co\'els hold in moisture, allow fiw more e\vn heating and reduce cooking time. Venting plastic wrap o1"
co,wing with wax paper allows excess steam to escape.
In a reoflar o\vn, you shield chicken breasts or baked fi)ods to pre\vnt o\ eiqm)wning. \\]_en microwm'ing,
you use small strips of tbil to shield thin parts, such as the tips of wings and legs on poultry, which would
cook befiwe larger parts.
\_]_en you cook with regular o\vns, fl_ods such as roasts o1" cakes are allowed to stzmd to finish cooldng or
to set. Standing time is especially impollant in microwm_e cooldng. Note that a microwaved cake is not
placed on a cooling rack.
_Jter c_wering a dish with plastic wrap, you _vnt the plastic wrap by turning back one corner so excess
steam can escape.
27
Careand cleaning of the microwave oven.
HelpfulHints
An occasional thorough wiping with a solution ot baldng soda and water keeps
the inside fl'esh.
Unplug the cord before cleaning any part of this oven.
Donot touch, cleat?or attempt to
remove theprotective cover on the
side wall
How to Clean the Inside
Walls, Floor, Inside Window, Heating Elements, Metal and Plastic Parts on the Door
Some spatteI_ can be relnoved with a paper towel; othei_ inay require a damp cloth.
Relnove greasy spattels with a sudsy cloth, then rinse with a daln l) cloth. Do not use
abrasive cleanei_ or shai I) utensils on oven walls.
Toclean the surface of the door and the surface of the oven that come together upon closing,
use only mild, nonabrasive soaps or detergents using a sponge or soft cloth. Rinse with a damp
cloth and drg.
Never use a commercial oven cleaner on any part of your microwave oven.
The heating elements cannot be removed.
Glass Microwave Turntable, Black Metal Tray and Turntable Support
To l)revent breakage, allow the glass inicrowave turntable and black metal tray to cool
coml)letely before cleaning. Wash careflflly in w;mn, sudsy water or in the dishwasheI:
A soap-filled scourii_g pad can also be used to clean the black metal tray: Do not use
abrasives, as they may damage the finish.
Rack
Clean with inild soap aim water or in the dislm_shei: Donot clean in a self-cleaning oven.
24
How to Clean the Outside
Do not use cleaners containing ammonia or alcohol on the microwave oven. Ammonia or alcohol
can damage the appearance of the microwave oven.
Case
Clean the outside of the microwave oven with a sudsy cloth. Rinse with a dam I) cloth aim
then dry: Wipe the window clean with a dam I) cloth.
Control Panel and Door
Wipe with a damp cloth. Dry thoroughly: Do not use clealfing spra}:s, large amouI_ts of soap
aim wateI; abrasives or shaq) objects on the i)anel--they can damage it. Solne paper towels
can also scratch the control panel.
Stainless Steel Surfaces
Do not use a steel-wool pad; it will SClatch the stmfi_ce.
To clean the stainless steel SUll'ilce, use a hot, dam I) ch)th with a inild detelgent suitable for
stainless steel surfllces. Use a dean, hot, dam I) cloth to relnove soap. Dry with a di_' dean
cloth. Mways scrub lightly in the direction (ff the groin.
Door Surface
It is iml)ortant to kee I) the area clean where the door seals against the microwave (wen.
Use only Inild, i_on-abrasive detelgents applied with a clean sponge or soft cloth. Rinse well.
Power Cord
If the cord becomes soiled, unl)lug aim wash with a dam l) cloth. For stubborn spots, sudsy
wamr Inay be used, but be certain to rinse with a dam I) cloth aim dry thoroughly befi)re
i)ltlgging cord into outlet.
Troubleshootingtips. ge.co,,
Problem Possible Causes What ToDo
Oven will not start A fuse in your home may he o Replace fuse or reset rh'c/fit breaker.
blown or the circuit breaker
tripped.
Power surge. * Unplug tile microwm e o_en, then plug it back in.
Plug not fully inserted into ® Make rare tlle -13- _rong, I_lug, on tlle o_en is full} inserted
wail outlet, into wall outlet,
Door not securely closed. * (-)pen tile door and dose seem'ely.
Control panel lighted, Door not securely closed. * (-)pen tile door and dose securely.
yet oven will not start STARTnot pressed after * Press START
entering cooldng selection.
Another selection entered * Press CLEAR/OFF
aJready in overt aJad CLEAR/OFF
not pressed to cancel it.
Food weight not entered after ® Make sure yon ha_e entered fi)od weioht_ atter selecting
selecting AUTODEFROST AUTODEFROST
Microwaveovencontrols The control has been locked.
will not work (When the control panel is
locked, L will be in the display.)
• Press and hokl CLEAR/OFFfi_rabout 3 seconds to mdock
tile control.
Things That Am Normal With YourMicrowave Oven
[] Ste;lll/ (tr vapor escaping froi// aroHlld
tile do(n:
[] Light reflection aromld door or
oHter case.
[] Dimming ()\eIl light and change in
tile blower sound at power levels other
than high.
[] Dull thunq/ing sound while oren is
operating.
[]
TV/radio interterence might be noticed
while using tile microwave. Similar to
tile intei_erence caused by other small
appliances, it cities not indicate a
pIoblem with the microwave. Nug tile
microwa\v into a different electrical
drcuit, too\ e tile radio or TV as tier mvav
fl'om tile micro_:we as possible, or check
tile position and signal of tile TV/radio
alltelula.
25
€_
cr_
q
--°
IVetes.
26
Notes.
m
@
w
I
m
m
27
€_
cr_
q
--°
Notes,
28
GE Service Protection Plus 'M
GE, a name recognized worldwide fbr quality and dependability, offers you
Service Protection Plus'_'--comprehensive protection on all yore appliances--
No Matter What Brand!
Benefits Include:
• Backed by GE
• All brands covered
• Unlimited service calls
• All parts and labor costs included
• No out-of-pocket expenses
• No bidden deductibles
• One 800 number to call
We TICover Any Appliance.
Anywhere. Anytime.
You _dll be completel) satisfied with our service protection or )ou ma) request )our mone) back
on the remaining value of your contract. No questions asked. It's that simple.
Protect yore" refrigerator, dishwasher, washer and dryer, range, TV_ VCR and much more--a_y brand!
Plus there's no extra charge flw emergency service and low monthly financing is available. Even icemaker
coverage and toed spoilage protection is offered. You can rest easy, knowing that all your valuable
household products are protected against expensive repairs.
Place ,our confidence in GE and call us in the U.S. toll-free at _UU._Z_.ZZZ_
for l//Ol'e infol'I//atiOll.
:_,_*]1 hi}in(Is (o_.{!l_{!(L tip t(t _0 ){!iris Ill(I, ]11 the (on[lllenl tl [.S.
_ (Jill here
Please place in envelope and mail to:
GeneralElectricCompany
Warranty Registration Department
P.O. Box 32150
Louisville, KY 40232-2150
29
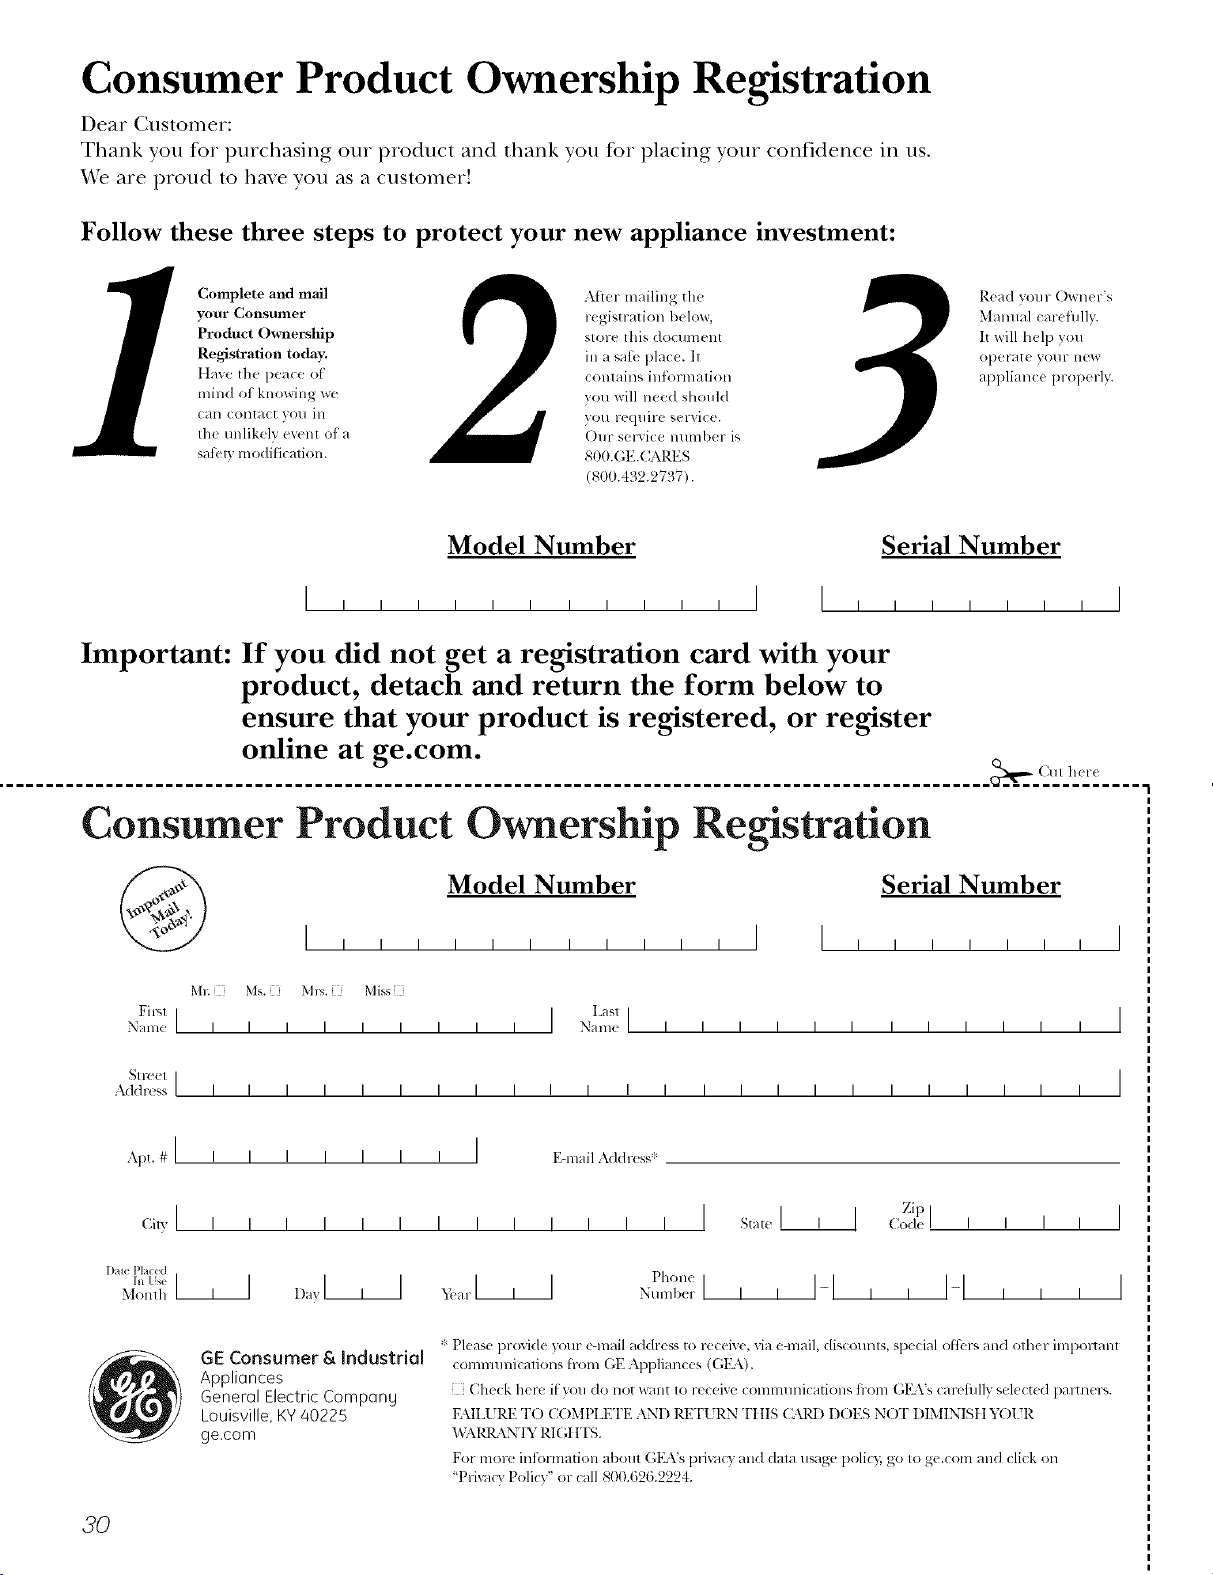
Consumer Product Ownership Registration
Dear Customer:
Thank you for purchasing our product and thank you for placing your confidence in us.
X_'eare proud to ha_e you as a customer!
Follow these three steps to protect your new appliance investment:
Complete and mail
your Consumer
Product Ownership
Registration today.
ttaw' the peace of
mind of knowing wc
Call colltact VOl/ ill
tile unlikely ev{'nt of a
sail' B modificalion.
Alter mailing the
registration below,
store this doclnnent
ill a sati' place. It
contains inlormation
you will need should
you require service.
()Ill" selvice number is
800.GE.CAlZES
(800.432.2737).
Read your Owner's
Manual carefilllv.
It will help you
operat( yol/r lleW
appliance properly.
Model Number Serial Number
I I I
Important: If you did not get a registration card with your
product, detach and return the form below to
ensure that your product is registered, or register
online at ge.com.
.................................................................................................... _.,..,_ (_tIt here
Consumer Product Ownership Registration
_) Model Number Serial Number
I
Ms. M*>,. Mi_',
Fil'q I I L_sll
Name I I I I I I I I I Name I I I I I I I I I I I I
SI r{ (!1 I
Ad(h-(ss I I I I I I I I I I I I I I I I I I I I I I I I
Apt. # ] I I
Cilv ] I I
lJale Placed
In Use 111
Monlh
I [ [ [ I [ E-lnailAddress*
_4_ar]l] Phone
Nulnl)er I I I
Zip I
I ] (2)de I I I I
I-I,, I-I , , ,
I
I
GE Consumer & Industrial
Appliances
General Electric Compang
Louisville, K¥/40225
ge.com
* Please pr(wide your e-mail address to ruceive, via e-mail, discounts, special ofld-', and other important
communications from (;E Appliances ((;1_\).
Check heir if you do not wunt to receixe COlnmunications fi-om G1L\'s carcflllly select(d paltner'.
FAIII RE T() COMPLETE AND P.ETI RN TIIIS C\RI) D()ES N(YF DIMINISII _3)[ 7R
B,T\I_t \N'IY 1¢_I(;If FS.
For more intormation about (',ltVs privuqv and (laIa usag,: policg go to ge.com and click on
'Privacy Policy" or call 800.6'-)6.22'24.
3O
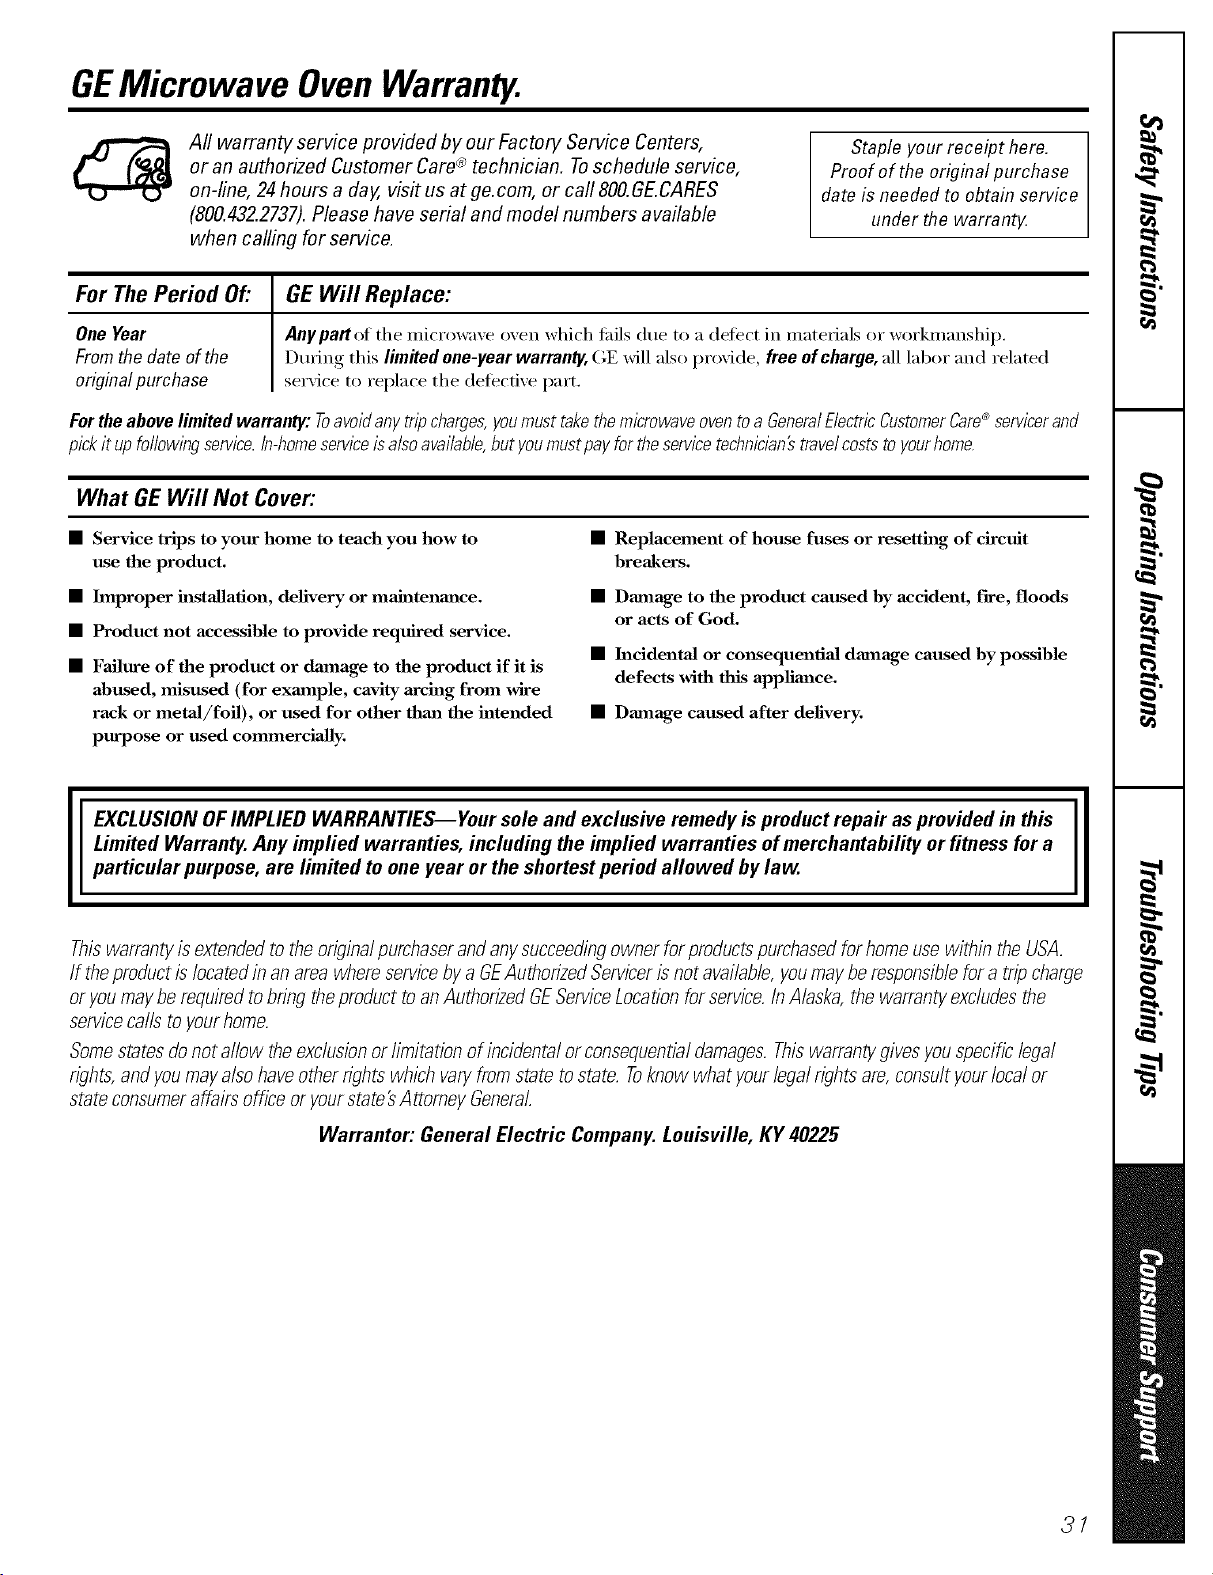
GEMicrowave OvenWarranty.
All warranty service provided by our Factory Service Centers,
or an authorized Customer Care® technician. Toschedule service,
on-line, 24hours a day, visit us at ge.com, or call 800.GE.CARES
(800.432.2737).Please have serial and model numbers available
when calling for service.
Staple your receipt here.
Proofof the original purchase
date is needed to obtain service
under the warrant}4
For The Period Of."
OneYear
Fromthedate ofthe
originalpurchase
GEWill Replace:
Anypartof the microwave oven which flfils due to a (lefect in materials or workmanship.
During this limitedone-yearwarranty,GE will alsoprovide, freeofcharge,all labor and related
service to replace the defecti\'e part,
Fortheabovelimitedwarranty: Toavoidanytripcharges,youmusttakethemicrowaveoventoa GeneralElectricCustomerCare®servicerand
pickit upfo//ow/bgservice,in-homesemceisalsoavailable,butyoumustpayfortheservicetechnic/an#travelcoststoyourhome.
What GEWill Not Cover:
• Service trips to your home to teach you how to
use the product.
• Improper installation, delivery or maintenance.
• Product not accessible to provide required service.
• Failure of the product or dmnage to the product if it is
abused, misused (for exaanple, cavity arcing from wire
rack or metaJ/foil), or used for other thaa_ the intended
purpose or used commerciaJly.
• Replacement of house fuses or resetth_g of circuit
breakers.
• Damage to the product caused by accident, fire, floods
or acts of God.
• h_cidentaJ or consequentiaJ damage caused by possible
defects with this applimlce.
• Damage caused after delivery.
EXCLUSION OFIMPLIED WARRANTIES--Your sole and exclusive remedy is product repa# as provided in this
Limited Warranty. Any implied warranties, including the implied warranties of merchantability or fitness for a
particular purpose, are limited to one year or the shortest period allowed bylaw.
Thiswarrantyis extendedto theoriginalpurchaserand anysucceedingownerforproductspurchasedforhomeusewithin theUSA.
If theproductis locatedin an area whereservicebya GEAuthorizedServicerisnot available,youmaybe responsiblefora tripcharge
or youmaybe requiredtobring theproductto anAuthorizedGEServiceLocationforservice.InAlaska,thewarrantyexcludesthe
servicecalls to yourhome.
Somestatesdonot allow theexclusionor limitation of incidentalor consequentialdamages.Thiswarrantygivesyouspecificlegal
rights,andyoumayalso haveotherrights which varyfromstate tostate. Toknow what yourlegalrightsare,consultyourlocalor
state consumeraffairsoffice oryourstate'sAttomey General.
Warrantor: General Electric Company. Louisville, KY 40225
31
ConsumerSupport.
gEApplbncesWebsite ge.com
Have a question or need assistance with your ai_pliance? Try tile GE Appliances _.Vebsite 24 hours a day,
any day of the year'. For greater convenience and taster se_Mce, you can now download Owner's Manuals,
order parts, catalogs, or even schedule service on-line. You can also "_sk Our Team of EN)erts .....
your questions, and so much more...
ScheduleService
Expert (;E repair setsice is onl_ one step away fl'om xour door Get on-line and schedule your set\ice at
xour conxenience 24 hours any (lax of tile year! Or call 800.GE.(:ARES (800.432.2737) during n{mnal
business hours.
ge.com
RealLifeDesignStudio ge.com
GE supports tile Universal Design concept--products, services and environments that can be used by
people of all ages, sizes and capabilities. We recognize tile need to design fin" a wide range of physical and
mental abilities and impaimmnts. For details of GE's Universal Design applications, including kitchen
design ideas t0r people with disabilities, check out our Websim today. For the hearing impaired, please call
800.TDD.GEAC (800.833.4322).
ExtendedWarranties
ge.com
Purchase a (;E extended warrant_ and learn about special discounts that are available while your warranla,
is still in effect. You can imrchase it on-line an}time, or call 800.626.2224 during n(mnal business hours.
(;E Consulner Home Ser',ices will still be there alter your warrant} expires.
PartsandAccessories
ge.com
Individuals qualified to se_'ice their own appliances can have parts or accessoiies sent direcflv to their
homes (VISA, MasterCard, and Discover cards are accepted). Order on-line today, 24 hours every day or
by phone at 800.626.2002 during nomml business hours.
Instructions contained in this manual cover procedures to be performed by any user. Other servicing generally
should be referred to qualified service personnel Cautionmust be exercised, since improper servicing may cause
unsafe operation.
ContactUs
ge.com
If you are not satisfied with the service you receive fl'om (;E, contact us on our _&'ebsite with all the details
including your phone ntlI/lbeI'_ oi" write to: General Manager; Customer Relations
GE Appliances, Appliance Park
I,ouisville, KY 40225
RegisterYourApplbnce
Register your new applimlce on-line--at your convenience! Timel) product registration will allow for
enhanced communication and prompt service under tile terms of_our warranty should tile need a_ise.
You may also mail in tile pre-p_inted registration card included in tile I)ackin°_ material.
ge.com
Printed in Korea

