Loading ...
Loading ...
Loading ...
Kelvinator Air Conditioning installation instructions 11
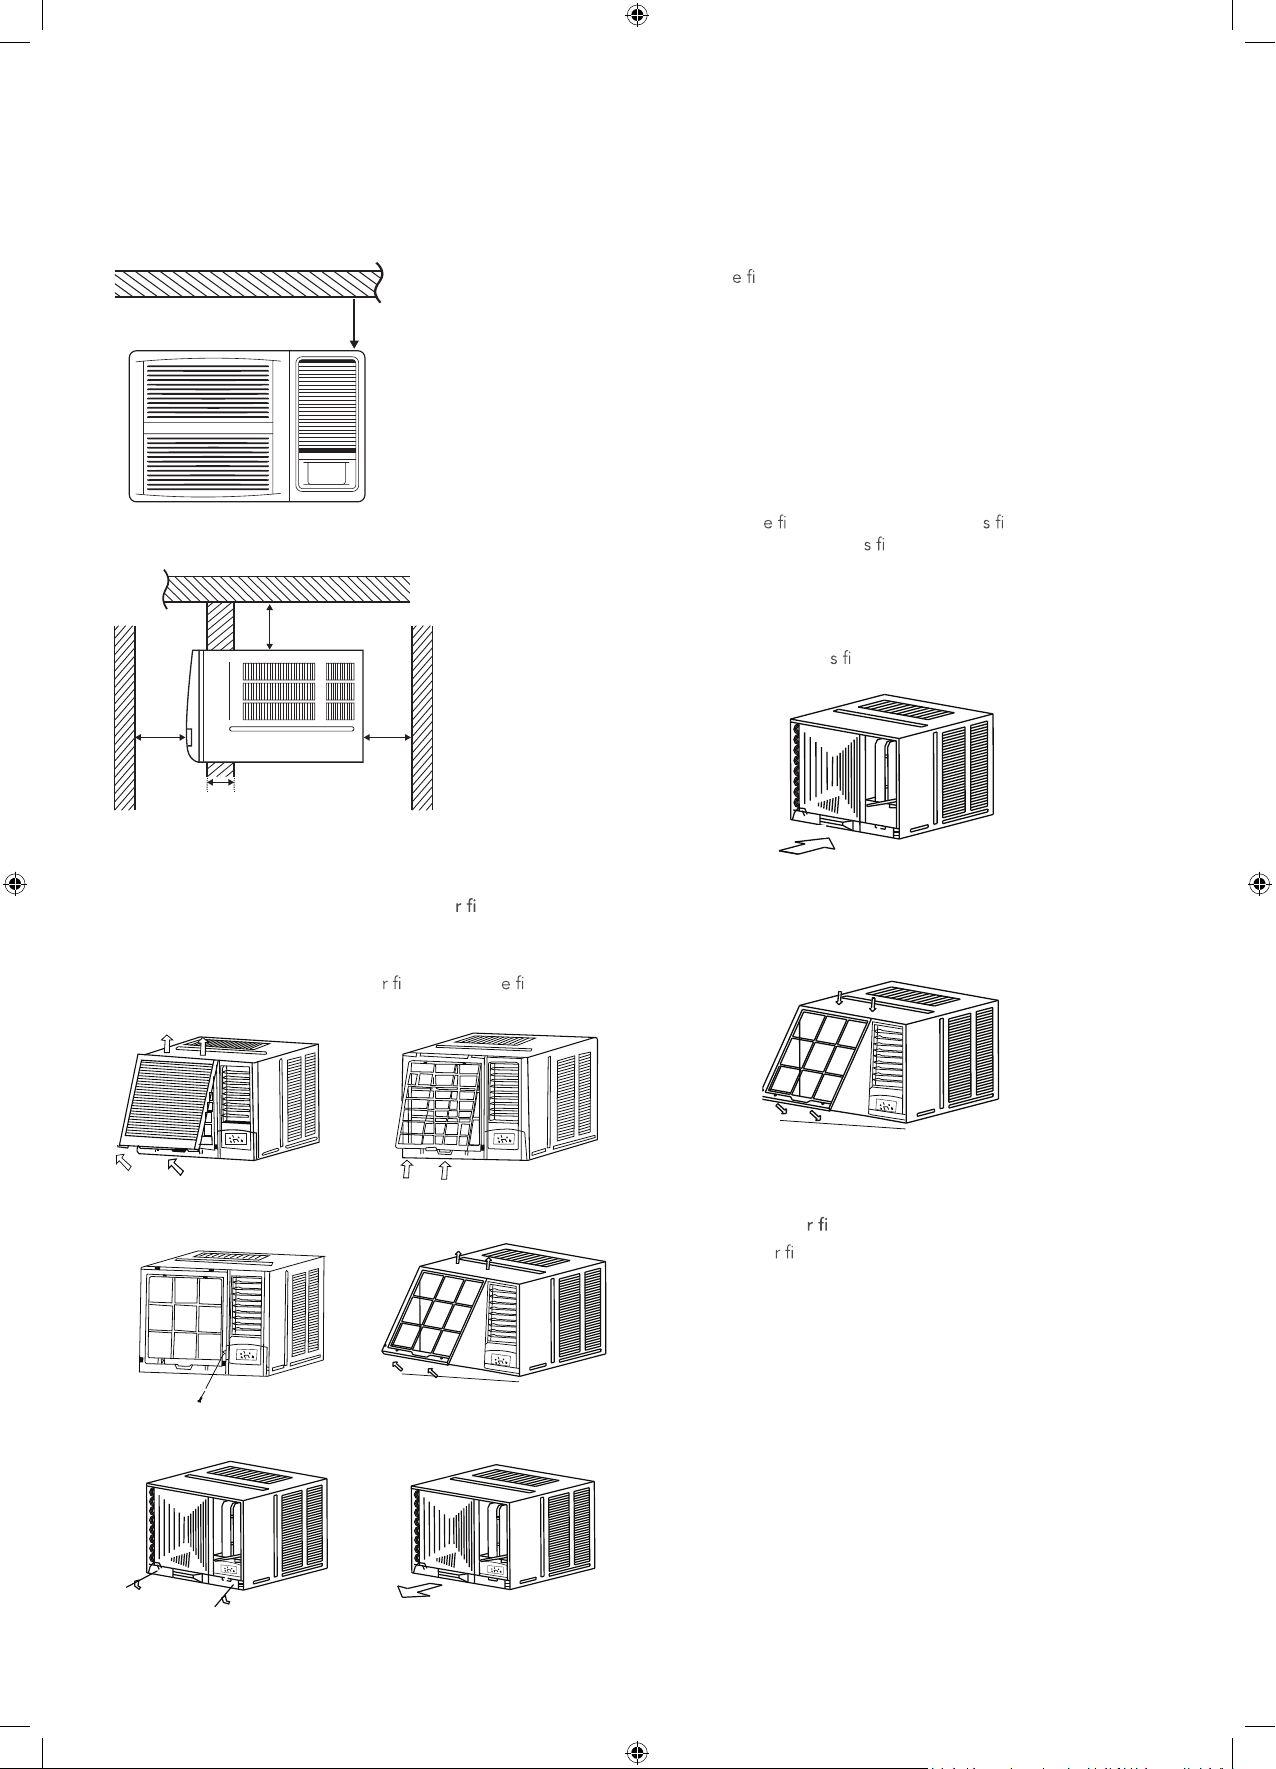
4 Reinstall the chassi xing bracket removed earlier
(See Fig.5).
Install the frame.
1 Install the frame making sure not to jam the power
supply cable (See Fig.8).
2 Fix the screws on the frame.
Step 5. Install the ai
lter and front panel.
1 Install the ai
lter into the frame's slot from upside to
underside (See Fig. 2).
2 Hang the front panel on the frame's top edge, then press
the front panel into the frame edges until you hear clicks.
Installation Steps
Step 1. Remove the front panel and the ai
lter
1 Hold the slot under the front panel, then lift it up and
outwards, and remove the front panel (See Fig.1).
2 Pinch the handle under the ai lter, bend th lter gently
and remove it from the slots (See Fig.2).
Step 2. Remove the frame.
1 Remov
xing screws from the frame (See Fig.3). Screws
can be in different positions of the frame for different
models, usually there are 2 screws at the rear of the
larger units and one screw at the mid front right. Smaller
units have less screws.
2 Release the front panel lugs on the side of the front
panel from the outer frame slots at top, middle and
bottom where they meet. Grasp the left corner of the
frame's underside, then loosen the frame (See Fig.4).
Step 3. Installation.
1 Remove th
xing screw on the chassi xing bracket,
then remove the chassi xing bracket (See Fig.5).
2 Grasp the handle on the chassis and carefully slide the
air conditioner out of the cabinet (See Fig.6).
3 Push the unit chassis into the cabinet (See Fig.7).
Fig. 1
Fig. 3
Fig. 5
Fig. 2
Fig. 7
Fig. 8
Fig. 4
Fig. 6
Installation instructions
FRONT VIEW
Over 150mm
Ceiling
SIDE VIEW
Over 150mm
Over
500mm
Less than 220mm
Over
1000mm
Loading ...
Loading ...
Loading ...