Loading ...
Loading ...
Loading ...

5
and long run as much as possible as this may reduce the performance of the hood. Make
sure that the duct work leads to the outside.
6. It is recommended to use metal / aluminum duct/pipe with a uniform size (ex. 6” round
pipe from range hood to the outside).
7. If an elbow is necessary, a minimum of 12” straight run is necessary before the elbow.
Clearance
8. Clearance is the distance between the cooktop and the bottom of the range hood. The
recommended minimum clearance for this model is 26” and the maximum clearance is
30”.
9. It is important to install the hood at the recommended clearance. Installing too low could
result in damage and/or fire hazard while installing too high may result in reduced
performance and efficiently.
Hood Installation
10. The hood has to be installed inside the cabinet. It is
recommended to install a front and rear stud support.
Refer to Figure 1. The stud supports are located 1-
1/2” from the rear and 2” from the front.
11. Determine and mark the centerlines on the base of
the hood frame where the insert will be installed.
12. Determine and make all necessary cuts in the wall or
ceiling of the ductwork. Note: Install the duct work
before installing the hood.
13. Cut out the opening where the hood will be installed.
Refer to Figure 2.
14. Slide the hood to the opening.
15. Locate the screw holes (2) on each side of the hood.
Adjust the level of the hood casing support according
to the thickness of the base.
16. Secure the hood using the screw holes that are
located at the front and back of the unit (screws
provided). Refer to Figure 3.
17. Make sure the hood casing support is secure before
releasing.
Ductwork
18. Attached the rubber plate and 6” round exhaust vent
adapter to the exhaust opening and use 6 4*16
screws to secure it. Refer to Figure 4.
19. Connect the pipe to the vent adapter and seal the joint
with duct tape. Make sure it is completely tight.
Figure 1
Figure 2
Figure 3
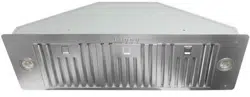
*Note: Sample image only. May not be actual model.
Loading ...
Loading ...
Loading ...