Loading ...
Loading ...
Loading ...

6
EN
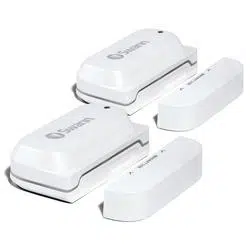
Take the time to choose a location and properly check the orientation of the sensor and the magnet.
The sensor and magnet should ideally be positioned in a way that when the window or door is closed,
they are aligned side by side, less than 10mm (3/8”) apart. See Mounting Examples on the next page.
Also,makesurethesensorlocationhasstrong,reliableWi-Fireceptionavailablesoyoucanget
timelyalerts.Asageneralrule,theneareryoursensoristoyourWi-Firouter,thebetterthewireless
connectionquality.YoucanexpandtheWi-FicoverageofyourcurrentnetworkbyinstallingaWi-Fi
range extender.
1 For reliable bonding, clean the surface where the sensor and magnet will be mounted with an
alcohol/cleaning wipe, and let dry.
2 Fit the sensor and the magnet with appropriate double-sided tapes.
3 Select a location on the window/door. Attach the sensor to the window/door frame and the magnet
tothewindow/door.Makesurethesensorcoverwillbeaccessibleinthenalposition(incaseof
battery replacement/re-pairing).
4 Pressrmlyontosurfacefor60secondseachtosecure.
5 To test the sensor, simply open the window/door. The app will send you a push
notication,forexample,“Contact sensor has been opened on Front Door”.
Closethewindow/door.Theappwillsendyouanothernotication,forexample,
“Contact sensor has been closed on Front Door”. The sensor tile will also
automatically update its status in the app, as shown on the right.
Note: You can use the Modes feature in the app to congure whether or not to
receive “Opened” and “Closed” push notications when the sensor is in Home,
Away or Night mode.
MOUNTING THE SENSOR
Loading ...
Loading ...
Loading ...
