Loading ...
Loading ...
Loading ...
The Dispenser Light
When you use the dispenser, the lever will automatically turn the
light on. If you want the light to be on continuously, you may
choose either ON or AUTO.
ON AUTO
Q Q
ON: Press the light bulb button at the right-hand side of the
dispenser control panel to turn the dispenser light on. The green
indicator will appear below ON.
AUTO: Press the light bulb button a second time to select the
Auto mode. The green indicator will appear below AUTO. The
dispenser light will automatically adjust to become brighter as the
room brightens, dimmer as the room darkens.
OFF: Press the light bulb button a third time to turn the dispenser
light off.
The dispenser lights are LEDs which should not need to be
changed. If it appears that your dispenser lights are not working,
check to be sure that the light sensor is not blocked (in Auto
mode). See "Troubleshooting" for more information.
The Dispenser Lock
Your dispenser can be turned off for easy cleaning or to prevent
unintentional dispensing by small children and pets.
NOTE: The lock feature does not shut off power to the product,
to the ice maker, or to the dispenser light. It simply deactivates
the dispenser levers.
To turn off the dispenser, press and hold the lock button until the
red indicator appears below LOCKED. The ice and water
dispensers will not work. To unlock the dispenser, press the lock
button until the indicator disappears. Then continue to dispense
ice or water as usual.
LOCKOUT
Ware Stssrus ci
The water filter status light will help you know when to change
your water filter. When the status light changes from green to
yellow, this tells you that it is almost time to change the water
filter. It is recommended that you replace the filter when the
status light changes to red OR when water flow to your water
dispenser or ice maker decreases noticeably. The filter should be
replaced at least every 6 months. To change the filter, see
"Changing the Water Filter" later in this section.
A. Status light
B. Light switch
After changing the water filter cartridge, reset the status light by
pressing the light switch 5 times within 10 seconds. The light will
change from red to green when the system is reset.
Non-Indicator Water Filter (on some models)
If your refrigerator does not have the water filter status light, you
should change the water filter cartridge every 6 months
depending upon your usage. If the water flow to the water
dispenser or ice maker decreases noticeably before 6 months
have passed, replace the water filter cartridge more often.
NOTE: Do not use with water that is microbiologically unsafe
or of unknown quality without adequate disinfection before
or after the system. Systems certified for cyst reduction may
be used on disinfected waters that may contain filterable
cysts.
Changing the Water Filter
The water filter is located in the base grille below the freezer
compartment door. It is not necessary to remove the base grille
to remove the filter.
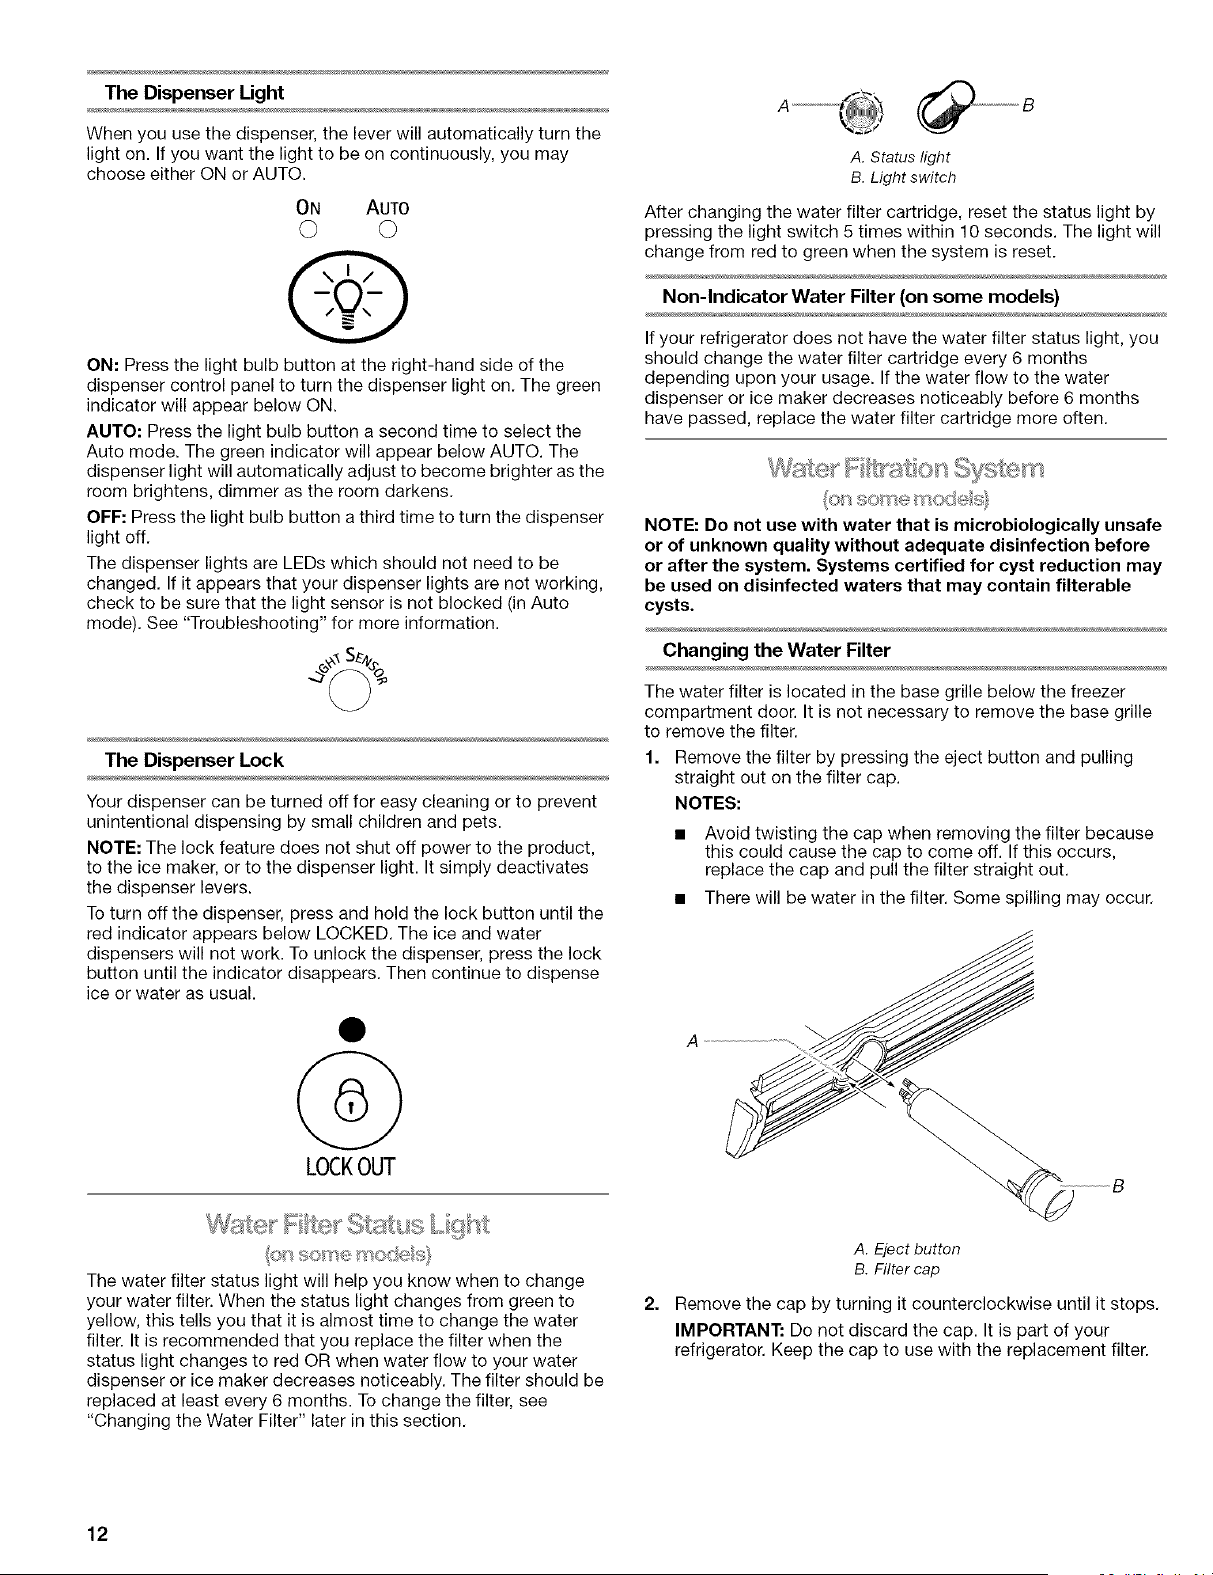
1. Remove the filter by pressing the eject button and pulling
straight out on the filter cap.
NOTES:
• Avoid twisting the cap when removing the filter because
this could cause the cap to come off. If this occurs,
replace the cap and pull the filter straight out.
• There will be water in the filter. Some spilling may occur.
2.
A
B
A. Eject button
B. Filter cap
Remove the cap by turning it counterclockwise until it stops.
IMPORTANT: Do not discard the cap. It is part of your
refrigerator. Keep the cap to use with the replacement filter.
12
Loading ...
Loading ...
Loading ...