Loading ...
Loading ...
Loading ...
7
Original Instructions
Multi II
Technical specifi cations
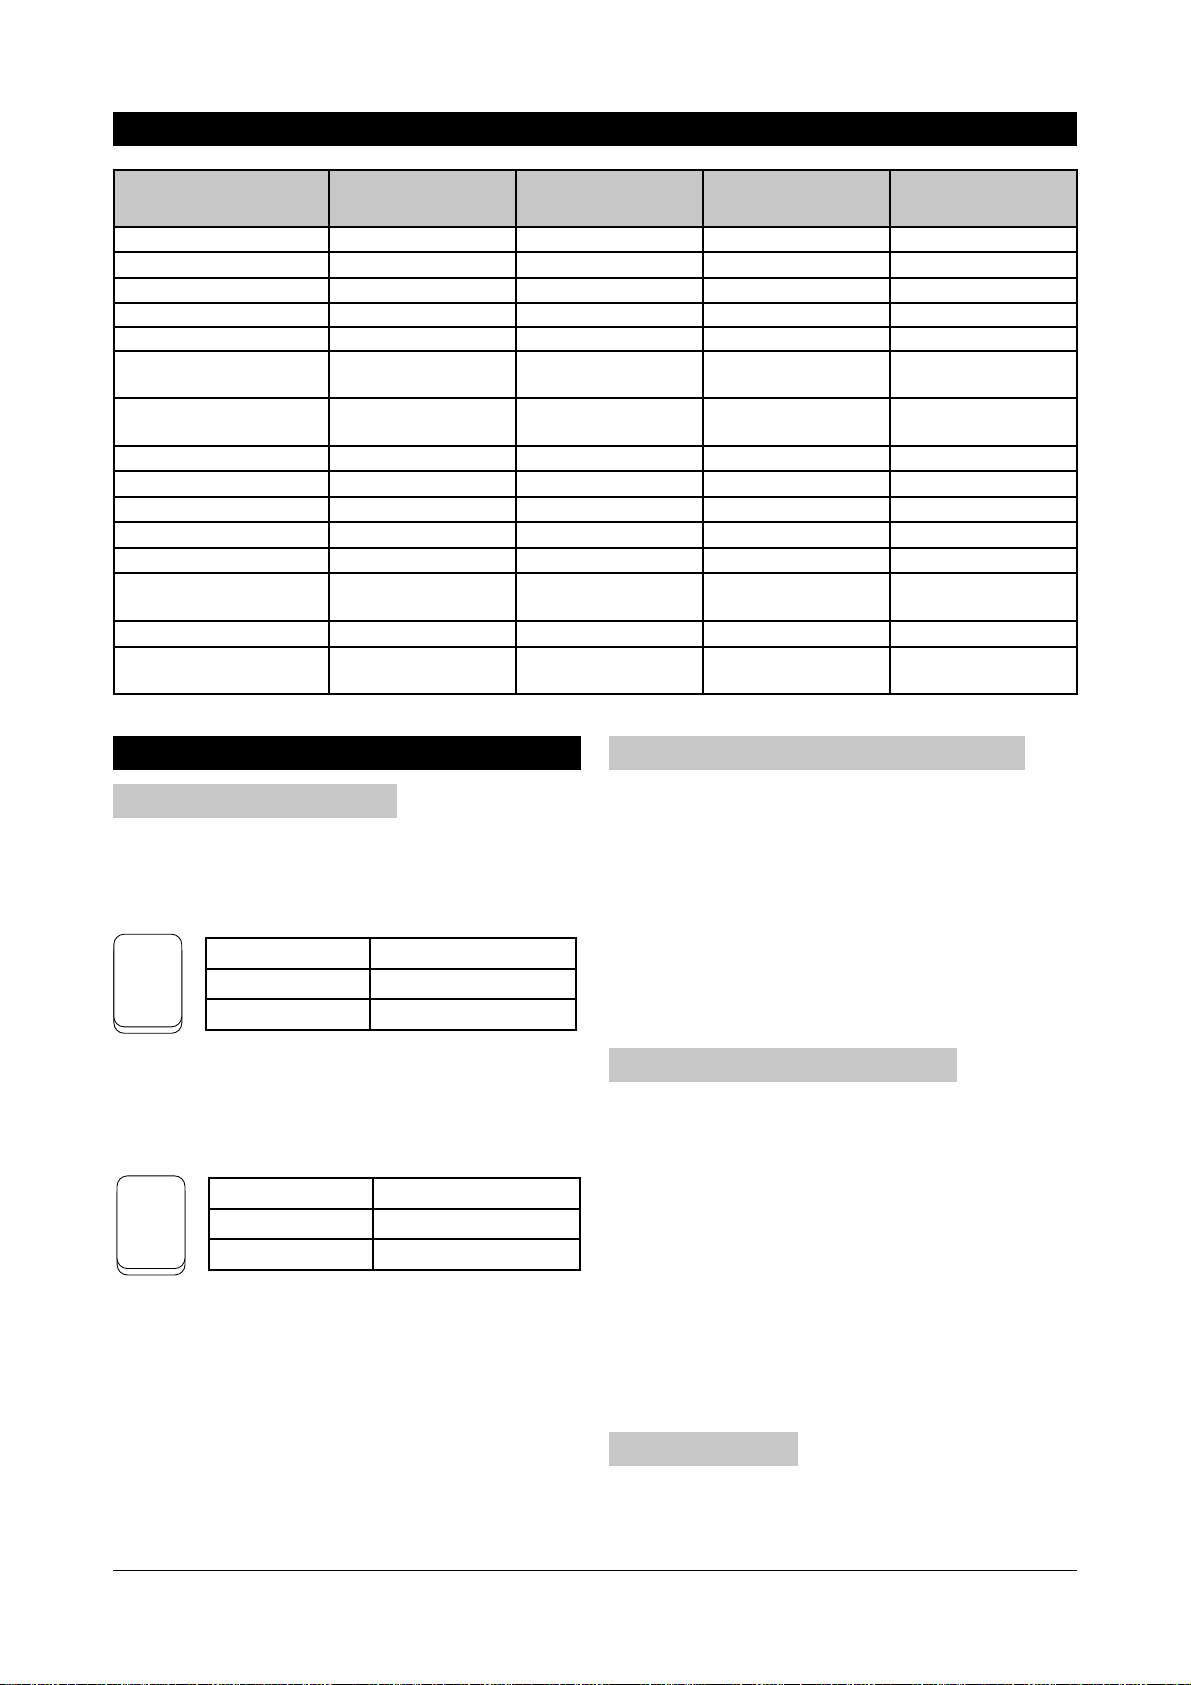
Model Multi 22 Multi 22 T Inox Multi 30 T Inox Multi 50 Inox
Container material
PP INOX INOX INOX
Voltage (V)
220 - 240 220 - 240 220 - 240 220 - 240
PNOM (W)
1130 1130 1260 1260
Pmax (W) 1200 1200 1400 1400
Max Vacuum, kPa/bar 20/200 20/200 21/210 21/210
Max Suction power -
machine, W
270 270 292 292
Sound power
(EN 60704-2-1), dB(A)
85 85 87 87
Tank size, L
22 22 30 50
Net fi lling dry, in bag, L
9 9 13 20
Net fi lling liquid, L
14 14 20 36
Filter indicator
yes yes yes yes
Push to Clean
yes yes
Power out, max 1100
W
yes yes
Auto on/off
yes yes
Variable suction
control
yes
Operational instructions
Using the vacuum cleaner
On/Off - position “E”
Switch “0-I”
Switch position Function
I On
0 Off
Powertool Auto On/Off - position “A”
Switch “0-I”
Switch position Function
I On
0 Off
The machine provides two modes of operation:
vacuuming and blowing.
When using the machine for vacuuming, the hose is
connected to “G”. When using the machine for blow-
ing, the hose is connected to “H”.
The machine is turned on or off at switch “E”.
When running and operational the light in “B” will not
light. The light “B” will light when a drop in suction
performance occurs due to a dirty fi lter.
I
0
Cleaning the fi lter with Push to Clean*)
If the light “B” is turned on, the fi lter may be clogged.
1. Hold one hand against the end of the hose to form
a closed wall. Push the “Push to Clean” button “C”
for 2-3 seconds to let the machine clean the fi lter.
Wait for 3-5 seconds and repeat Step 1, max. 3
times.
2. If the indicator still lights, the cause may lie in a
too heavily clogged fi lter. Occasionally a light rinse
is suffi cient. If not, then replace the fi lter by a new
one.
Filter change (ref. illu. 4, page 2)
1. Open the machine so the fi lter is accessible.
2. Unscrew the tensioning plate “M” to release the
fi lter.
3. Remove the fi lter and replace it by a new one.
4. Tighten tensioning plate (turn right). Make sure
the threads on the tensioning plate are aligned
properly with the threads on the machine. Tighten
the tensioning plate fi rmly so the fi lter seals make
a closed connection to the machine. Beware not
to over-tighten the tensioning plate.
5. Assemble the machine again making sure the mo-
tor head has a proper fi t to the container.
Dust bag change
1. Open the machine so the dust bag is accessible.
2. Remove the old dust bag.
3. Gently slide the new dust bag over the angled
I
0
Loading ...
Loading ...