Loading ...
Loading ...
Loading ...
Installation procedure en-us
15
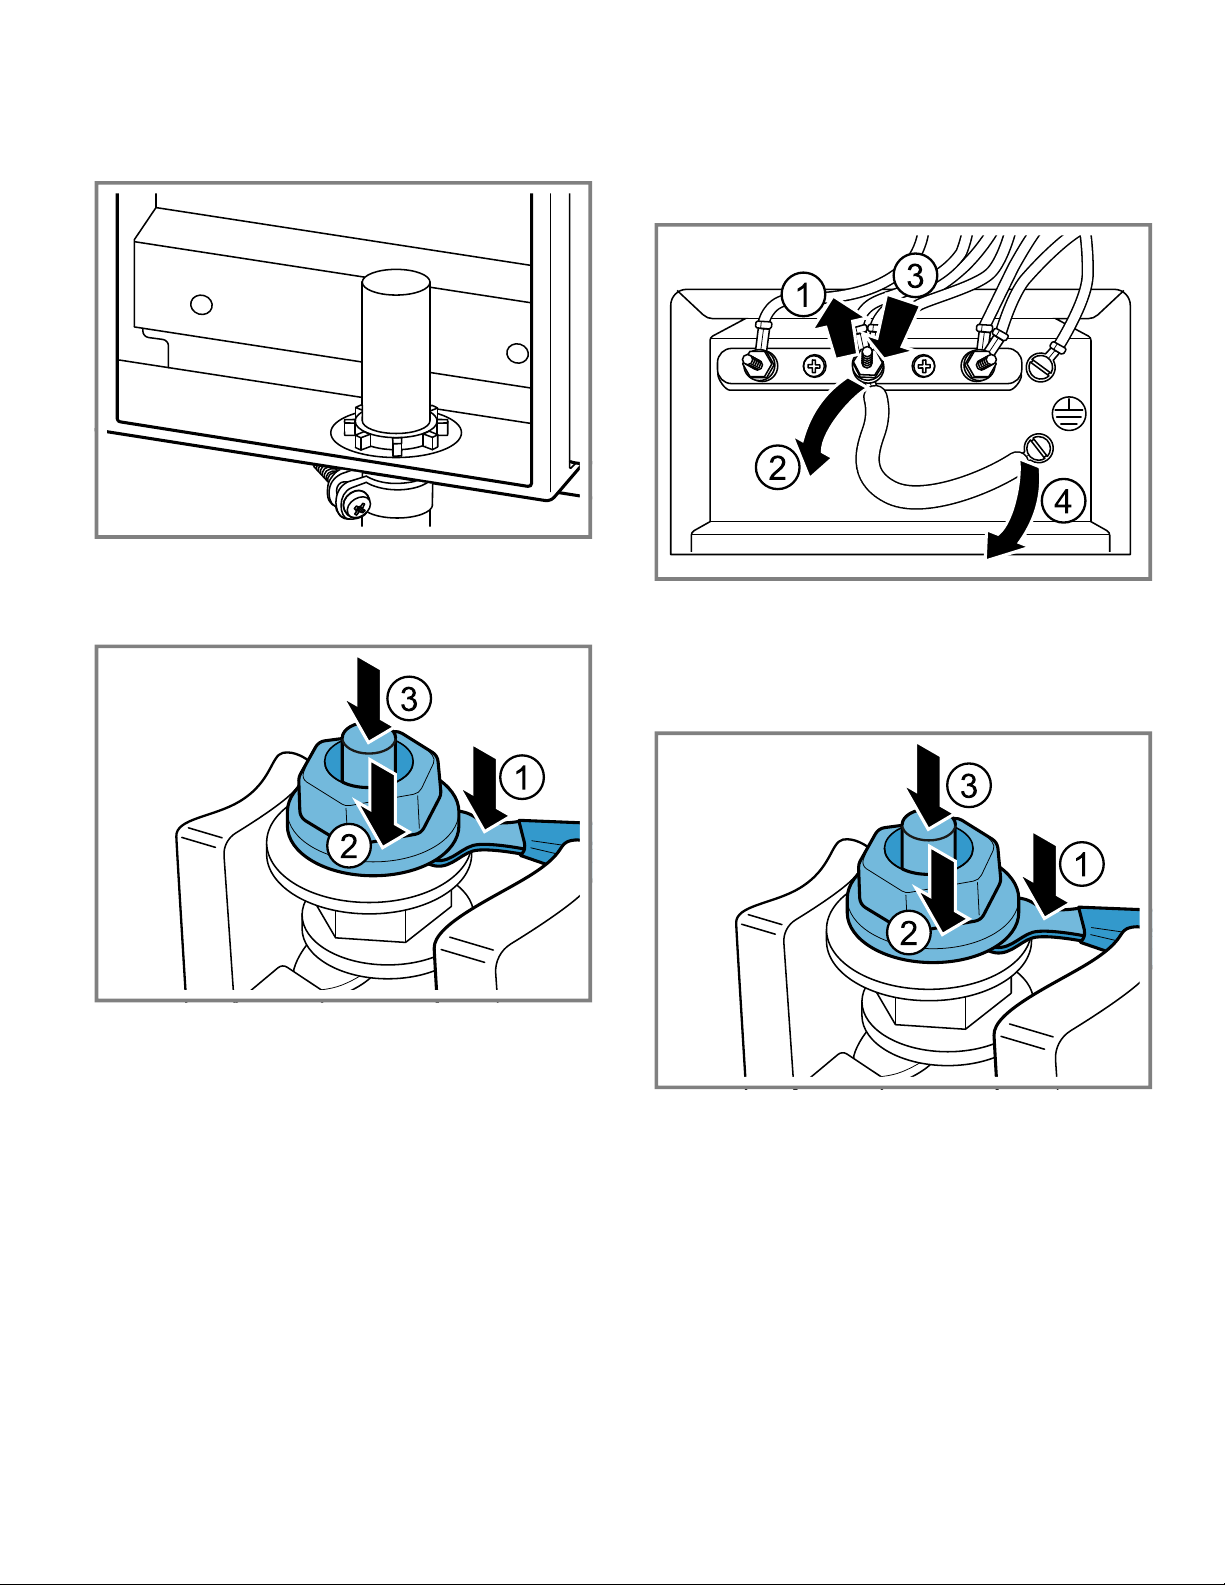
4. Mount strain relief (not provided with range) through the
hole of the metal plate in the back panel located below
the terminal block and secure tightly. Route the wires of
the power supply cable through the strain relief and
tighten clamp.
Make sure the strain relief is secured properly.
5. Insert the flat washer.
6. Attach the red wire to the left junction block terminal us-
ing one of the hexagonal nuts.
7. Attach the white wire to the center junction block termi-
nal using one of the hexagonal nuts.
8. Attach the black wire to the right junction block terminal
using one of the hexagonal nuts.
9. Tighten all connections securely and replace terminal
block cover.
Do not plug in the range at this time.
3.10 Connecting the four-wire flexible con-
duit
1. Disconnect the electrical power at the breaker box. Re-
move the terminal block cover to expose the terminal
block.
2. Insert the power supply cable into the terminal block
through the bottom hole.
3. Remove the grounding strap from the center post on the
terminal block. Therefore remove the hexagonal nut of
the neutral pin. Remove the fork type connector of the
groundling link. Mount the hexagonal nut on the neutral
pin again. Remove the green hexagonal screw and the
ring connector from the grounding. The strap will not be
needed. Remove it from the unit.
4. Attach the insulated grounding wire to the grounding
hole with the green grounding screw. Tighten the green
hexagonal screw firmly, but do not overtighten.
5. Insert the flat washer.
6. Attach the red wire to the left junction block terminal us-
ing one of the hexagonal nuts.
7. Attach the white wire to the center junction block termi-
nal using one of the hexagonal nuts.
8. Attach the black wire to the right junction block terminal
using one of the hexagonal nuts.
Loading ...
Loading ...
Loading ...