Loading ...
Loading ...
Loading ...
16
REFRIGERATED GRIDDLE STANDS
OPERATIONS MANUAL
2. All refrigerant should be removed from the system by a
qualified technician and disposed of properly, or reclaimed.
(Intentional venting of many refrigerants into the air is harm-
ful and prohibited; violators are subject to fines). All refriger-
ant oil should be drained from the compressor and discarded
appropriately.
3. Properly dispose of the cabinet and refrigeration system
components. The majority of the metal in your unit (stainless
steel or aluminum cabinet shell and doors, steel shelving and
compressor, copper refrigerant lines, etc.) can be recycled.
Many recycling facilities will dispose of the unit free of
charge, or pay you for scrap value of the material content.
OPTIONAL ACCESSORIES
INSTALLING ELECTRIC CONDENSATE HEATER
The condensate heater has a thermal limit switch and power
cord attached. Place the condensate heater in the drain pan as
shown in Figure 6. Position the end of the plastic drain tube
in the pan. Make sure tubing isn’t kinked, end is secure and
doesn’t touch the heater. Plug the heater power cord into the
receptacle labeled “vaporizer”. Secure excess cord with wire tie,
so it doesn’t fall in pan or under the cabinet.
IMPORTANT NOTE: Make sure the condensate heater is
plugged into the receptacle labeled “Vaporizer” and that
the condensing unit is plugged into the receptacle labeled
“condensing unit.”
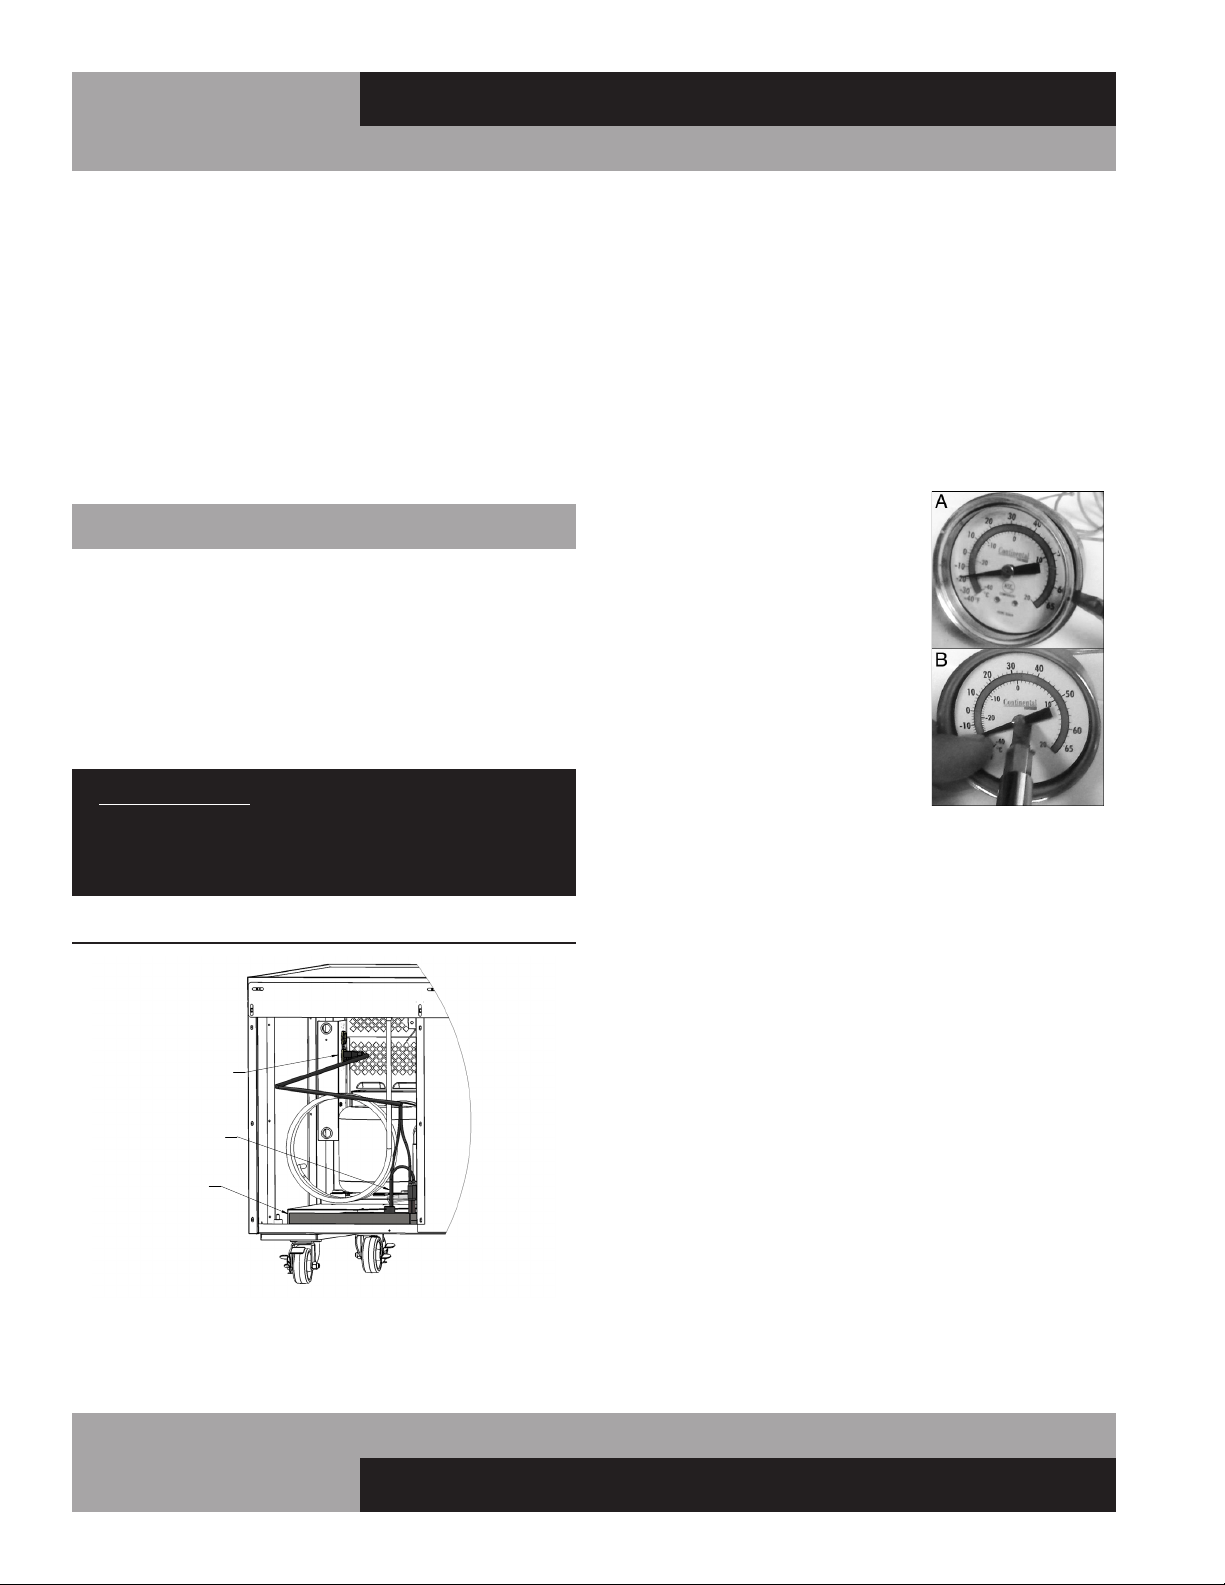
DIAL THERMOMETER AND CALIBRATION
Your NSF-approved dial thermometer has a remote sensing
bulb, located in the refrigerated compartment. The display fea-
tures a large 2” diameter face, with any easy to read scale that
shows the internal cabinet temperature in Fahrenheit (°F) and
Celsius (°C). Blue (safe) and red (caution) color bands provide a
quick, visual indication of the temperature inside your refrigera-
tor or freezer. The thermometer is pre-calibrated at the factory,
to accurately show the cabinet temperature.
To check the calibration of your thermometer, place a pre-
calibrated temperature sensing device in the center of the
refrigerated compartment and keep the door closed for at least
10 minutes. The thermometer should read the same temperature
as the sensing device, within +/-2°F
(+/- 1°C). If it does not, use a small
straight-blade screwdriver to care-
fully pry the clear lens cover from the
thermometer body as shown (see
Photo A).
Place the screwdriver tip in the slot-
ted center screw on the thermometer
face. Carefully hold the needle pointer
and turn the center screw clockwise to
lower or counterclockwise to increase
the desired temperature, as shown
(see Photo B). Replace the lens cover
and recheck the calibration.
DIGITAL THERMOMETER AND CALIBRATION
Your NSF-approved digital thermometer has a remote sensing
bulb, with an FDA-approved coating, located in the refrigerated
compartment on the left-hand wall. The unit features a large,
easy to read, LED display that shows the internal cabinet tem-
perature.
To check the calibration of your thermometer, place a pre-
calibrated temperature sensing device in the center of the refrig-
erated compartment and keep the door closed for at least 15
minutes. The digital thermometer display should read the same
temperature as the sensing device within +/-2°F (+/- 1°C).
If it does not, press the right, center section of the front display
(see Photo, next page) twice. After the first press, the letters
“CAL” will appear on the screen (to show the unit is in calibra-
tion mode). After the second press, the number of degrees (-25
to 25) that the display offset is set for will appear. Once you see
this, press on the lower left corner of the front face to decrease
the temperature displayed, or press on the upper left section to
increase the temperature displayed.
FIGURE 6: Electric Condensate Vaporizer
Loading ...
Loading ...
Loading ...