Loading ...
Loading ...
Loading ...

11
ENGLISH
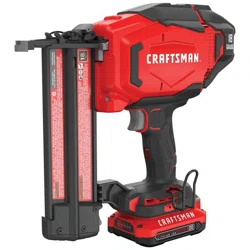
Installing and Removing the Battery Pack
(Fig.H)
NOTE: For best results, make sure your battery pack is
fullycharged.
To install the battery pack
12
into the tool handle, align the
battery pack with the rails inside the tool’s handle and slide it
into the handle until the battery pack is firmly seated in the
tool and ensure that it does notdisengage.
To remove the battery pack from the tool, press the release
button
13
and firmly pull the battery pack out of the tool
handle. Insert it into the charger as described in the charger
section of thismanual.
Proper hand position requires one hand on the handle
15
as shown.
Proper Hand Position (Fig.G)
WARNING: To reduce the risk of serious personal injury,
ALWAYS use proper hand position asshown.
WARNING: To reduce the risk of serious personal
injury, ALWAYS hold securely in anticipation of a
suddenreaction.
OPERATION
WARNING: To reduce the risk of serious personal
injury, turn unit off and remove the battery pack
before making any adjustments or removing/
installing attachments or accessories. An
accidental start‑up can causeinjury.
• Engage trigger lock‑off.
• Avoid contact with trigger during adjustments.
Depth settings are on a sliding scale. The left side indicating
the deepest and the right side indicating the shallowest.
1. To drive a nail deeper, rotate the depth adjustment
wheel
3
downwards. This will slide the depth
adjustment indicator
4
to the left on the scale.
2. To drive a nail shallower, rotate the depth adjustment
wheel upwards. This will slide the depth adjustment
indicator to the right on the scale.
Preparing the Tool
WARNING: NEVER spray or in any other way apply
lubricants or cleaning solvents inside the tool. This can
seriously affect the life and performance of the tool.
NOTE: The battery pack is not fully charged out of the carton.
Follow instructions outlined (see ChargingaBattery).
1. Read the Safety Warnings section of this manual.
2. Wear eye and ear protection.
3. Ensure magazine is empty of all fasteners.
4. Check for smooth and proper operation of contact trip
and pusher assemblies. Do not use tool if either assembly
is not functioning properly. NEVER use a tool that has the
contact trip restrained in the actuatedposition.
5. Keep tool pointed away from yourself and others.
6. Insert fully charged battery pack.
Hang Hook (Fig.E)
WARNING: Remove nails from magazine before
making any adjustments or servicing this tool. Failure
to do so may result in serious injury.
WARNING: Disconnect battery pack from tool
before making any adjustments, changing
accessories, servicing, or moving the tool. Such
preventative safety measures reduce the risk of starting
the tool accidentally.
CAUTION: When not in use, place tool on its
side on a stable surface where it will not cause
a tripping or falling hazard. Some tools with large
battery packs will stand upright on the battery pack
but may be easily knocked over.
Your CRAFTSMAN cordless nailer includes an integrated
hanghook
11
.
If the hook is not desired at all, it can be removed from thetool.
To Remove Hang Hook
1. Remove battery pack from tool.
2. Remove the screw
22
.
3. Replace battery pack.
Adjusting Depth (Fig.F)
The depth that the fastener is driven can be adjusted using
the depth adjustment wheel
3
on the side of the tool.
WARNING: To reduce risk of serious injury from
accidental actuation when attempting to adjust
depth, ALWAYS:
• Remove battery pack.
ASSEMBLY AND ADJUSTMENTS
WARNING: To reduce the risk of serious personal
injury, turn unit off and remove the battery pack
before making any adjustments or removing/
installing attachments or accessories. An
accidental start‑up can causeinjury.
optimal depth leaving approximately 7/32” (5.5 mm) of the
screw exposed. Align the slots on the back of the charger
with the exposed screws and fully engage them in theslots.
NOTE: Do not attempt to mount CMCB101 charger under a
bench ortable.
NOTE: Only mount CMCB101 charger with the charging
lights pointed upward toward theceiling.
VersaTrack™
WARNING: Do not charge batteries while charger is
hung onTrackwall.
CRAFTSMAN chargers, except the CMCB101, can be
stored on CRAFTSMAN VersaTrack™ Trackwall. Hooks and
accessories are sold separately. Please refer to the VersaTrack™
Trackwall accessory sheet for furtherinformation.
NOTE: The CMCB101 charger is not CRAFTSMAN VersaTrack™
Trackwallcompatible.
SAVE THESE INSTRUCTIONS FOR
FUTURE USE
Loading ...
Loading ...
Loading ...